If you are as lucky as I am, you might someday get to drive your own vehicle in Africa. If you are very lucky, you might get to drive that vehicle close—sometimes very close—to African elephants. How you behave in that situation might determine whether or not your vehicle remains in its preferred position with all four wheels on the ground.
I’ve not only been lucky enough to drive close to elephants, but to have done it dozens of times, to have led others driving their own vehicles close to elephants, and, before that, to have been driven close to them. This, combined with (much more valuable) advice from biologists and guides with decades more experience than I, has imbued me with enough pachyderm politeness that—so far—my presence has been tolerated with no sudden 90-degree shifts of the horizon. But a quick search on YouTube will reveal others either unlucky enough or, more often, stupid enough to piss off the animal—and a full-grown African elephant is quite capable of toppling and/or trashing a heavy expedition vehicle.
The first thing to know is that the elephants you’re likely to see from a vehicle are probably quite used to seeing vehicles, and normally will virtually ignore them as long as those vehicles stick to predictable behavior. It’s when the vehicle does something unexpected—diverging from a known track, moving too quickly, approaching too closely, getting between members of a herd, or appearing unexpectedly—that the elephant’s alarm bells go off. It follows, then, that when piloting a vehicle around elephants you’ll want to stick to known tracks, drive slowly, keep distance between you and the animal, stay out of the middle of herds, and avoid surprising them. You’ll also want to avoid making loud noises—honking your horn to alert your friend in another vehicle that THERE ARE ELEPHANTS RIGHT HERE! is a no-no. And turn off your camera’s flash.
If you’re on a game drive and spot a group of elephants browsing, and want to get close enough for better viewing or photographs, the best strategy is to let them approach you. Slowly maneuver to get 50-75 meters in front of what appears to be their path, stop, and wait. You can leave the engine idling or turn it off—I’ve never had it affect the elephants’ behavior either way—but leaving it idling gives you a less intrusive option for slowly retreating if it seems necessary. If they come close, great; if not, don’t punch it in an attempt to head them off. Wait and circle around after they have passed.
If you’re on a track and come up behind an elephant or elephants heading the same direction you are, you can slowly close the distance, but watch very carefully indeed for any signs of discomfort or annoyance—elephants don’t like to be tailgated any more than you do. On the other hand, if you come around a bend and find an elephant walking down the road toward you, don’t just stop; pull off to leave it room to take the easy path.

One common situation I’ve come across causes trouble surprisingly often. An elephant will be standing next to a road, either simply loitering, or musing on whether to cross and try that tasty acacia he sees yonder. However, even though he’s not moving, I’m absolutely convinced that elephant has already laid claim to the crossing. Numerous times I’ve watched a vehicle stop and wait for a minute, then try to ease past, and more often than not this results in an immediate flaring of ears, shaking of the head, and an annoyed trumpeting if not an actual mock charge. It’s tempting to anthropomorphize and think this baiting game is a popular elephant pastime, but in any case it’s better to just wait until he makes up his mind.
Speaking of charges: I first remember reading about the differences between a mock charge and a real one in an early book by a professional hunter. He described the mock charge as “ears out wide and flapping, trunk straight down, lots of head-shaking and trumpeting and stirring up dust, but brought up short of any real confrontation,” while a real charge was, “ears flat against the head, trunk tucked up underneath, no noise, just a shockingly fast rush at the offending object that would only stop when that object was flattened or gored.” I’ve only seen a single real charge, at a rapidly retreating safari vehicle that had tried the “squeeze past” maneuver (it escaped), but lots and lots of mock charges that fit the old hunter’s description perfectly and ended with nothing but a truck full of wide-eyed tourists and some really good photos. With that said, it would be utterly stupid to treat any charge by an elephant as a harmless show of bravado. I recently watched a video of a “mock charge”—ears out, trumpeting, the works—that ended with the elephant’s head impacting the side of the vehicle hard enough to tilt it significantly and induce screaming in the occupants and a precipitous retreat by the driver.

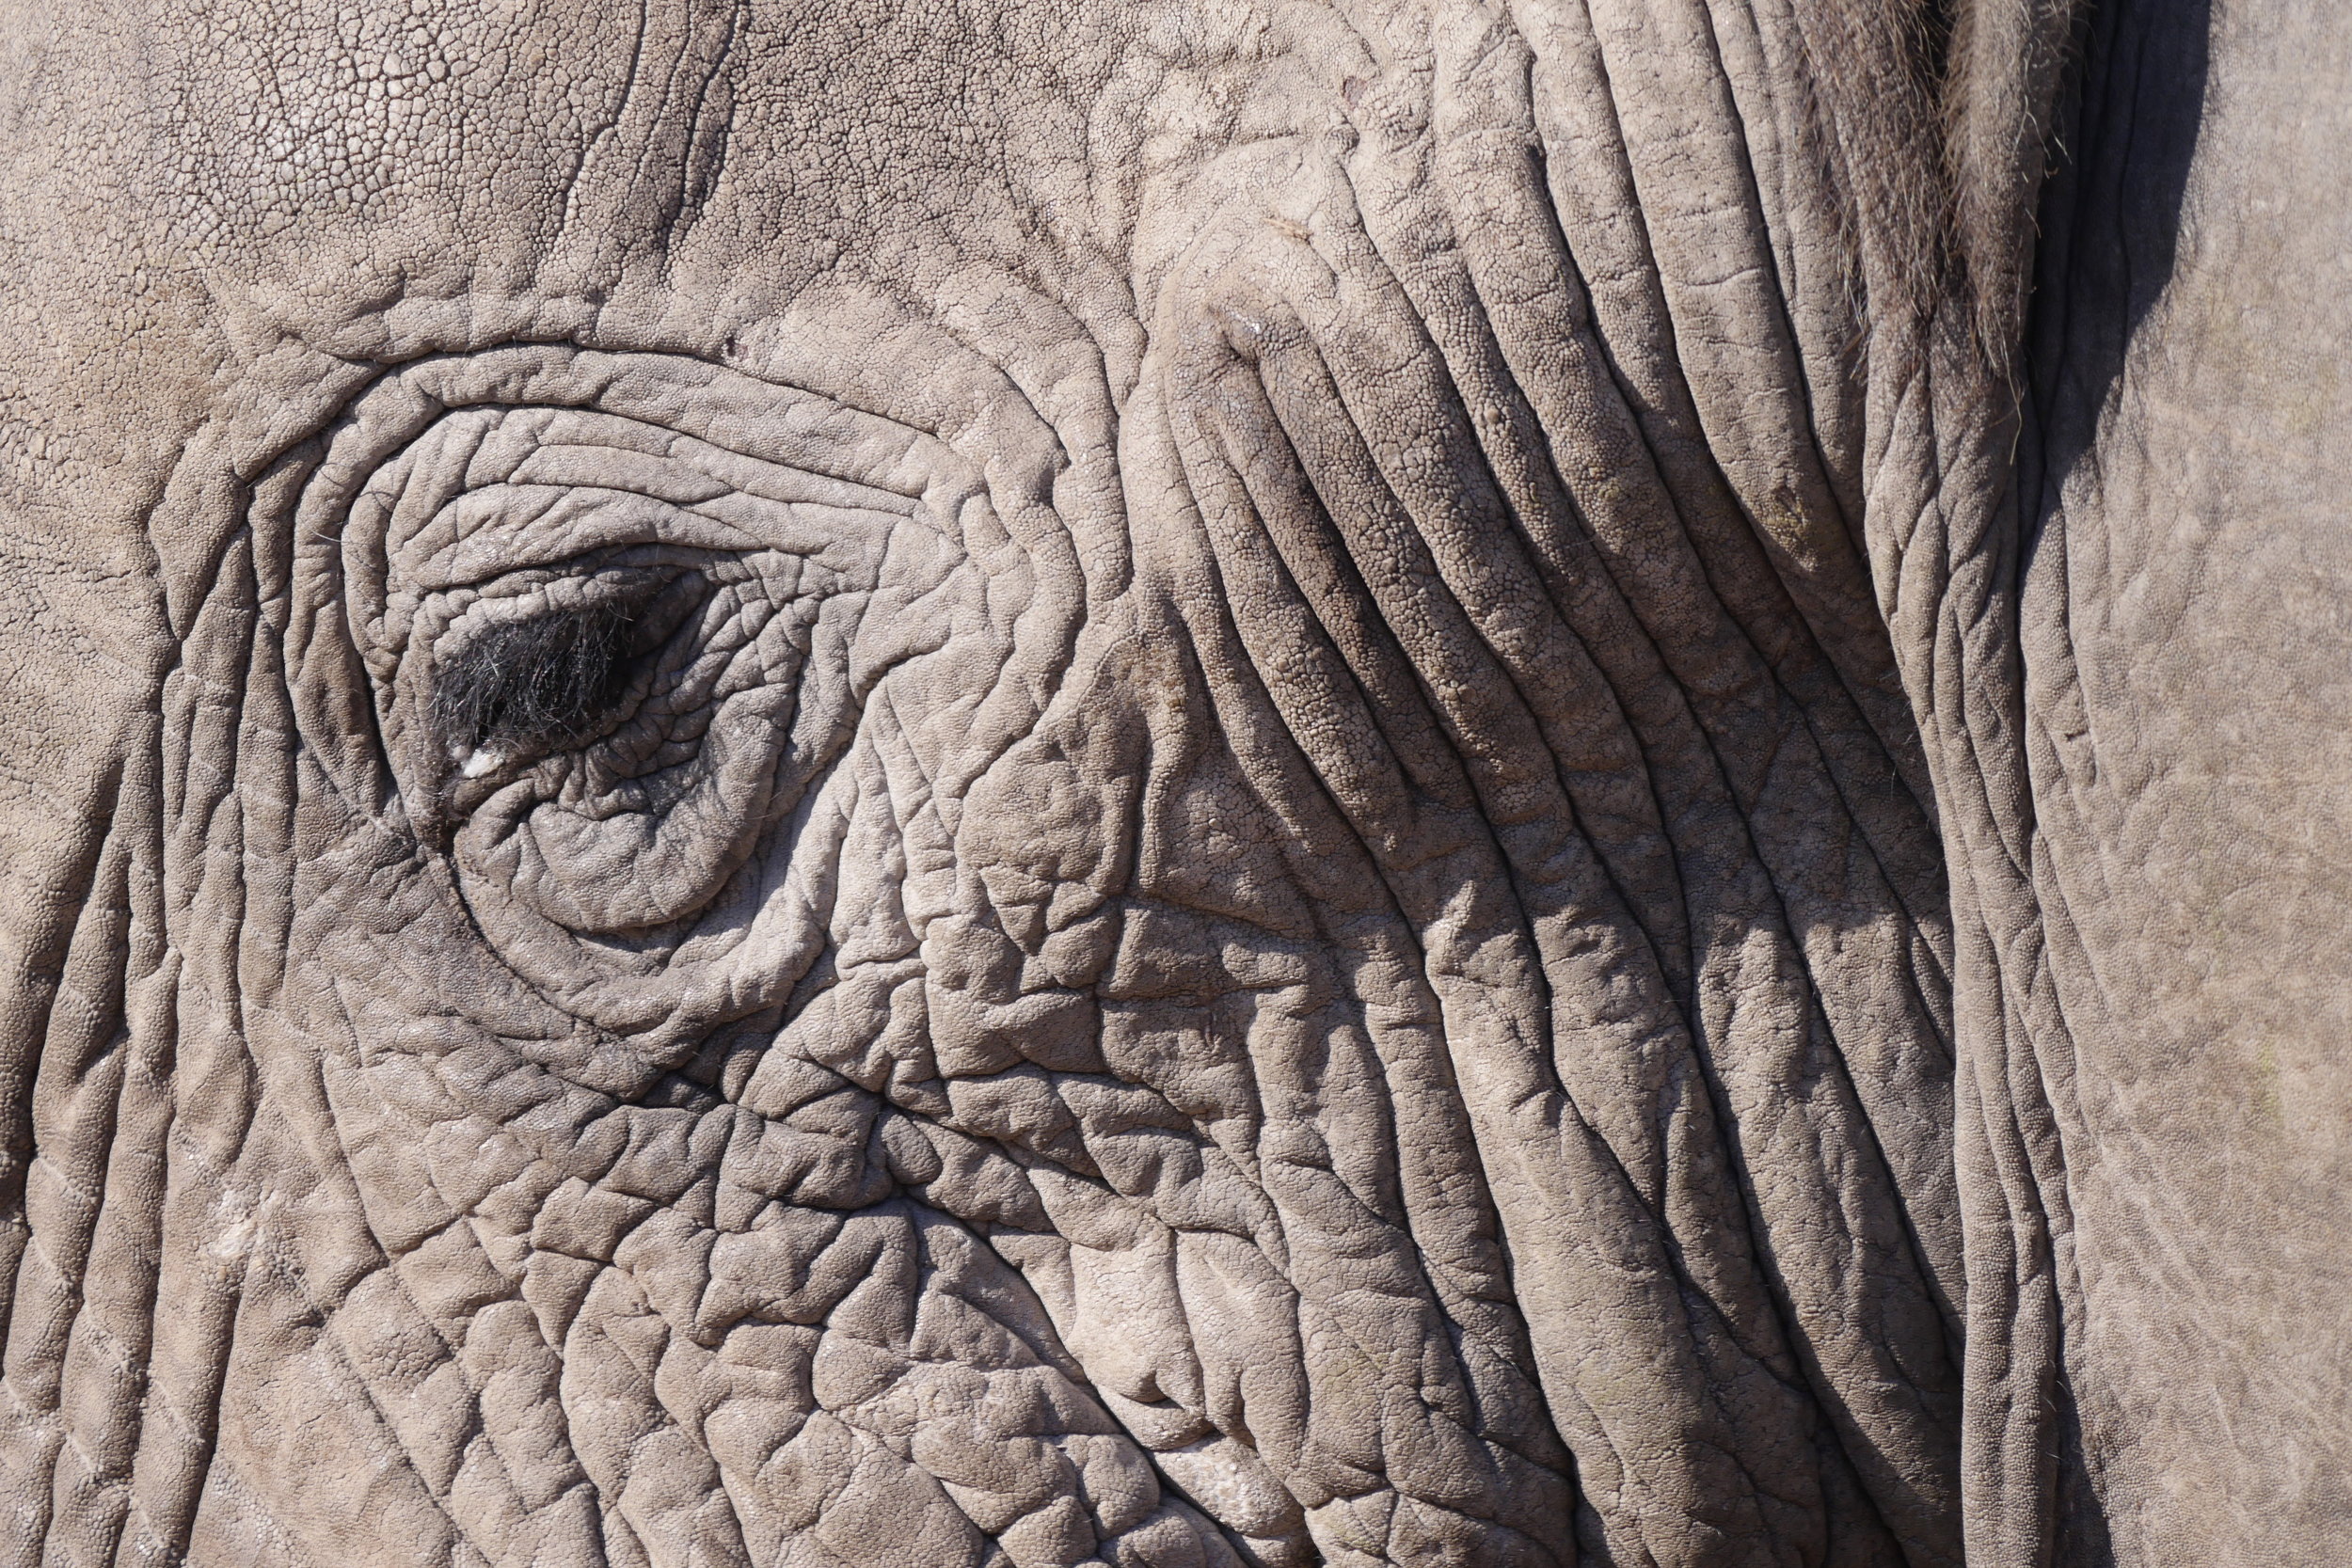
This elephant objected to us driving slowly past, obviously because of the young one behind her.
The other thing to remember is that an elephant can be a dangerous animal even when it’s not trying to be. I watched another video, taken from inside an open 12-seat safari vehicle, of a large bull elephant that slowly circled the vehicle three or four times only a few feet away, giving the forest of brandished phones and cameras inside a great show. Eventually he stopped, gently placed his head against the rear corner of the Land Cruiser, and pushed. The vehicle rocked on its springs and the occupants squealed delightedly. Then he pushed harder, and the occupants stopped squealing. Harder yet again, until it looked like the near-side wheels might be coming off the ground. At that point the driver abruptly took off, while the elephant just watched the retreating machine calmly. He clearly had no ill intent; he was just curious and playful—but that would have been irrelevant to the people inside the vehicle if it had turned over.
While I’ve had no such close calls, Roseann and I did have a hilarious episode on our last trip. We were driving along a track in Chobe National Park, heading toward Savuti Camp and pushing it just a bit to make it before sundown, with Graham and Connie a half kilometer or so behind us. It was a single-width track running through dense mopane forest about three or four meters tall—the astute among you will note this is more or less exactly elephant height. There was no sound but the calm rattle of the 1HZ diesel—until there was a deafening scream about two meters from my right ear, and an elephant crashed back into the brush from where it had been standing, completely invisible, almost in the road. I believe Roseann and I both might have made our own elephant noises. Fortunately the elephant left rather than sticking around to take revenge on the next Land Cruiser to come along, as Graham and Connie never saw it.
Most of our encounters on that trip were far less coronary-inducing—such as driving up to an unoccupied elevated hide (blind in U.S.-speak) by a waterhole with no wildlife in sight, having lunch, and being just about ready to move on when two, then six, then twelve, and finally sixty four elephants showed up to drink and bathe in the mud. A transcendent experience.

As we all know, elephants are facing an existential threat due to the rampant poaching trade, which does nothing but supply wealthy Asians with status-symbol trinkets and coffee-table sculptures. Income from tourism does at least some good in the fight against this despicable perversion of human greed, and encourages the countries involved to continue fighting. Thus driving among elephants is both a humbling personal experience and a valuable contribution to their future.
Just keep in mind the rules of the road when you go.
Elephants always have the right of way.