
Overland Tech and Travel
Advice from the world's
most experienced overlanders
tests, reviews, opinion, and more
A cheap copy of a legendary camp chair

Not what it looks like . . .
There are few things I loathe more than copycat products sold at cut-rate prices. As J.A. Richards wrote: "There is hardly anything in the world that some man cannot make a little worse and sell a little cheaper, and the people who consider price only are this man’s lawful prey.” Sadly, the practice is an unavoidable aspect of a free market for anything that cannot be patented.
Sometimes the issue of just what is a copy, rather than a development or an improvement of an existing product, can reside within a gray area. Friends who own series Land Rovers like to tease me by claiming that my Land Cruiser FJ40 is just a copy, despite its significantly different design and engineering; I respond by reminding them that the first Land Rover prototype was actually built on a Jeep chassis. More recently, Jaguar/Land Rover sued Ineos (unsuccessfully) over the styling of its Grenadier, which few people could deny is derivative.
Other copies are more blatant: the first example I remember noting, decades ago, was a Takamine guitar that not only mimicked the design of the legendary Martin guitars, but employed the exact same curved gold script for the name on the headstock. More recent and relevant examples include MaxTrax clones that replicate everything down to the exact color of the originals, shoddily made LED driving lamps that mimic the fine ARB Intensity lamps, and the Chinese-made Kodiak tent that is a blatant copy of the wonderful U.S.-made Springbar.
Recently I encountered another copy so egregious, and so tacky, as to beggar belief.
I was on a forum devoted to vehicle-based travel, and saw that someone had started a thread asking advice about camp chairs. I noted that several people had recommended the Kermit Chair, and I chimed in with my own tale of our nearly 20-year-old pair of Kermit Chairs, still functioning perfectly and comfortably.
The original Kermit Chair was designed 40 years ago by a BMW motorcyclist named Kermit Easterling, and is still made in Tennessee from locally sourced white oak. It has the unique ability to either fold flat instantly for transport, or to disassemble entirely and pack into a soft case no longer than your forearm. It’s easily carried on a motorcycle, yet optional leg extensions raise it to standard height. (It won the chair review in the Volume 1, Number 2 Exploration Quarterly.)
A few days later I checked back in on the thread. A couple posts down from mine, someone had written, “I like the wood and non-disposable nature of the Kermit, but $299 is a little rich for my wallet; plus the company charges $26 shipping. Really? Instead I found this for $129.” And there was a photo of a chair that looked so much like a Kermit that had I passed the owner sitting in it I would have greeted him as a fellow fan. Identical design, identical folding/disassembly procedure, indentical handsome oak frame.
Except this one, sold by Ironman 4x4, wasn’t oak. It was aluminum with an “oak-grain finish,” and had genuine wood caps (not oak) only on the armrests. Made in China, to no great surprise.
A subsequent poster had written, “Obviously a Kermit clone, but it looks like a nice chair.” Barely restraining my typing fingers (both of them), I replied, “Calling this a Kermit “clone” is extraordinarily diplomatic.” I was sorely tempted to write something much, much harsher, and only refrained from doing so because, given my somewhat authoritative stature on the forum, I didn’t want to openly insult the person who bought this utter ripoff of a product.
To be blunt, I find this product shameful thievery. Copying every detail of the original Kermit is bad enough; adding the fake oak finish so it will pass as the genuine article to a cursory look is just plain shabby. Shame on Ironman for offering such a thing. Please support the company that envisioned, designed, and built the original, here in the U.S., offers a five-year warranty, and maintains a stock of spare parts should you ever need any.
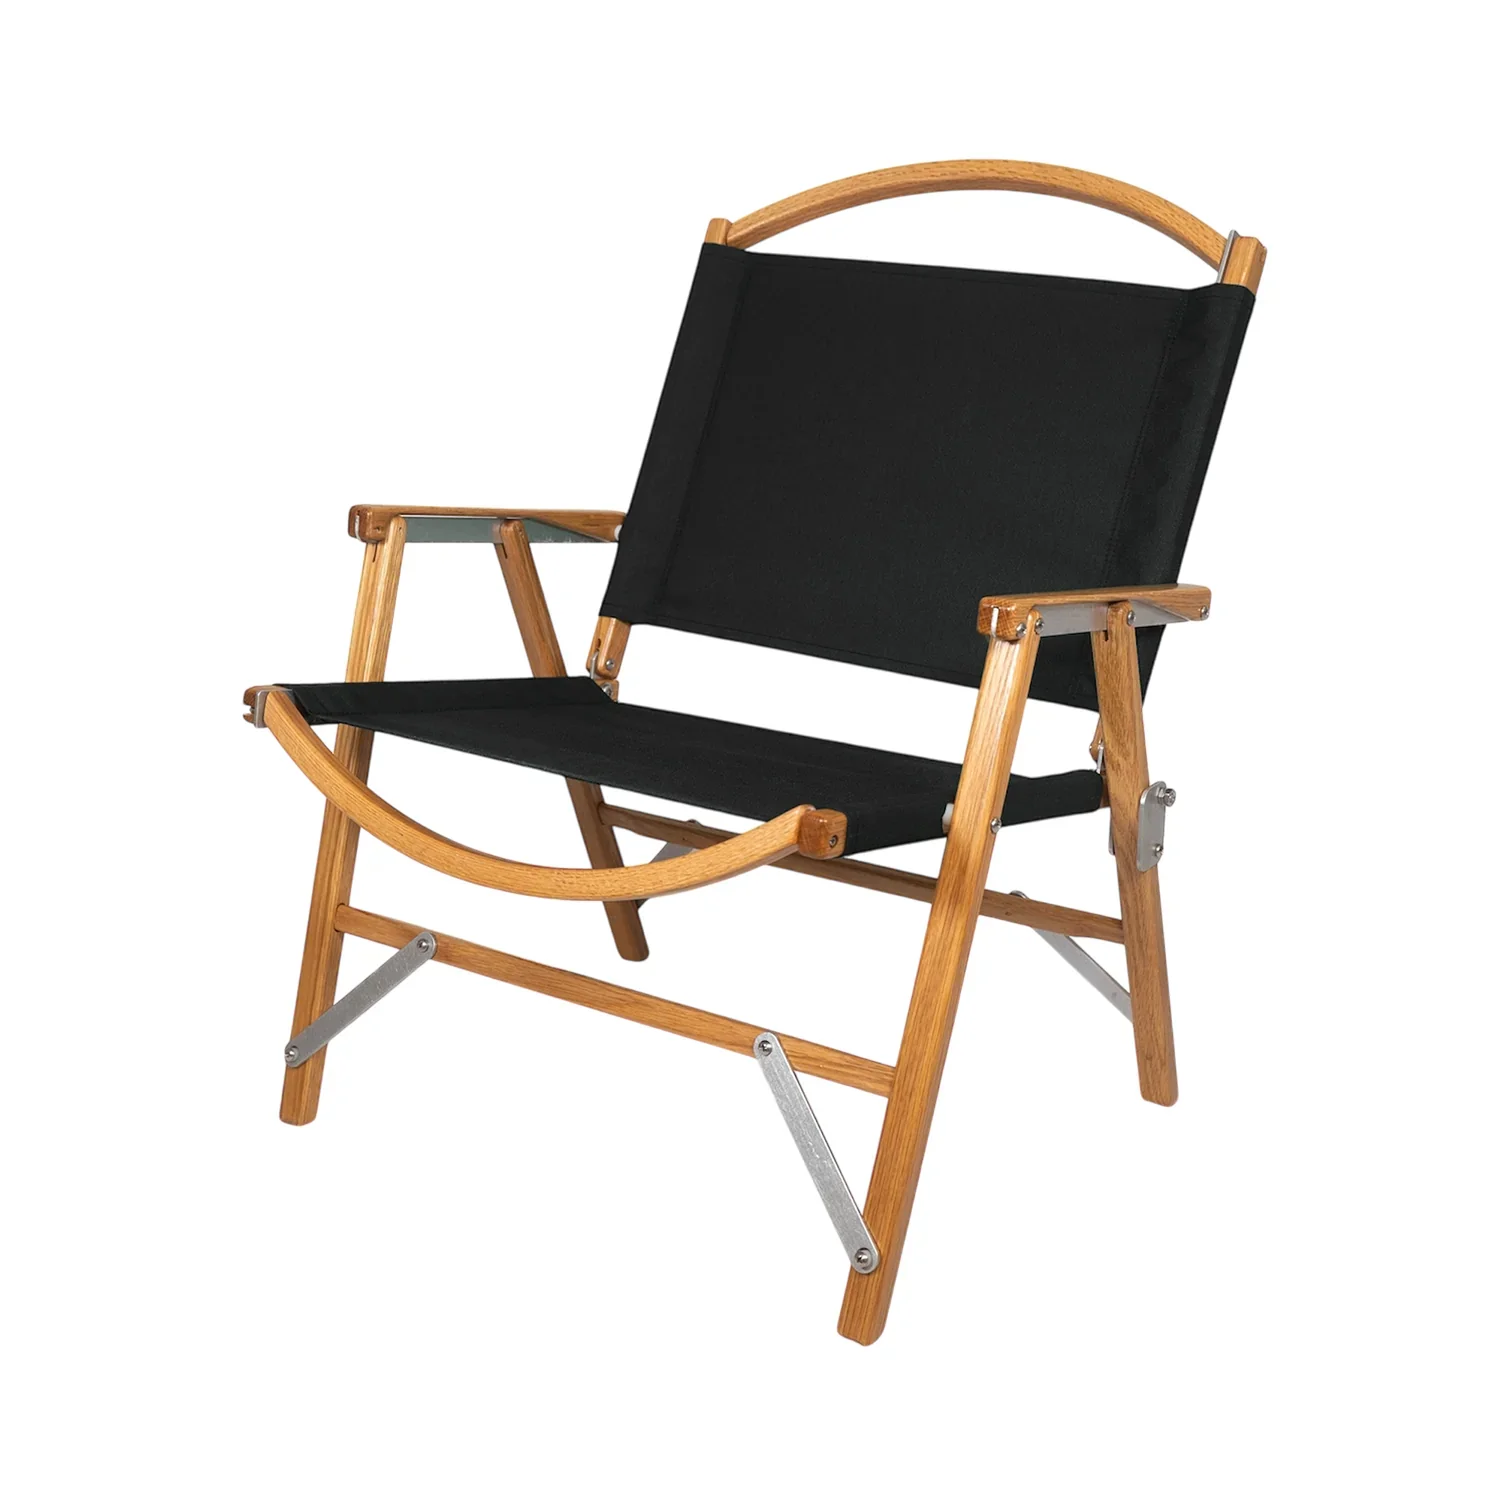
The real thing. Accept no substitutes.
Inspiration—and pizza!—at the RGS Explore Week
Each fall the Royal Geographical Society in London hosts an event called Explore Week, a gathering of students, scientists, and explorers that is at once an educational experience and a chance for like-minded people to connect. Many expeditions have been put together here over coffee, or drinks in the legendary Map Room. Explore Week is open to anyone who is curious about the planet, and it is a fine thing around which to base a visit to London’s superb museums, many of which are a short walk or hired bicycle pedal away.
Roseann and I have been attending and presenting at Explore since 2016, and this year we did so again. I sat on a panel discussing freelance magazine and book writing, along with Graeme Gourlay, the editor of the society’s own Geographical magazine, and Kate Stephenson, the regional director for the National Geographic Society. Graham Jackson and I led a seminar on arid-lands and vehicle-based travel. Roseann chaired several panels on art and exploration, and we had a table to display and talk about Exploration Quarterly. In the large Ondaatje theater, we heard reports from several scientific expeditions, and Ray Mears, one of the few real-deal bushcraft/survival experts to successfully popularize his classes and videos, gave a talk on expedition preparation.
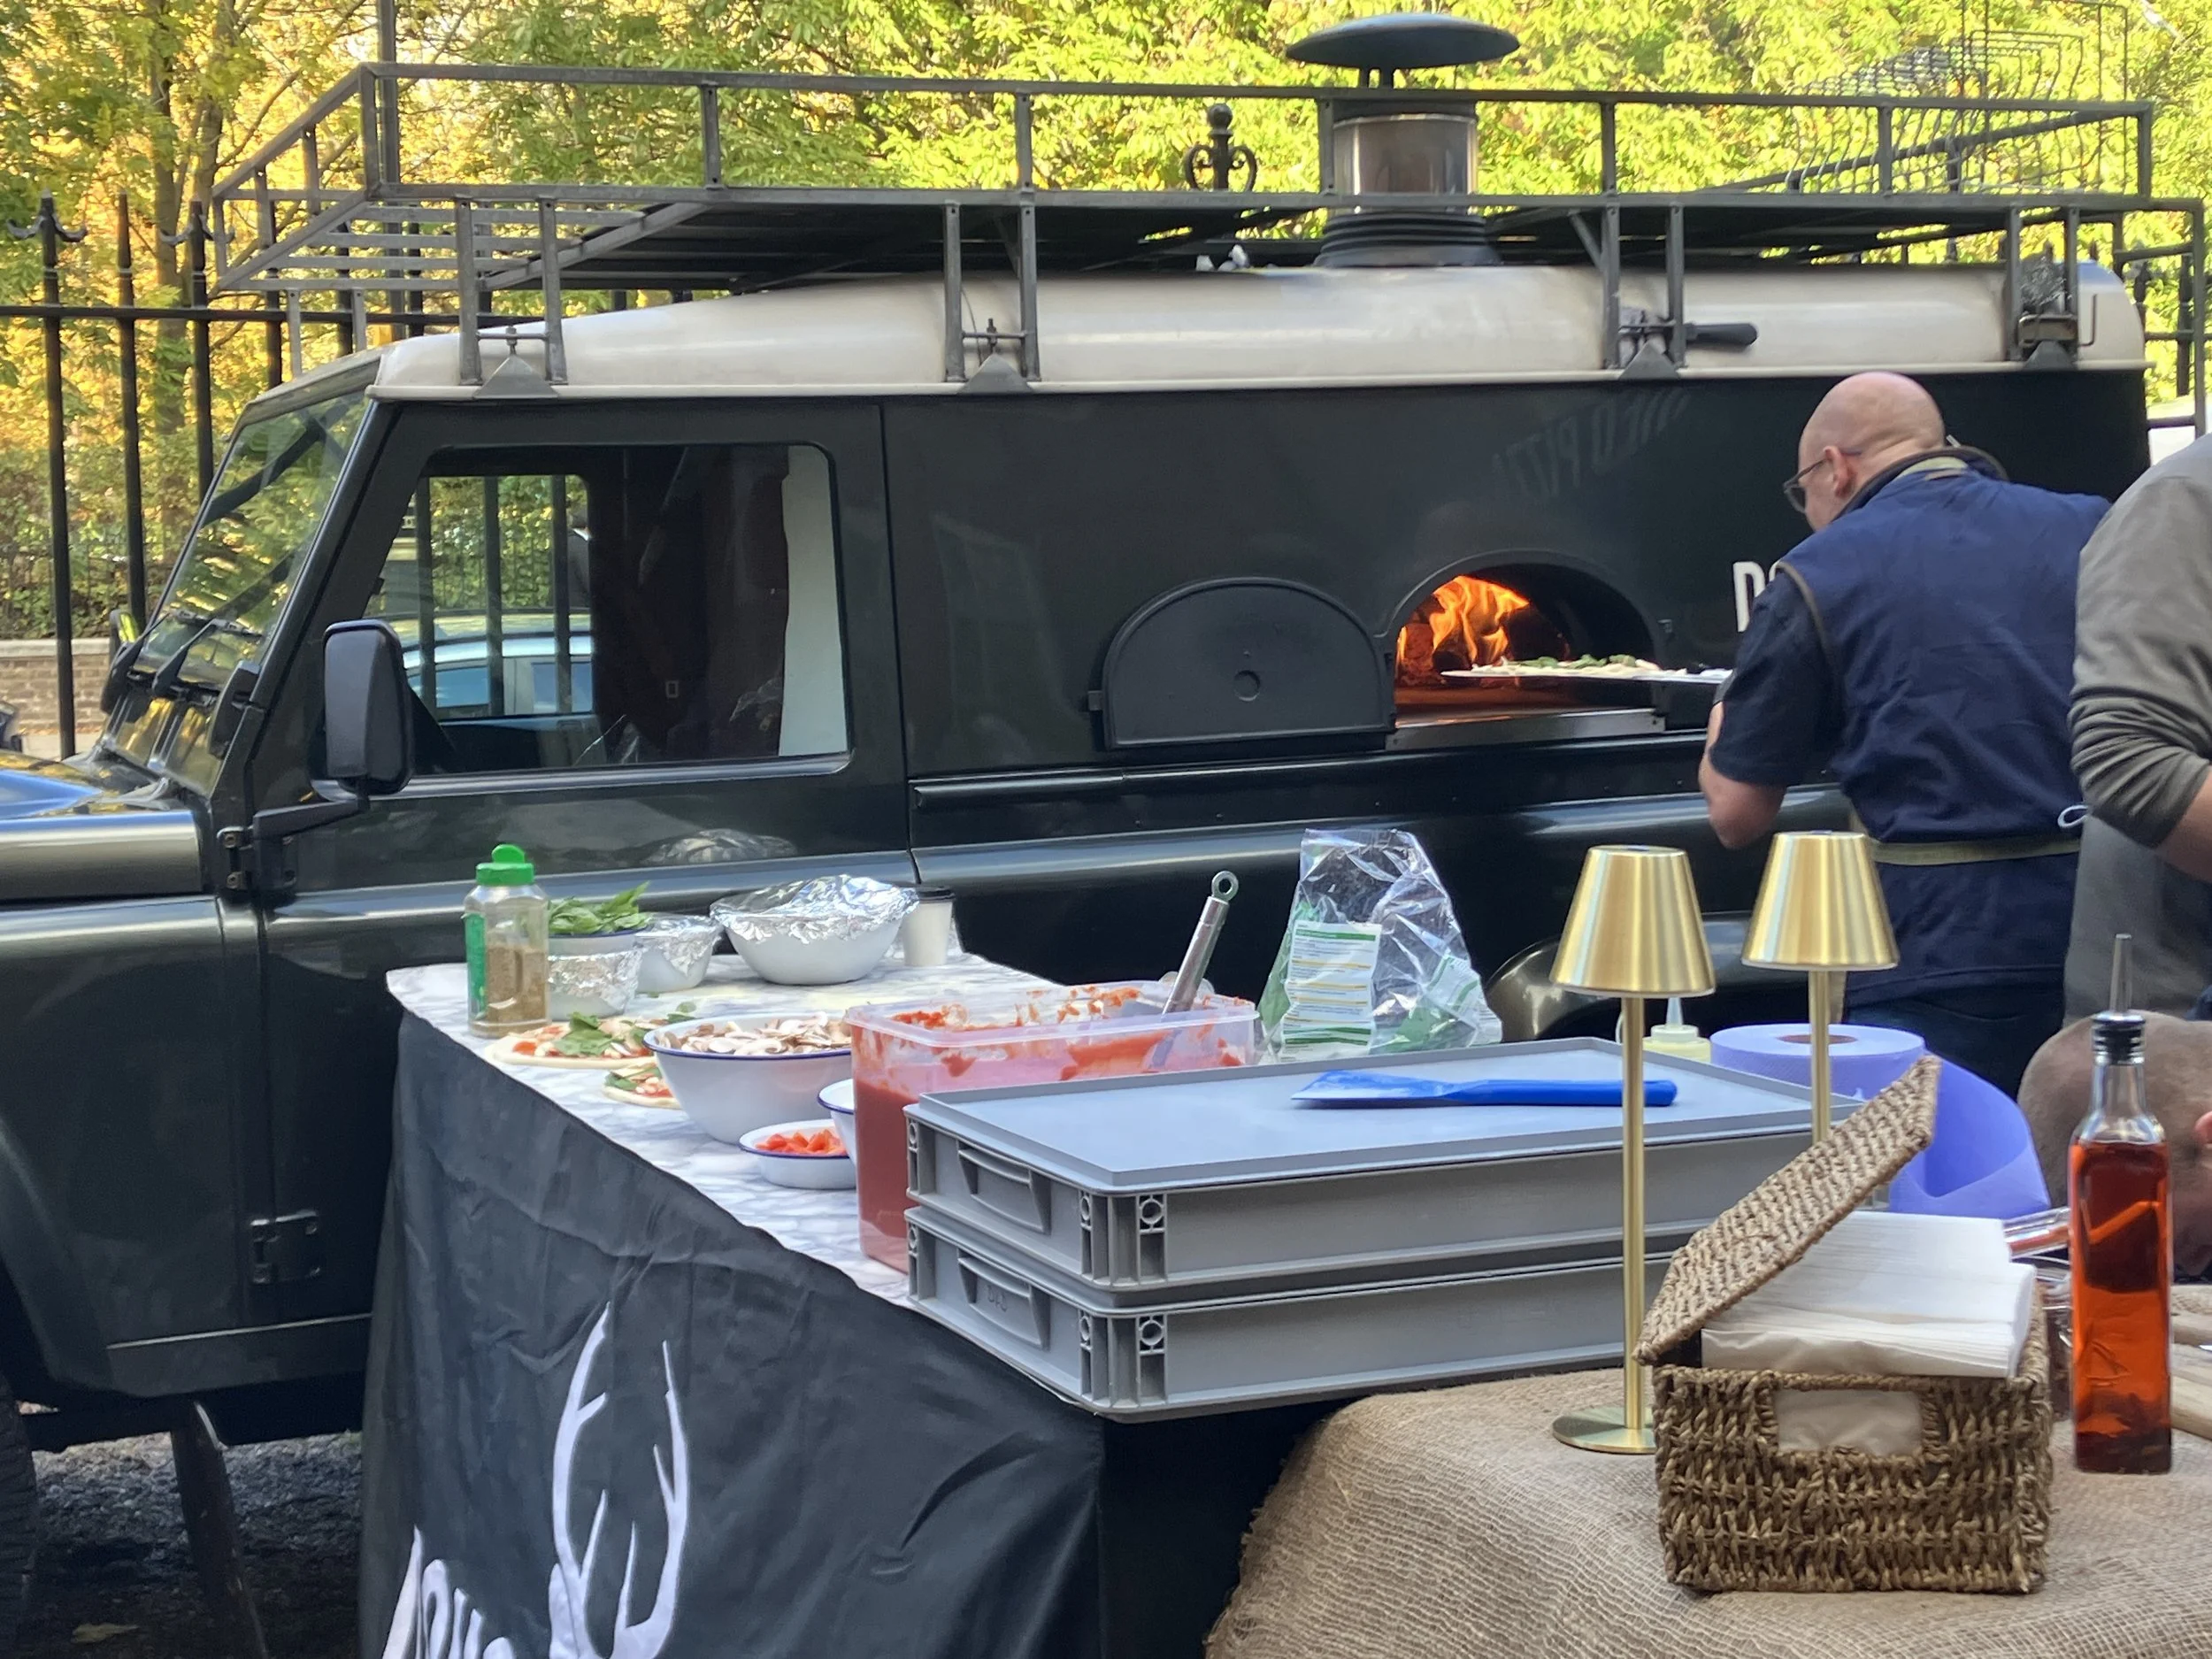
Lunch is provided for attendees on Saturday and Sunday. The latter proved to be quite a treat, as we were all served truly superior pizza from Dough & Deer, produced from a wood-fired oven secreted in the cargo area of a Land Rover Defender.
Membership in the RGS is open to anyone, and includes not only the society’s fine magazine, but entrance to the historic areas of the society’s headquarters south of Hyde Park on “Hot and Cold Corner”—so named by London cabbies because of the opposing statues of David Livingstone and Ernest Shackleton in recesses on the outside walls.
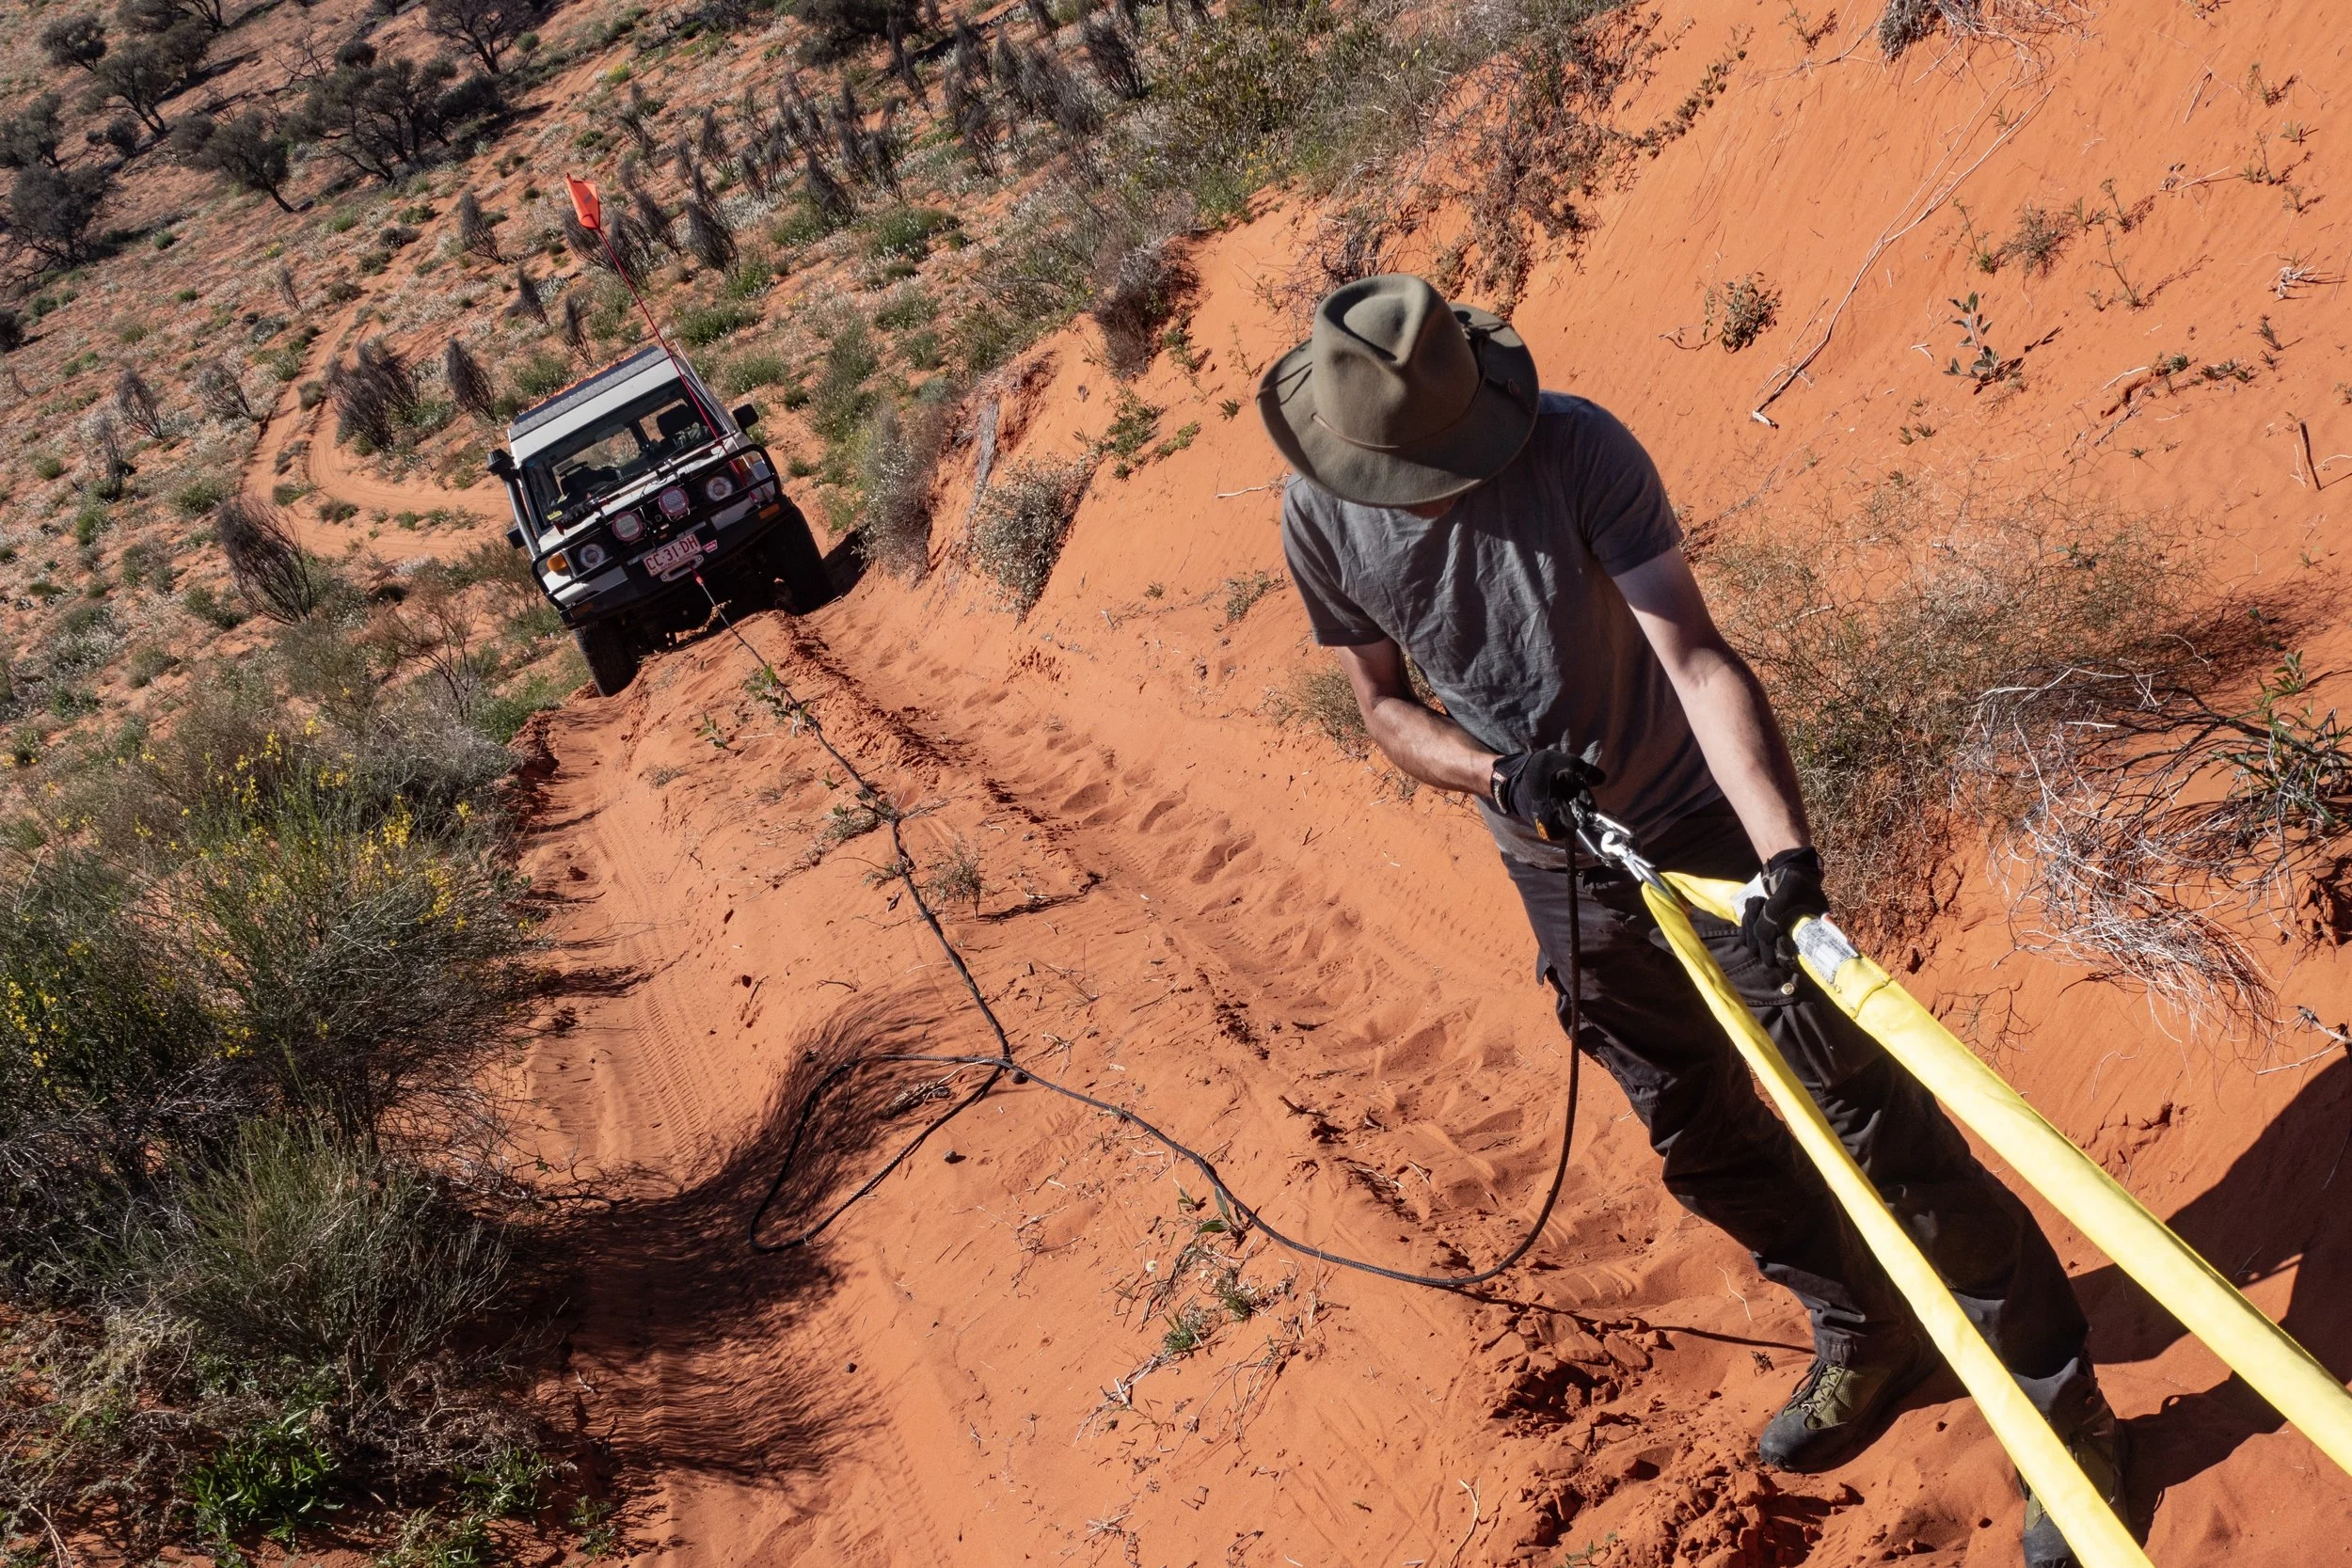
Intensive Recovery Training Workshop

Registration is now open for our first intensive overland training workshop—March 2–5, 2026. You will spend two full days with three of the world’s most experienced overland training instructors learning vehicle recovery, including winching and non-mechanical recovery both solo and assisted. Between them, Graham Jackson (Overland Passage, Overland Expo training director 10 years), Jim West (Camel Trophy competitor), and Jonathan Hanson (founder, Overland Expo) have over 100 years of overlanding experience on every continent that’s self-drivable. Whether you drive a Subaru or a Super Duty, this course will increase your self-confidence and self-sufficiency when exploring off the beaten track.
Camping and ranch-house lodging available; one group dinner on March 4; movie nights; campfires. This event is held on a private ranch with miles of 4x4 trails, and abundant wildlife.
Details and registration details >HERE<
Long-term test: Genesis Off Road 1st-generation dual-battery system for the 2007-2021 Toyota Tundra
(Full disclosure: this is a long-term review of the first-generation Genesis dual-battery kit for the 2007-2021 Tundra. It has been superceded by a later design, the merits of which I cannot address.)
In 2021 we bought a beautiful, 80-year-old cabin in Fairbanks, Alaska, and soon realized we’d need a dedicated vehicle to leave there. A full-sized 4x4 pickup seemed the right choice, both for the conditions near the Arctic Circle and because I’d be hauling up a cargo trailer loaded with furniture, tools, and other immediate needs. So we bought a hideously overpriced (it was that period) 2014 Toyota Tundra.
Since we fully intended to do a lot of exploring, and since we also intended to spend part of our winters there (so as not to be viewed as mere un-snowbirds), I considered it mandatory to install a dual-battery system. I wanted the kit to fit in the engine compartment if at all possible, for simplicity, and the only one that came up on searches was from Genesis Off Road. At that time, in early June of 2022, I planned to drive up within a couple of weeks, so I ordered the kit with little in the way of research into it, or even a thorough reading of the installation procedure. Mea Culpa.
The first revelation when I got the kit and read the instructions was that it required Optima batteries, each of which was smaller than the stock battery. Starting reserve capacity would be reduced in comparison to the full-size stock battery, and the specified deep-cycle Yellow Top Optima had a capacity of just 48 amp-hours. Neither is ideal in potential -40º conditions. Ah well—I figured that was the sacrifice necessary to fit two batteries in the stock location.
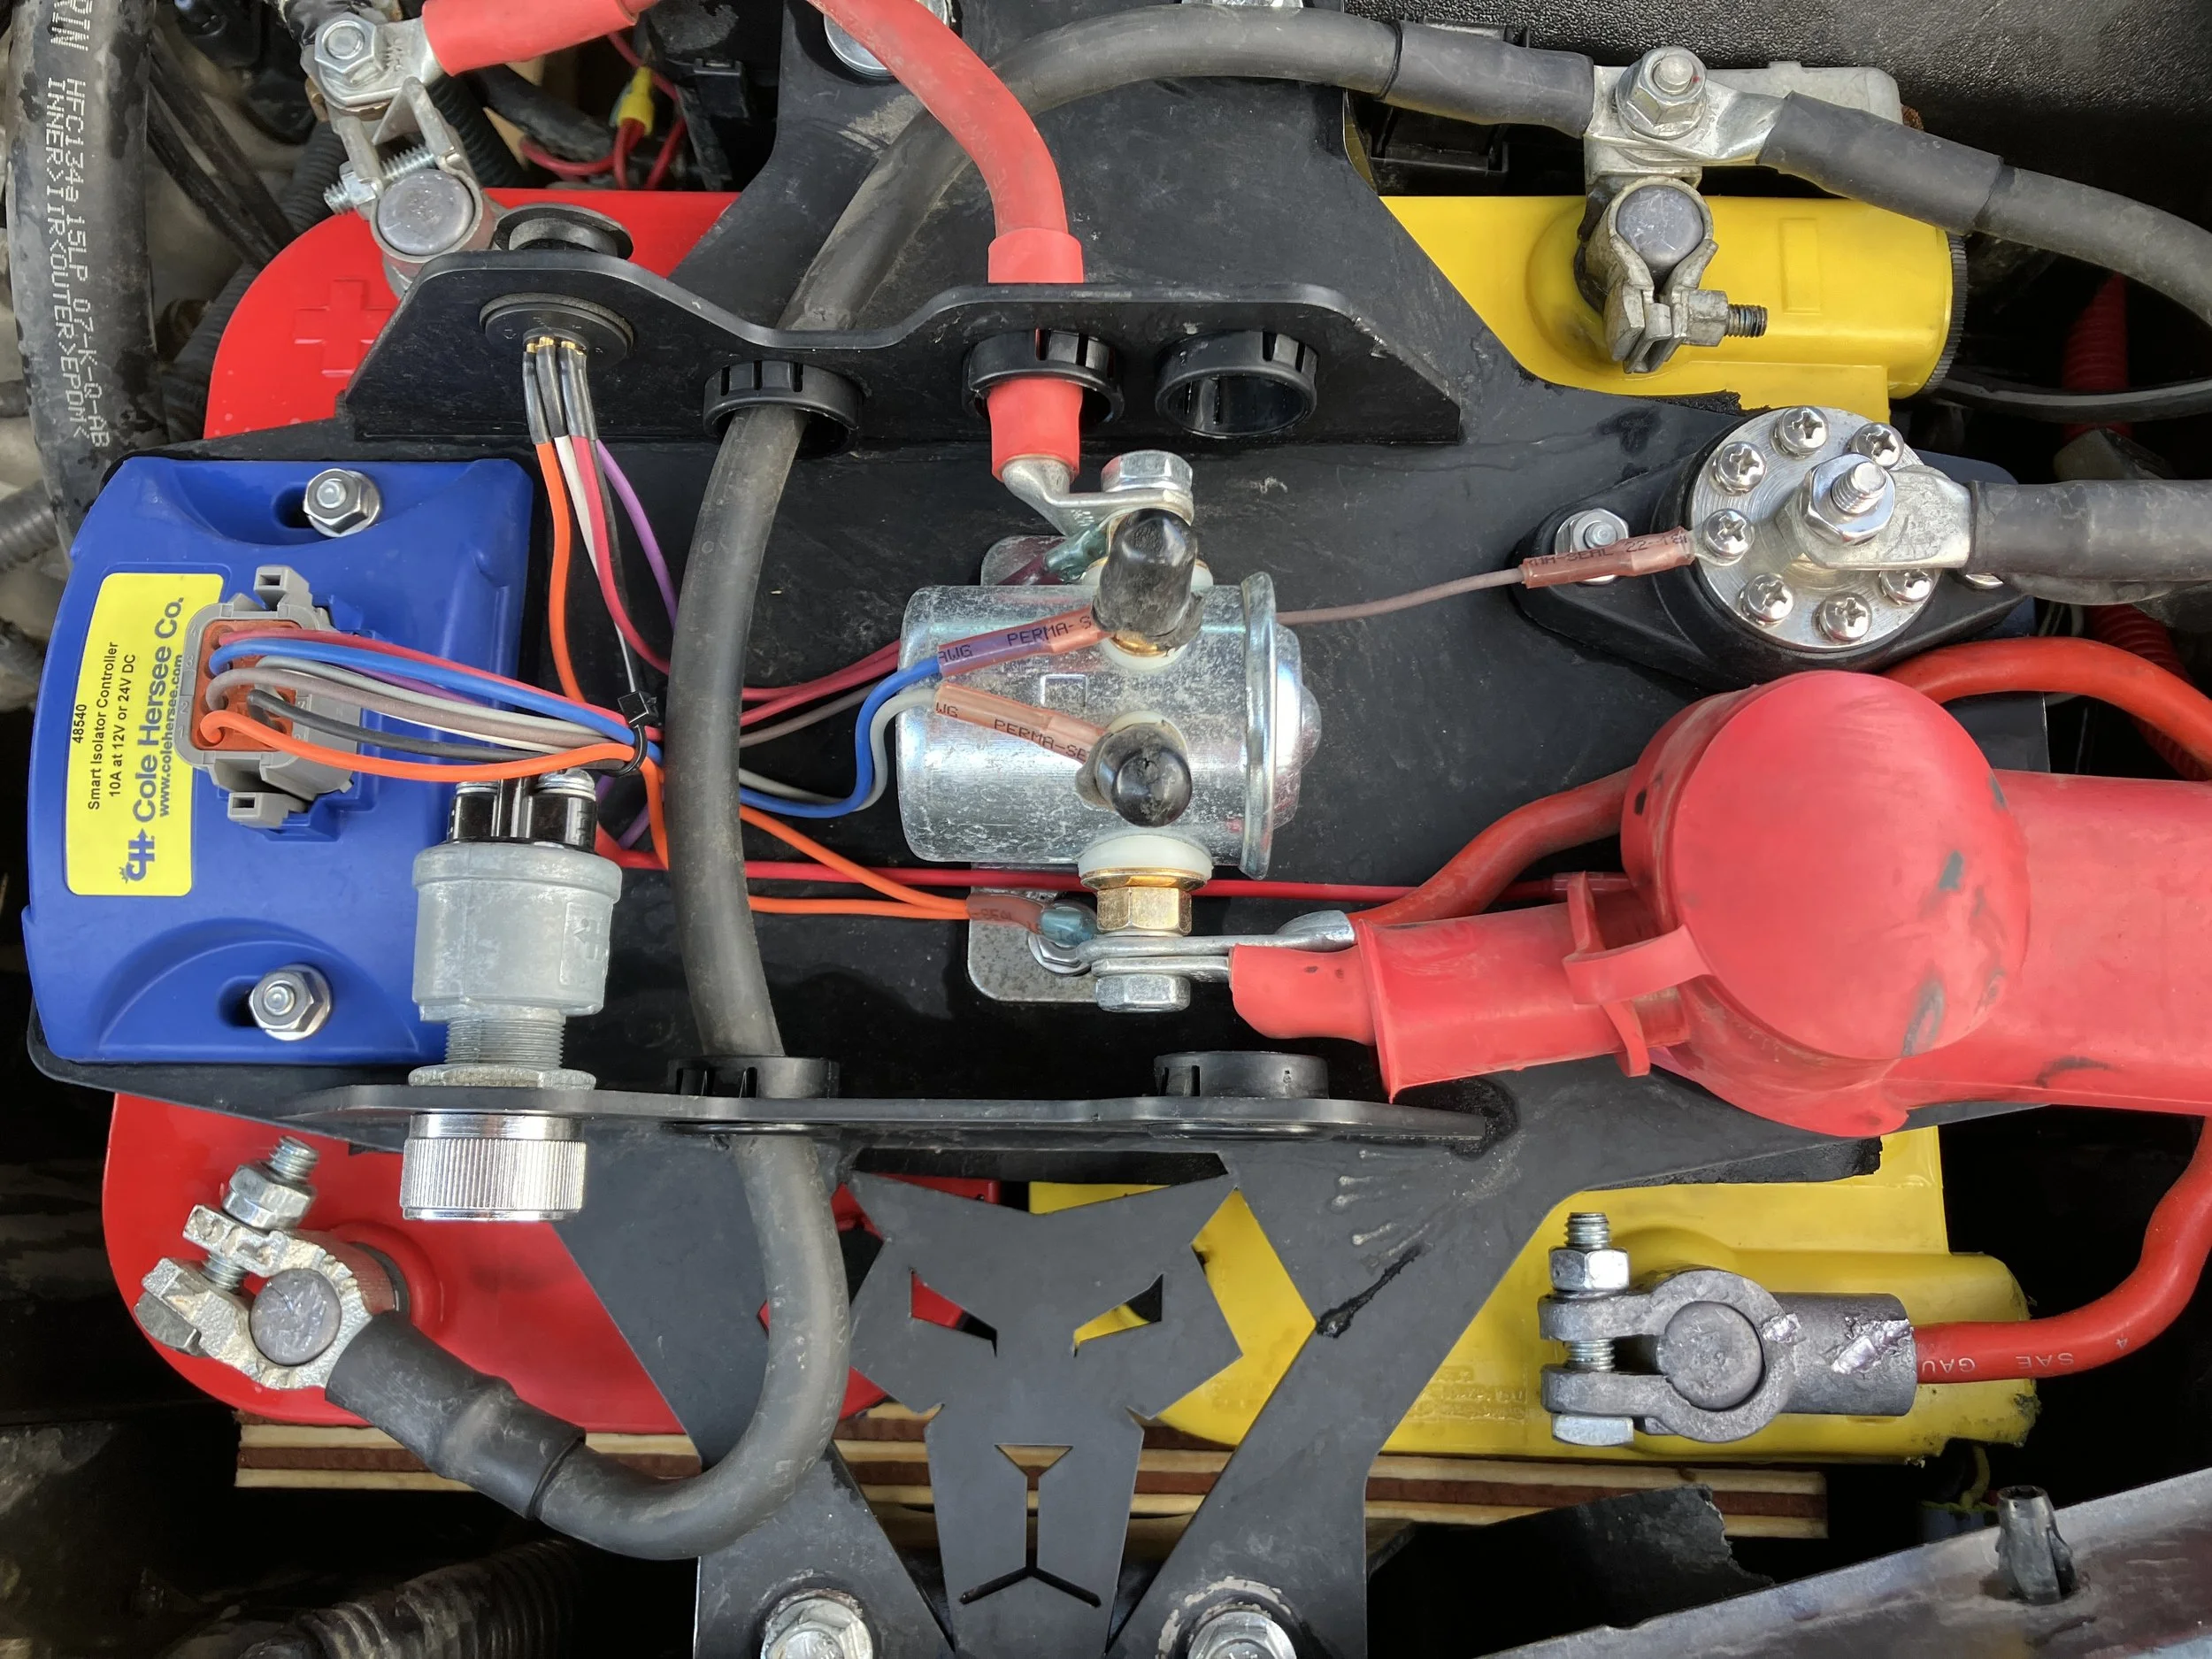
The battery tray and top were nicely made, powder-coated, clearly laser-cut and incorporating a fancy large-cat-head design. The control unit looked solid, and all necessary wiring was already in place. Reading installation instructions thoroughly at last, I was a bit perturbed to discover that the entire assembly attached to the bottom of the original battery platform with four Rivnuts. That seemed a bit light for 60-plus pounds of battery, mount, and charge controller. The next thing I noted was that all the included hardware, including the bolts that secured the top plate to the base, was SAE. Really? On a Toyota? That might have saved Genesis, what, 50 cents per kit over metric hardware? A small thing, perhaps, but annoying.
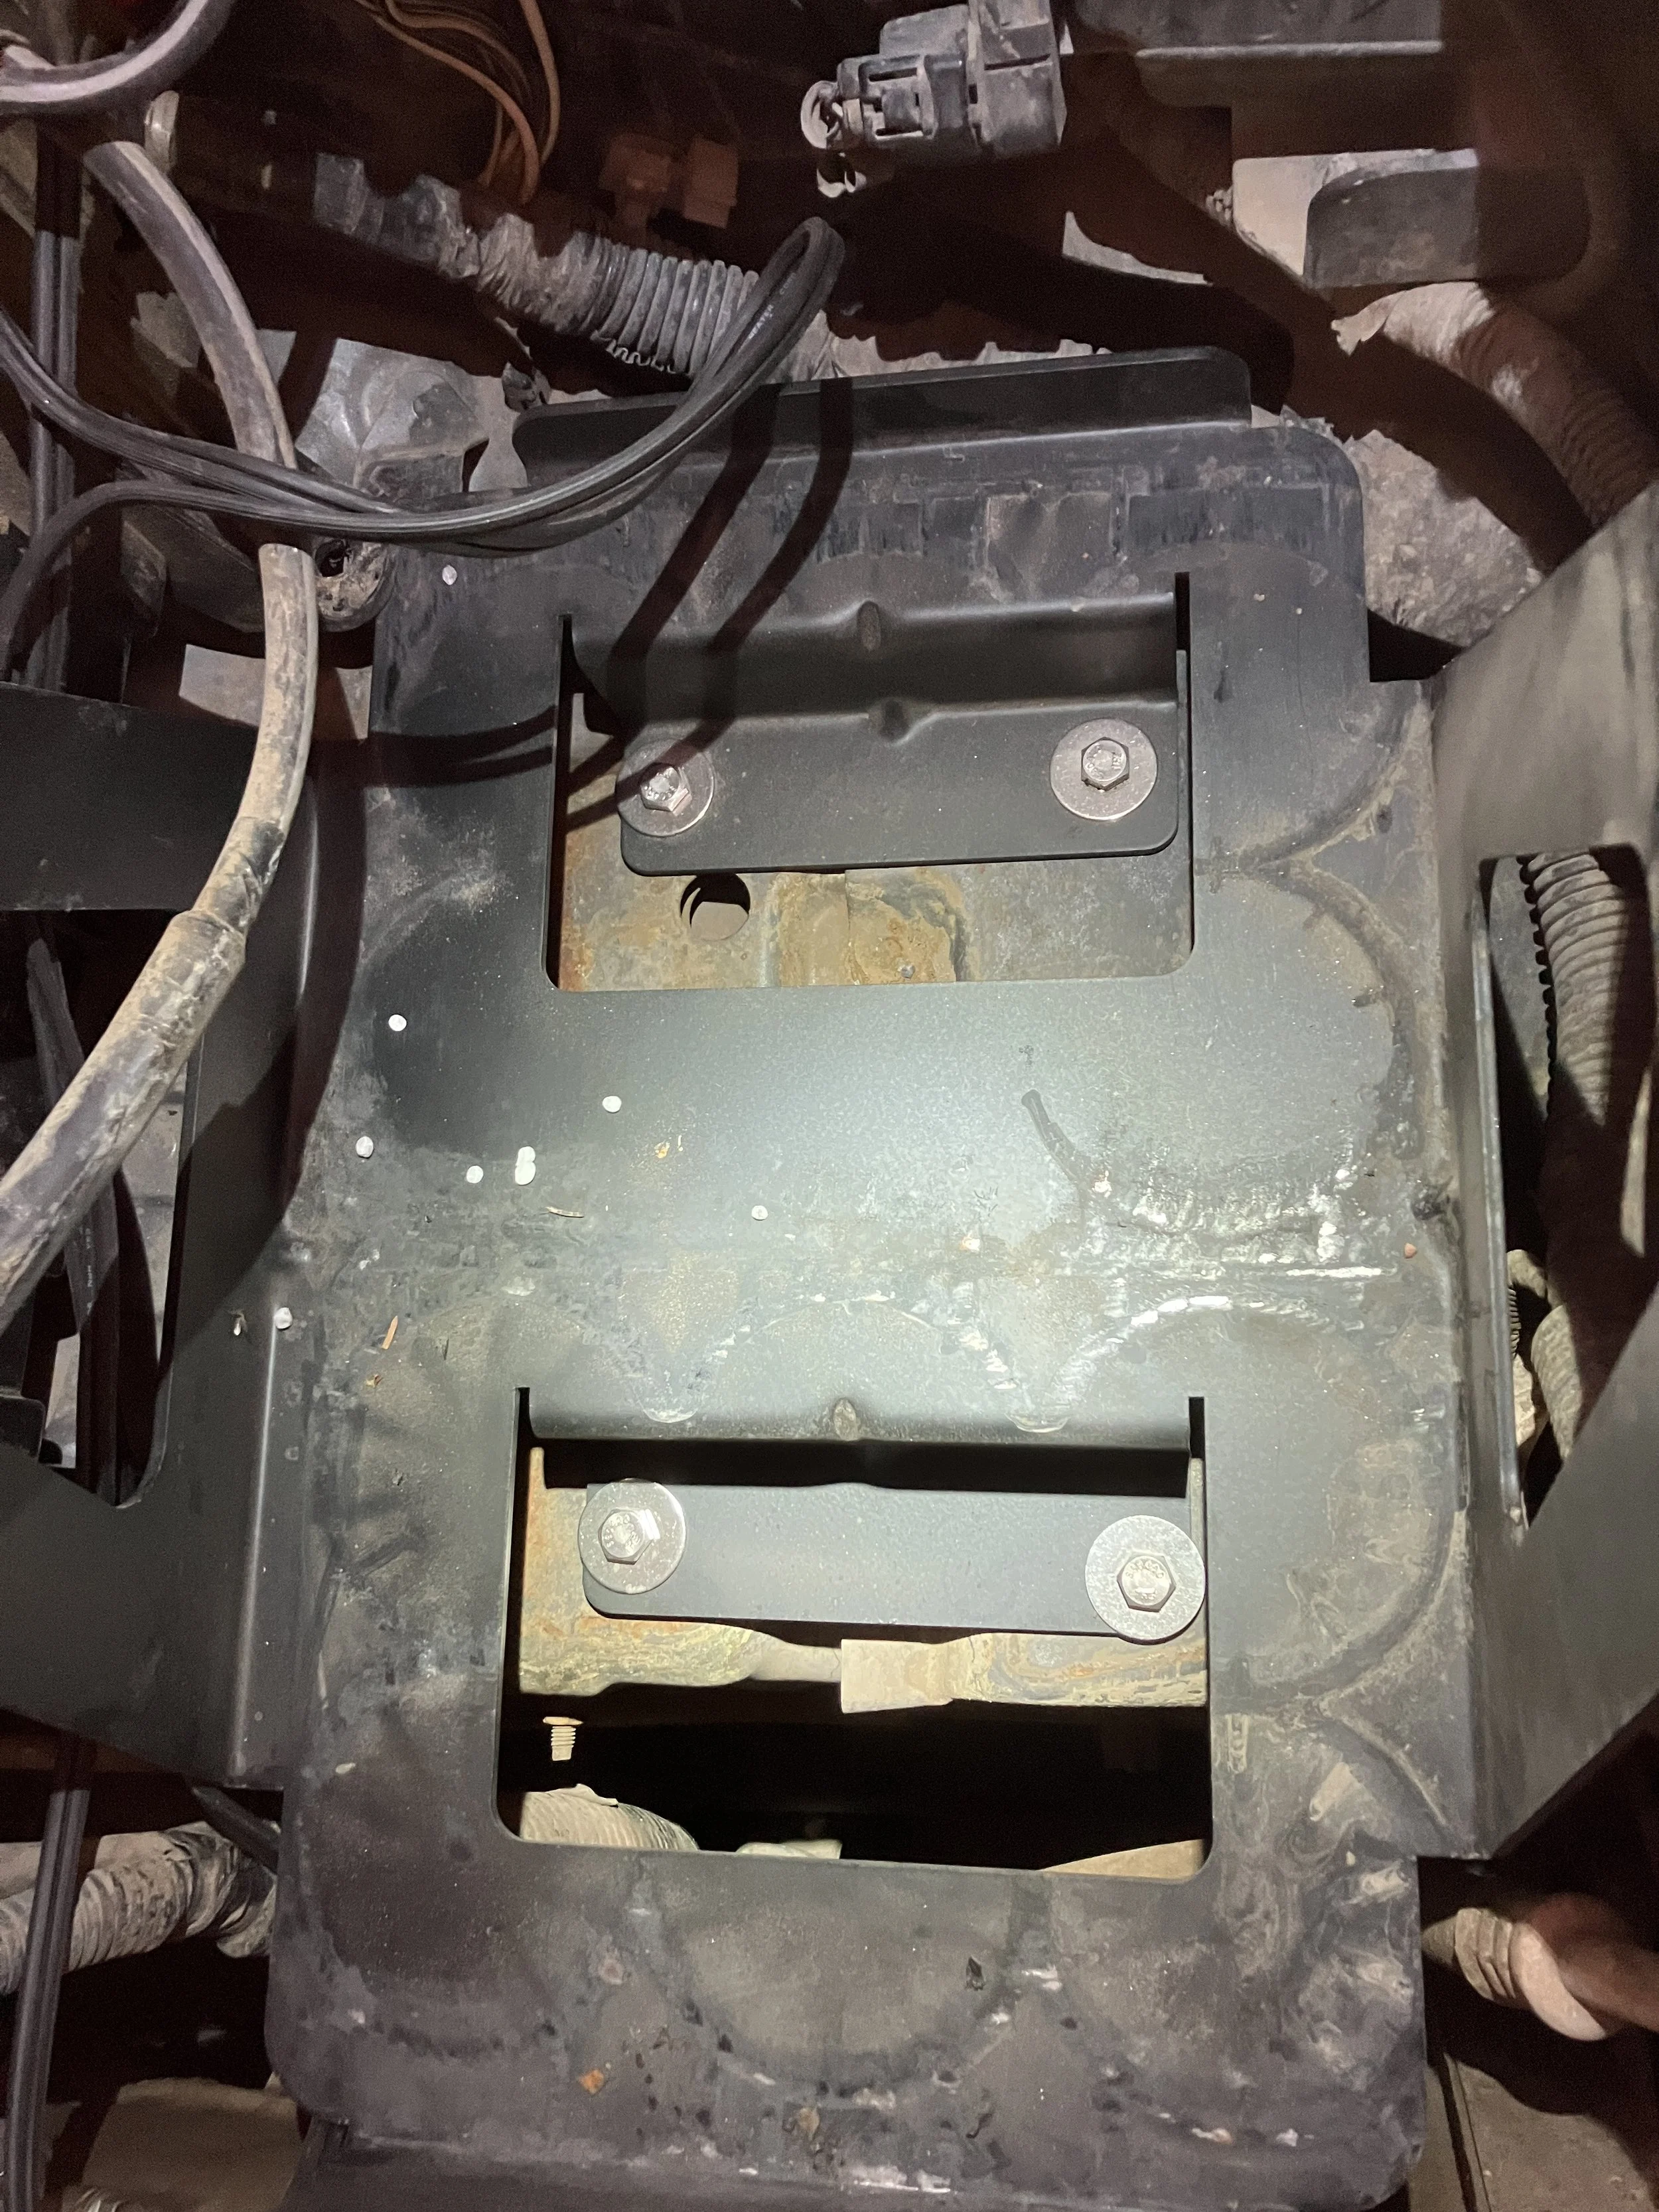
Then, on trial-fitting the bracket into the Tundra after removing the stock battery tray, I realized that it was going to be a very, very tight fit. The instructions noted this and offered extremely precise directions for mounting, so I didn’t just do a trial fit, I did five or six, noting each time how close the whole thing would come to the bodywork in front and the fuse/relay box in back. In fact the front attachment bolts for the top plate were actually under the radiator frame.
Finally I was as satisfied as I could be that I had the bracket correctly positioned. I drilled the holes for the Rivnuts and bolted it down. The Genesis system was designed to use the extended plastic base plates that come with the Optima batteries, so I affixed those and dropped both batteries in place, with the Yellow Top on the right (looking toward the cab).
And I was completely stunned by how close the positive terminal of that battery came to the (steel) radiator frame. There was no more than an eighth of an inch between proper function and a major short circuit. I shifted the batteries as much as possible—no difference. I pulled them out and checked my installation, which agreed with the directions. There was no way to shift the Rivnuts one way or another since they were crimped in place. I was absolutely certain that eighth of an inch would disappear on some moderately rough stretch of the Alaska Highway and cause a serious problem. But I had no time to make any major adjustments.
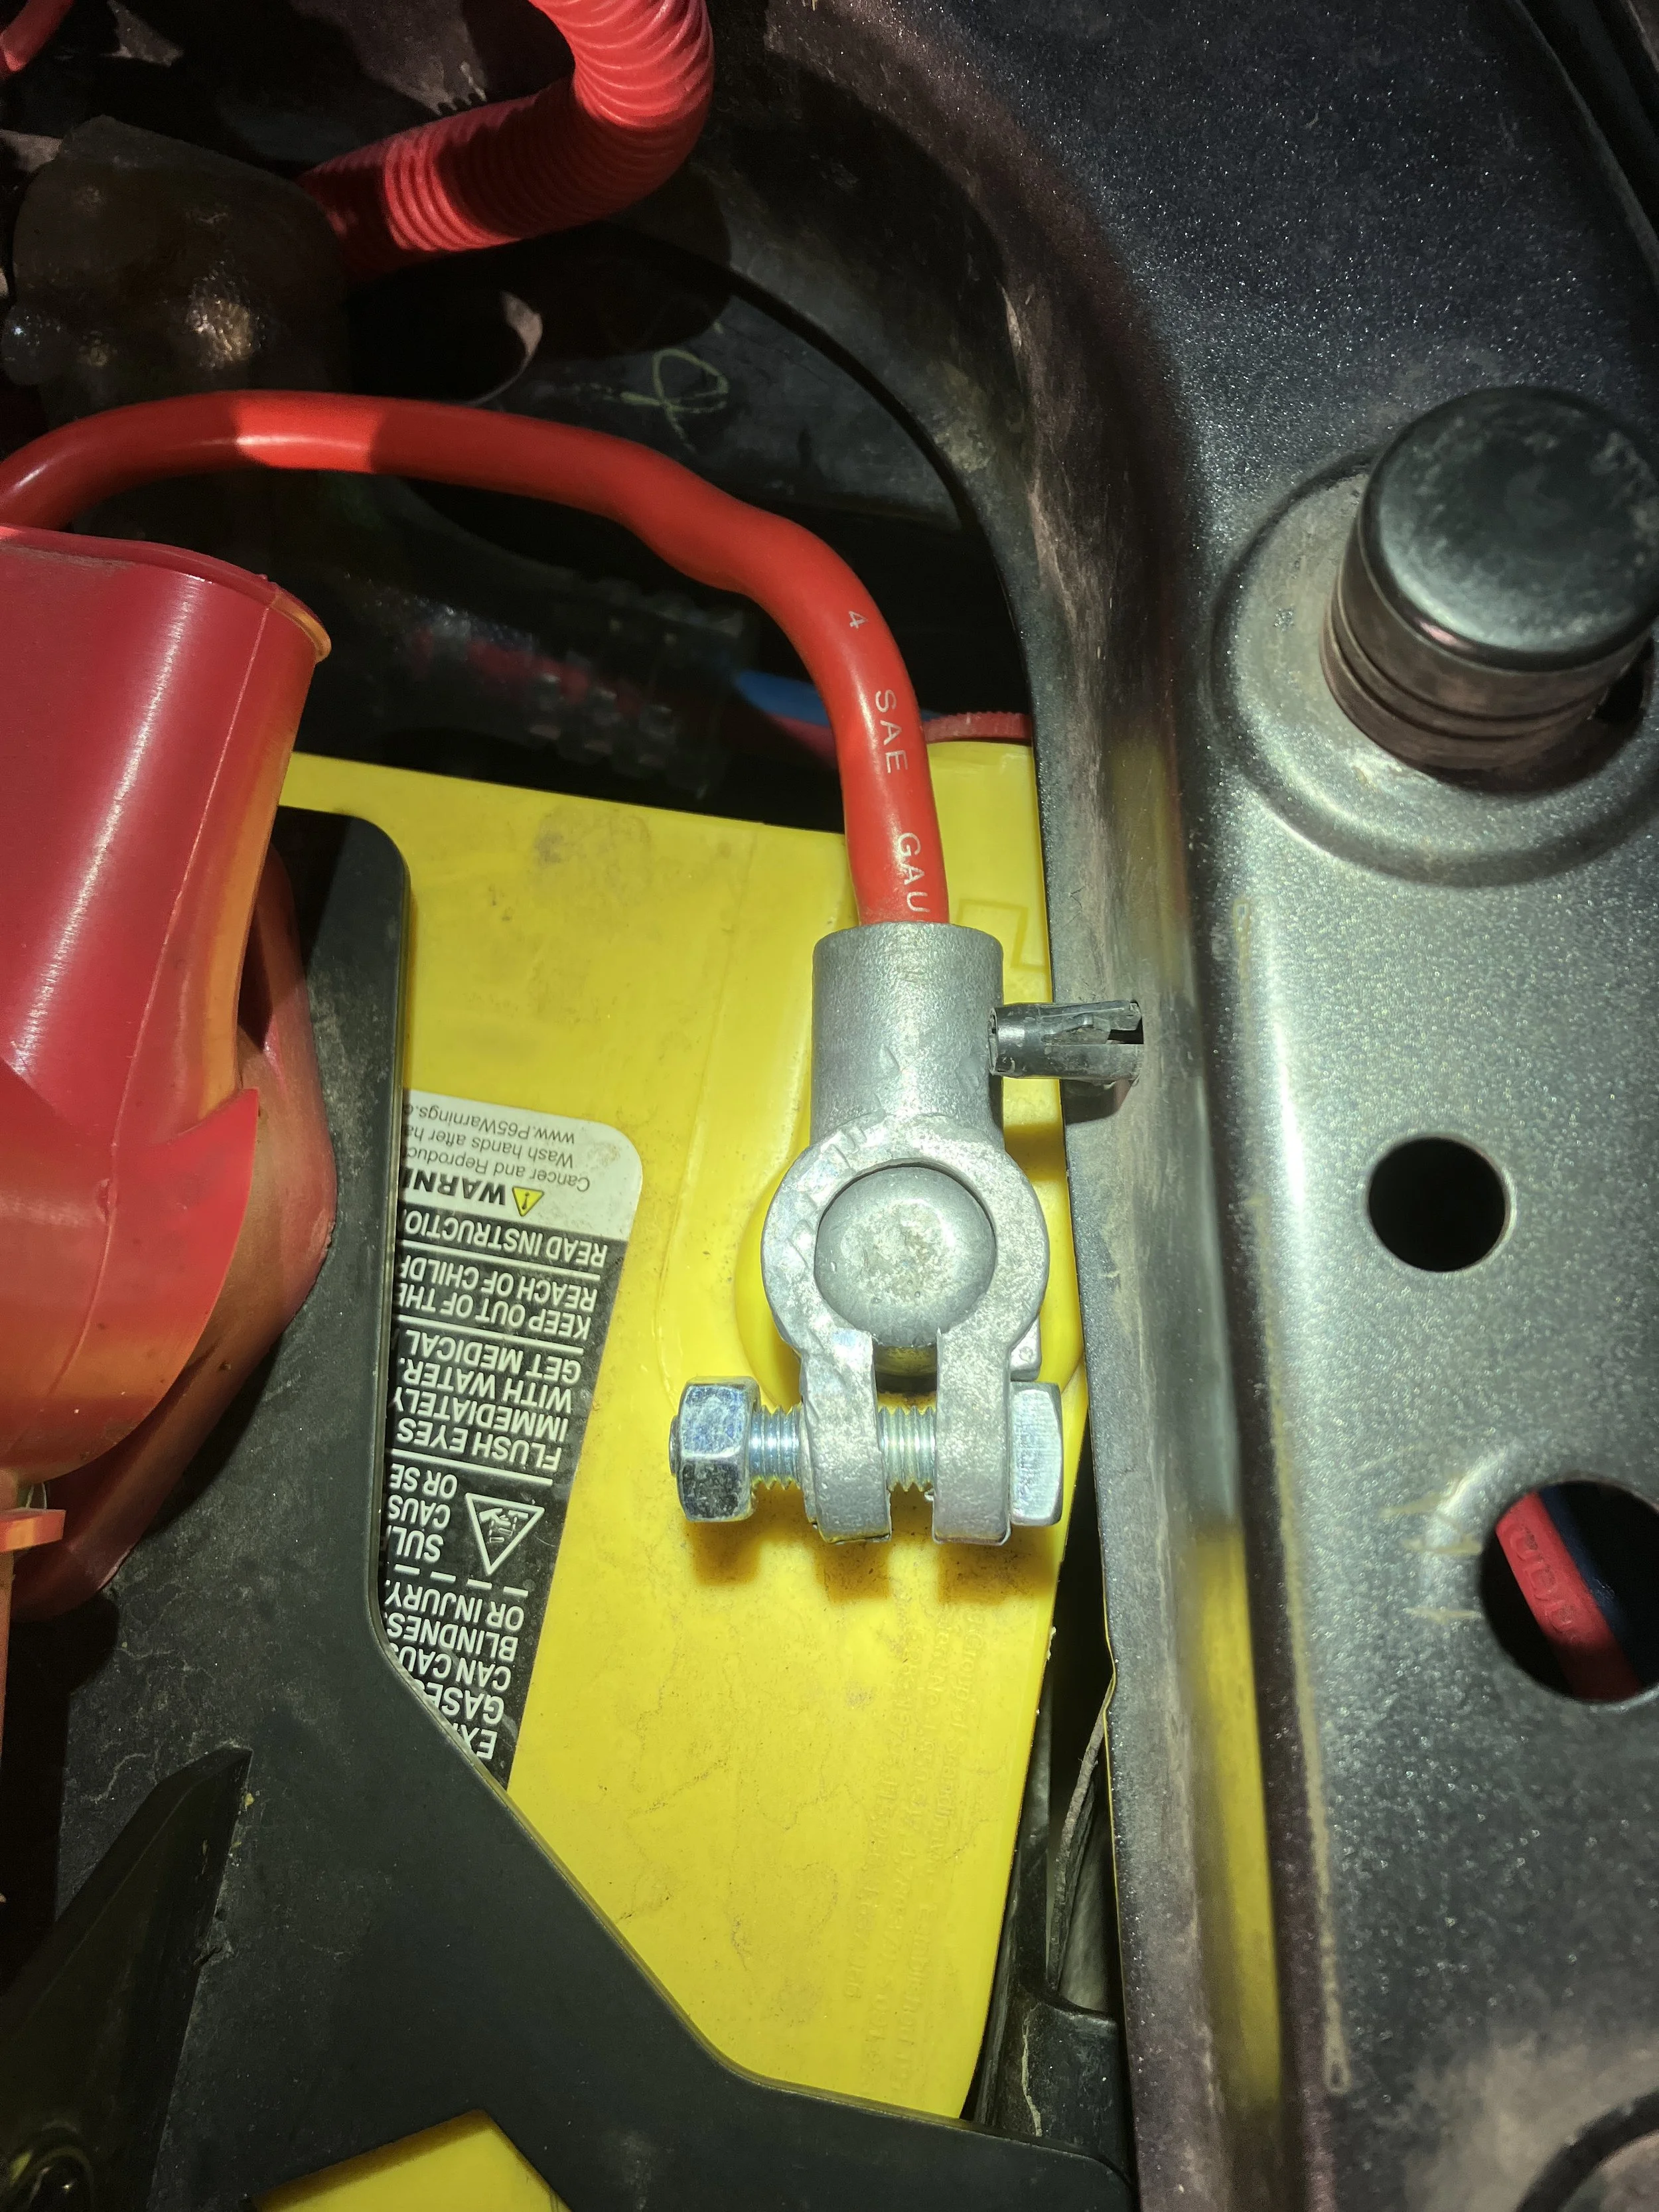
Too damn close . . .
So I removed the two base plates from the batteries, which dropped them below the immediate danger zone, and filled in the gap on top with dense, closed-cell foam, so tight that I had a difficult time inserting the bolts for the top plate to compress everything. The other bits were still frighteningly close together—access with a wrench to the positive terminals was excruciatingly tight, and even the not-very-sharp-eyed among you might notice the spot where I once managed to arc a wrench on a positive lead. But there was at least sufficient clearance between the hot terminals and bodywork.
One remaining worry was the left running and turn-signal lamp, the wires to which were bent sharply against the side of the Yellow Top battery. If the battery moved at all it could cause trouble, so I resolved to keep an eye on it.
The journey to Alaska was without issue, and in fact for the next two years the system worked perfectly in terms of keeping both batteries charged. I never had to use the switch that combined the batteries for an emergency start. I almost forgot my frustration with the installation. Then, one day when I put on my left turn signal, it started hyper-flashing rapidly—usually an indication that a bulb has burned out.
To access the bulb I had to disassemble the entire battery system, leaving only the bottom bracket in place. When I did so the issue became clear: the battery had in fact shifted just enough to smash the wires to the bulb, and one or the other had shorted.
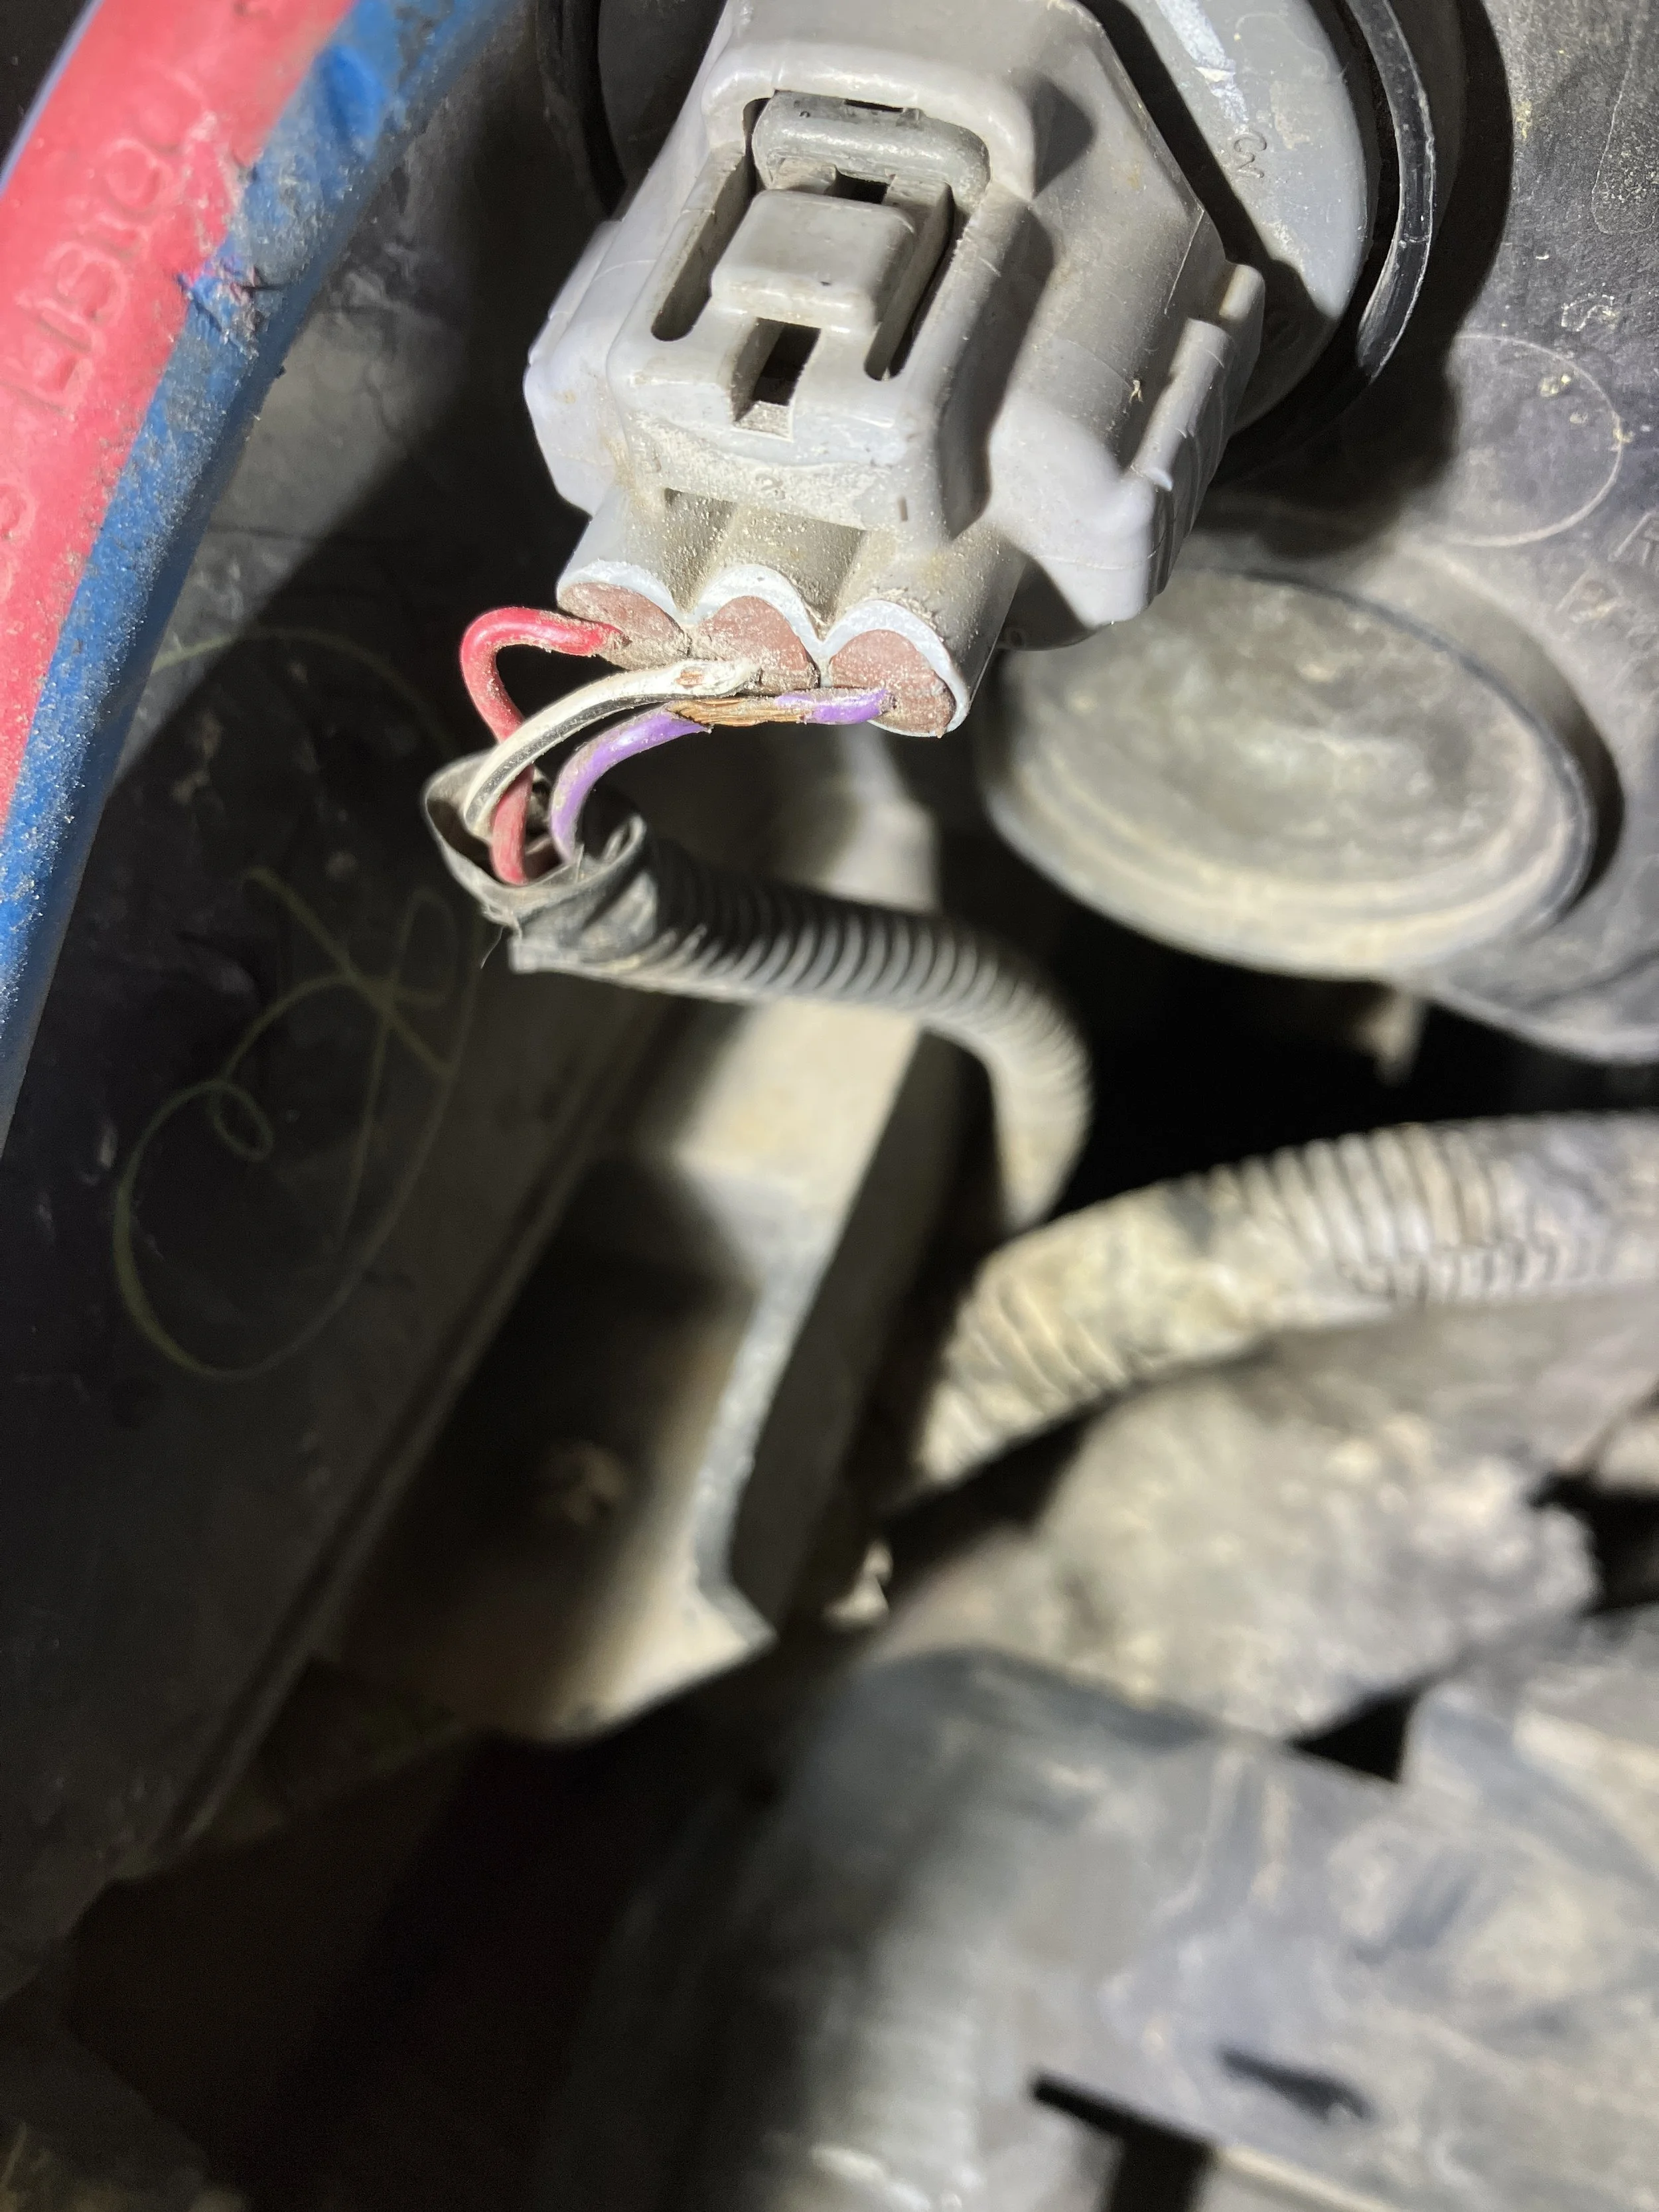
I installed a new plug and bulb and took another look at the clearances. I found that I could fractionally increase the distance between the battery and plug by grinding away part of the battery’s base plate, and did so—but by now my frustrations had resurfaced. (To be fair, I noted meanwhile that the tray had not loosened on those four Rivnuts.)
Last week the problem came back. Everything out again. This time I resorted to the ultimate bodge fix: I cut a square of three-quarter-inch plywood and wedged it in front of both batteries, gaining a critical few tenths of an inch extra clearance. With it in place I could barely get the top plate bolted on again, but I’m now hopeful things will stabilize for a while. Who knows, it might even be possible to replace a bulb without disassembling an entire corner of the engine compartment.
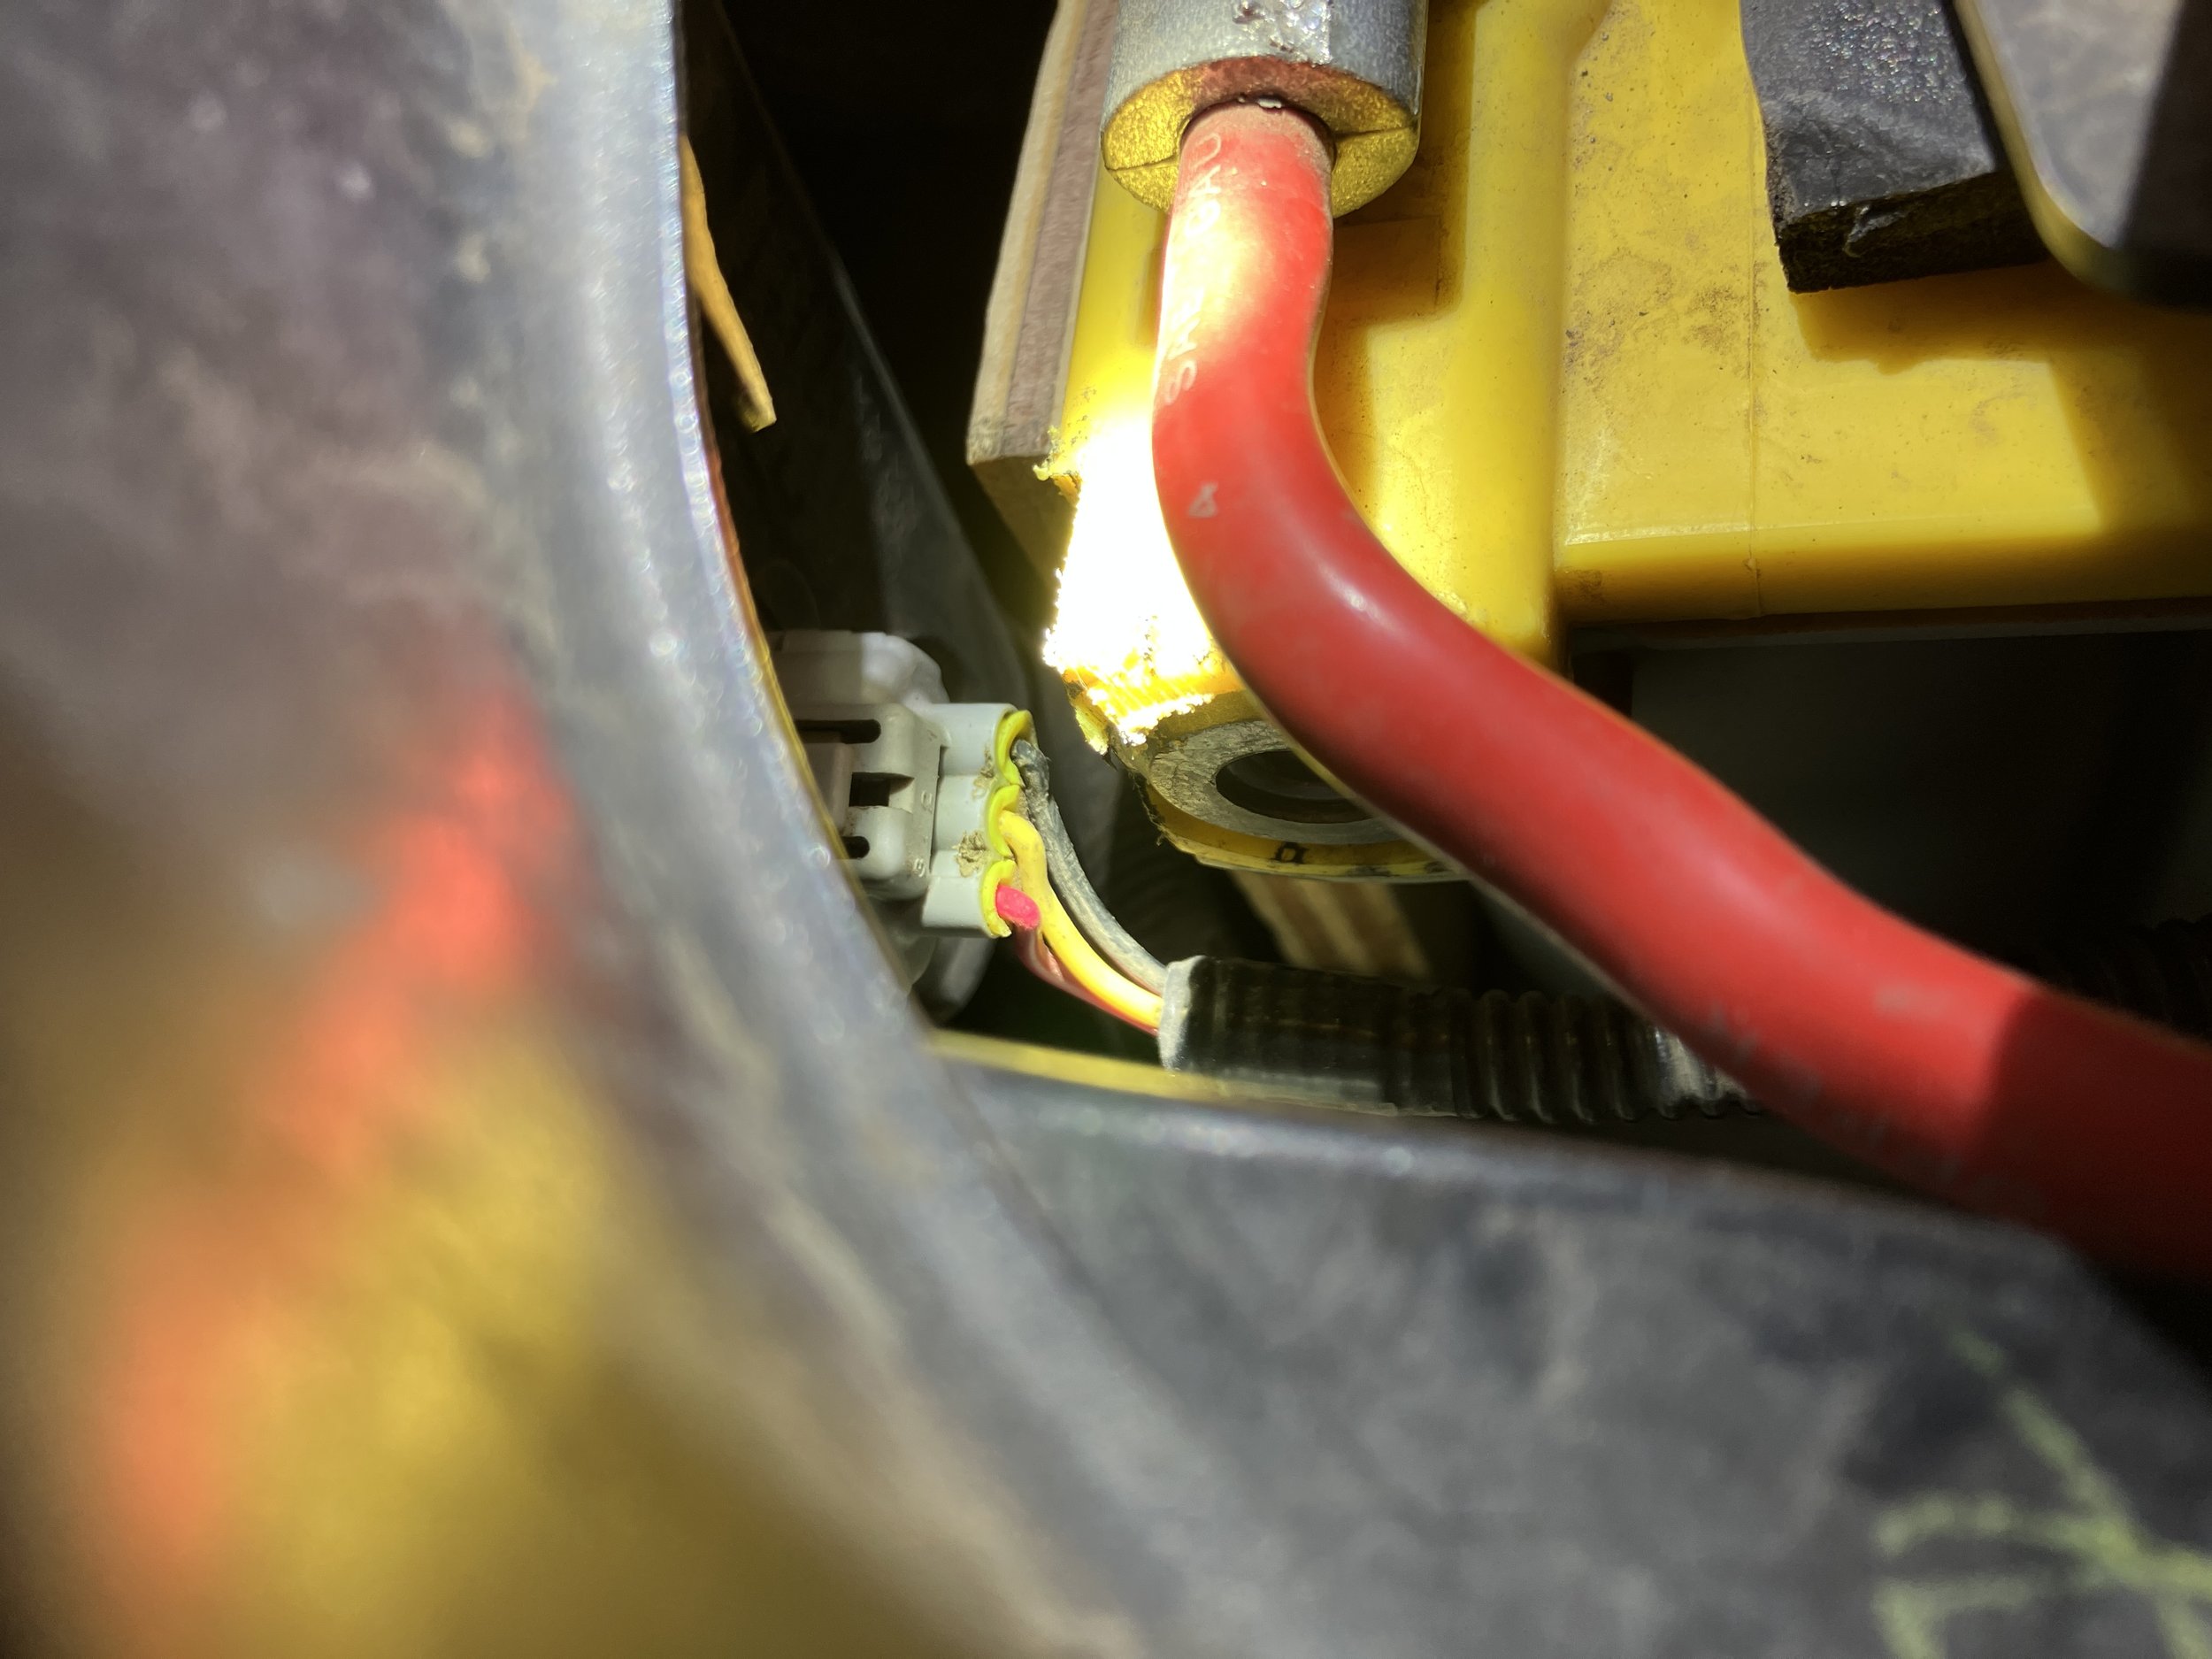
Is that . . . plywood? Yes . . .
Obviously, a reader (or the company) could claim that it was my modification of the battery arrangement in the first place that caused the turn signal issue. But there was simply no way I was going to leave that positive terminal that close to metal—and my modification only moved the battery vertically. Having done a fair number of aftermarket modifying on more than a few vehicles, I’m absolutely confident I installed the Genesis kit exactly where I was told to. As it is it is so tight at the back that opening the fuse box is a real struggle.
As I mentioned at the beginning, Genesis now offers a “Generation 2” version of this kit, now employing a pair of (still undersized) Odyssey batteries. Perhaps this new version addresses the issues the first one had (else why the need for a redesign?). I can’t say—and I’m not about to spend $700 plus batteries to find out. When I decide to fix this system permanently it will be with an entirely different approach and two full-sized batteries. In the meantime, if you’re considering the current Genesis kit you might ask a few questions regarding the improvements I hope have been implemented.

Sneak Preview Vol. 2, No. 2 – Exploration Quarterly

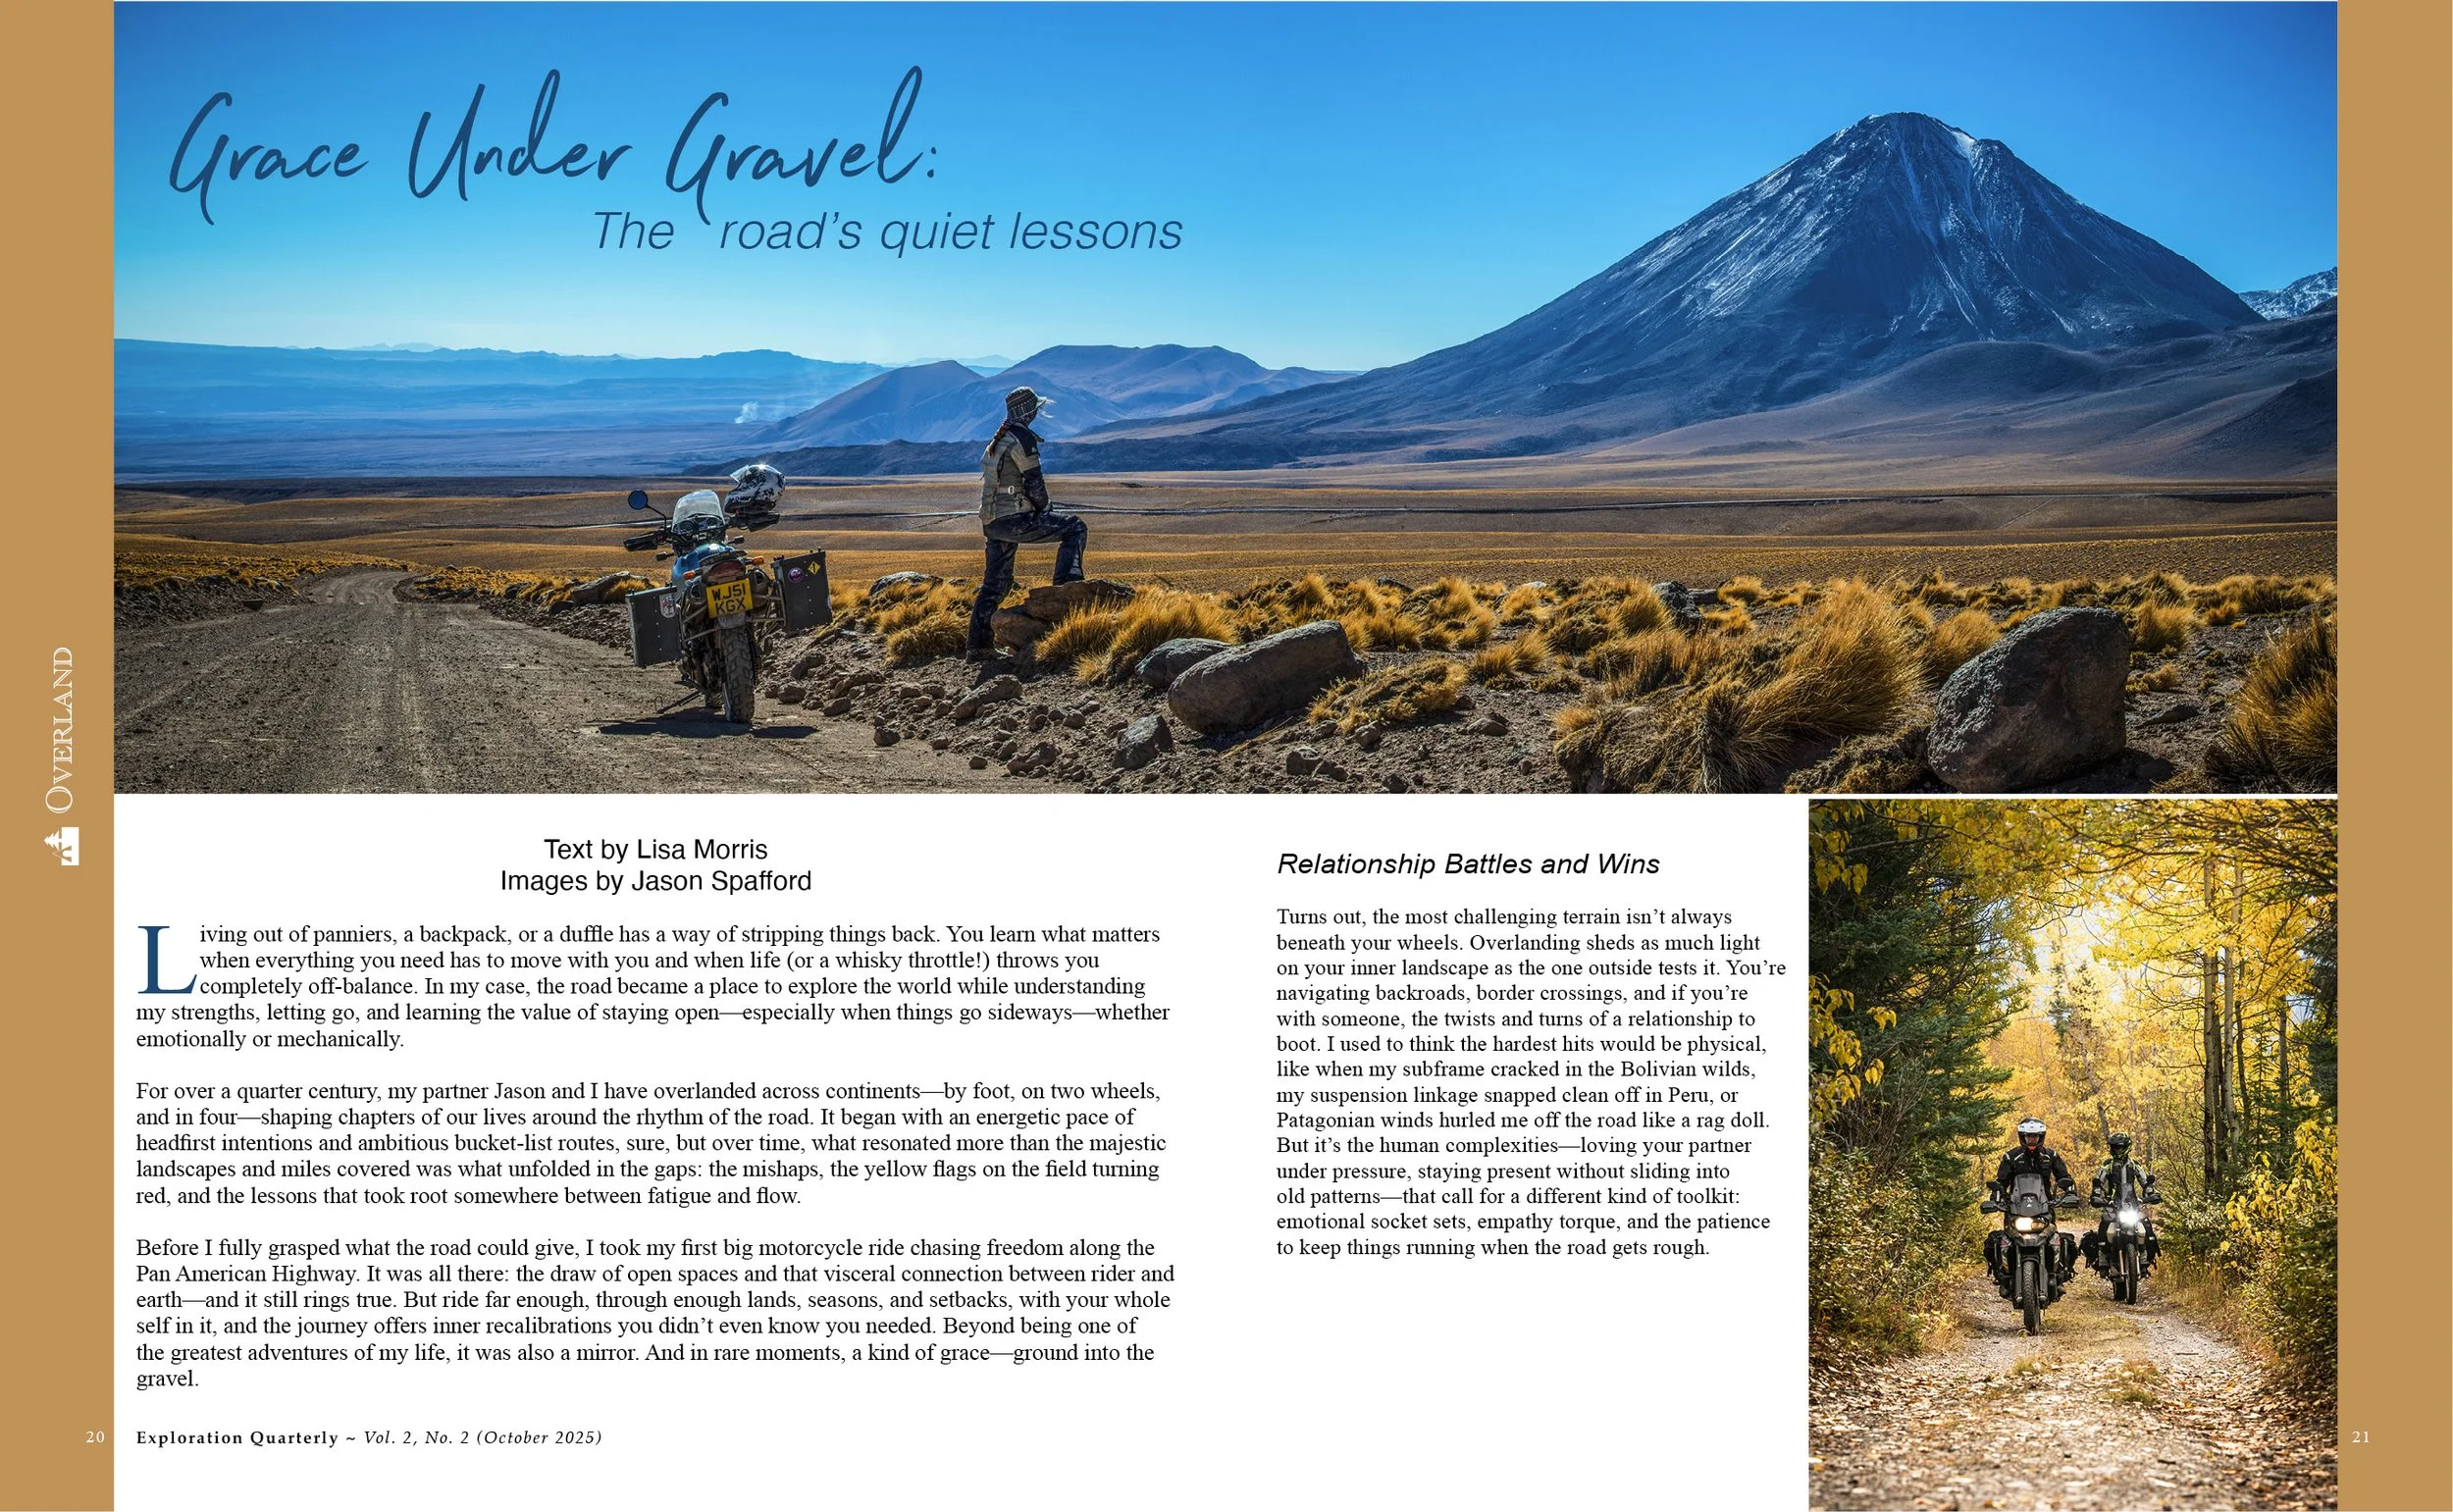
Image by Jason Spafford, from Grace Under Gravel by Lisa Morris.
Amongst the upheaval and excitement of our move 65 miles southeast of Tucson to our new Ravenskeld, we are hard at work on Vol. 2, No. 2 of Exploration Quarterly—and it’s shaping up beautifully with a diverse mix of subjects for your reading pleasure. This all-digital issue will include:
An overlanding feature by Lisa Morris and Jason Spafford — a hybrid philosophical look at 25 years of travel on two wheels and four, complemented by a survey of their vehicle choices and how they learned to love the road (and stay a couple).
A biogeographer delves into the early searches for the source of the Mississippi River — literally, by reenacting one explorer’s early-1800s canoe journey for a documentary film series. Janet Rith-Nyjarian shares her immersive experiences.
Graham Jackson reports on his 18 months owning an ENEOS Grenadier — a rough start (it tried to kill his wife) does not get any better, and he comes to some rather stark conclusions.
We share a beautiful artifact that recently came into our possession (after coveting it for 30 years) — a hundred-year-old roll-top camp table from a company that won a gold medal at the 1893 Columbian Exposition.
Jonathan will share the results of his field test of six multi-tools — will he choose One Tool to Rule Them All?
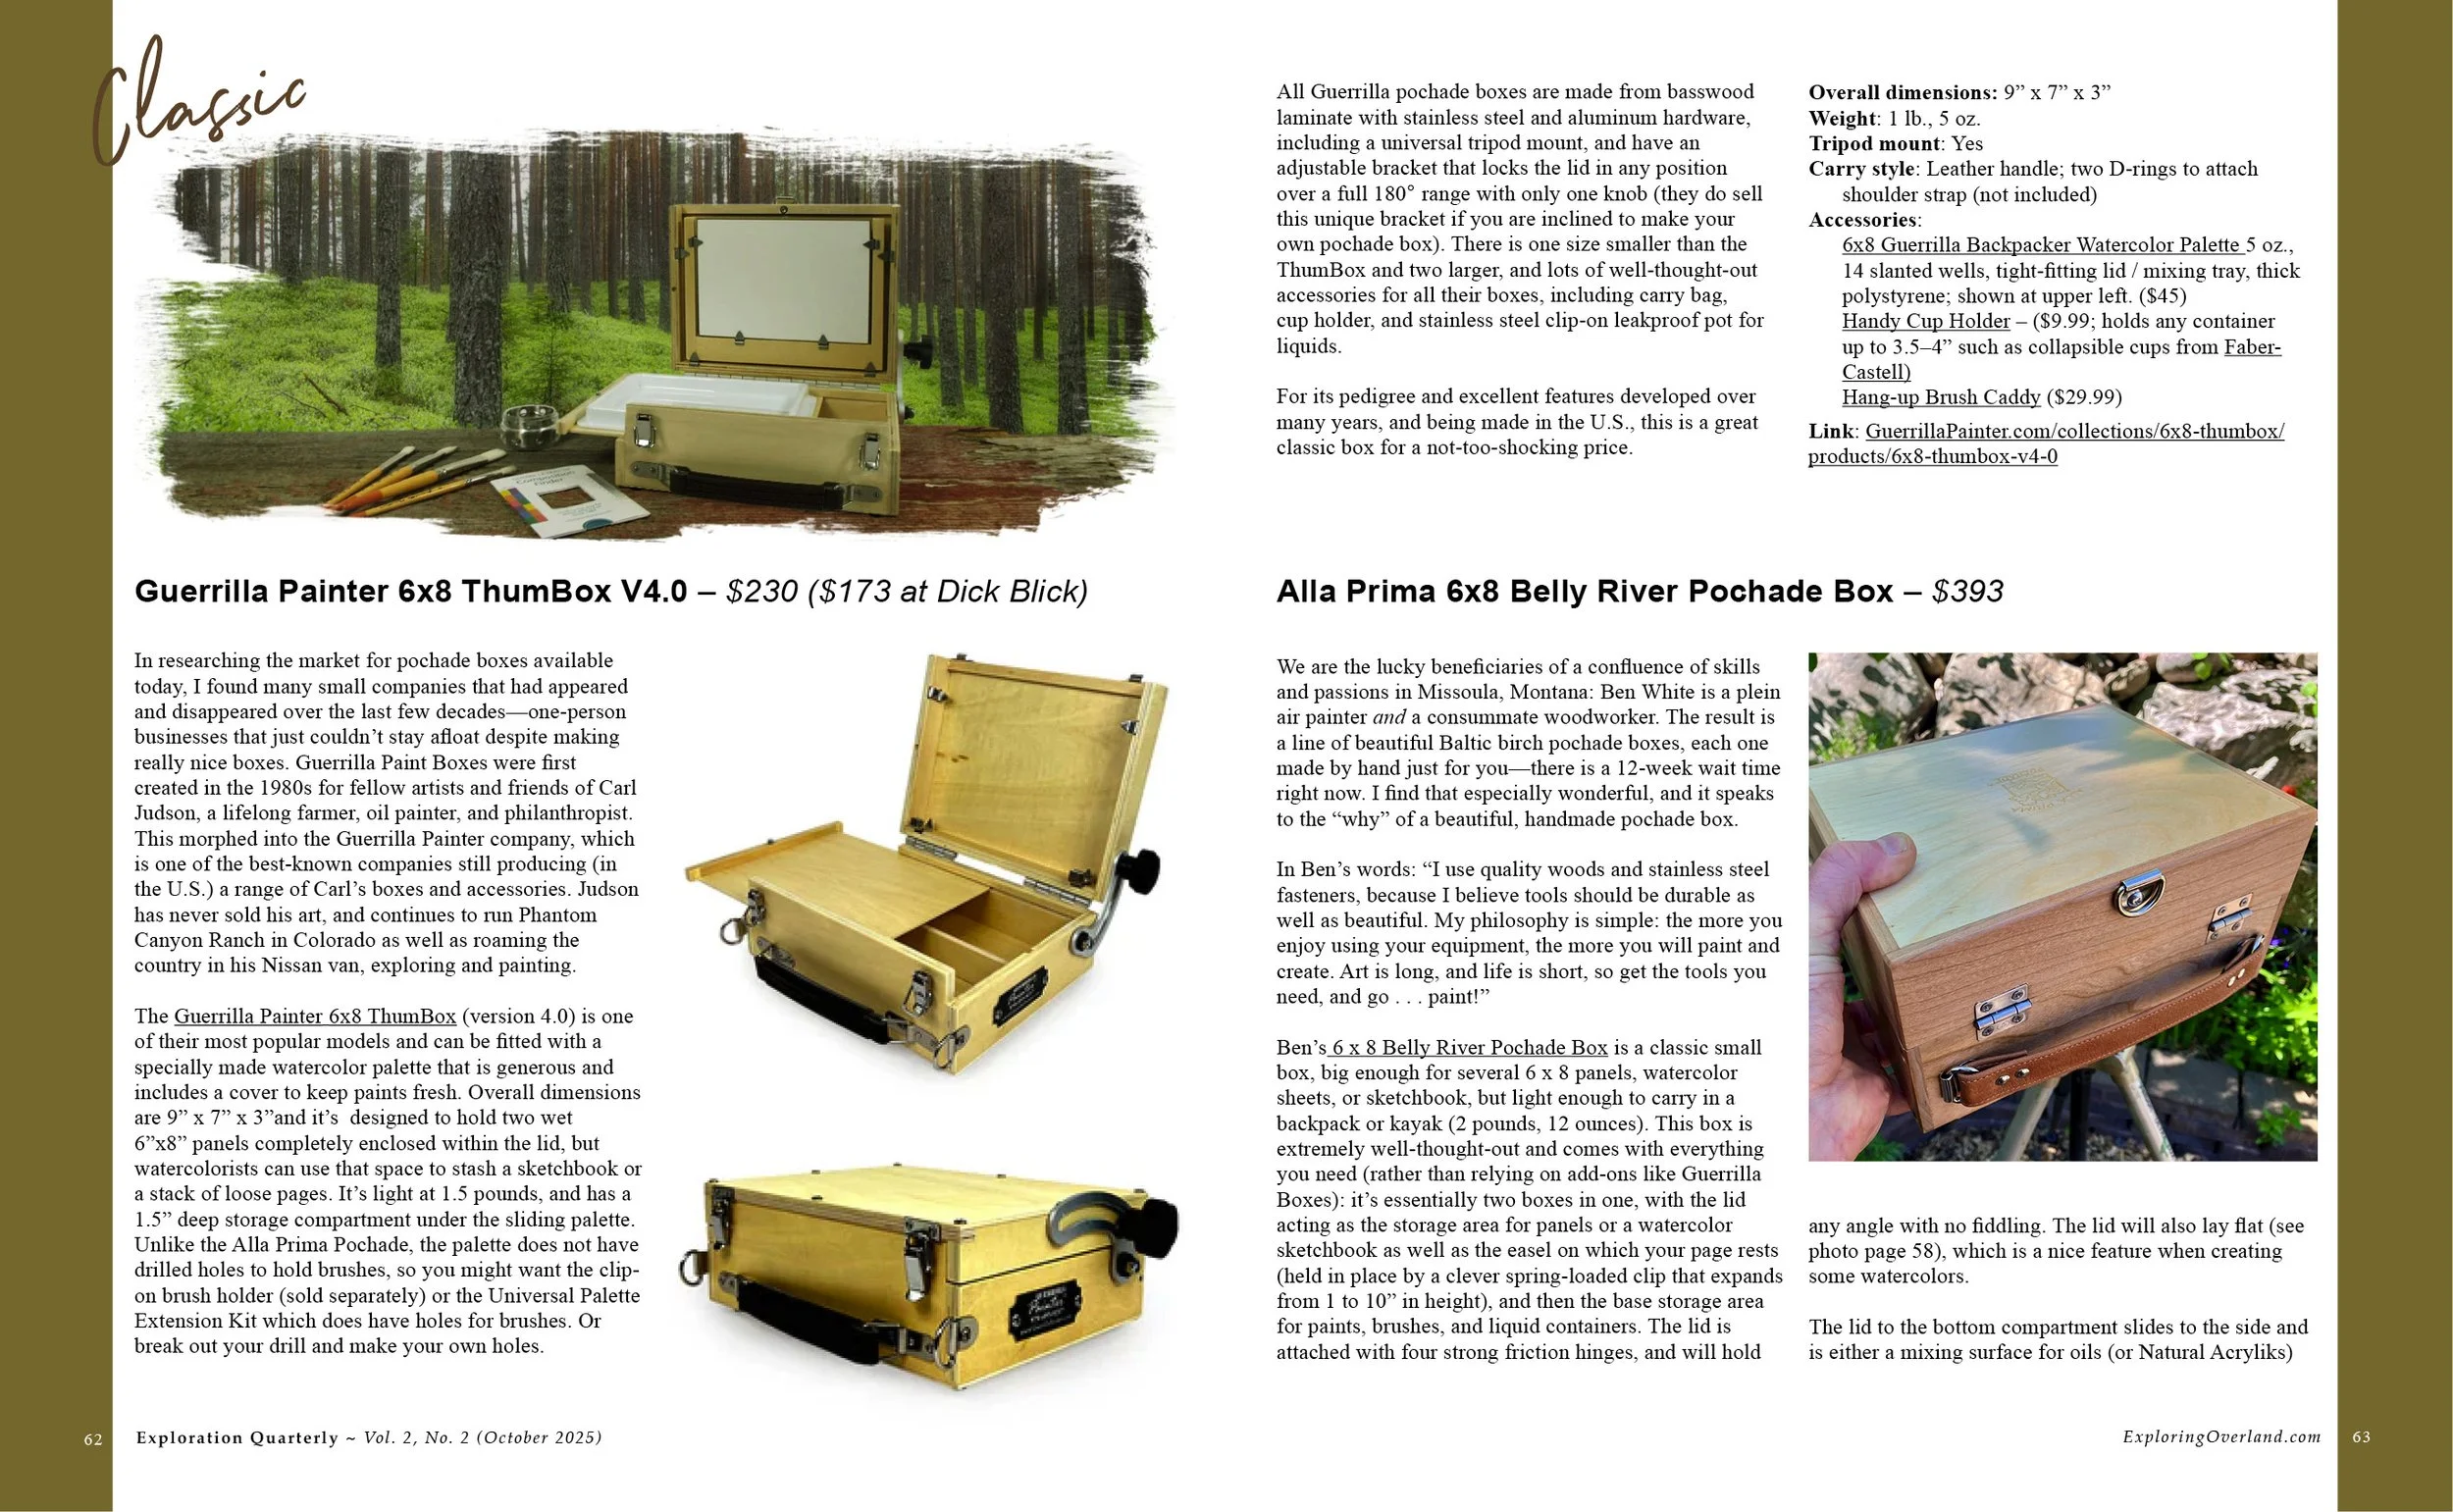
Roseann dove into the charming world of handmade pochade boxes — perfect portable field arts studios (and amazingly she only bought two of them).
Overlanding and art come together in our interview with artist Lisa Spangler, who with her husband, Jason, took to the road full time last year in their Sprinter van. We’ll talk with Lisa about how she creates on the road, her artist-in-residencies, and about her choice of field kit.
In Cartographia, we take a deep dive into the origin of scientific journals (and science as we know it today) and the birth of realistic rendering of visual data for public consumption.
Classic Kit features an iconic work: the pioneering Baedeker travel guidebooks.


First Exploration Quarterly Field Camp Report

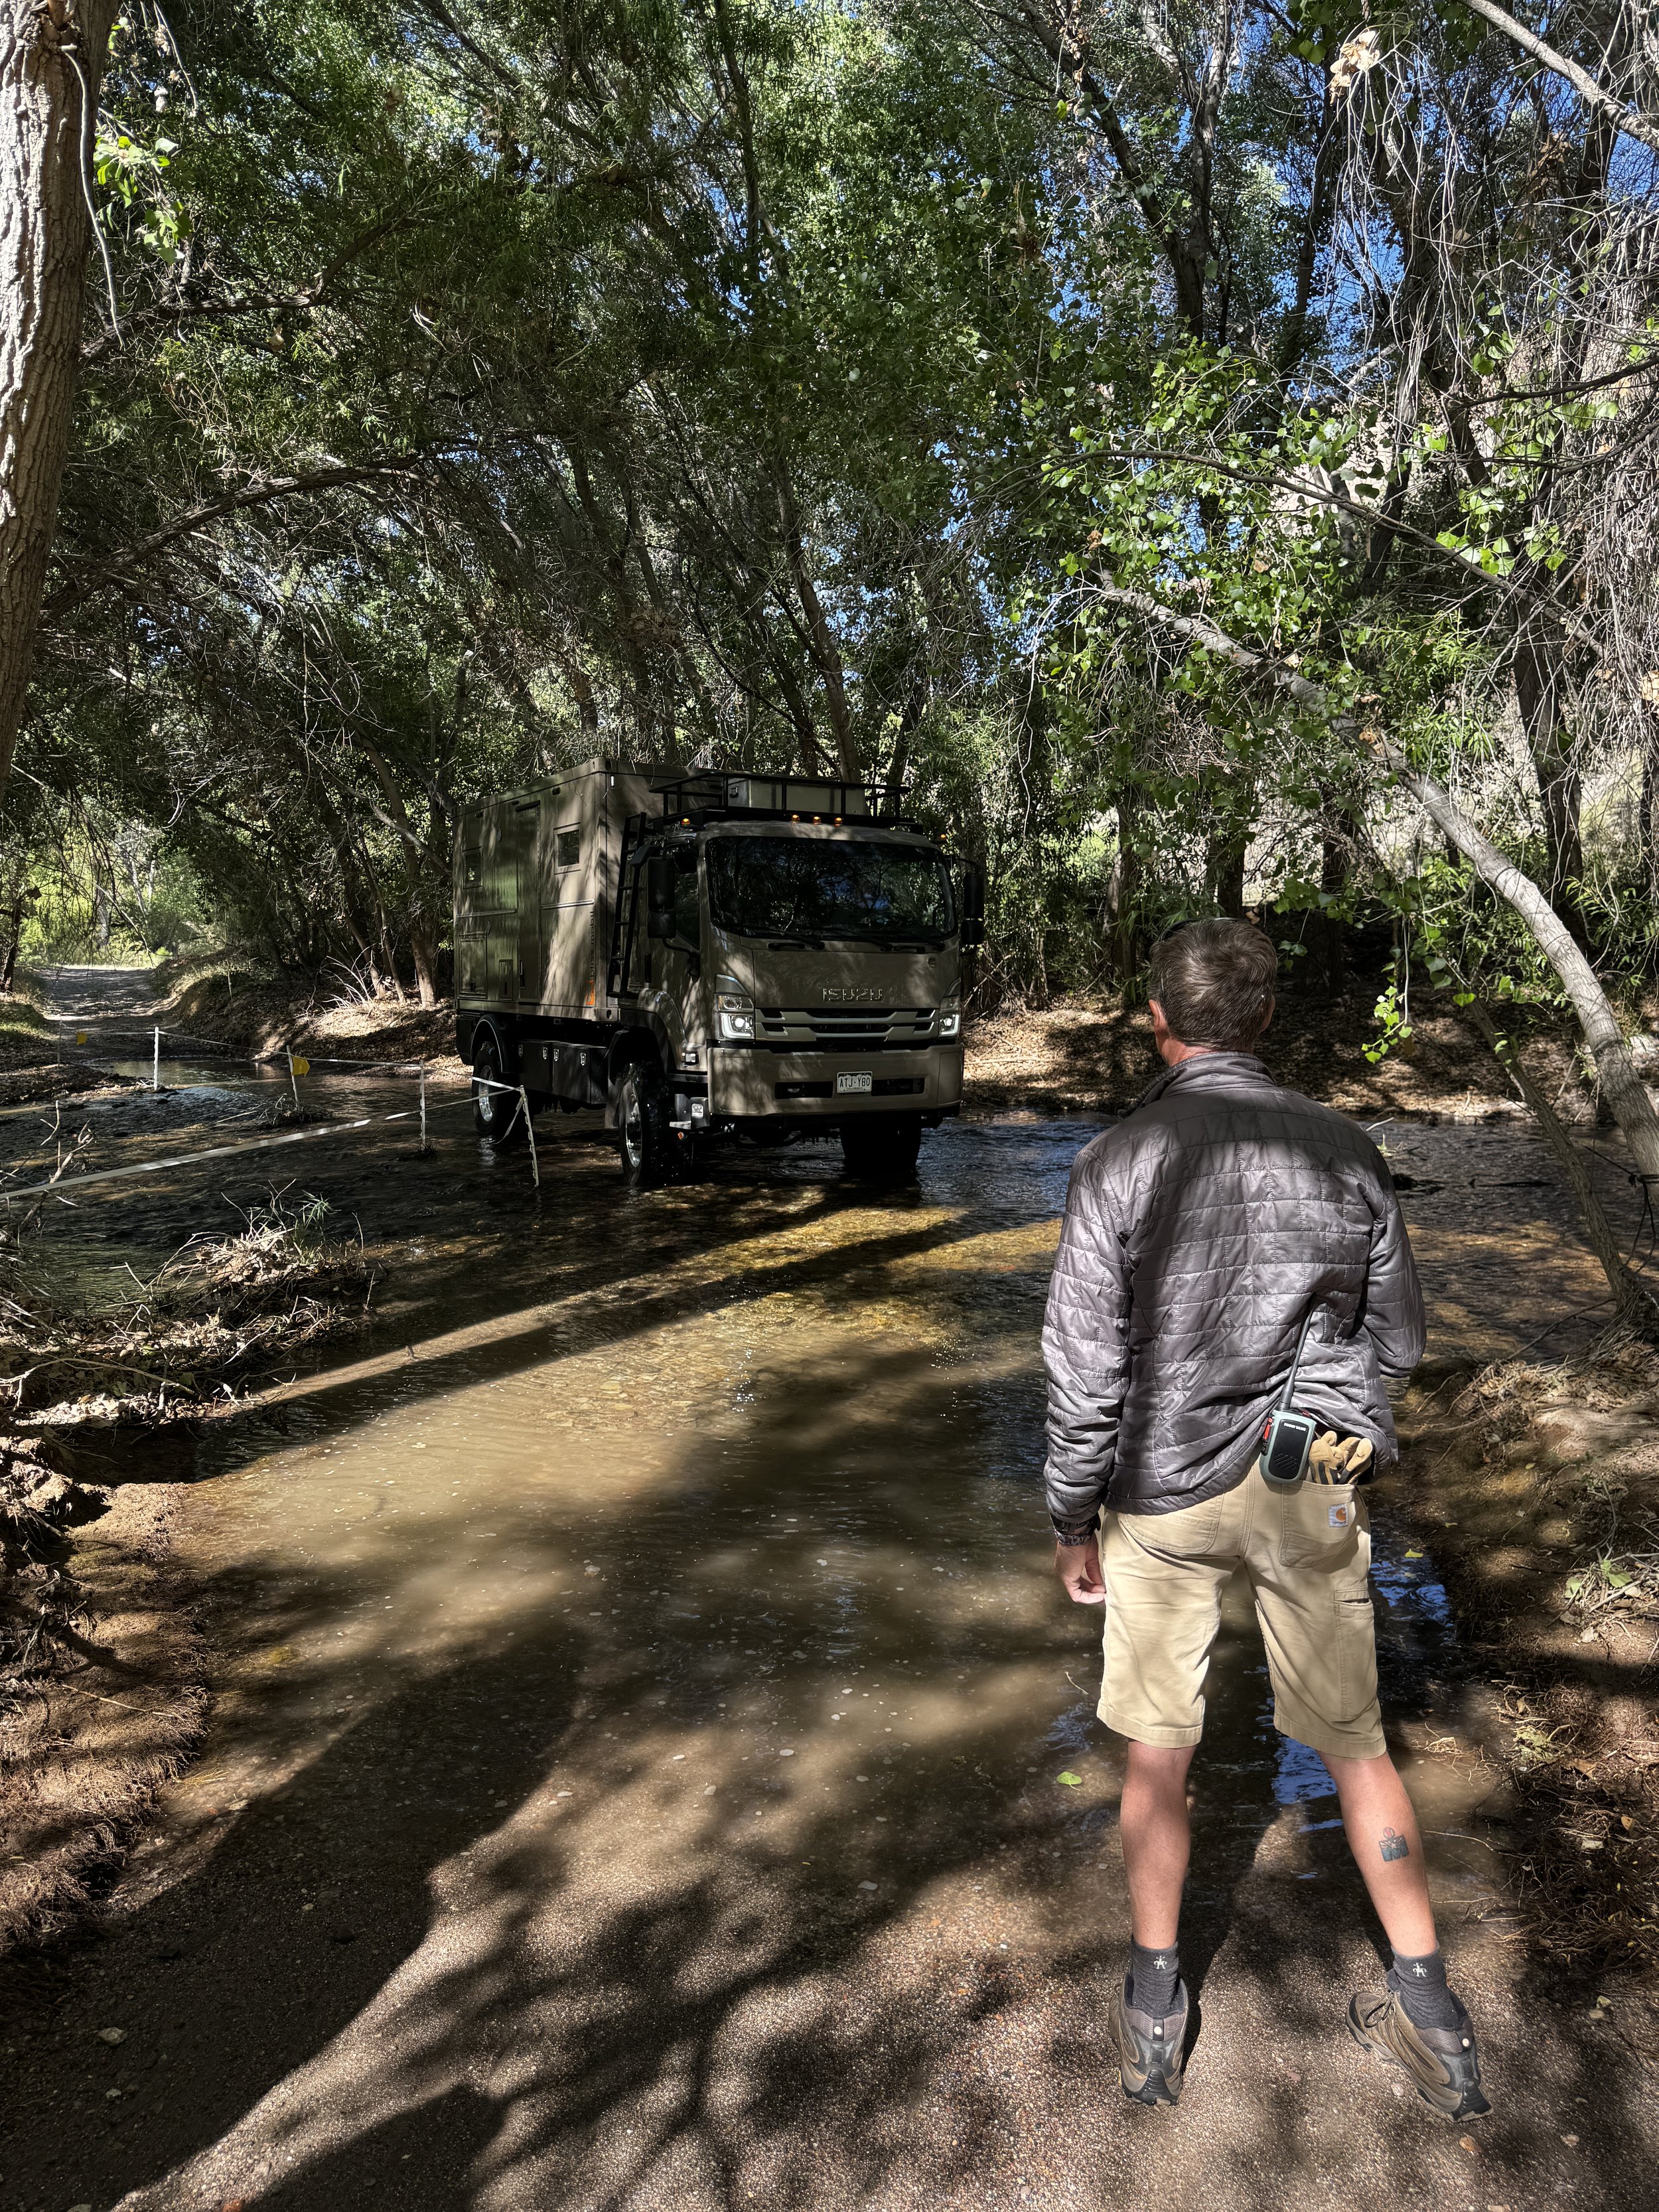
Our exploration community came together last week for four days of exploring, training, and best of all, camaraderie in southern Arizona’s beautiful Aravaipa Canyon. Forty explorers joined us and our sponsors—Graham Jackson’s Overland Passage, Goose Gear, Exploro, Swarovski Optik, and Sonoran Rovers—arriving as strangers and departing as friends.
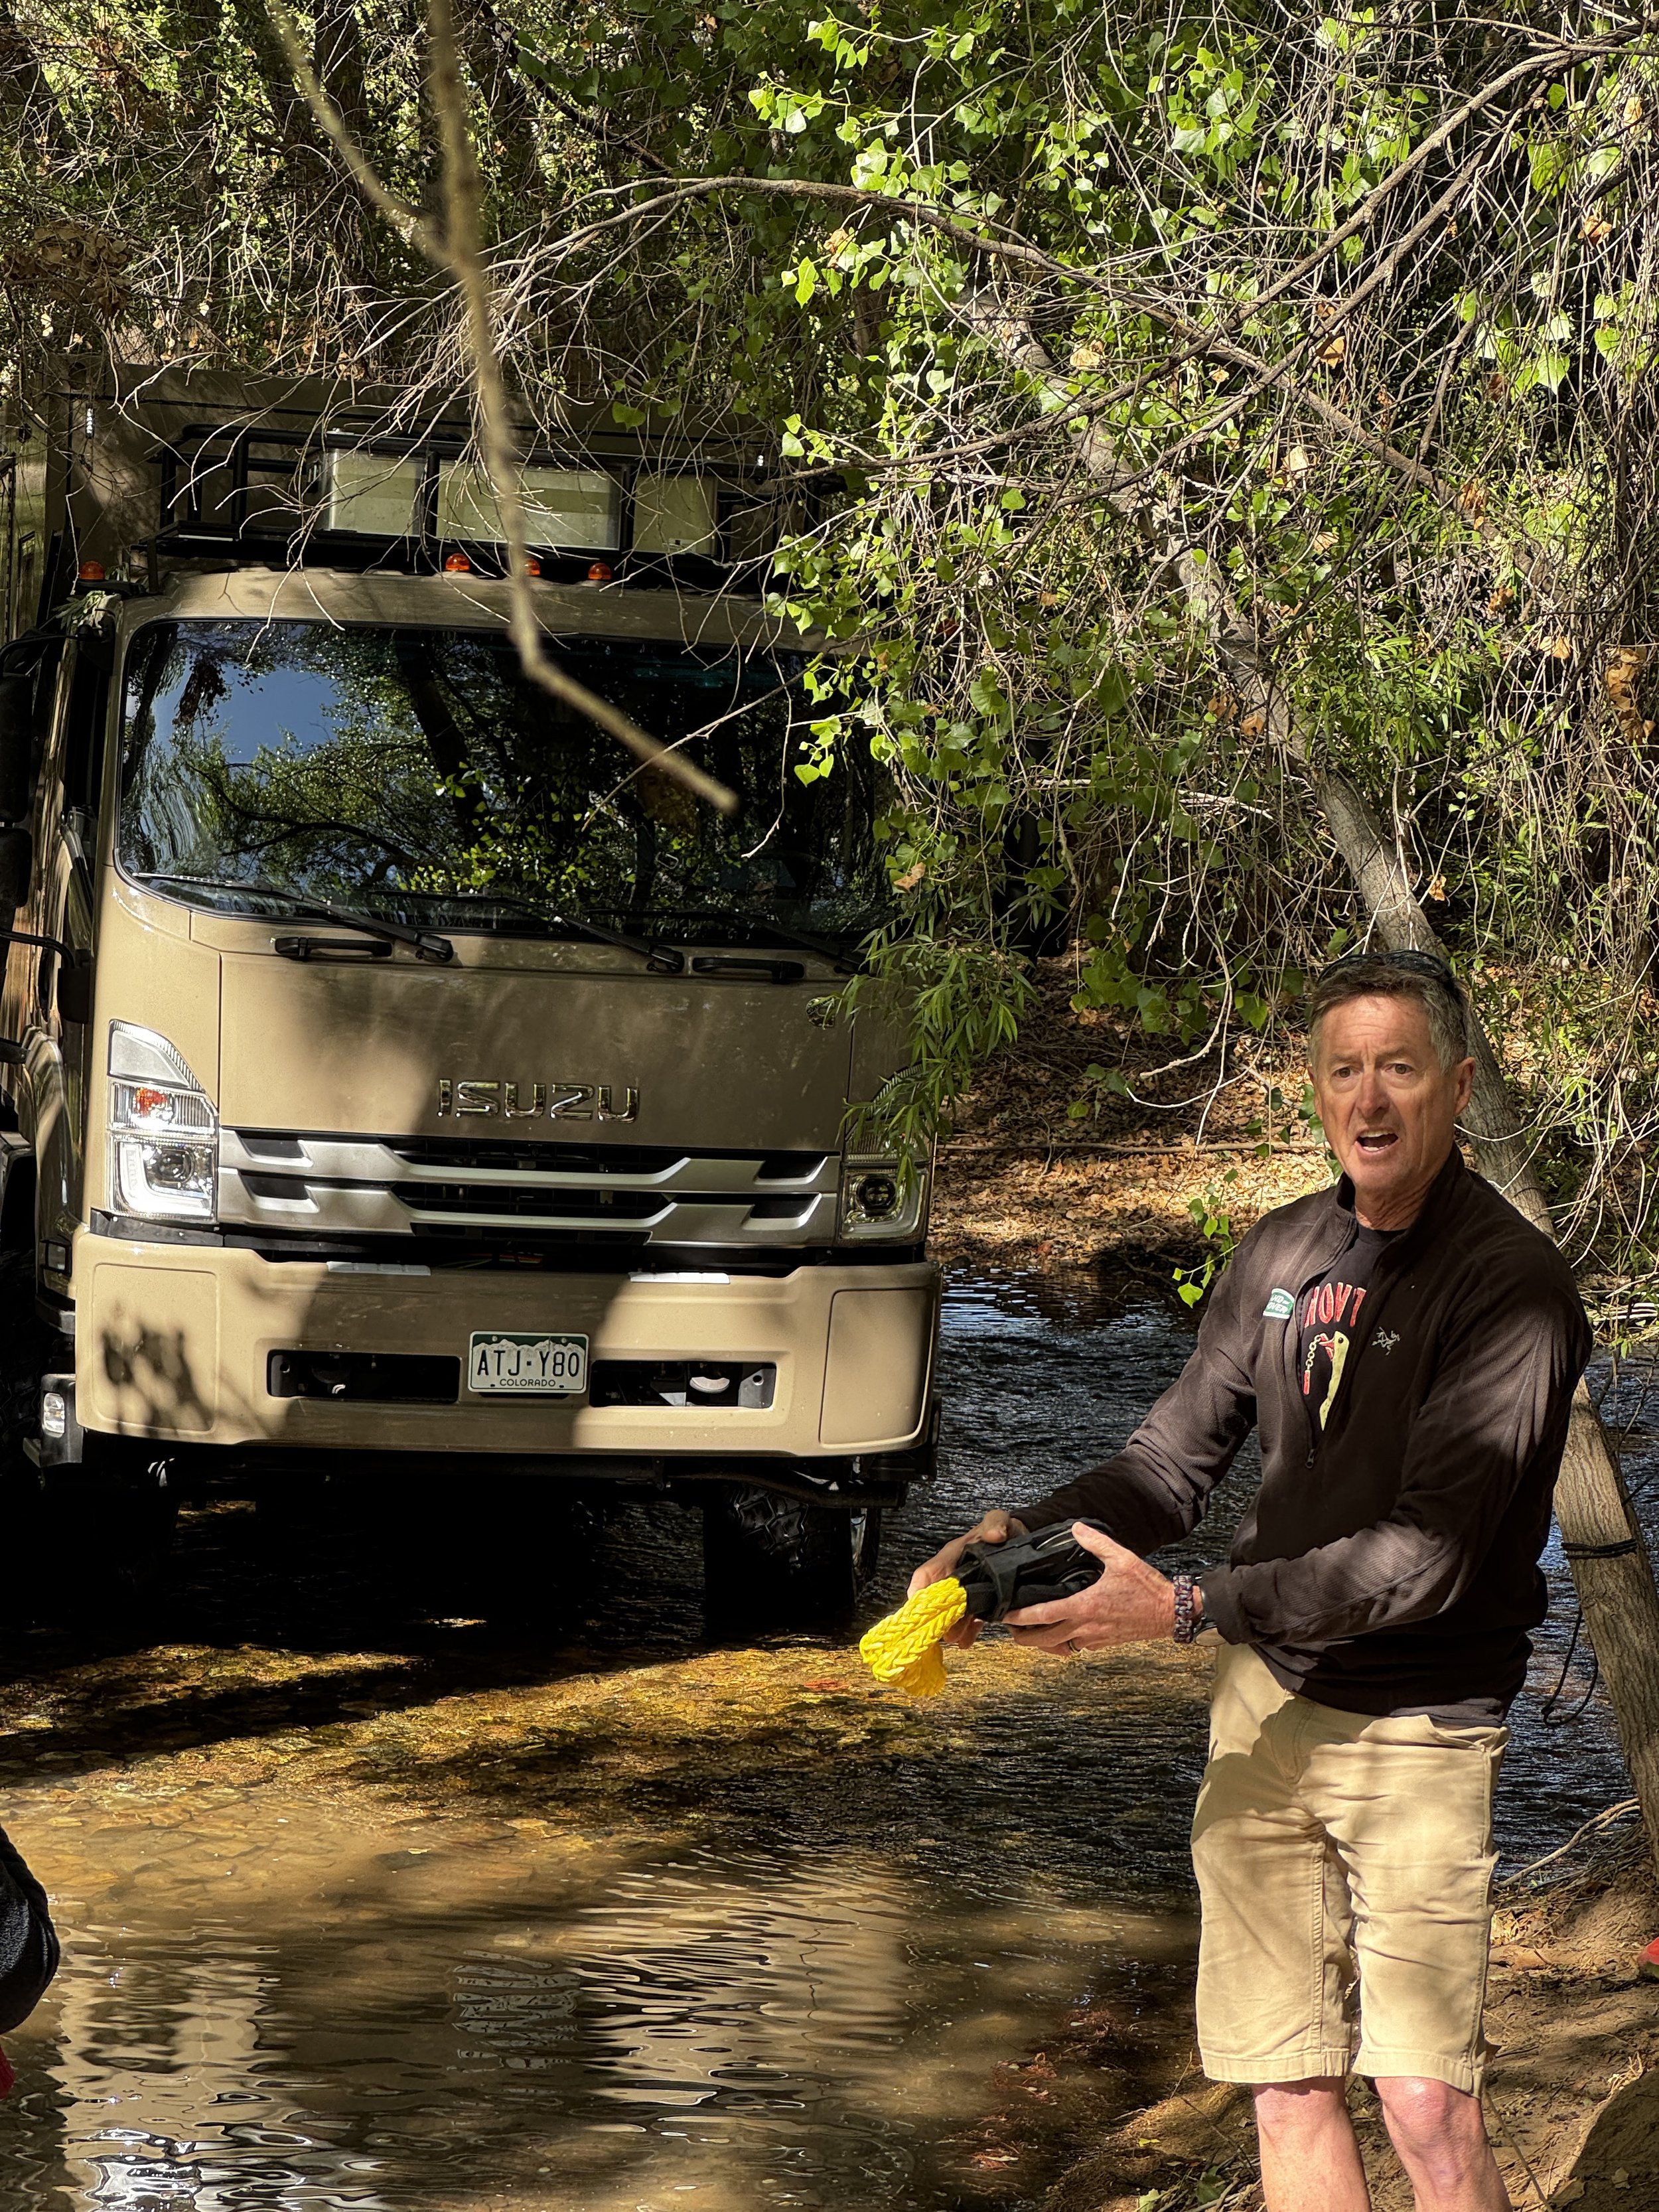
With smaller numbers we were able to host overland training workshops with experts Graham Jackson, Jim West, and Jonathan Hanson in winching, non-winch recovery, and a morning drive up into the woodlands above the ranch. We had a pop-up training opportunity to work as a team to get a 12-foot-tall Bliss Mobil rig into the venue through a creek crossing with lots of low-hanging trees without tearing up the trees or the beautiful new rig.
Brian Fulton with Goose-Gear and Graham talked about storage solutions, Marcus Whittaker of Sonoran Rovers talked about the ins and outs of purchasing classic Land Rovers, Jonathan gave his popular toolkit and bushcraft knife talks, and Roseann lead a group on a beginner’s field sketching and journaling walk.
We enjoyed a panel discussion of Exploration Quarterly contributors, and a hosted dinner (catered by Oracle Patio Cafe) with an agave spirits tasting courtesy Sonoran Rovers. Ecologist and EQ contributor Ben Wilder gave a talk on agave cultivation and spirit production. Each evening we enjoyed movie screenings, including Graham Jackson’s Camp 6 Road, and two vintage overland films: Tom Sheppard’s Widest Beach in the World, and Rough Road to Panama and its sequel Rugged Road to Cape Horn by Sullivan C. Richardson (thank you René and Mike Van Pelt of GXV - Storyteller Overland for the tip!). A campfire, lively discussions, and more spirits followed.
We were sad for the four days to come to an end, but look forward to future Field Camps. We are looking at venues in Maine, the Pacific Northwest, and the Midwest. Send us suggestions of private venues in beautiful, wild places. We hope to see you soon.


Bringing back the spirit: Exploration Quarterly Field Camps

Fifteen years later we still get these emails.
“The Overland Expo is great, but we miss the first ones!”
“The Expo is still fun, but the camaraderie isn’t there any more.”
“Lots more stuff to look at and buy, but less community spirit.”
Of course Roseann and I were thrilled—and more than a bit stunned—at the success of the event she started in 2009. In fact it eventually became just too big for her to manage, and its very success hindered our own travels, which was not the plan . . .
Now we are back to our roots in journalism, field arts, exploration, and conservation with the debut of Exploration Quarterly, which encapsulates all our passions.
And yet, we still miss those first few Overland Expos too, and our original family—both the attendees who still write us and our core team: Graham Jackson, the Camel Trophy team members, the vendors who took a chance on us.
So we’ve decided to bring that spirit with the Exploration Quarterly Field Camps. Our first will be held in one of our favorite spots, the private Aravaipa Canyon Ranch. The group will be limited to a maximum of 45—thus making even the first Expo seem big. Our activities are going to span a range including skills clinics, equipment demonstrations and samples, vehicle topics including driving and recovery (the ranch has miles of private roads), natural-history hikes, and campfire happy hours. Our director of training for the Expo, Graham Jackson, will be there, as will Camel Trophy veteran Jim West, who is well-known to double as a stand-up comedian. We’re looking for old friends and new to join us. The signup link is right here.
I’ll have lots of equipment on hand to try—for example a Freedom Recovery becket kit to rig a three-to-one winch system:

Also an interesting new compact wall tent from White Duck:

And many other new products. There are sure to be many cool vehicles.

Given the beautiful location, we’ll be keeping a Swarovski spotting scope trained on the cliffs to look for bighorn sheep (and, later, planets). And you never know what other wildlife we might find.

We still have spots left. Please join Roseann and me for the start of a new tradition!
Do-it-yourself alignment with the Gyraline

Ever since we bought our 2014 Tundra, it has exhibited a slight pull to the right, despite the fact that the used-car dealer from whom we bought it claimed to have performed an alignment. Taking it in to a professional alignment shop was one of those tasks that are just so easy to put off—like for three years?
A few months ago I installed a complete parabolic suspension on our FJ40. After such a swap it’s smart to have an alignment done. Especially important is checking for caster, which will change with a suspension lift on a solid-axle vehicle and can significantly affect handling. (Caster is the near-but-not-quite vertical axis around which the front wheels turn.) Now I had two vehicles that needed an alignment. And now I was looking at around $250-$300 plus the time (x2) out of my day to have them both done.
Finally . . . right now I have another parabolic suspension kit waiting to be installed on the Troop Carrier. So yet another alignment, another day lost, and another $125-$150 minimum. Ugh.
Then I got an email from friend and master Toyota mechanic Bill Lee, about this tool.
The Gyraline comprises a deceptively simple plastic plate, apparently 3D printed, with a clamp that allows you to secure an iPhone (or Android) to it. The magic part of the device is all in the software, which guides you step by step in measuring—with the accuracy of a professional alignment rack—all aspects of a vehicle’s alignment on all four wheels: toe, camber, caster, even Ackerman angle.
Once the app is loaded you simply follow prompts to place the device against each wheel, level it using the central green diamond, the tapping the relevant wheel. Move to the other side and repeat, and you’ll have your toe-in or toe-out to a fraction of a degree. Thirty seconds max. Other measurements are nearly as simple.
I was so impressed that I intended to write an in-depth article, but honestly the thing is so easy to use there’s just not much more to say. The Gyraline is not only useful for general alignment but also when doing such jobs as replacing tie rod ends. Most enthusiastically recommended.

Hint: When using “Search,” if nothing comes up, reload the page, this usually works. Also, our “Comment” button is on strike thanks to Squarespace, which is proving to be difficult to use! Please email me with comments!
Overland Tech & Travel brings you in-depth overland equipment tests, reviews, news, travel tips, & stories from the best overlanding experts on the planet. Follow or subscribe (below) to keep up to date.
Have a question for Jonathan? Send him an email [click here].
SUBSCRIBE
CLICK HERE to subscribe to Jonathan’s email list; we send once or twice a month, usually Sunday morning for your weekend reading pleasure.


Overland Tech and Travel is curated by Jonathan Hanson, co-founder and former co-owner of the Overland Expo. Jonathan segued from a misspent youth almost directly into a misspent adulthood, cleverly sidestepping any chance of a normal career track or a secure retirement by becoming a freelance writer, working for Outside, National Geographic Adventure, and nearly two dozen other publications. He co-founded Overland Journal in 2007 and was its executive editor until 2011, when he left and sold his shares in the company. His travels encompass explorations on land and sea on six continents, by foot, bicycle, sea kayak, motorcycle, and four-wheel-drive vehicle. He has published a dozen books, several with his wife, Roseann Hanson, gaining several obscure non-cash awards along the way, and is the co-author of the fourth edition of Tom Sheppard's overlanding bible, the Vehicle-dependent Expedition Guide.