field arts

Introducing Chroma Sonorensis project

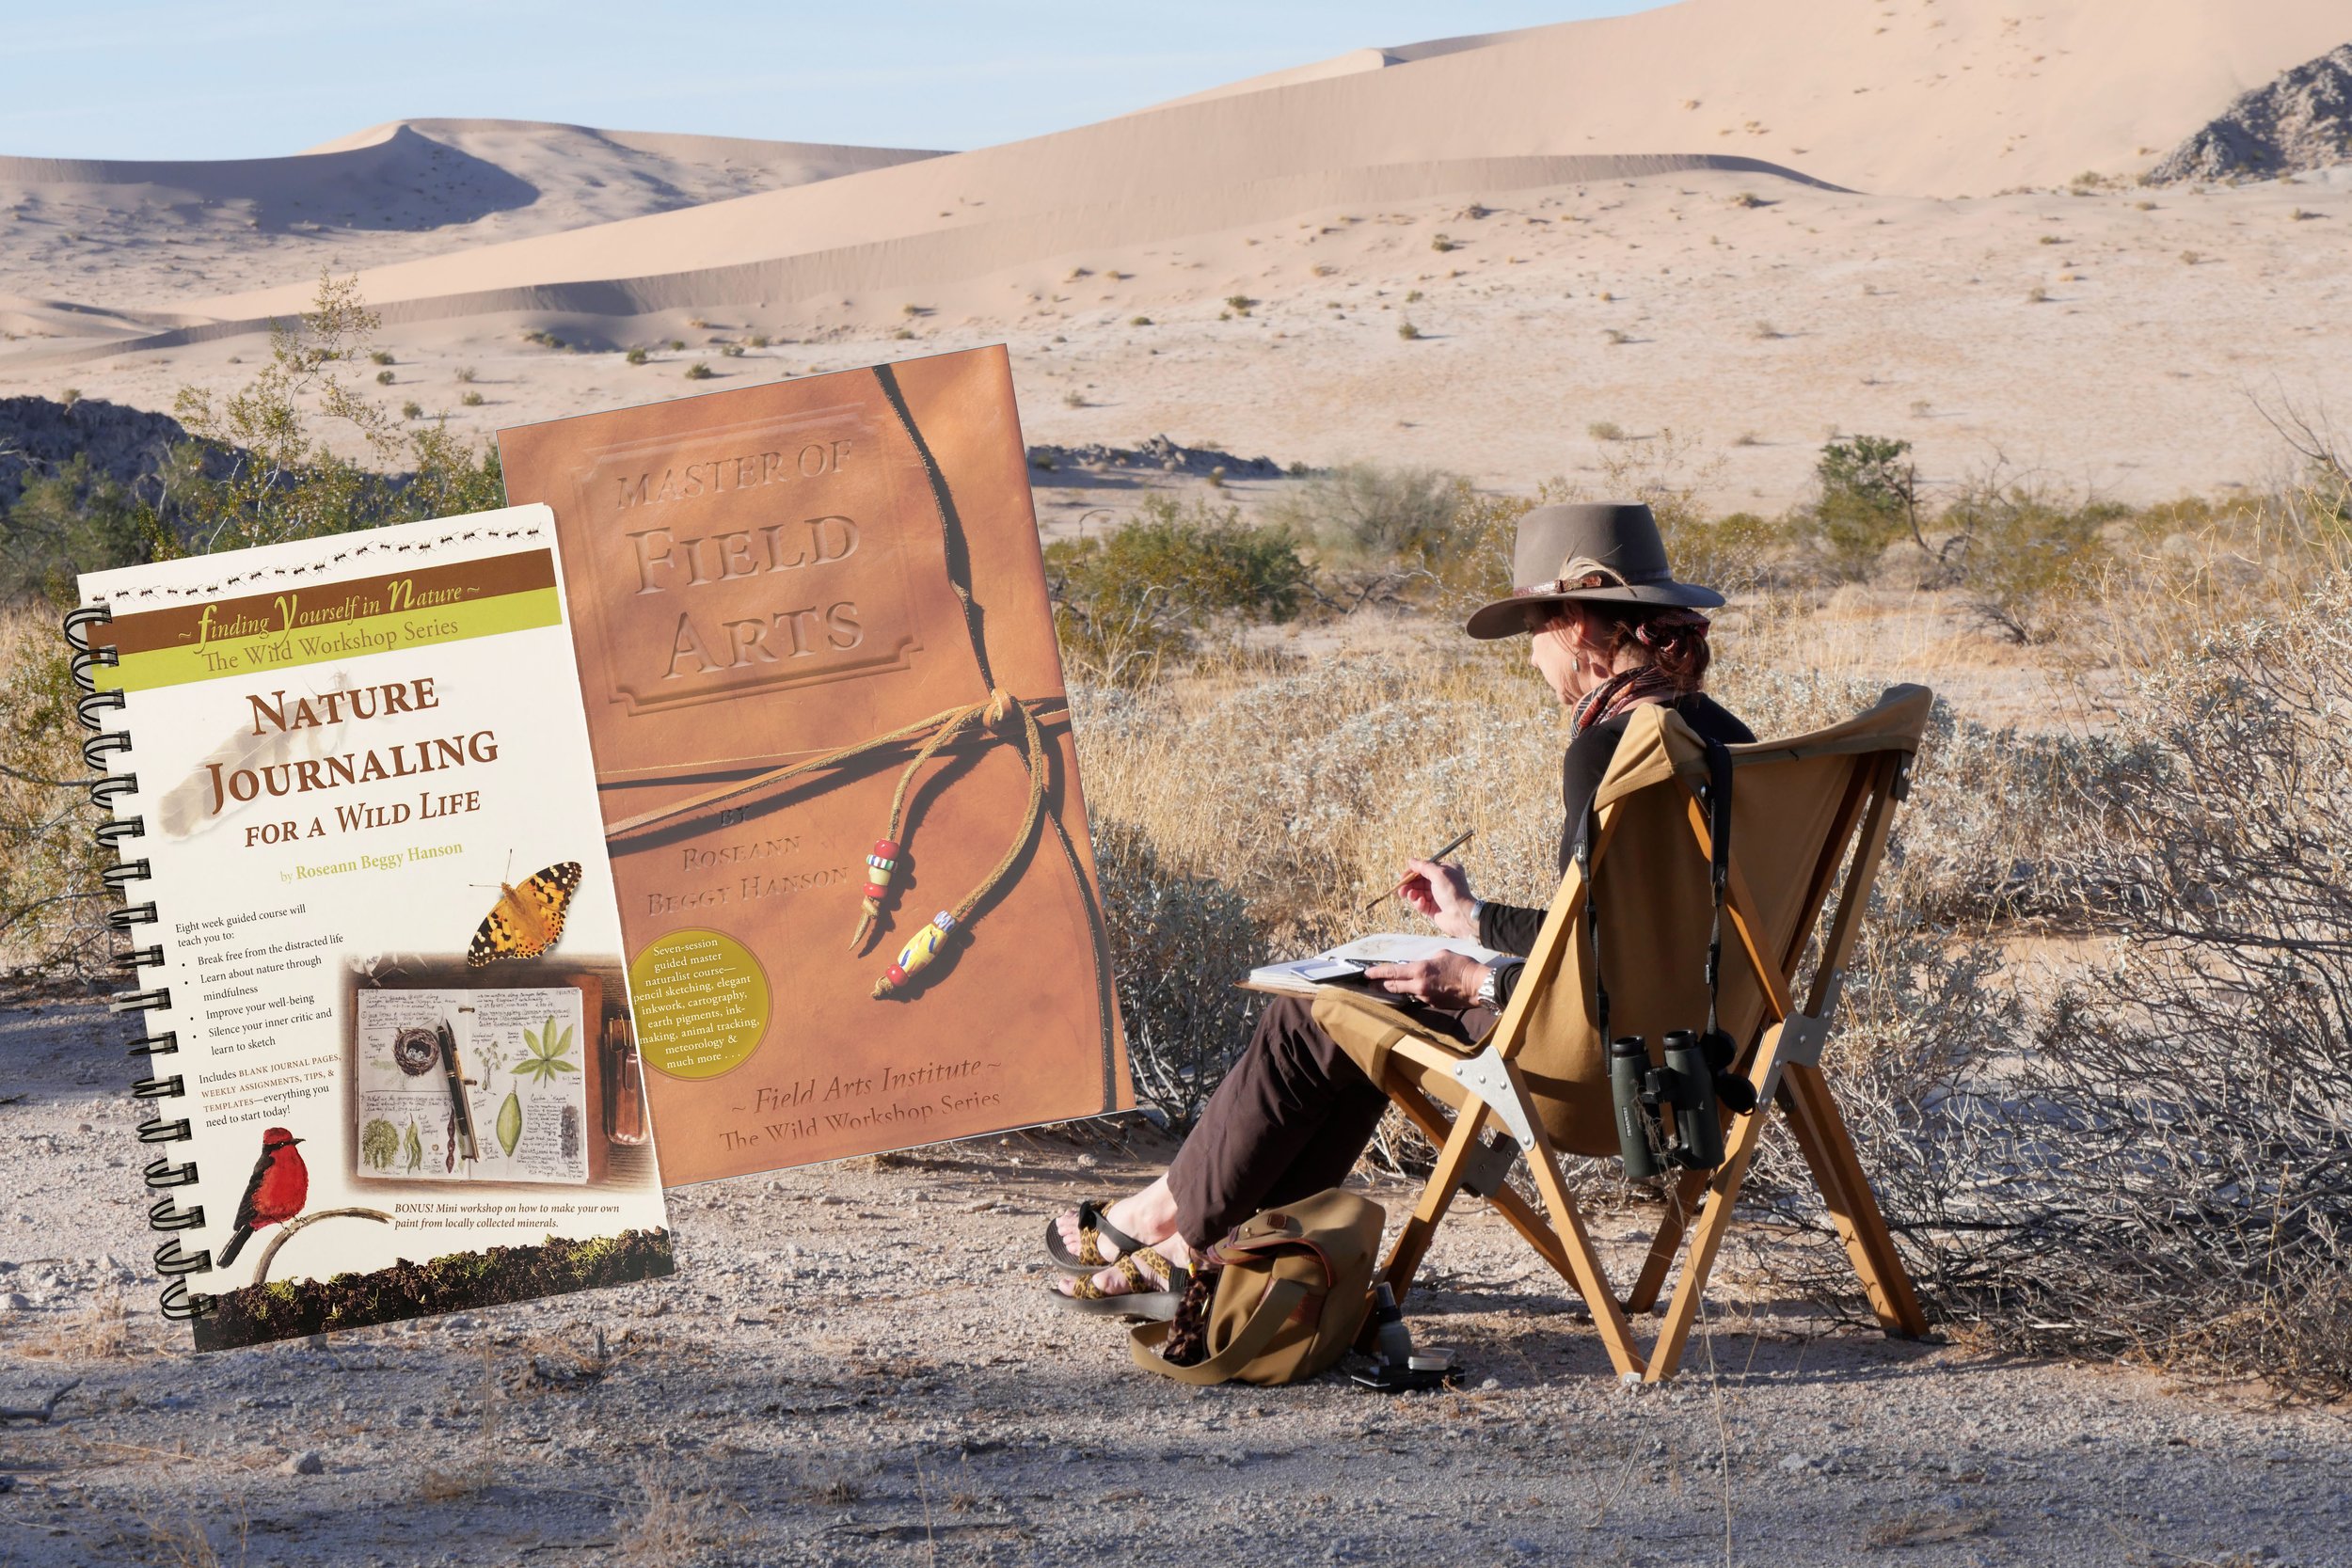
In March this year I embarked on a yearlong project exploring the chroma—colors, from Greek khrōma for “surface of the body, skin, color of the skin”—of the Sonoran Desert by creating paint and ink from 10 plants and soil types of our region.

Some of the colors will be relatively easy to capture—ink from the magenta fruit of the prickly pear cactus—while others will involve expedition-level travel—using scientific survey reports to track down the elusive Mayo indigo plant, popular throughout the Americas as a treasured blue paint and dye.

Each color tells a story of culture and nature: purple ochre, a hematite (iron oxide) pigment formed through the fires of volcanic upheaval, was popular amongst the southwestern Trincheras Culture (A.D. 700-1100) and traded widely, where did it originate? My research has found one of the sources, in Tucson, near Tumamoc Hill, site of a Trincheras outpost (see below).

Tucson Mts. purple ochre (aka hematite)

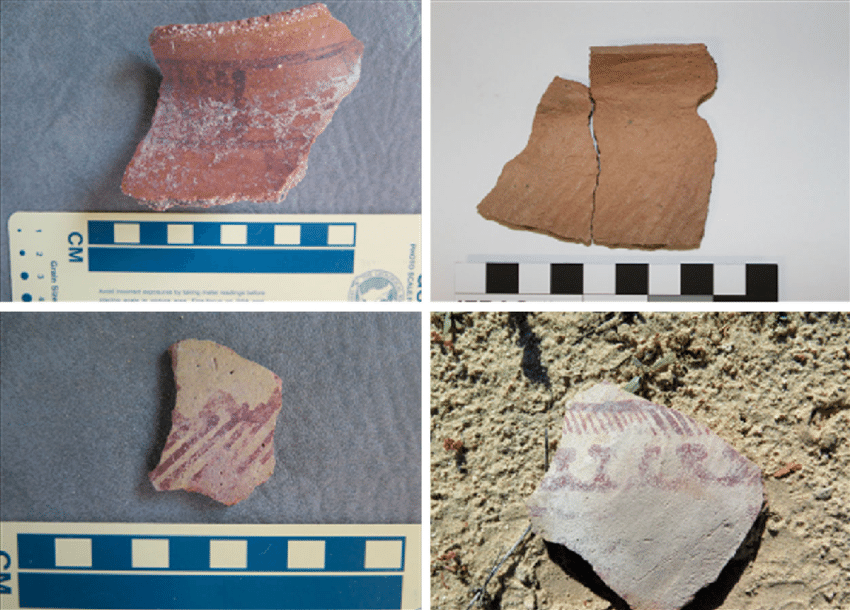
Examples of Trincheras pottery from northern Sonora, Mexico (Douglas R. Mitchell, Jonathan B. Mabry, Natalia Martínez Tagüeña, Gary Huckleberry, Richard C. Brusca & M. Steven Shackley (2020) Prehistoric Adaptation, Identity, and Interaction Along the Northern Gulf of California, California Archaeology, 12:2, 163-195, DOI: 10.1080/1947461X.2020.1818938 )

For each color I will create an ink or a paint, and works of art as well as written stories of nature and culture—“the chroma, or skin of the place”—which will be compiled in a finished work, a book, and gallery show: Chroma Sonorensis

CHROMA 1: the jaguar and the Ochres

Iron (Fe) is the fourth most abundant element, by mass, in the Earth’s crust. As it ages in the soil, the iron oxidizes (a process in which a substance morphs because of the addition of oxygen—think rust) and changes colors. There are yellow, brown, red, purple, and even green iron oxides, also known as “ochres.” The differences in their hues are a matter of what the base mineral or minerals are and how much moisture was involved in their formation. For example yellow ochre is FeO(OH)·nH2O, a hydrated iron (limonite), while red ochre is Fe2O3 and gains its red from the mineral hematite, which is an anhydrous (un-hydrated) iron oxide. Purple ochre is the same formula as red but comprises different particle-size and light-diffraction properties.

Humans have been using ochres to paint cave walls, adorn their bodies, and decorate objects for more than 200,000 years. Archaeologist Tammy Hodgskiss wrote:

“People may say ochre is the earliest form of art and symbolism, but there’s more to it. Ochre shows how our brains were developing, and that we were using our environment. It bridges the divide between art and science.”

Ochres are still used today, as pottery slips and in paint: yellow ochre, burnt sienna, raw umber, vivianite, and many others.

And let’s not forget that human bodies—as with many animals—contain iron, 70% of which is carried in our blood via hemoglobin, which transports oxygen from lungs, gills, or other respiratory organs to peripheral tissues that need the oxygen for metabolism. When the hemes pick up oxygen molecules, the interaction (oxidation) turns the blood red.

I knew I wanted to include an ochre chapter in Chroma Sonorensis, and immediately thought of the similarities between the beautiful red and orange ochre cliffs so common in the desert Southwest with the colors of a jaguar’s pelt. Southern Arizona and northern Mexico are home to a handful of the northernmost jaguars on the planet. And there is no more famous jaguar in the Sonoran Desert than the male called Macho B, who was was snared in 2009 in a leg-hold trap by Arizona Game and Fish Department biologists so they could radio-collar him. The capture was ill-conceived (it was clandestine not to mention illegal to handle an endangered species and stupid to do so to a 14+ year old big cat) and poorly executed (he was given too much tranquilizer) and led to the death of this magnificent creature.

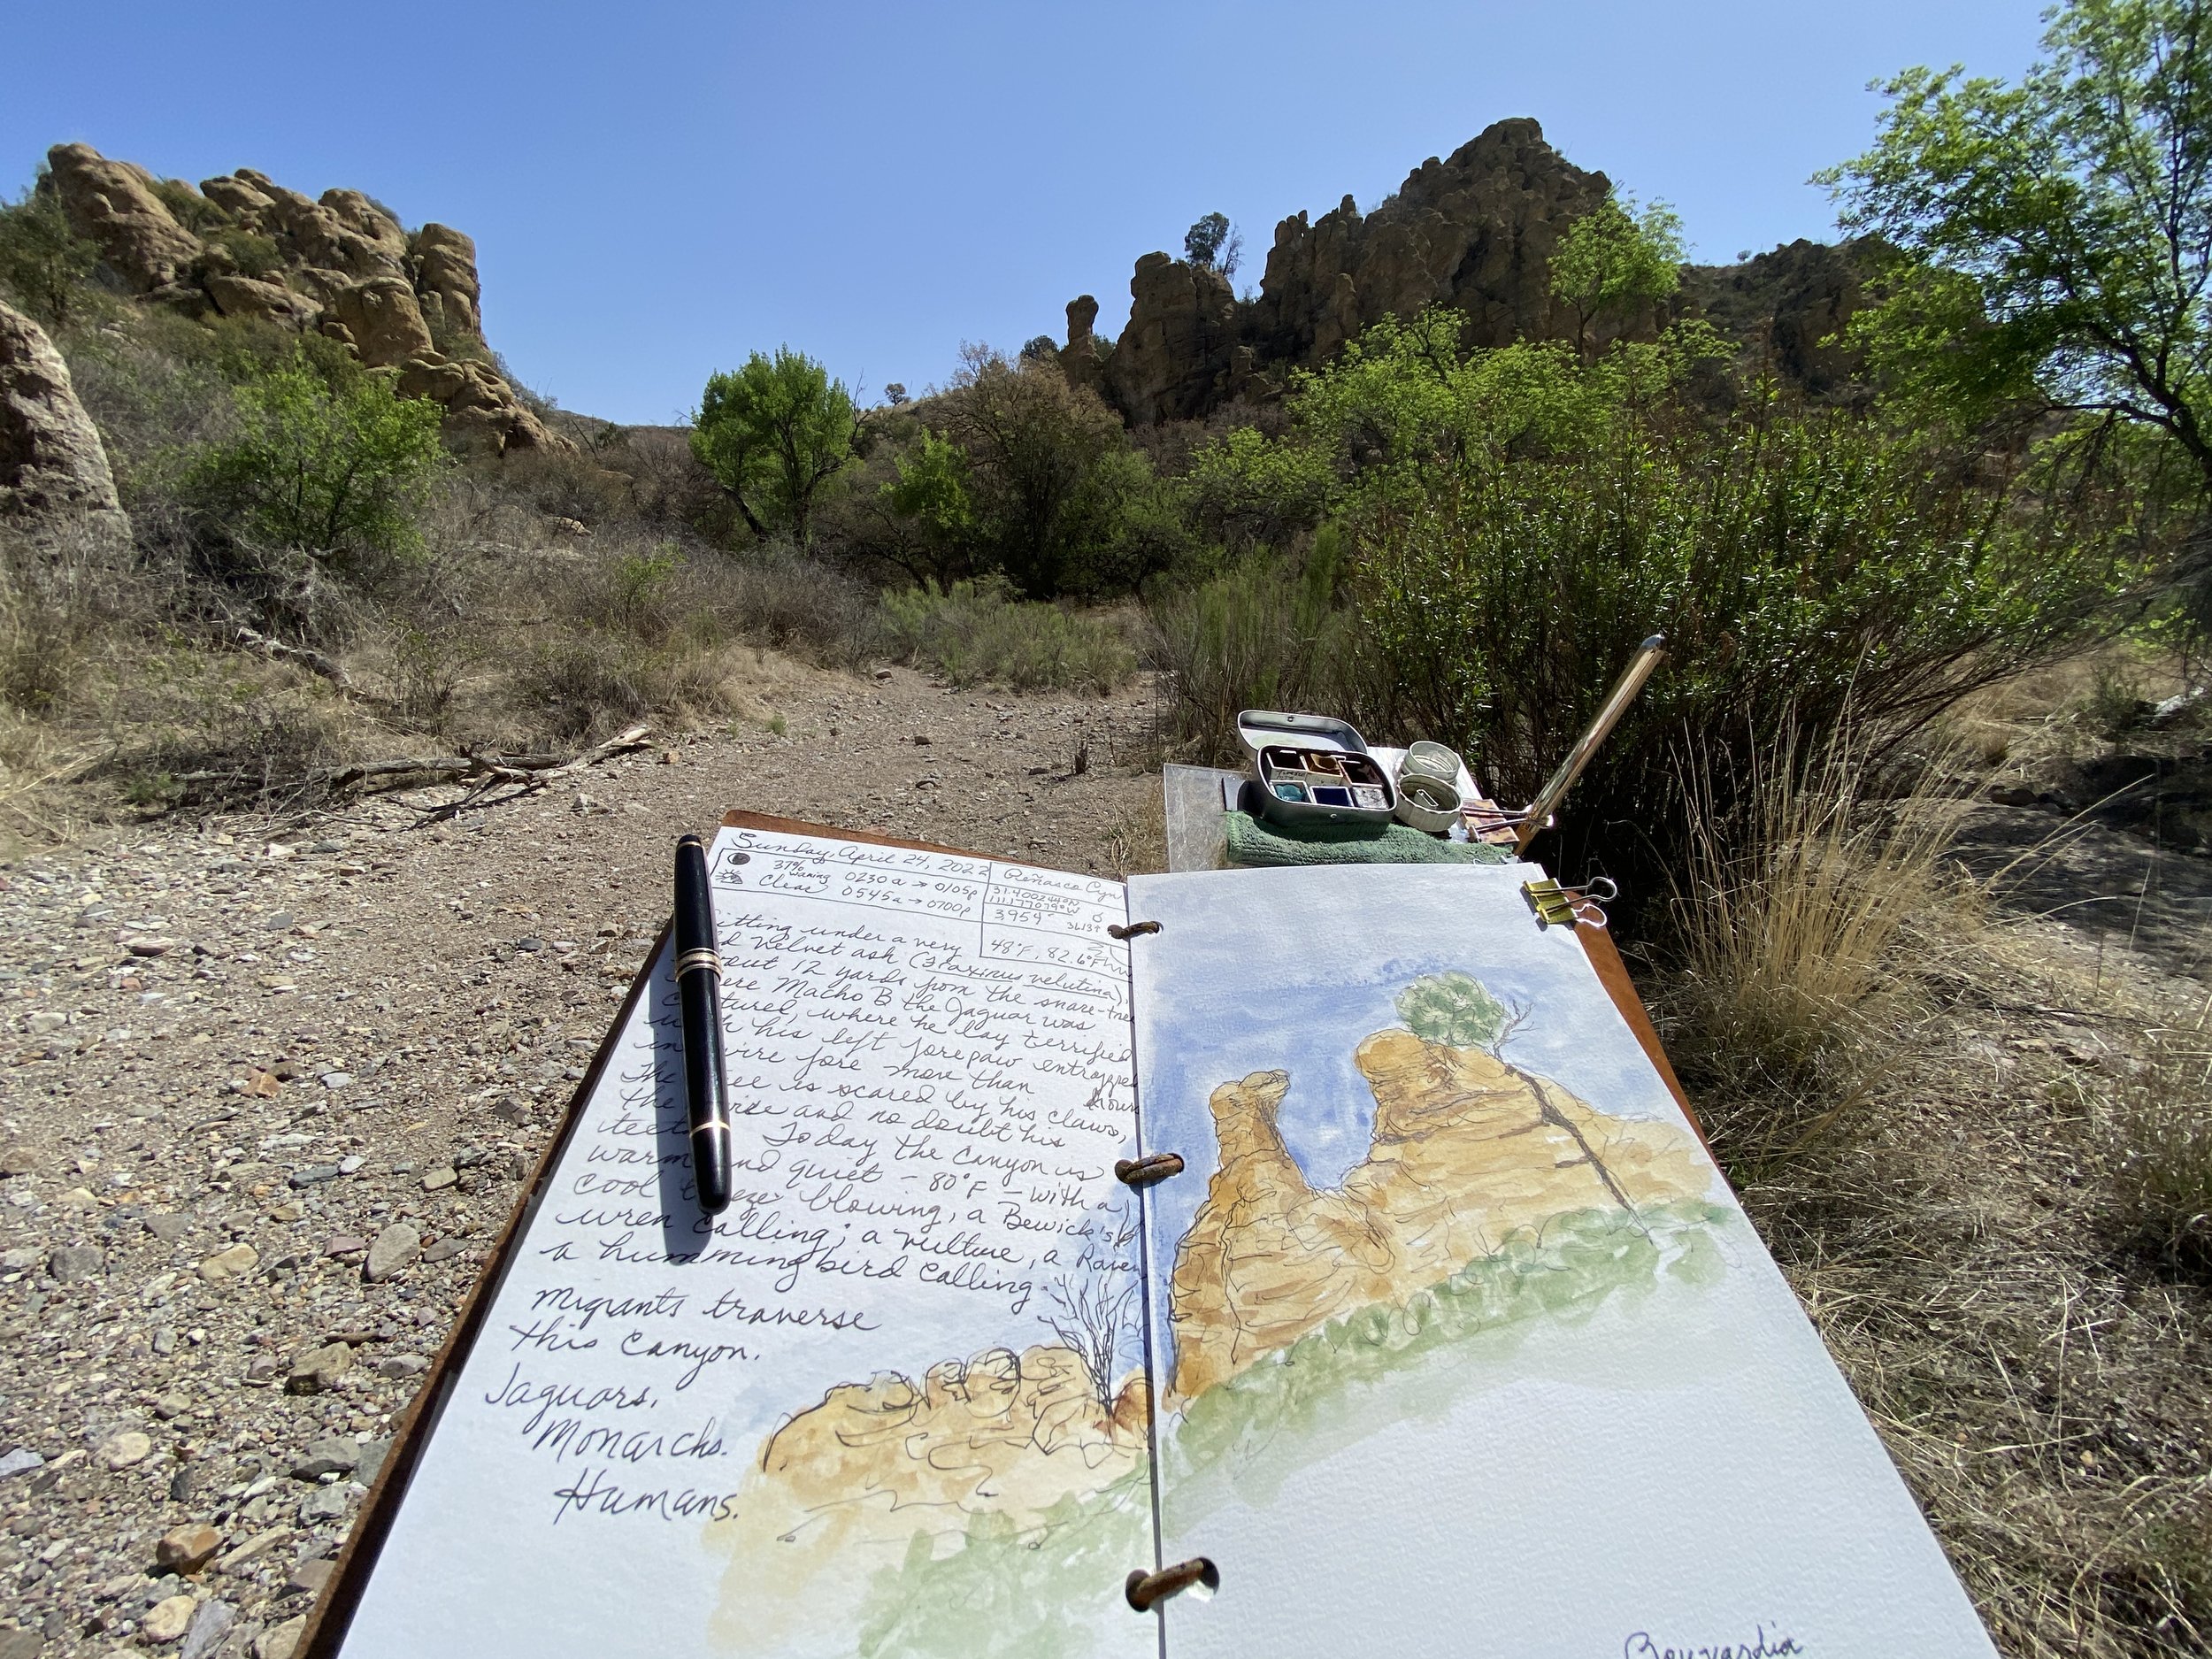
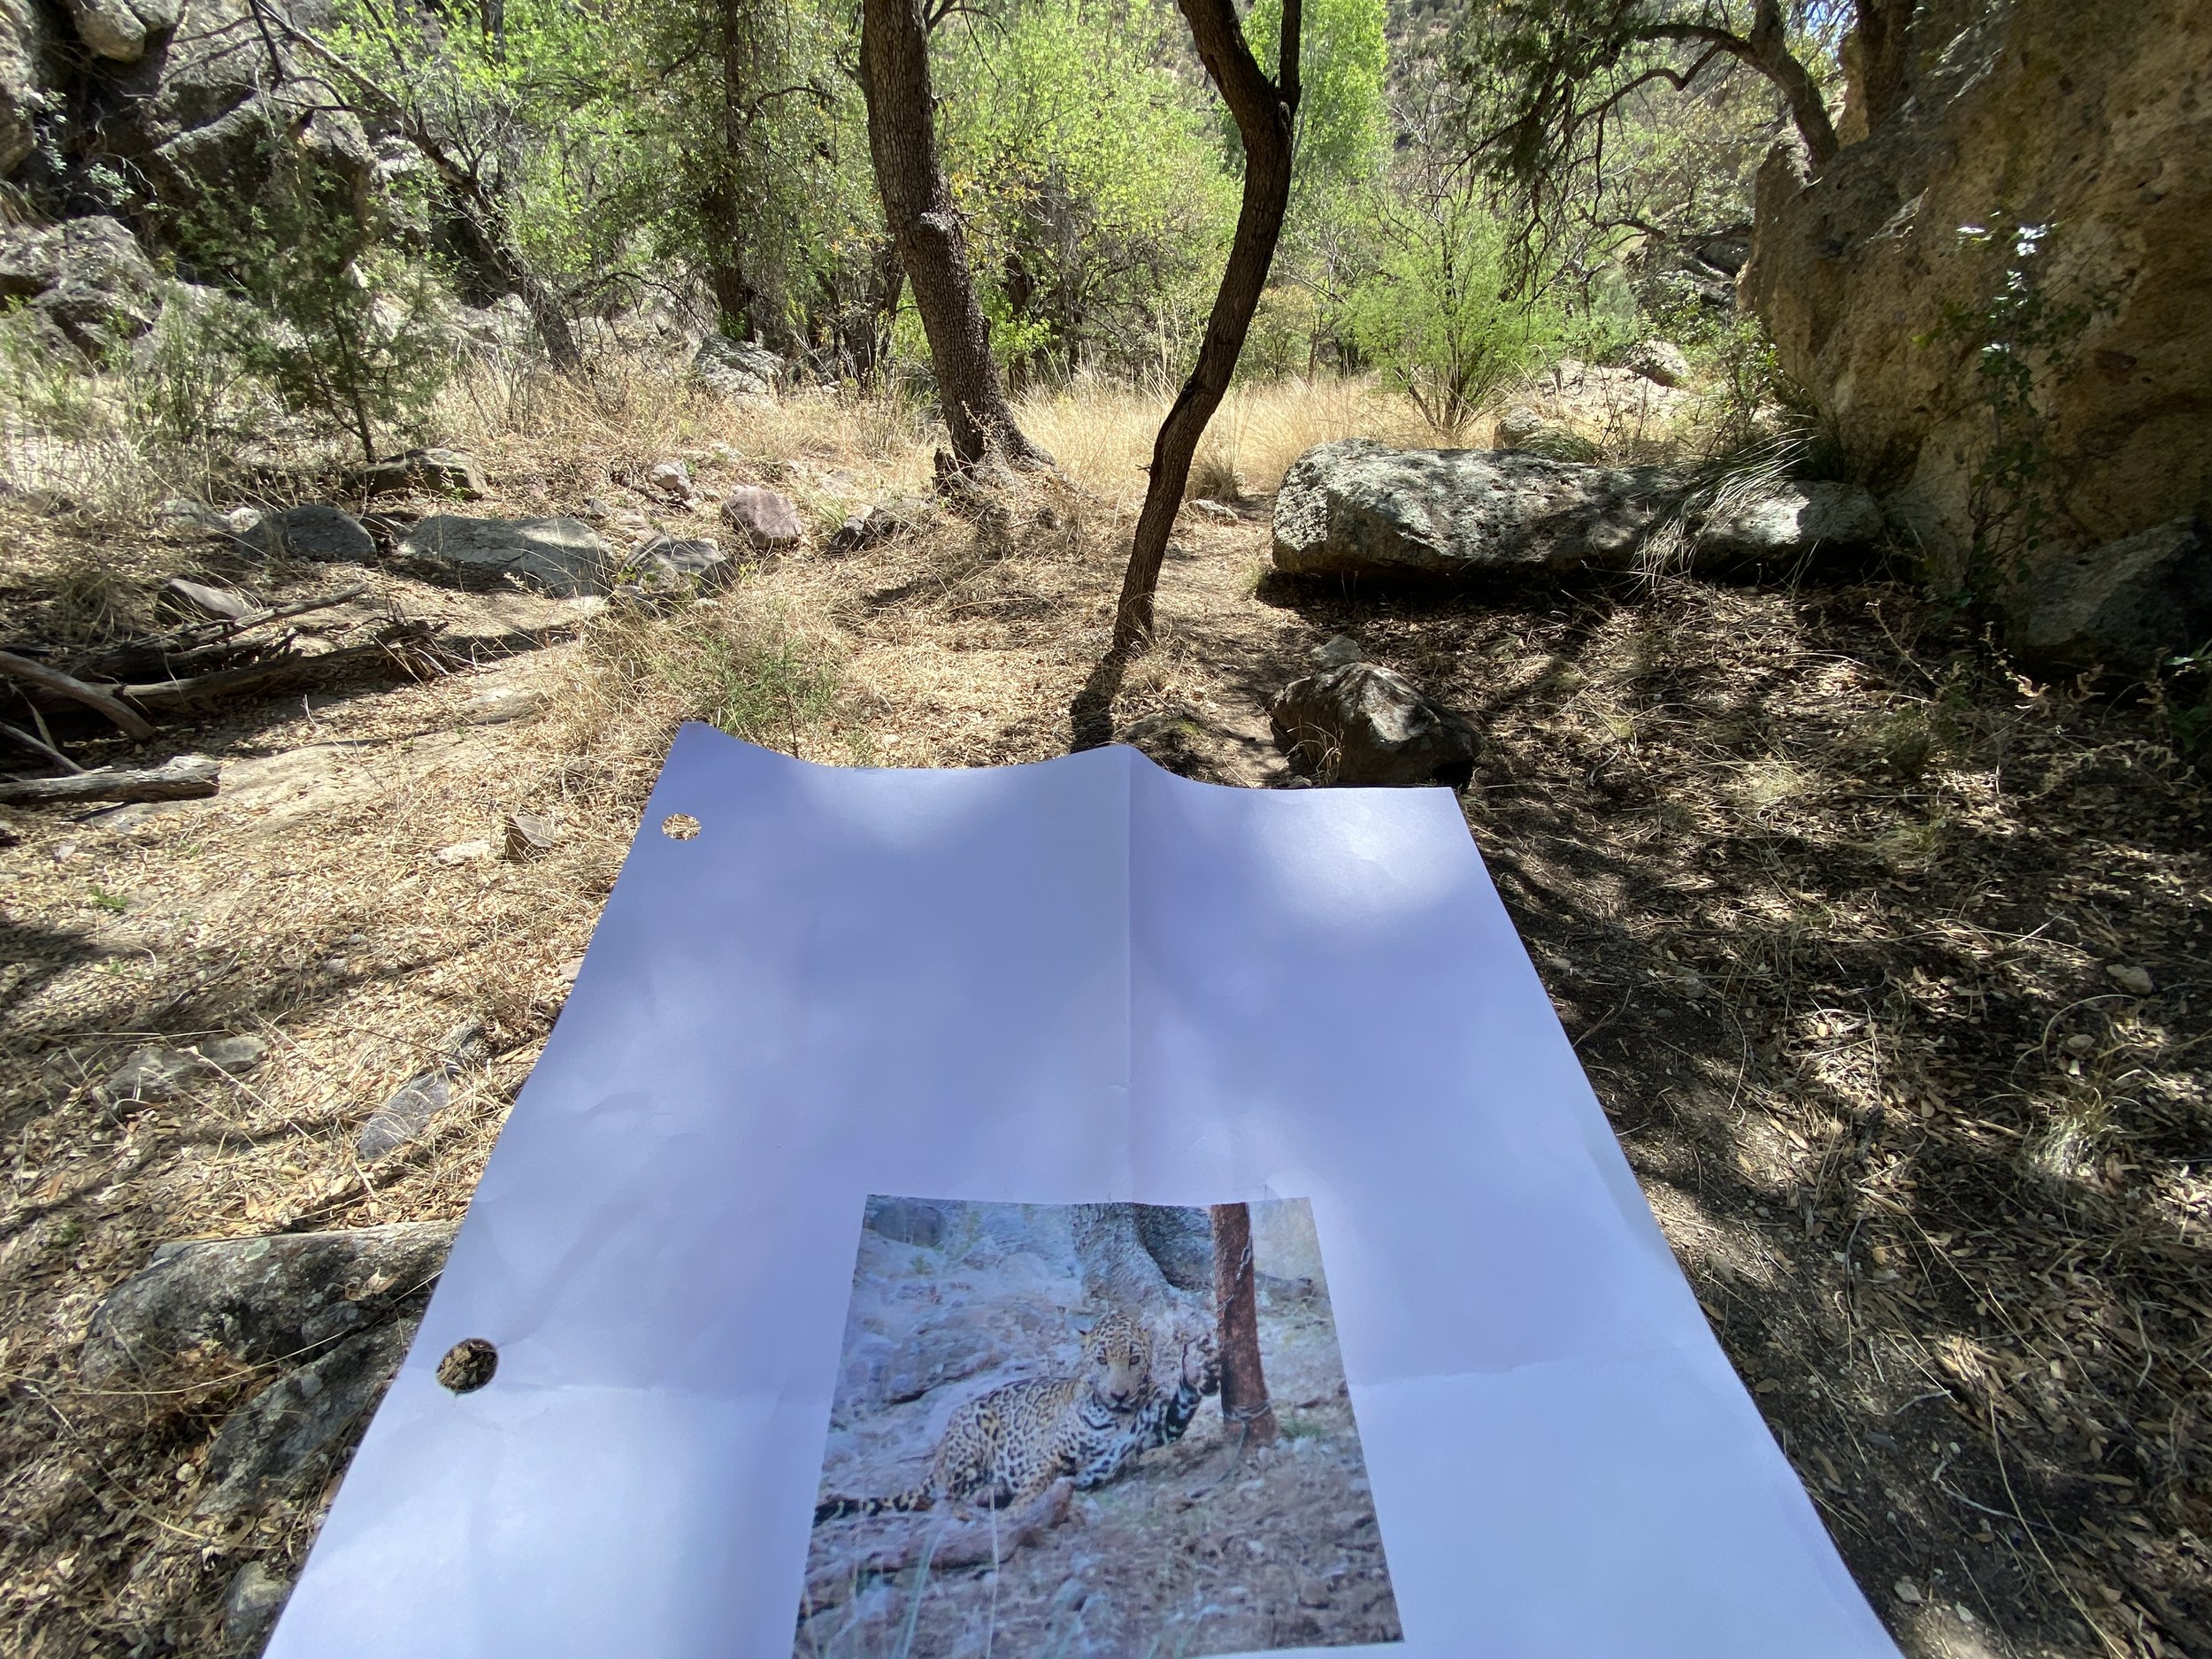
And so I decided to honor Macho B by making a pilgrimage to the tree where he was snared, hopefully collect pigments from the site, and paint his portrait with the wild paint gathered from where his own iron-rich blood was spilled—telling his story, keeping it alive so we may prevent this from happening again.

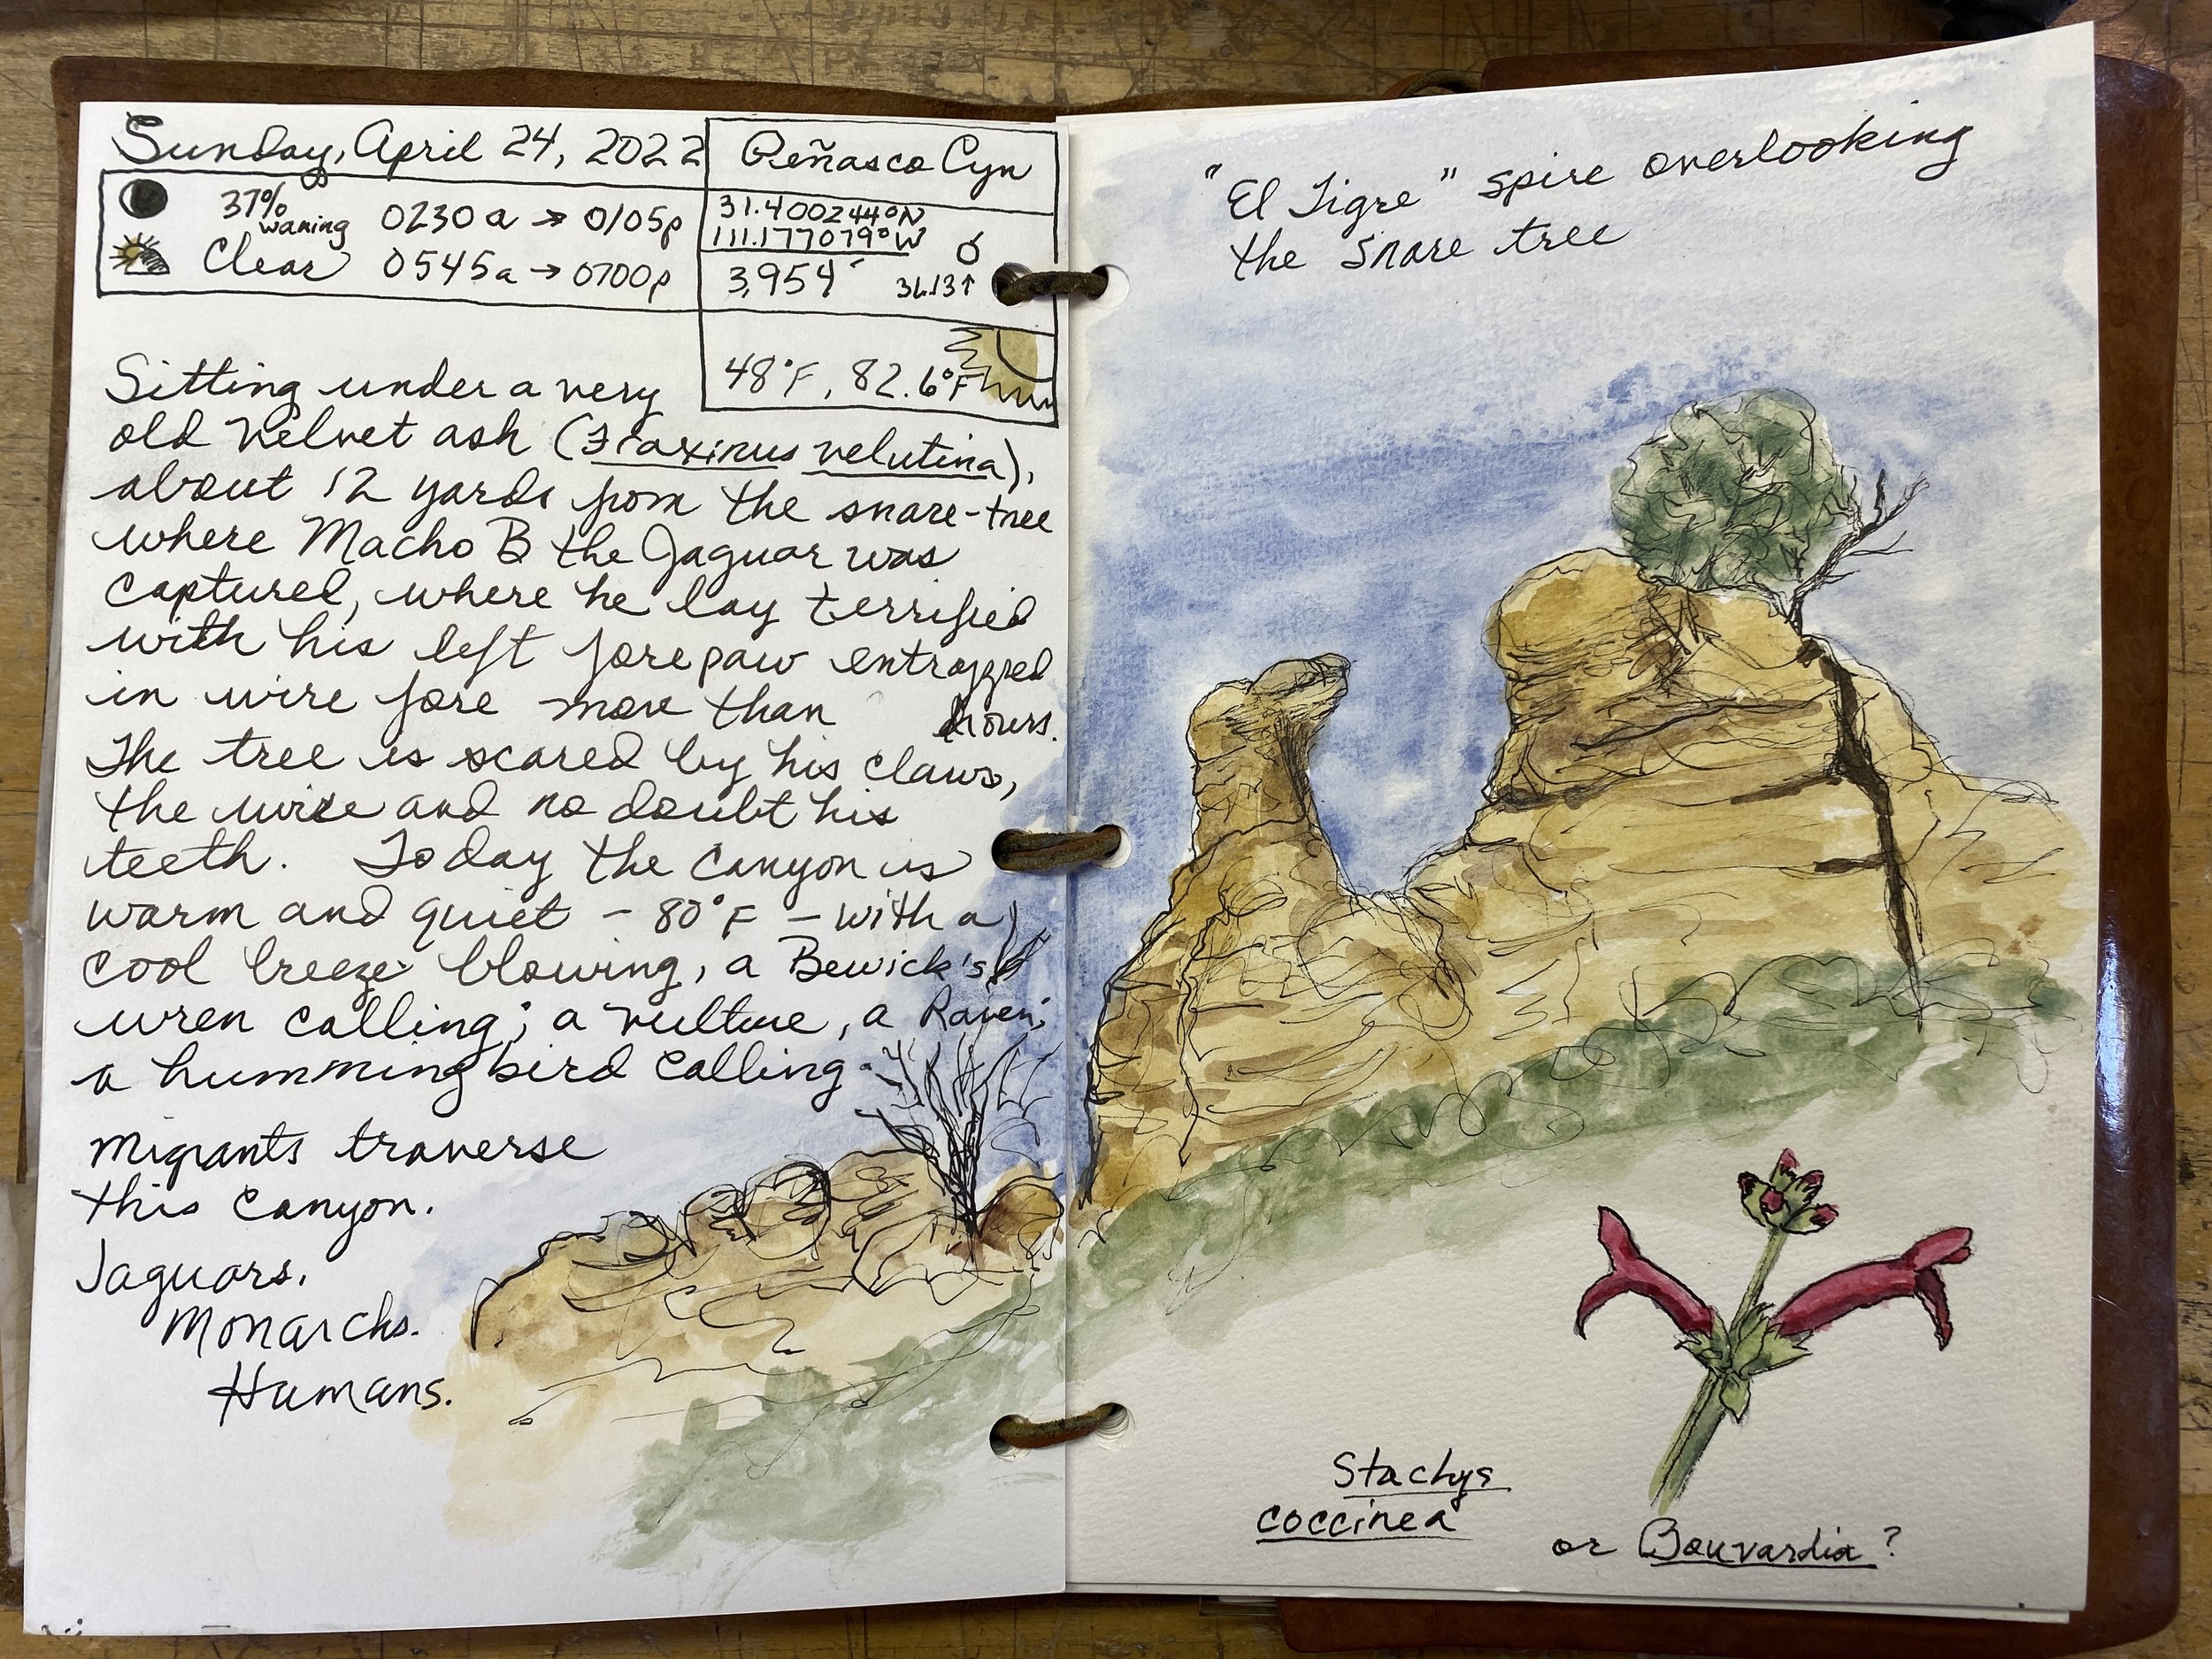
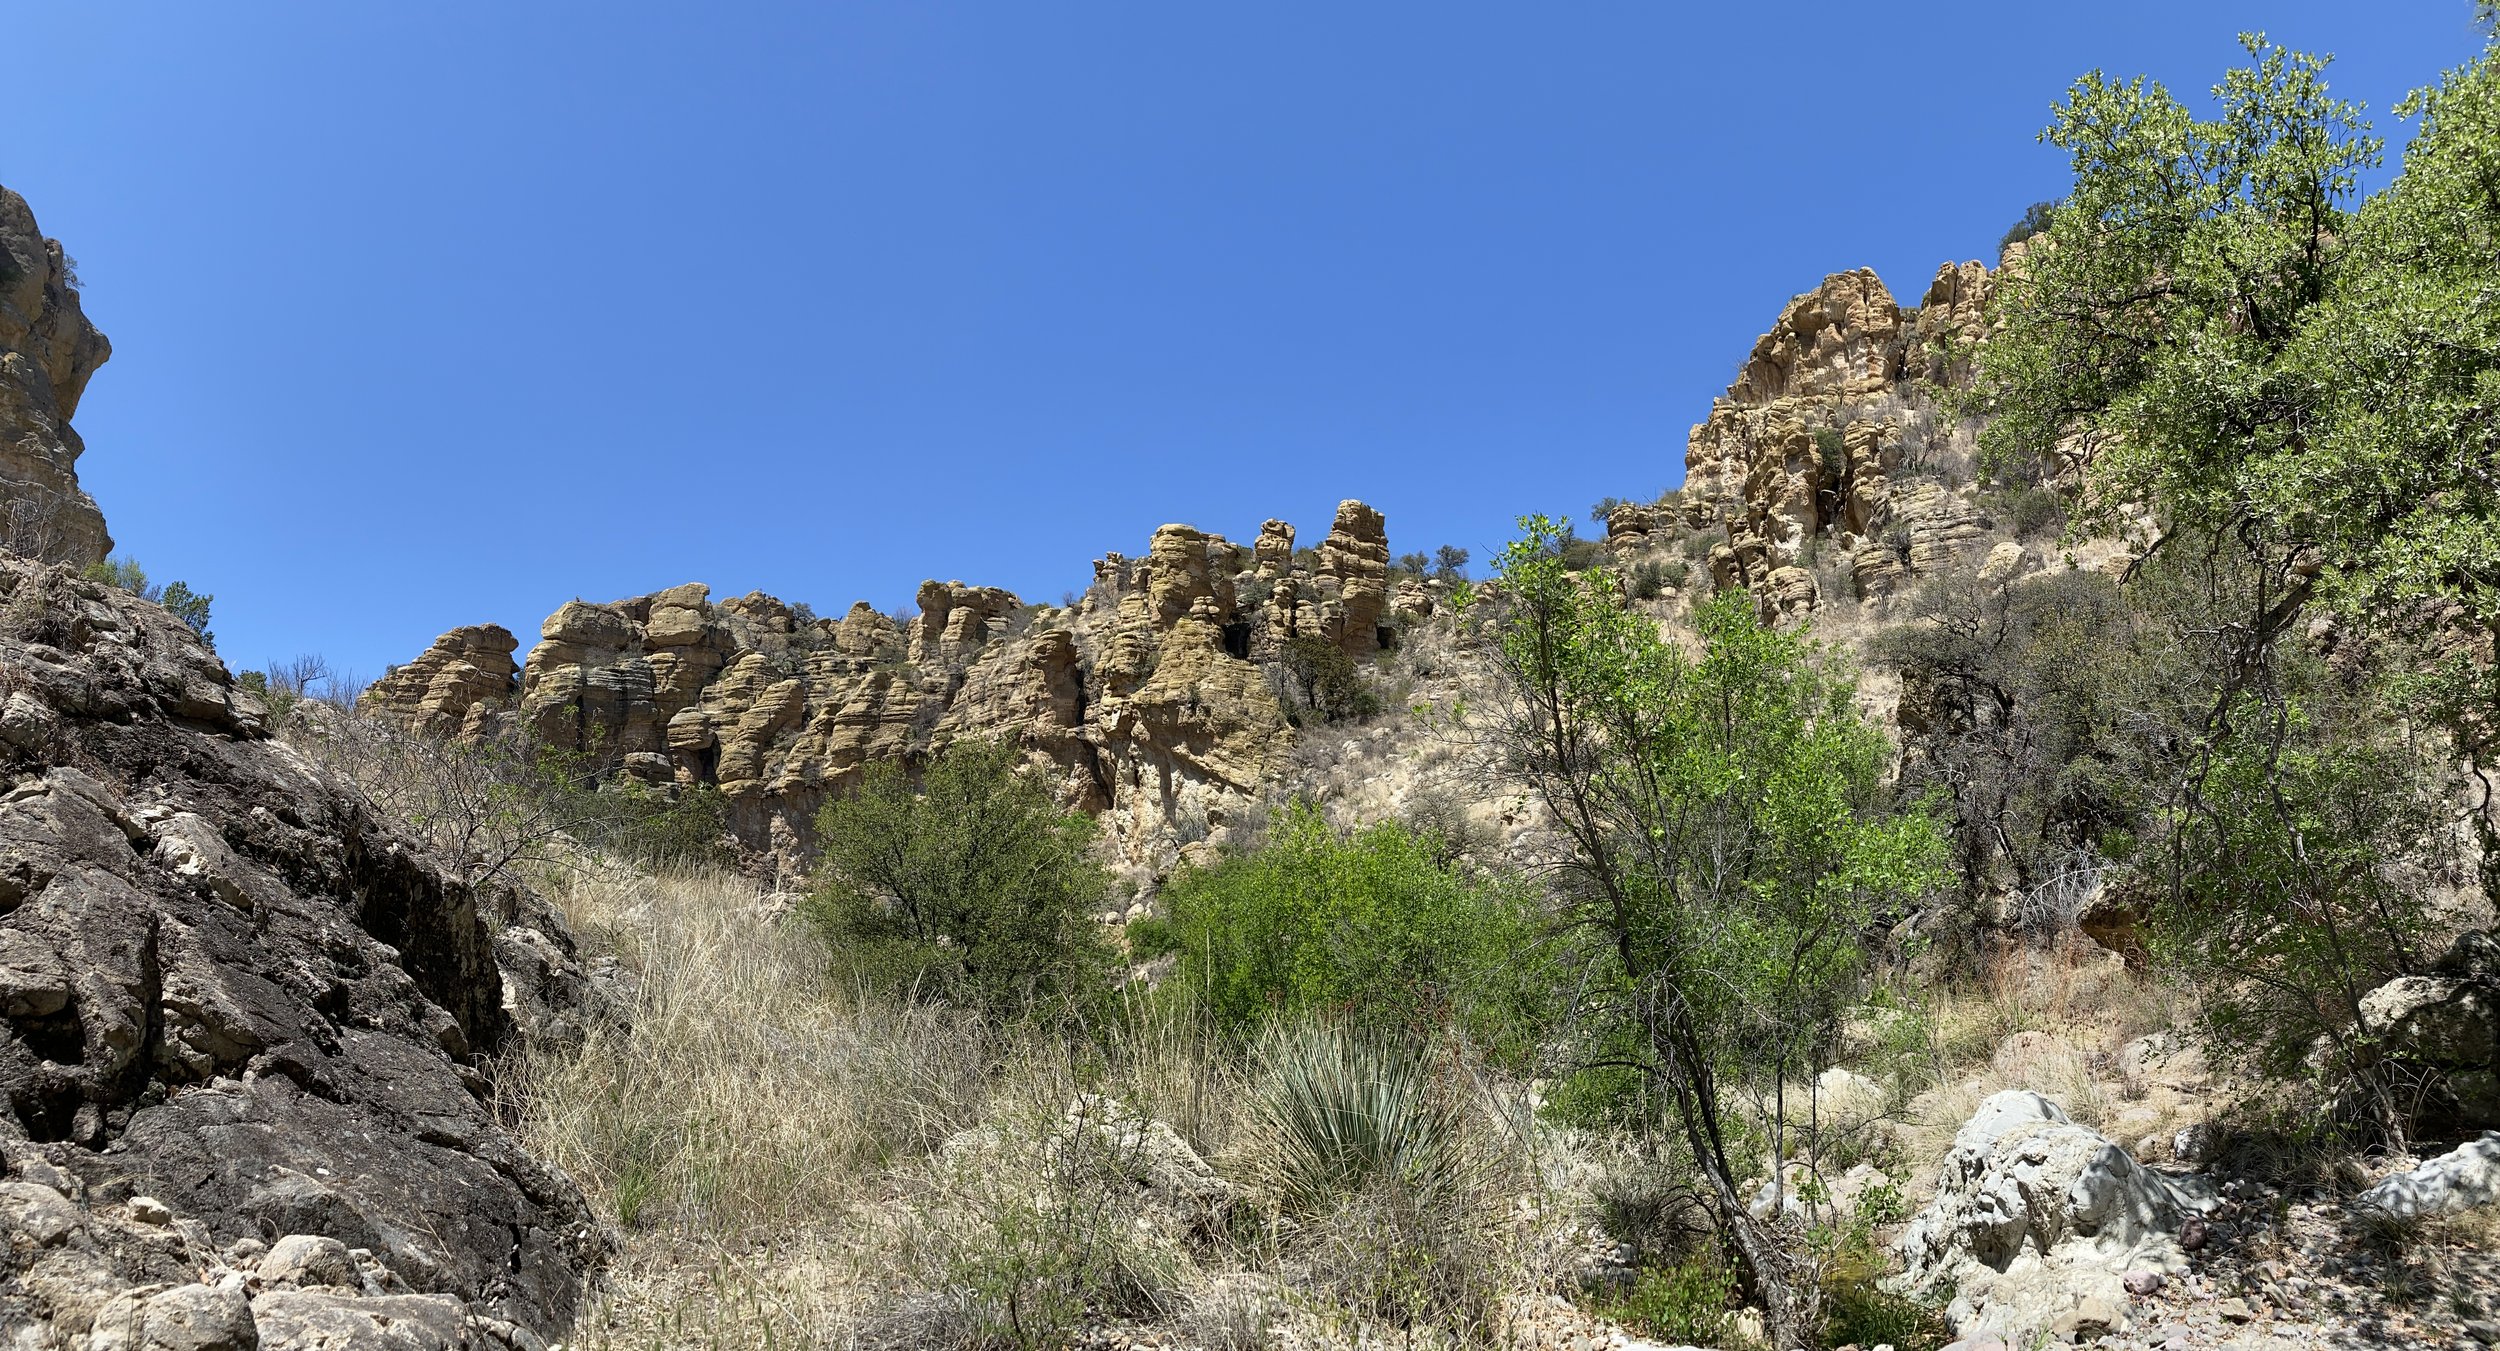
Heading into the yellow-ochre walls of Peñasco Canyon near the Mexico border.

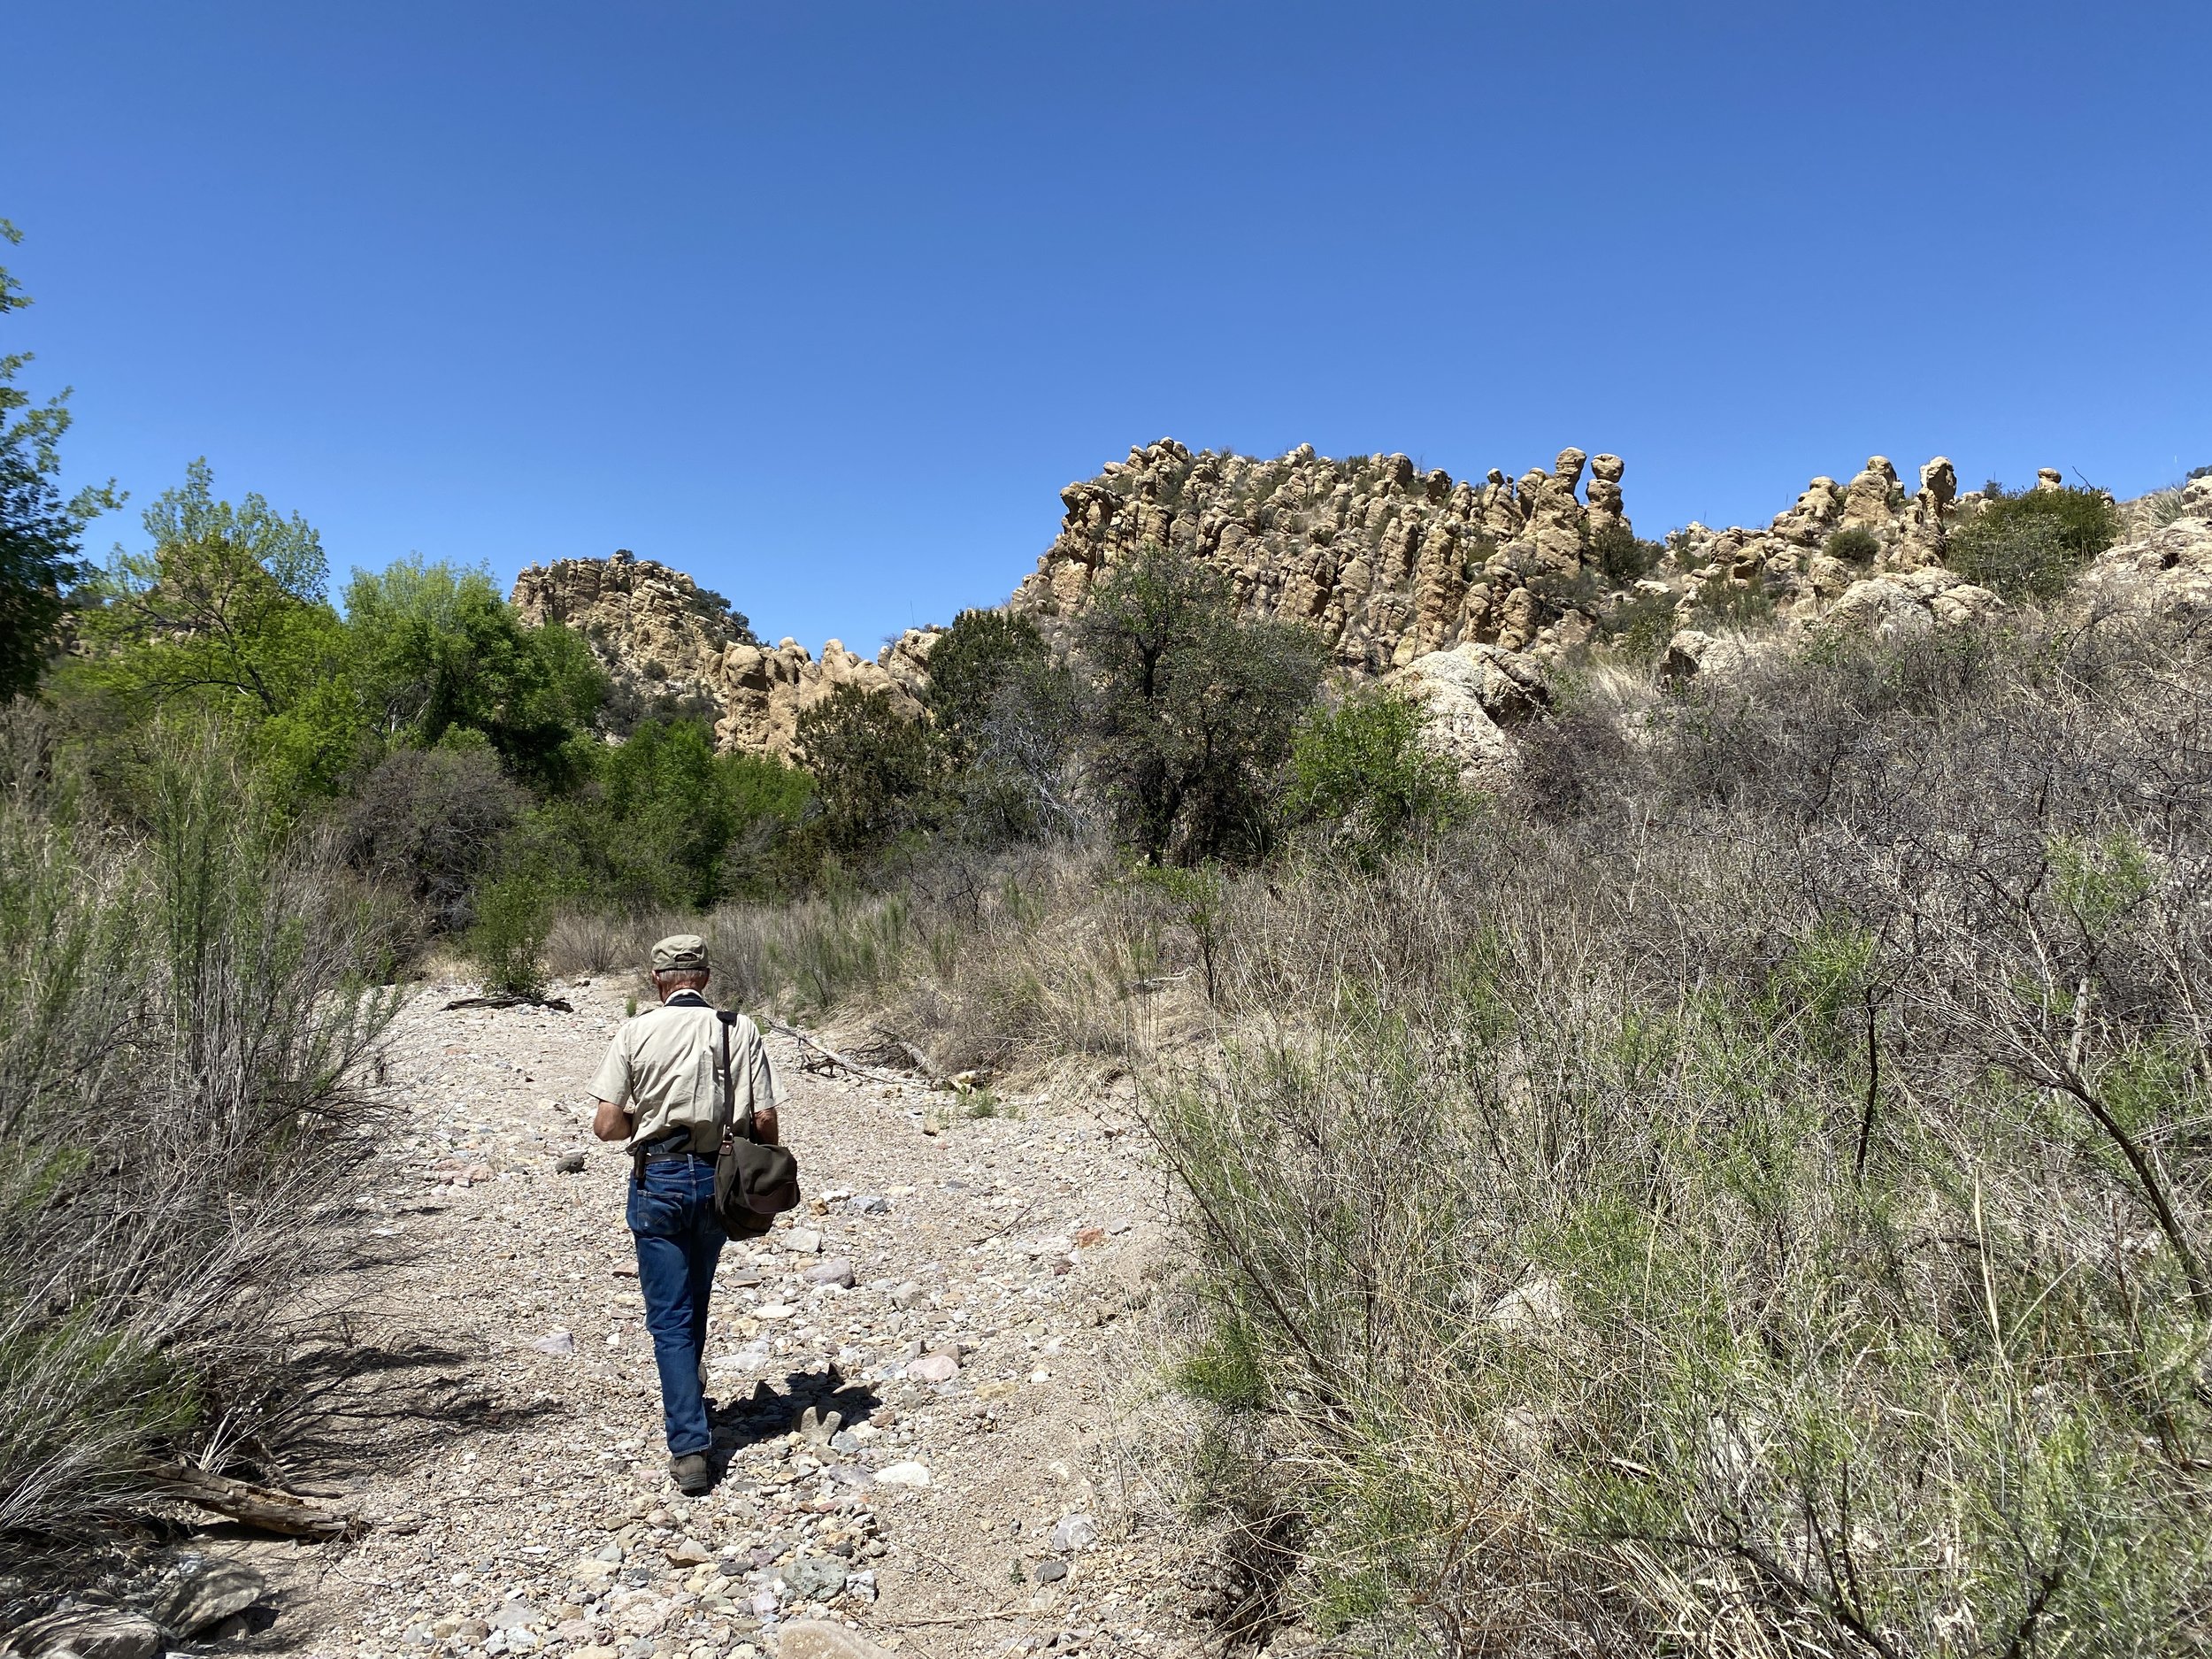
In late April my husband Jonathan Hanson and I followed a rough four-wheel-drive track into the rugged canyon country of southern Arizona's borderlands, west of Nogales. The yellow-ochre hoodoo-spires of Peñasco Canyon greeted us as we hiked to the snare tree site.

This pilgrimage and project are very personal for me and Jonathan because we heard Macho B roaring in Brown Canyon in the Baboquivari Mountains in 1997, just weeks after he was first photographed on the ridge to the north of our house. I have the field note in my nature journal about it.

The tragedy of the snare is that not only was capturing and radio collaring not necessary—by 2009 he'd been non-invasively studied by trail cameras and scat studies for nearly a decade, and leg-hold snares are notoriously dangerous (two jaguars had already died in Sonora, Mexico, in these insidious traps ostensibly for “science”)—but after the Game and Fish researchers tranquilized him and put on the collar, a few days later he stopped moving. They found him in very bad health, airlifted him to Phoenix, and euthanized him.

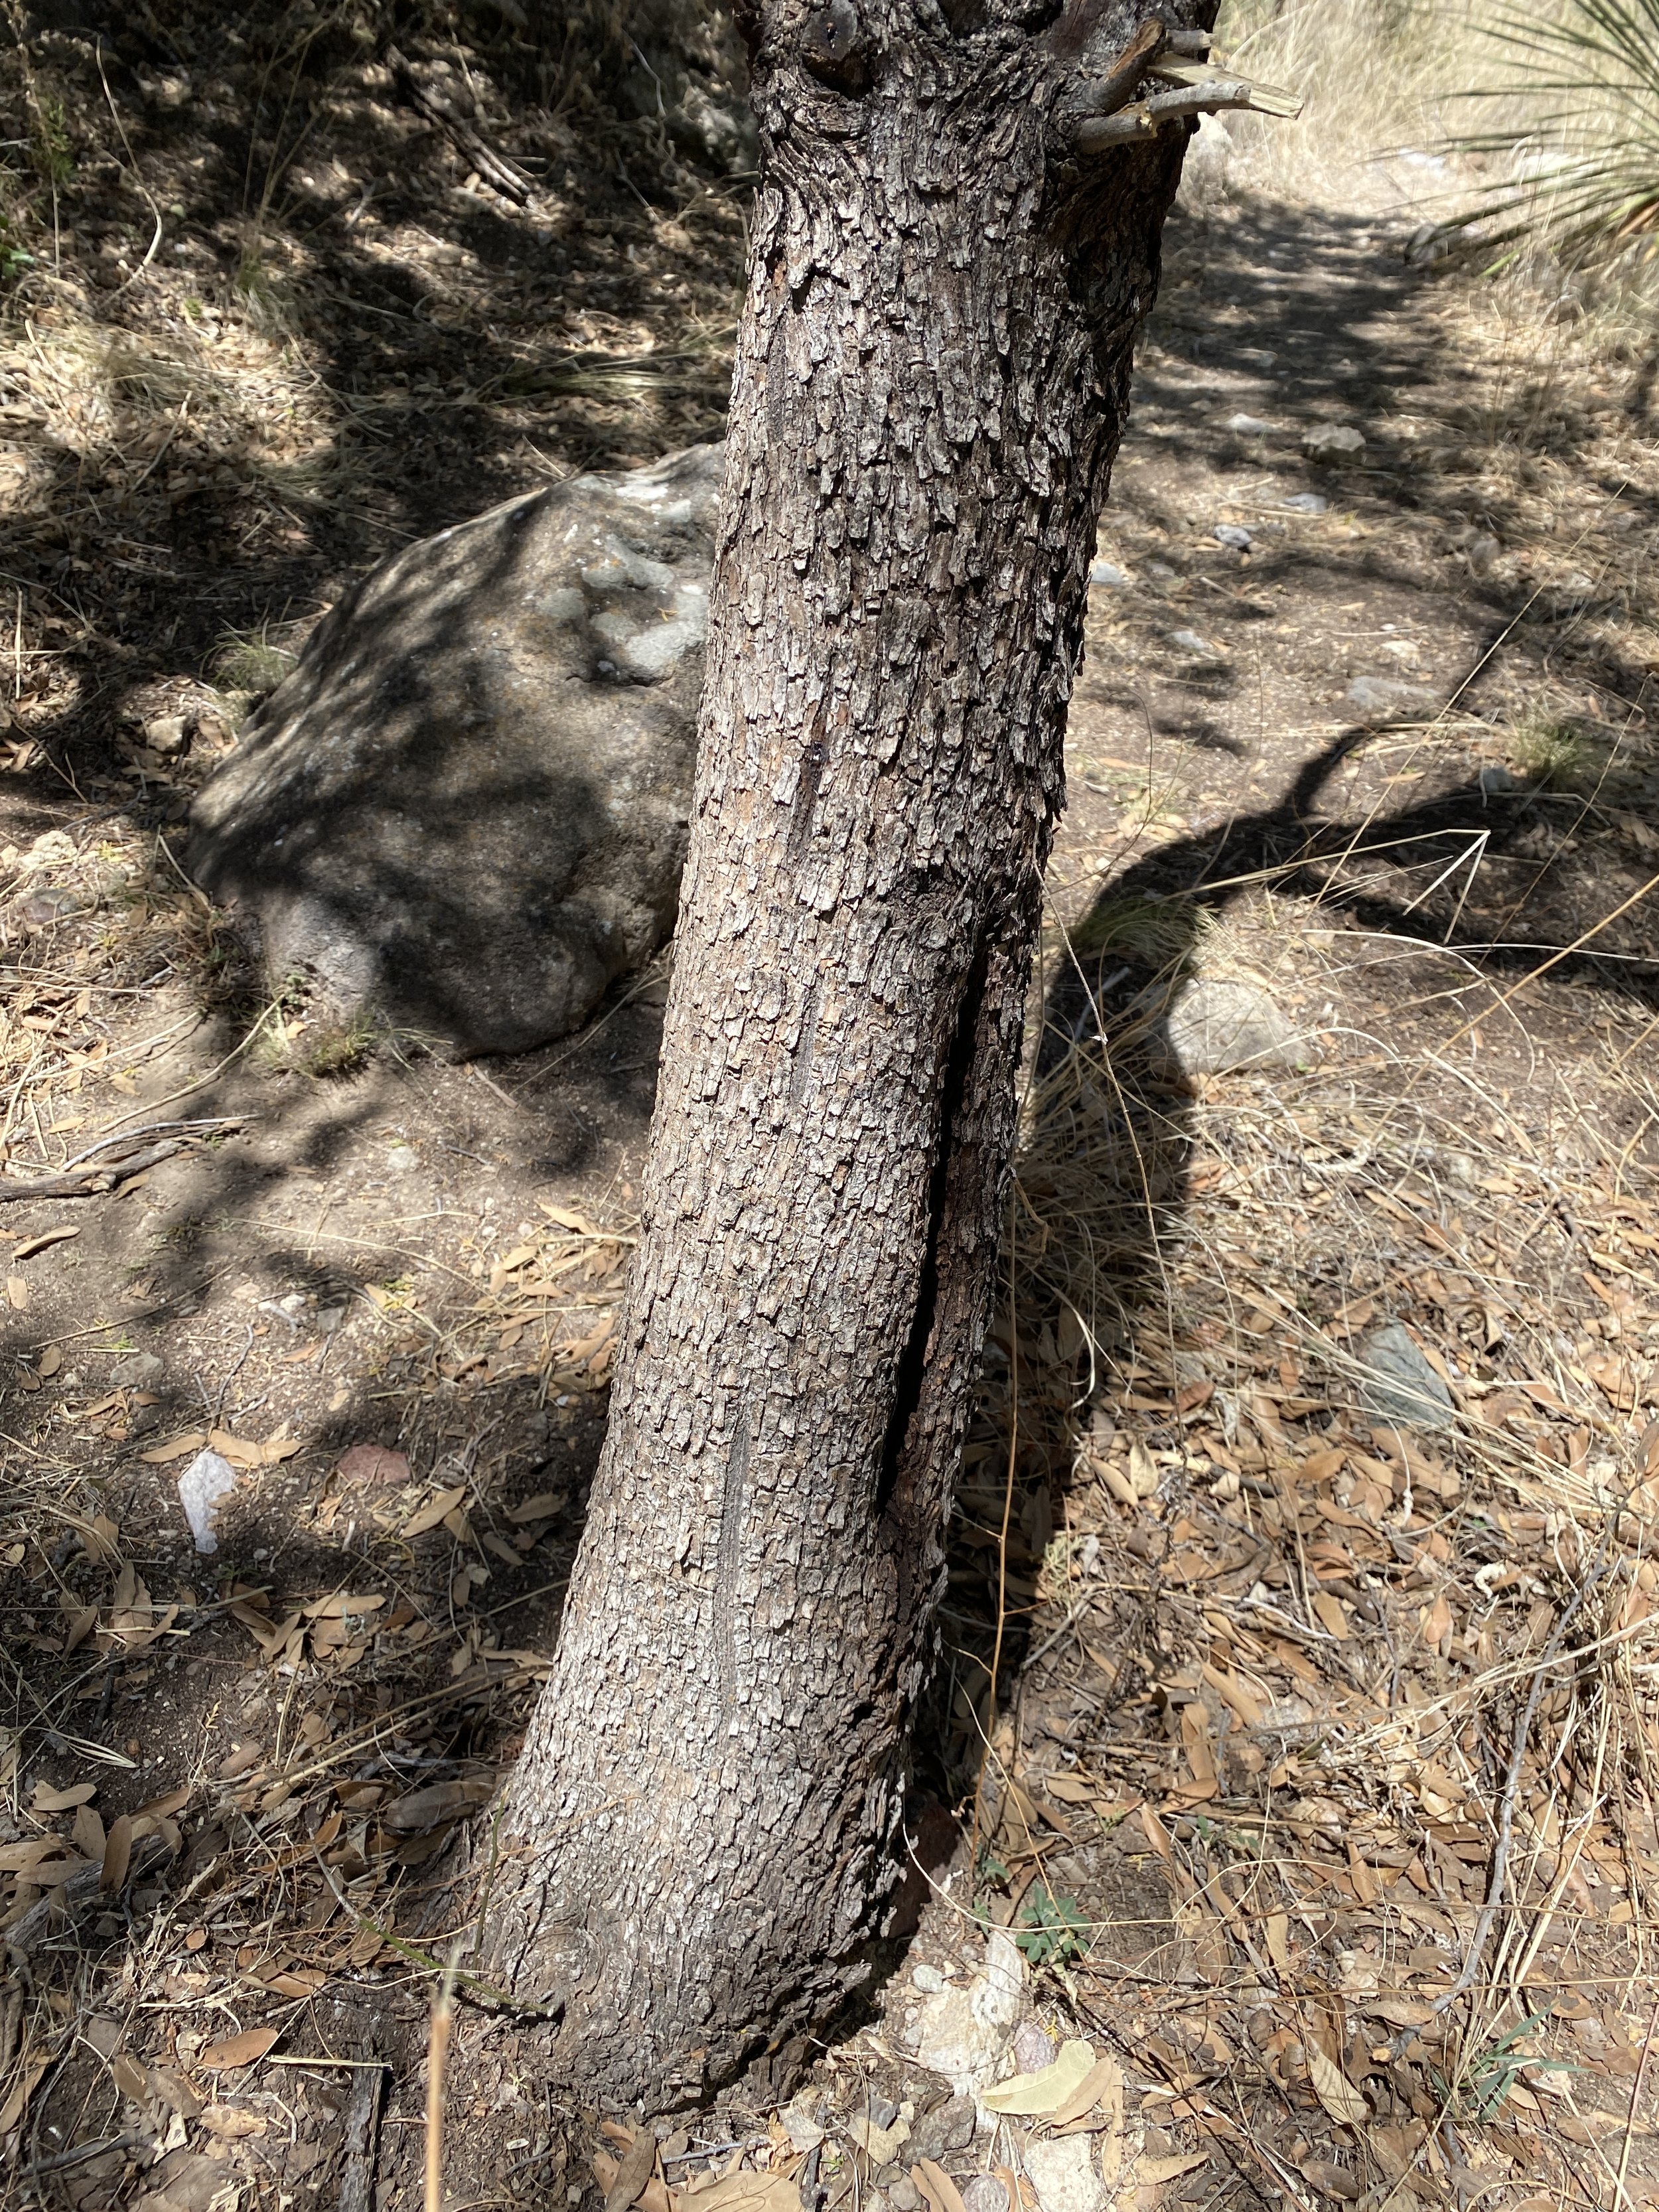
The snare tree 12 years after Macho B’s death.

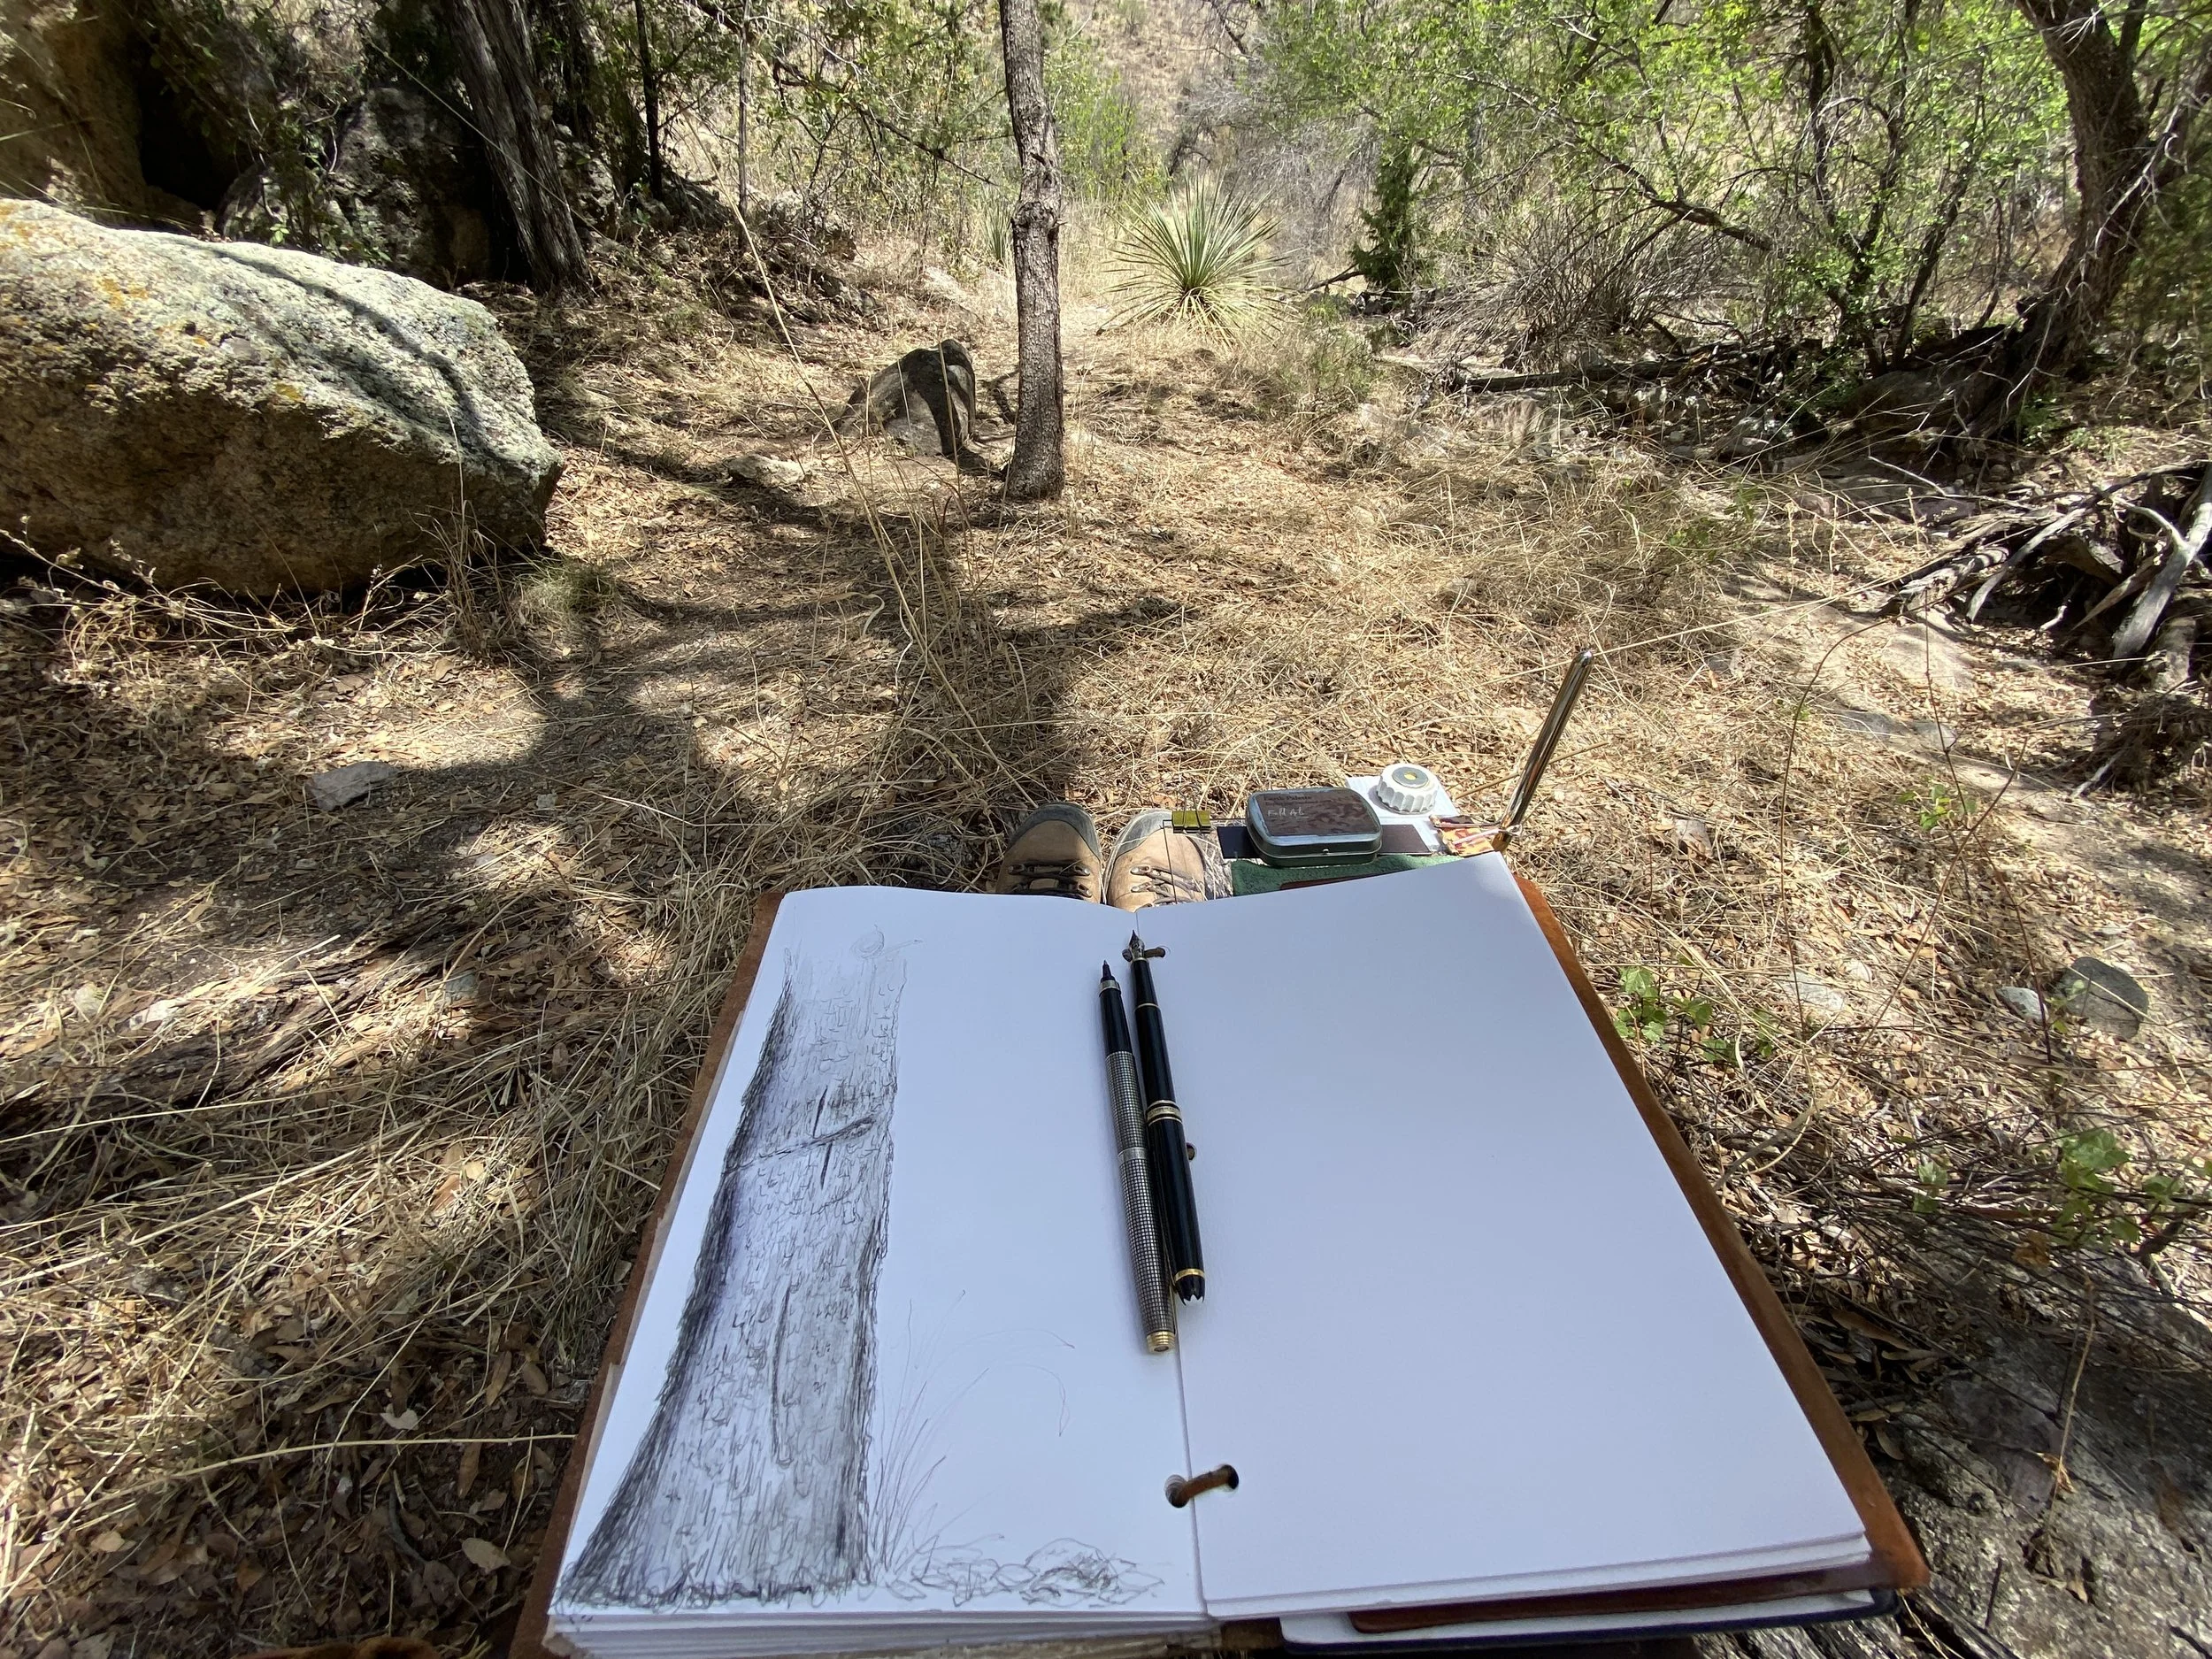
I sketched the tree, which has three very distinct claw marks and the diagonal slash of the snare wire. He fought and fought and fought the snare, ruining his foot, breaking a tooth.

It was very emotional to sit there knowing what happened. The entire story is told in Janay Brun’s excellent book Cloak and Jaguar: Following a Cat from Desert to Courtroom.” Janay, one of the contractors working for the researchers who set up the study, became a vocal whistle-blower about the ethics and illegality of the project. She was even prosecuted for being accessory to illegally taking an endangered species. None of the state and federal agency staff ultimately responsible for the project were charged or reprimanded. (You can also read much more detail on Janay’s blog: https://whistlingforthejaguar.wordpress.com)

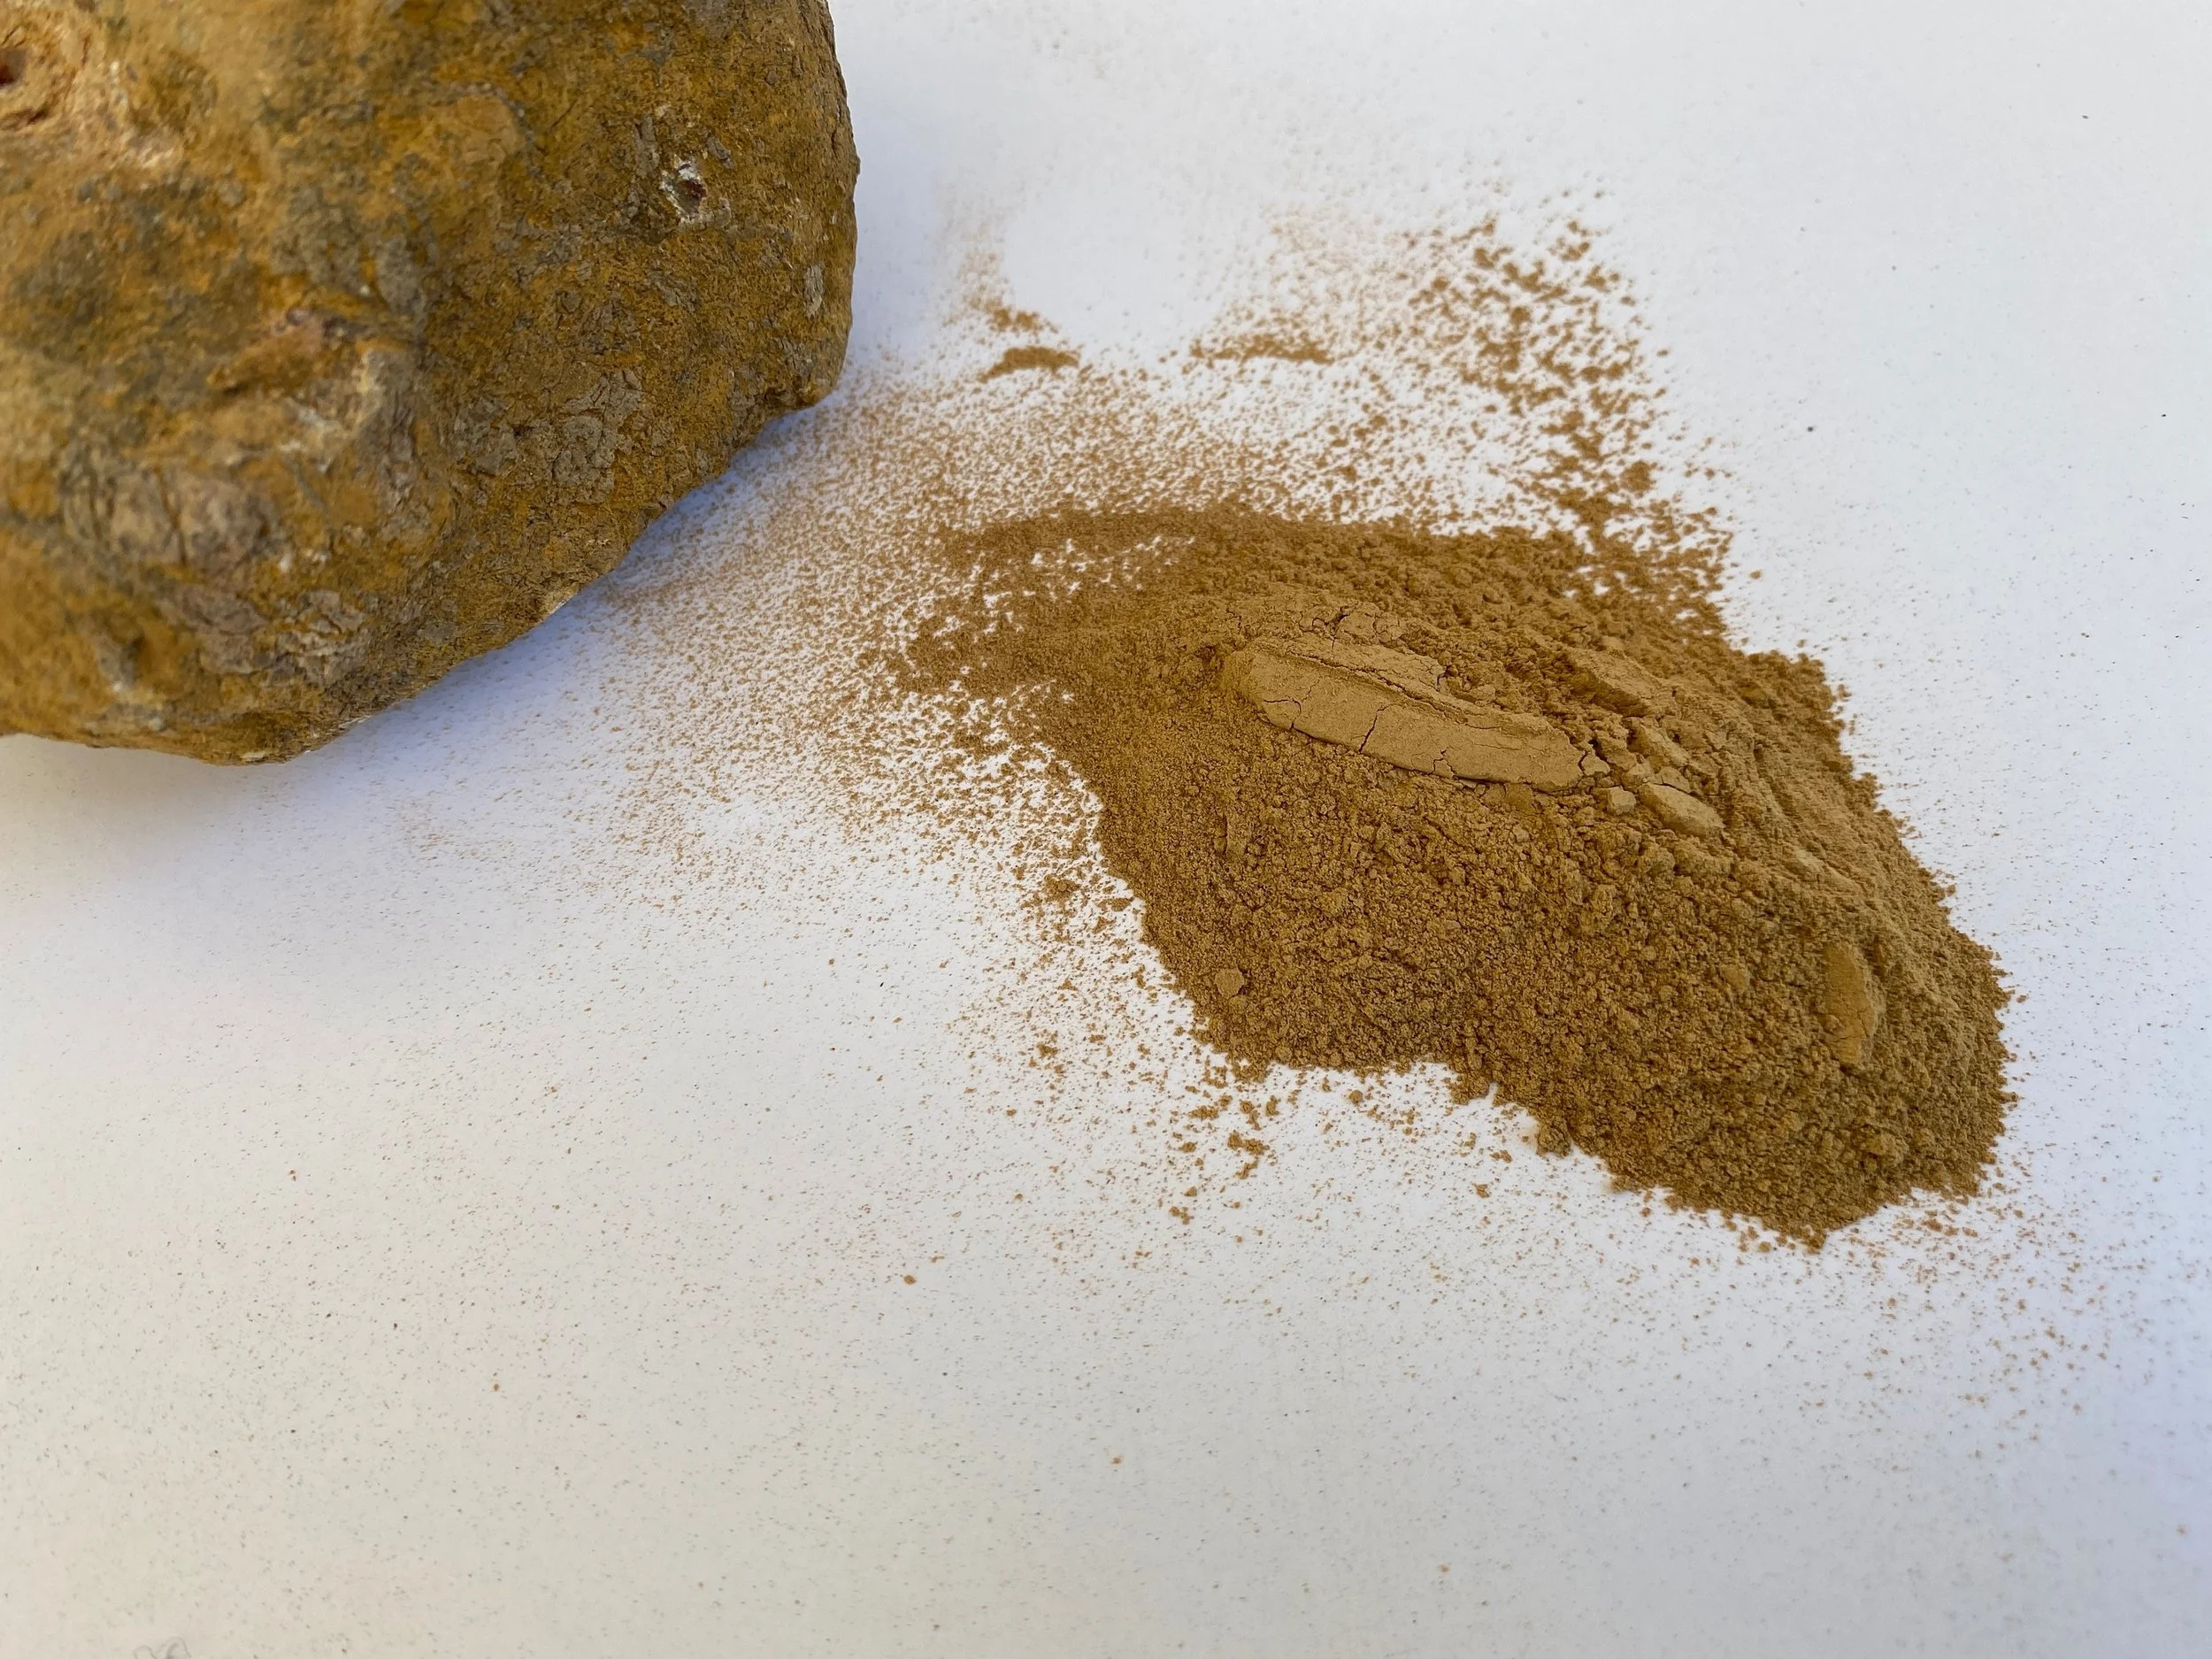
I collected red and yellow iron-oxide (ochre) rocks from under the tree, and orange ochre rocks from upstream, from which to make paint to complete a formal painting for Chroma Sonorensis. My field sketch study-concept sits at the top of this article.

I'm calling the pigments "Onça Ochres" — orange for Macho B's pelt, red for his blood that coated the tree and soil where he tore his paw and fought for his life, and yellow for the canyon walls that look over his spirit.

“Onça” is Brazilian-Portuguese for jaguar, and the scientific name for jaguar is Panthera onza, North America’s only roaring cat.

Yesterday I completed initial processing of these wild pigments, crushing the rocks, grinding them, and sifting to 200 microns so I can mull them into paints with gum arabic. Curious about the volume of rocks I collected, I weighed them: 2.7 kilograms! No wonder I was tired after our long hike out—but the results were worth it. I love the three colors, they will make a perfect Macho B portrait.

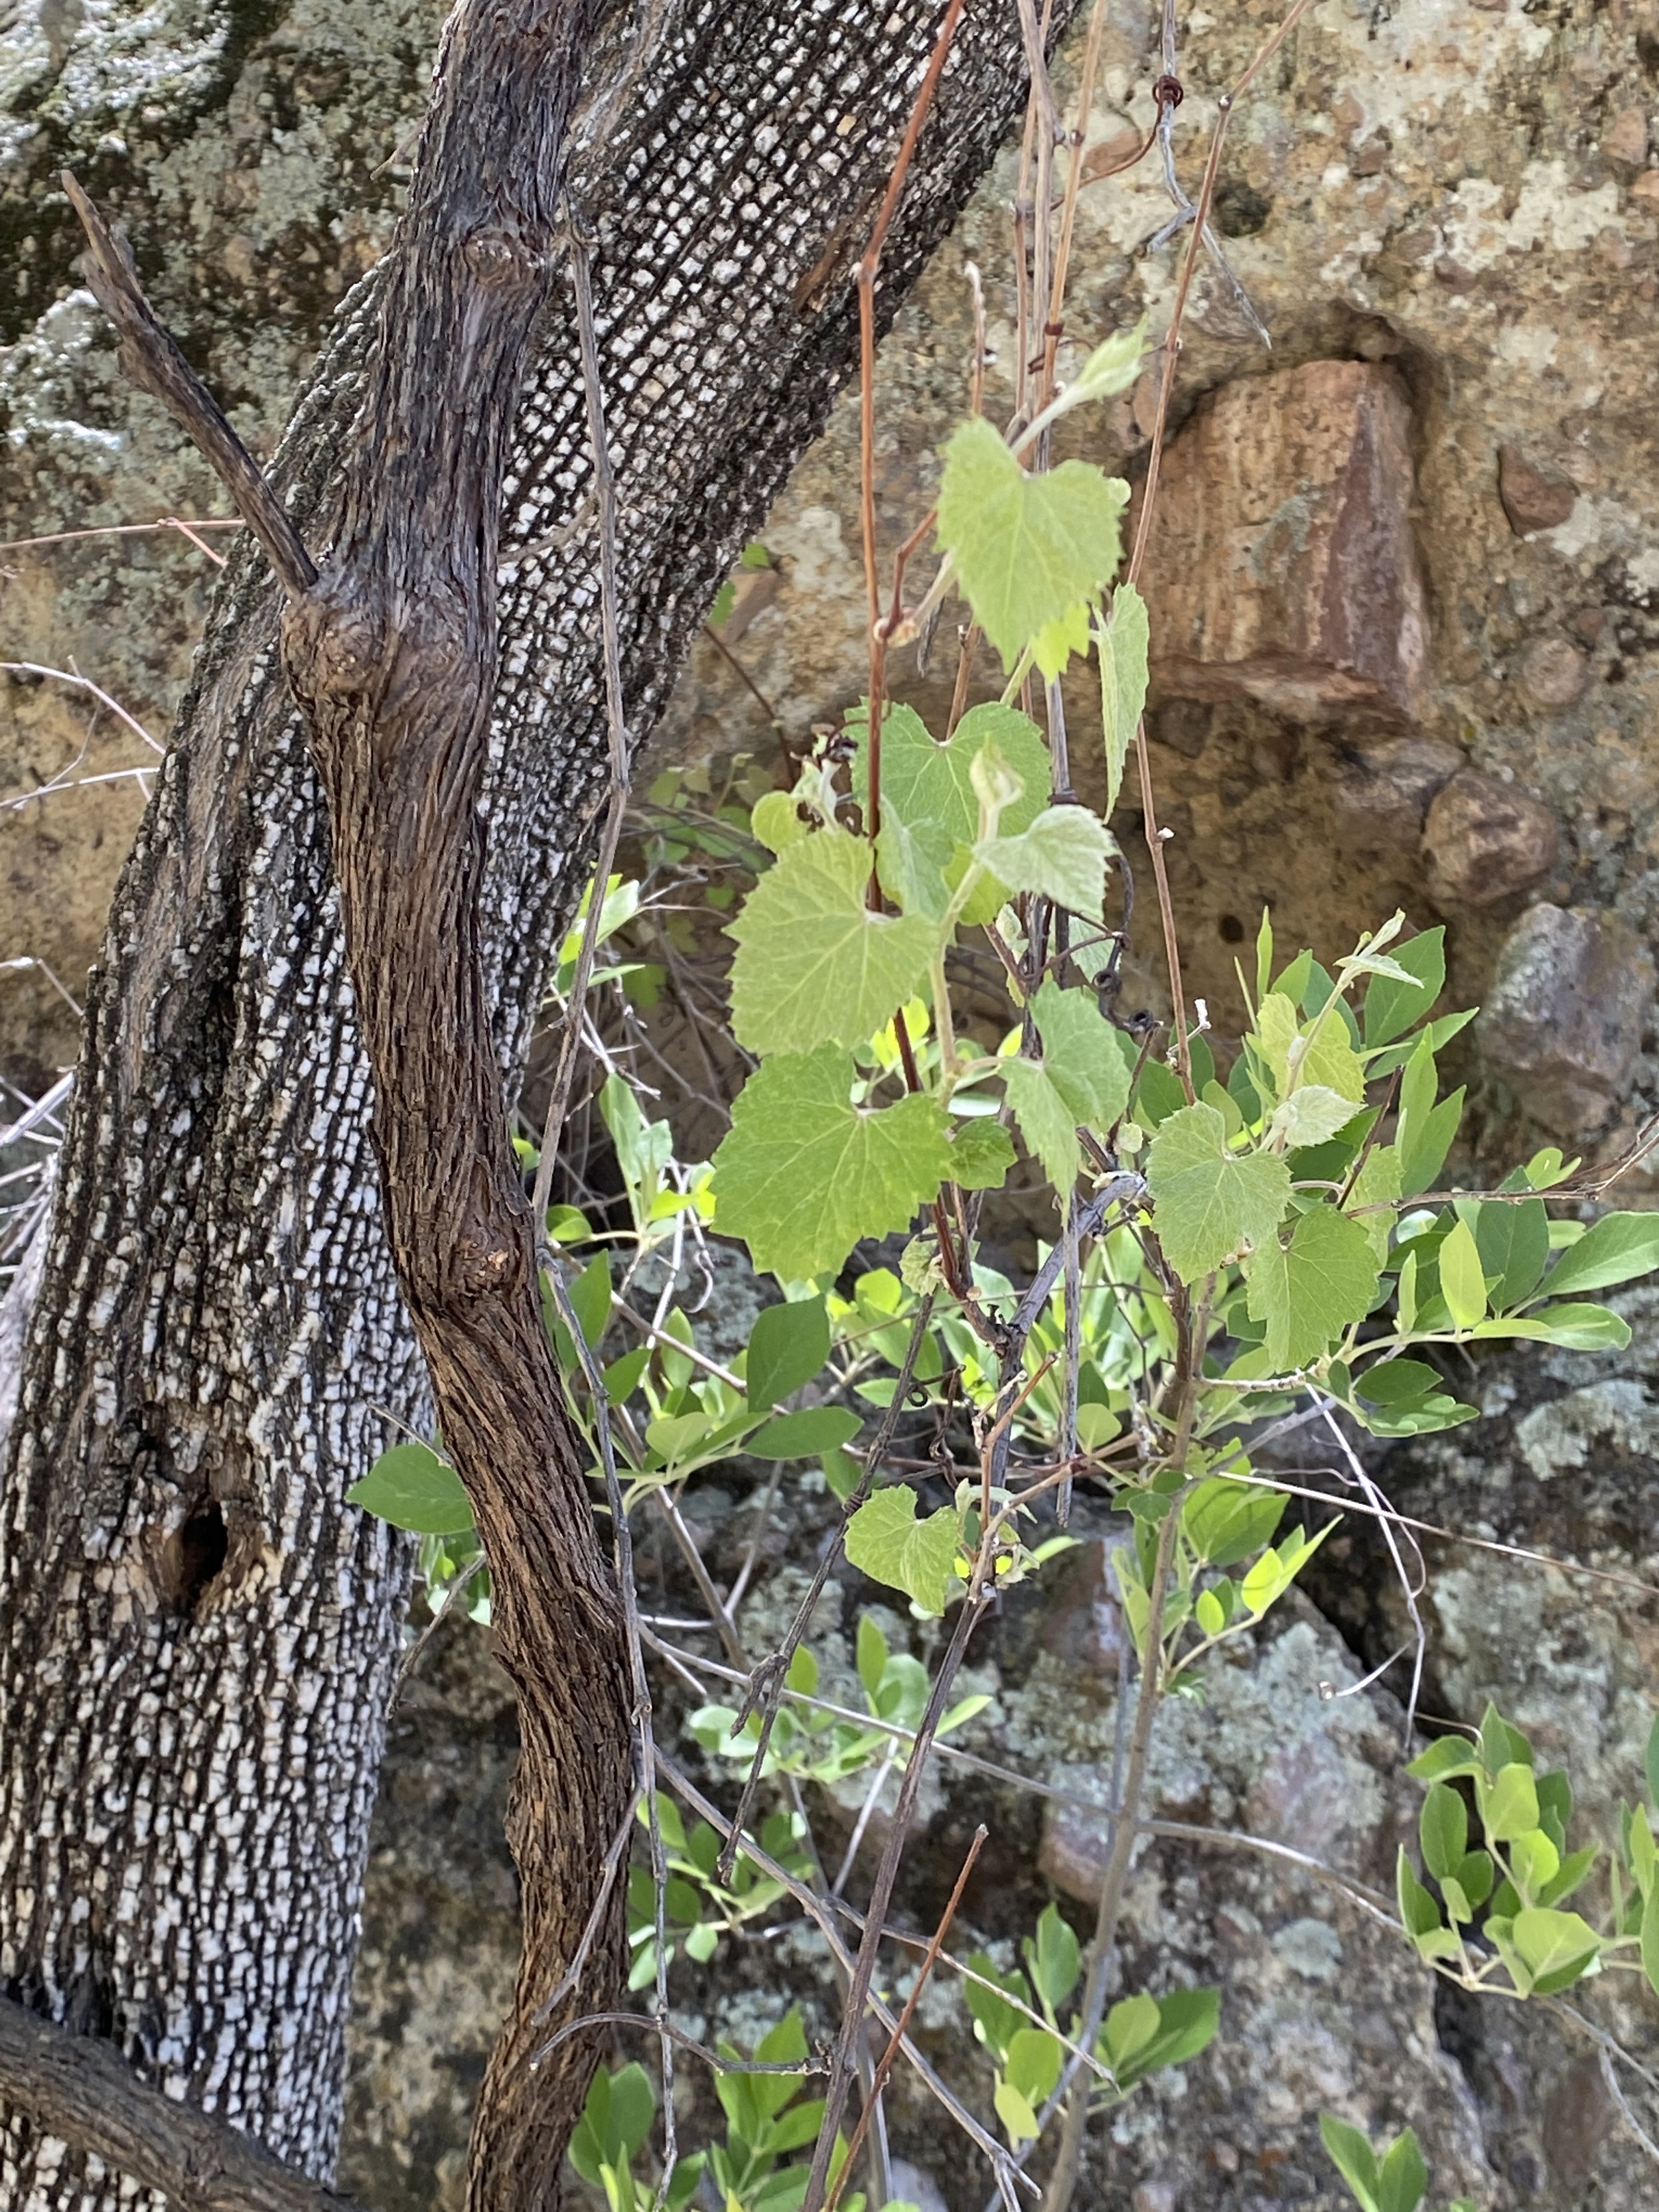
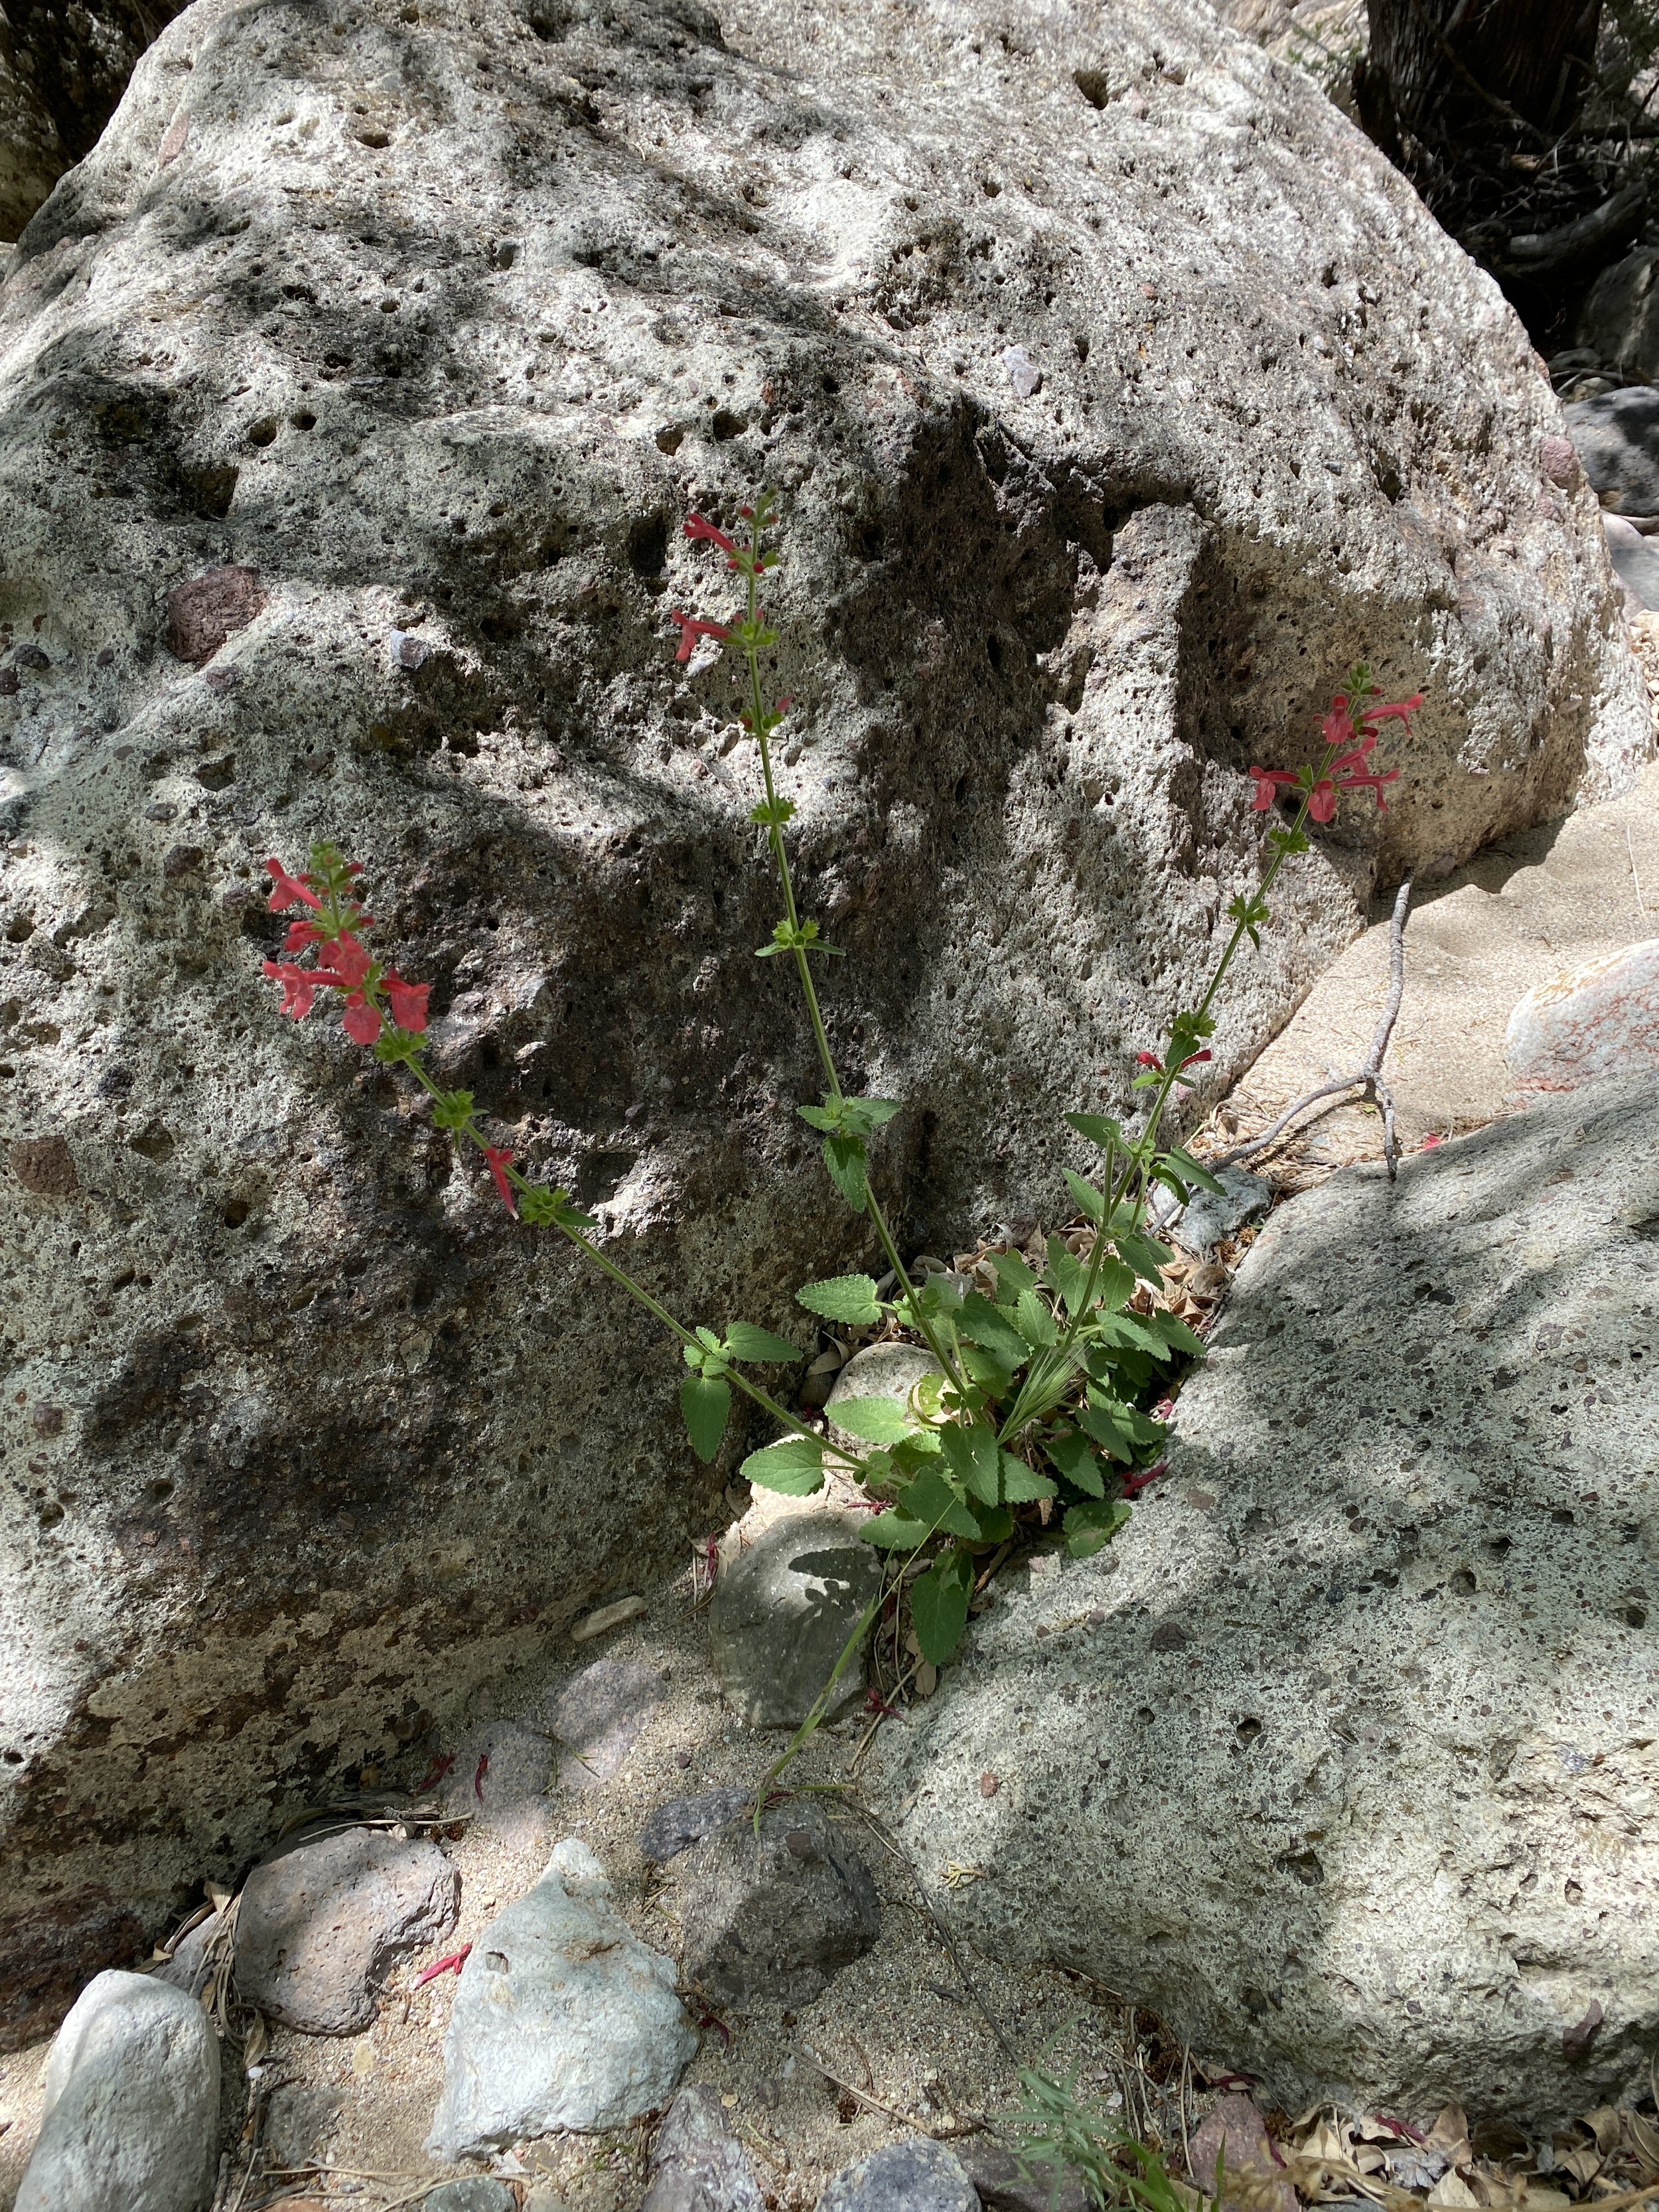
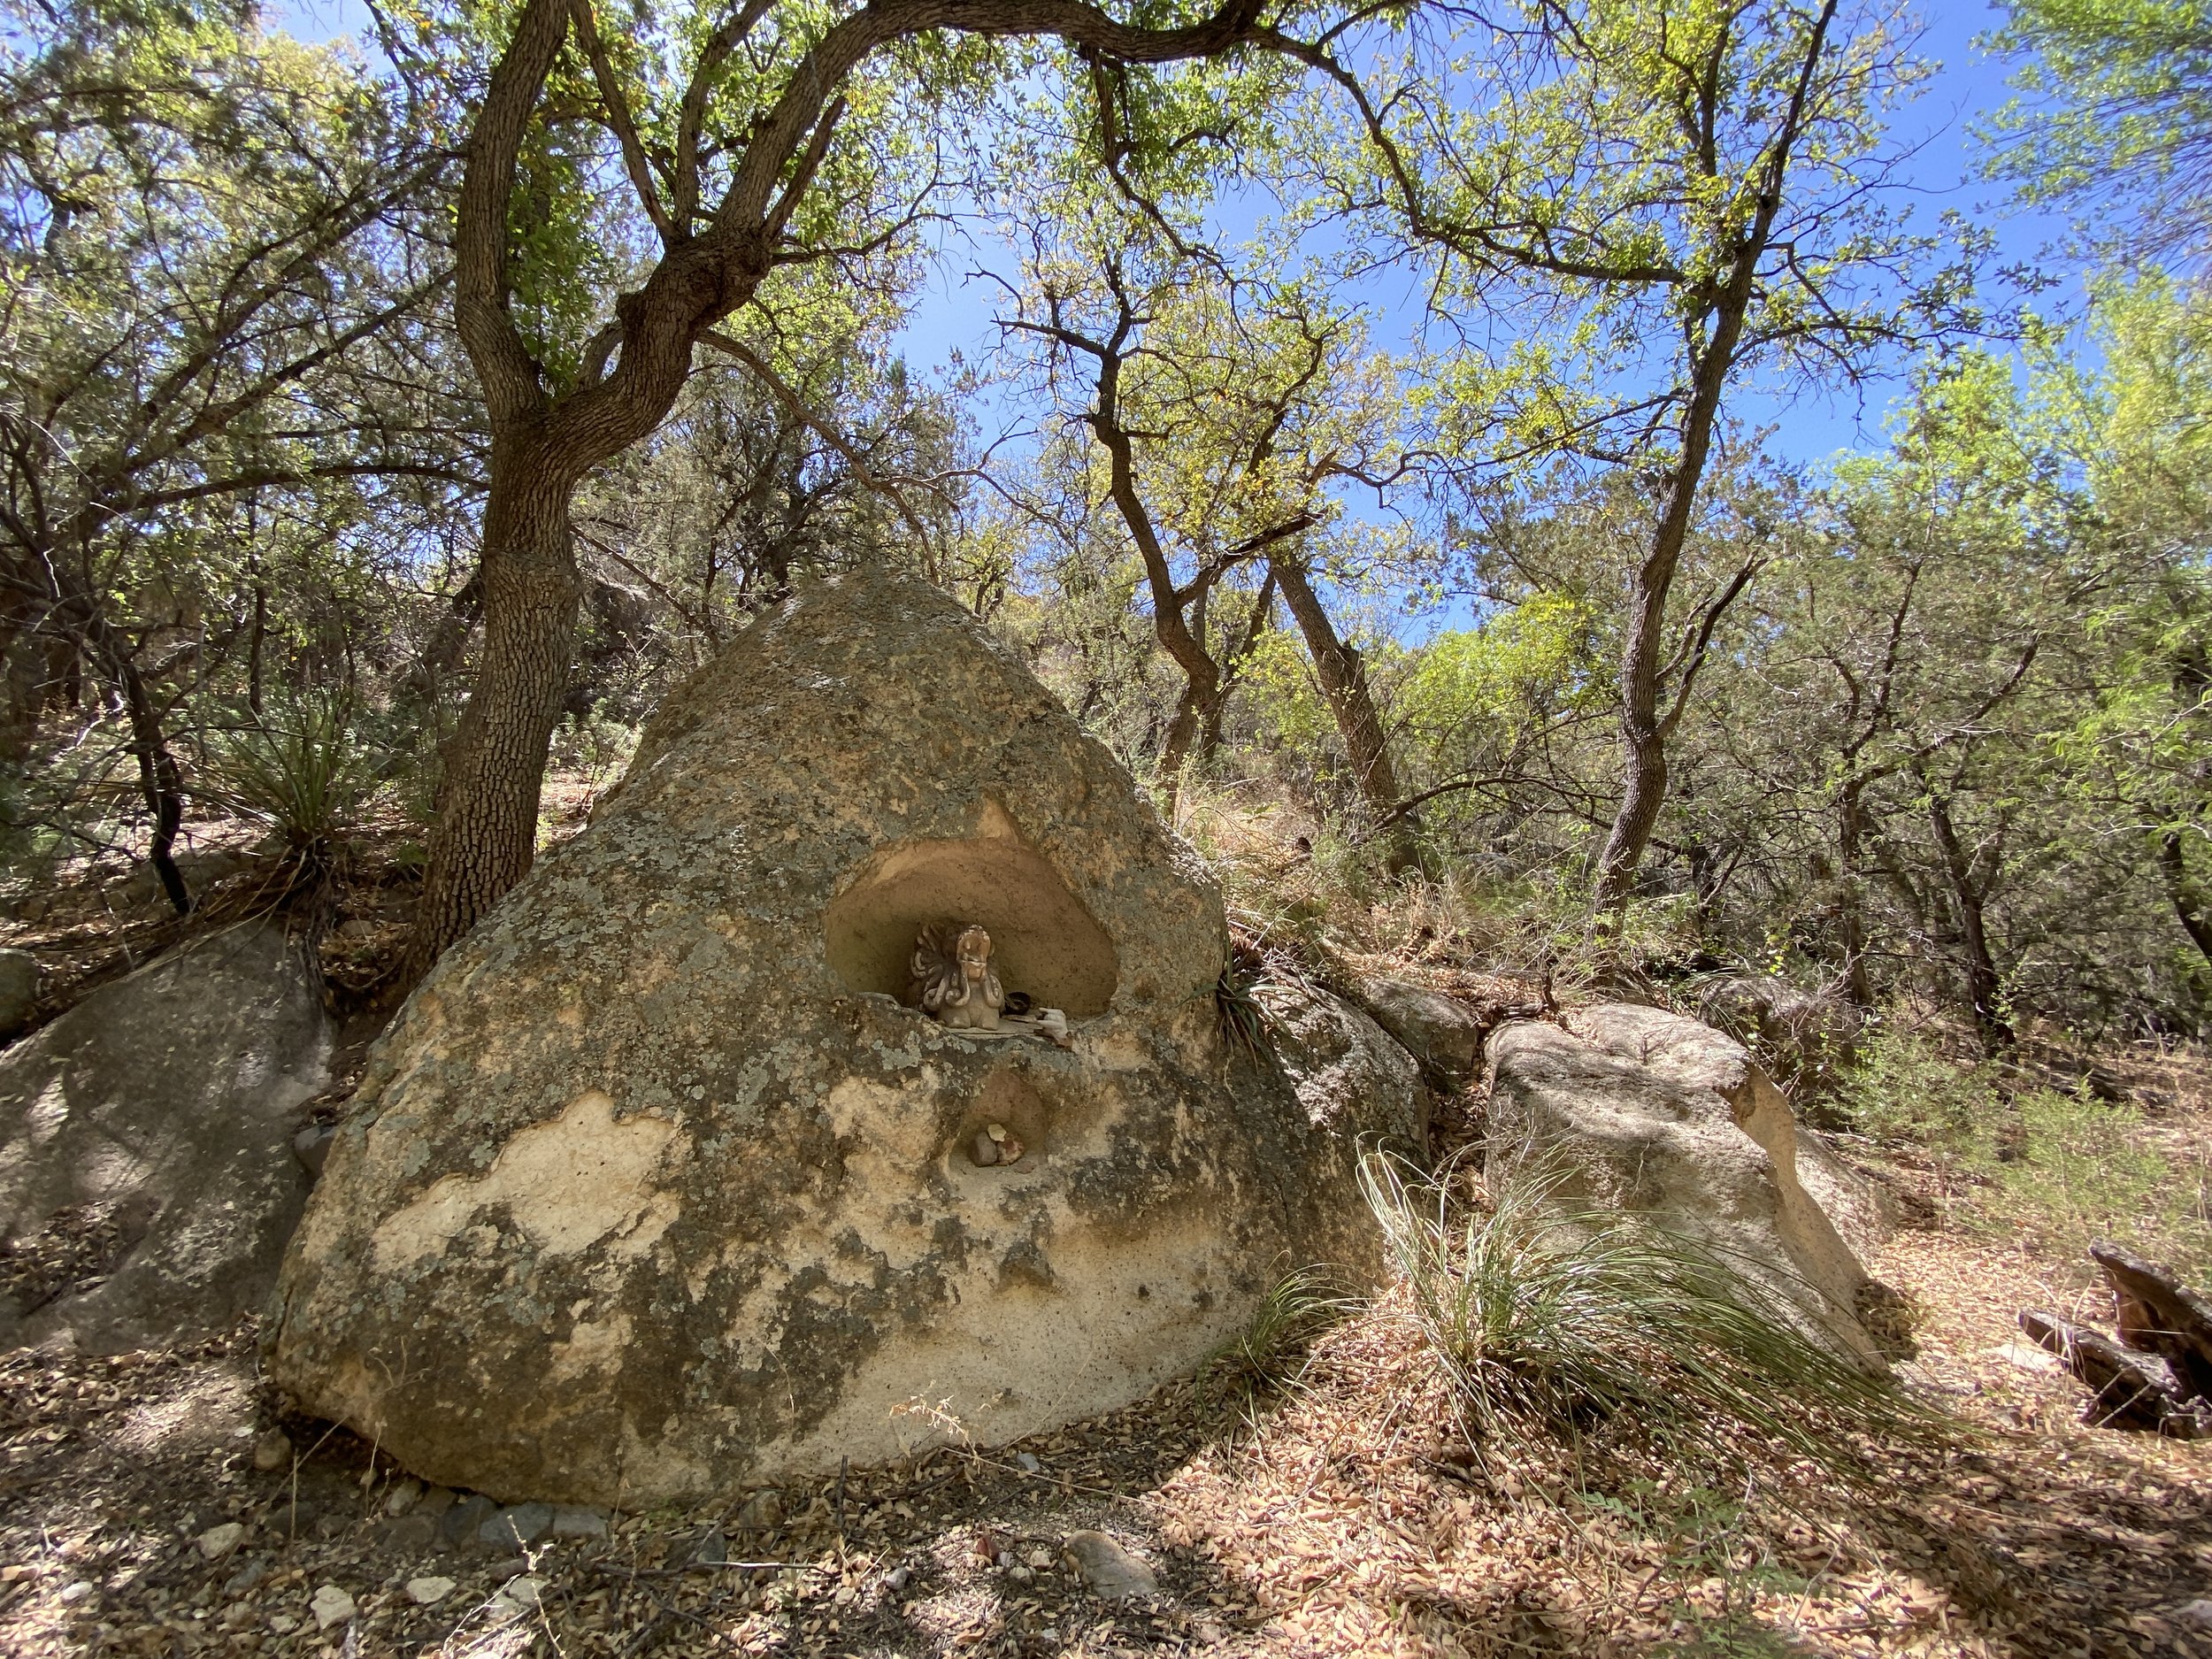
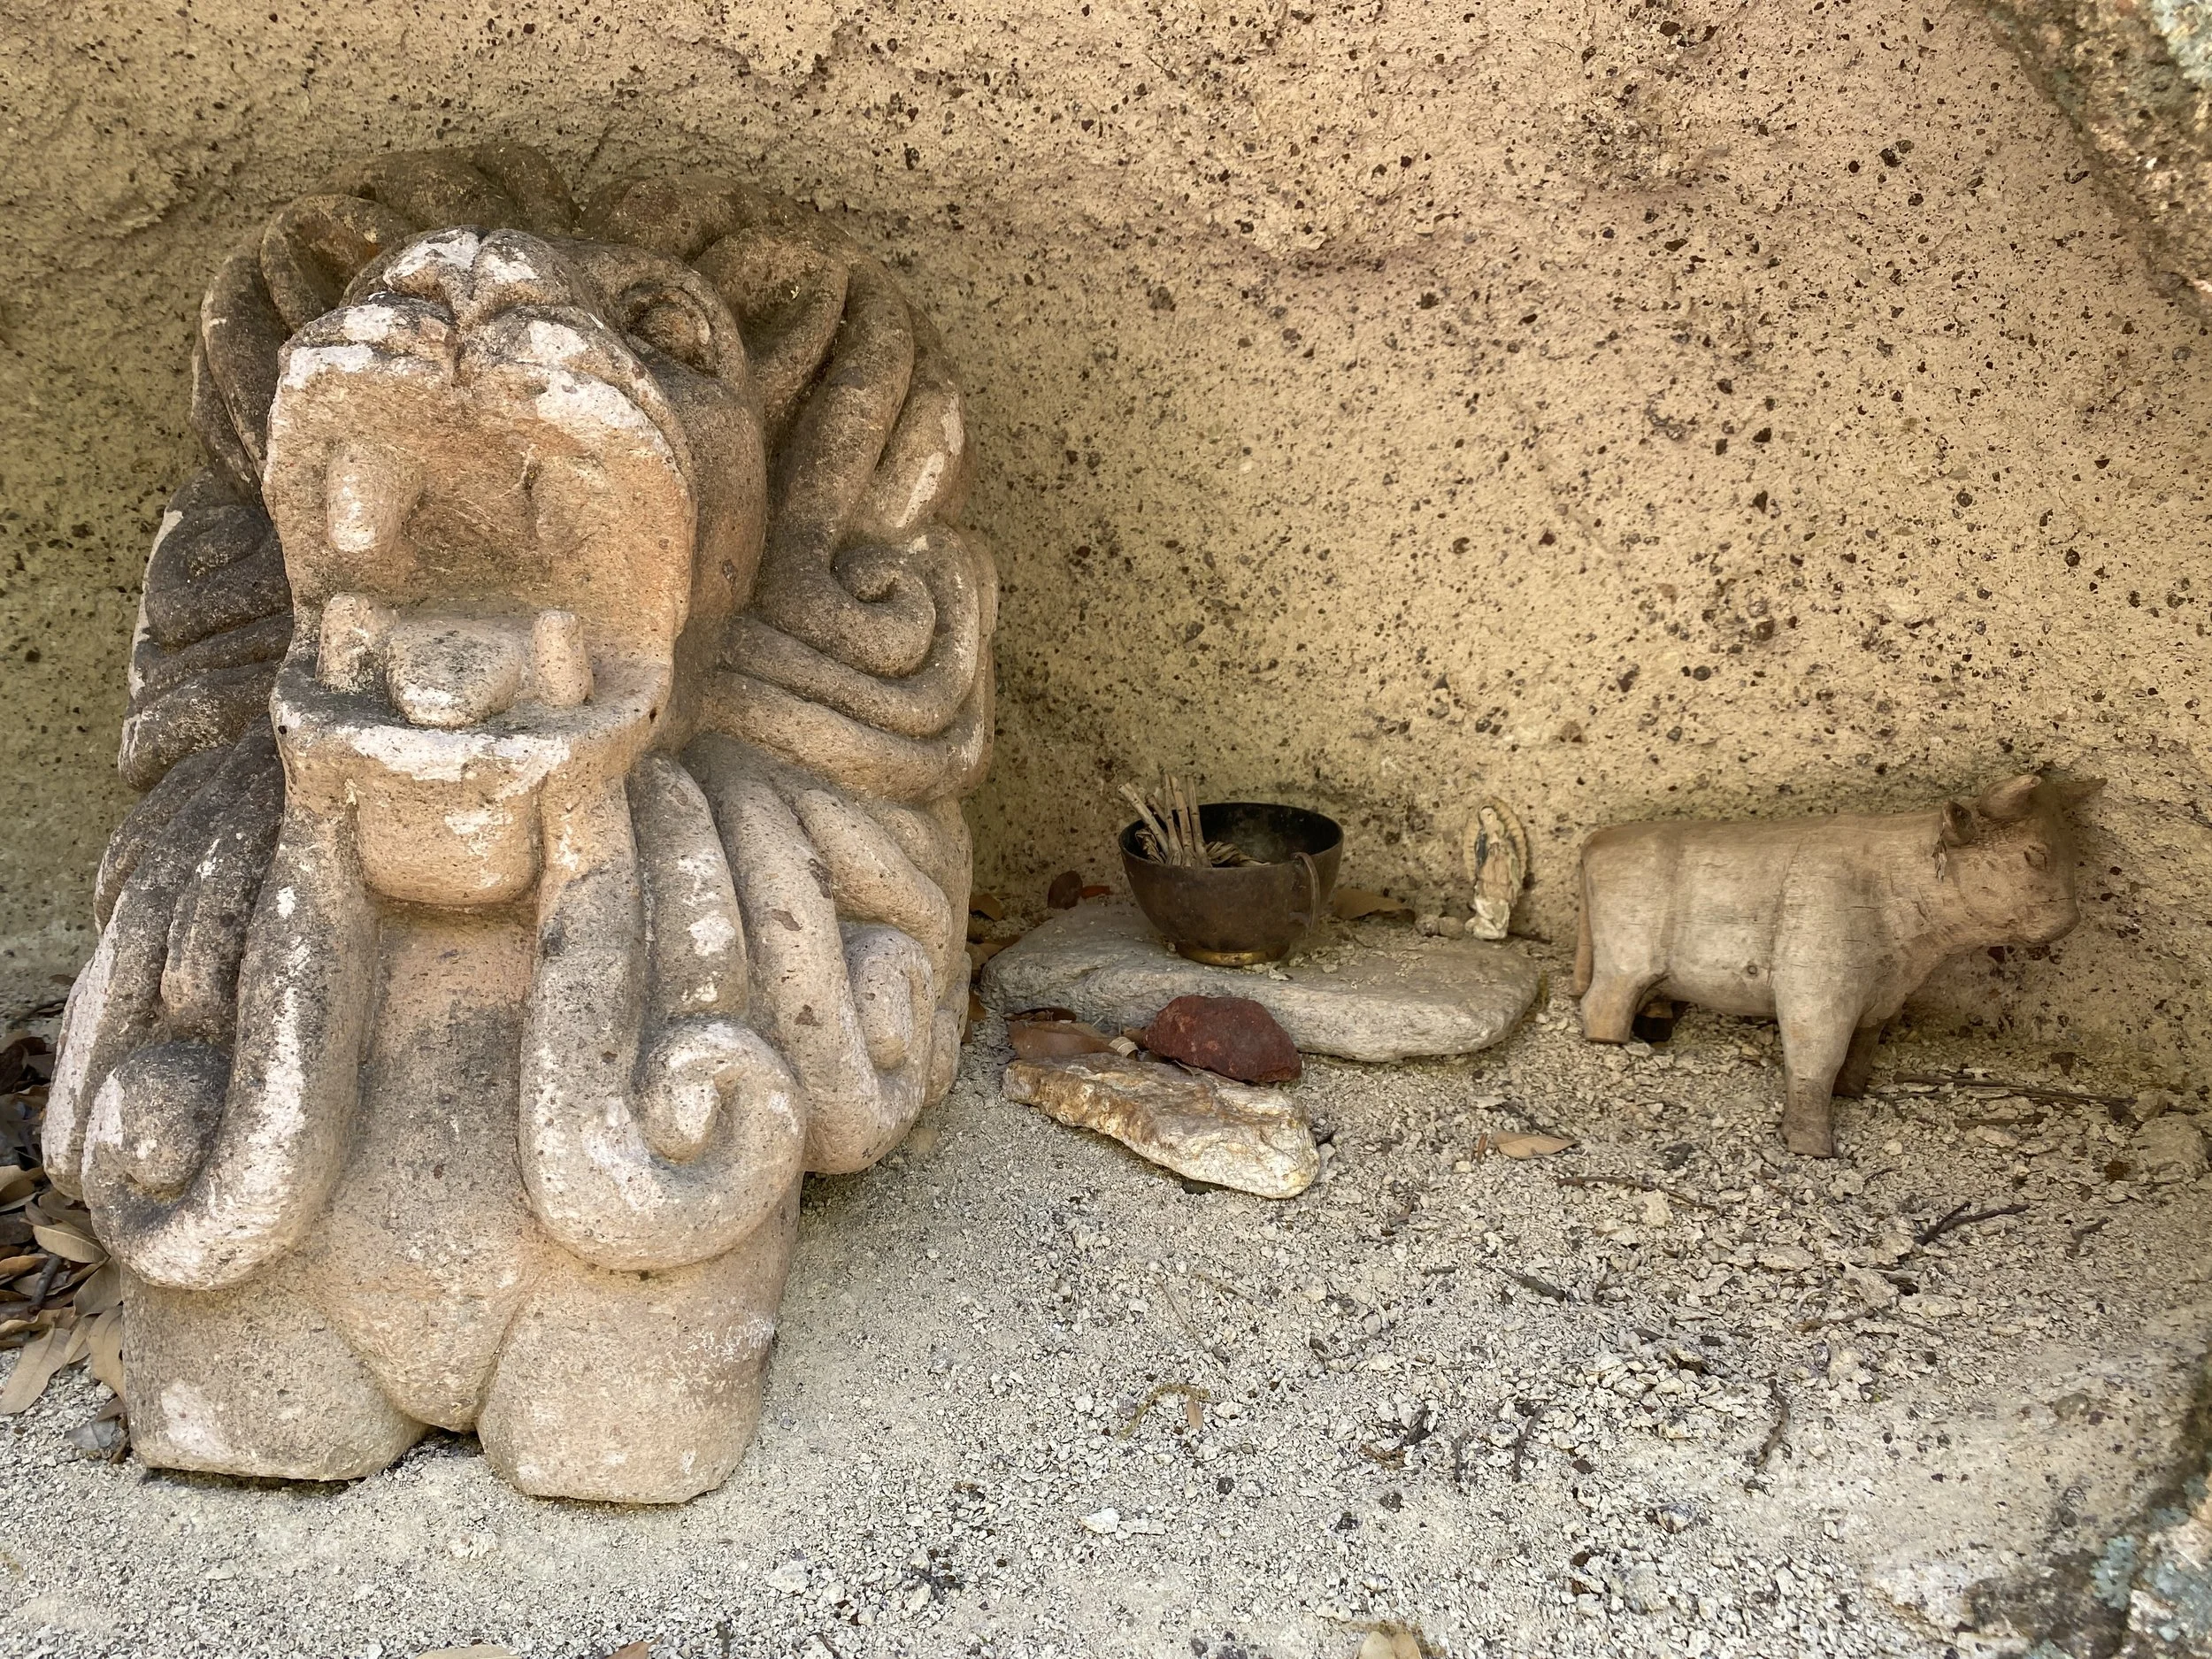
Below is a gallery of images from the canyon, including of the small shrine where Macho B is remembered. I left a small piece of red ochre.

Loving Nature in the Time of COVID

A virtual field trip in June 2020.

A virtual field trip in June 2020.

In January 2020 I was in a planning meeting with colleagues at the University of Arizona’s Desert Laboratory on Tumamoc Hill, where I am coordinator for the Art and Science Program.

Someone suggested that we start offering online learning experiences, that it was the wave of the future for all universities (Biosphere 2 already has a robust, impressive lineup).

I smiled, noted the suggestion, and quickly changed the subject. I’ll admit to inwardly rolling my eyes and scoffing in disdain. Online? For nature-oriented learning? Our specialty is teaching science and art through direct field experiences. We teach field sketching, nature journaling, nature writing—all of which relies on being . . . in nature. Online is for people with no soul, no sense of reality, no adventure!

By the end of February I was just finishing up a new book, Nature Journaling for a Wild Life, which was all set to debut in the booth my husband and I have rented for several years at the Tucson Festival of Books in mid-March. We’ve written many books on natural history, outdoor adventure, and Southwestern short stories, and always do well at the festival and meet many readers and make new friends. 

With this new book I was excited to sing the praises of learning to practice “intentional curiosity” as the core of nature journaling: to ask questions, to dig deeper, to focus one’s mind both intently and intentionally. In the book I suggest that we learn about nature by learning to see, not just look. By drawing to learn (not learning to draw), we also succeed in practicing a very satisfying and healing kind of meditation.

I had the booth prepped; new posters and promotions printed; talks planned; and looked forward to a busy summer already filled with sold-out nature workshops, events, and adventure guiding gigs . . . and then. COVID. 

Cancellations. Lockdown. Income zero, overnight.

In the first month it was just pretty much being stunned, glued to the computer reading horror stories, watching our country fail. 

But then a funny thing happened. My book sales took off. People were desperate for something to bring them inner peace, to take them away from these horrors.

Membership in the Facebook group The Nature Journal Club grew from 9,000 to 15,000 in just a month and a small group of us started offering fellow members Zoom “meet ups” to nature journal online. We had no idea what we were doing but just jumped in with crude tutorials and demonstrations. I figured out how to make a jive document camera with my iPad to demonstrate live sketching and watercolor.

Interest exploded. Soon our little club gatherings format was too small, so I started offering free online workshops on Zoom through my own business, the Field Arts Institute on our website, ExploringOverland.com.

Not happy with just “show and tell,” I started working with a friend who is the field program coordinator for Stanford University’s School of Earth Energy and Environmental Sciences. We developed a fun way to take our students on virtual field trips using the latest 360-degree viewer experiences either through university resources (ASU and University of Worcester in the UK have excellent ones) or the new Google Earth tours.

Ryan and I took students on field trips to Tuolumne Meadow in the Sierras and the Lake District National Park in northern England. Then Ryan got busy in his online teaching for Stanford, so I continued on my own and have since taken students on field sketching and nature journaling field trips to Sabino Canyon, the Dragoon Mountains, Yellowstone National Park, Botswana, Brazil, Alberta, and Australia.

IMG_3386.jpg

As many as 150 people have registered for my virtual field trips, joining from all over the world. This never could happen in person—this meeting of like-minded people just for a morning, to enjoy a wild place together, learning about plants and geology and wildlife and conservation issues.

A group of 300 middle school students (four classes in one school) used my book, which I gave them free in PDF form, as their text book for the first virtual “BioArt” fusion class and it was a huge success: kids in Boston learning to sketch leaves and observe birds and ask questions about nature they never even thought about. 

IMG_3144.JPG

On Summer Solstice, a group of people in The Nature Journal Club even organized a global nature journaling event, with people from all corners of the earth measuring the sun’s arc throughout the day, sketching diagrams, and sharing them on Zoom the next day. We had a father and son in South Africa comparing their pages with a woman in Ontario, and a family in India showing their results in comparison to someone’s observations in Brisbane.

In July and early August I taught 30 people beginning nature journaling online through the Natural History Institute, with students from all four corners of the U.S.

I don’t think any of this would have come to pass if not for COVID.

And as much as I have come to love this global reach, there is one aspect I had not counted on that took me by surprised and brought me to tears. I had several people let me know that they loved the virtual field trips because they are disabled, and could never do these adventurous “hikes” and safaris in the reality that is their life.

And thus I’ve spun 180 degrees, and learned to not just accept teaching Nature in the Time of COVID, I now love it. I think it is here to stay, and I’m glad.

Will it replace in-person nature explorations? No, not a chance. And best of all I think it will encourage many thousands—hopefully tens of thousands—to learn to love nature, and that means more will want to see it protected. Mission accomplished.

Work space face lift

IMG_3203.JPG

Thank you dear husband Jonathan for hanging the new oak shelves to get my work desk more organized—20 years of field notes, and some of my earth treasures from explorations around the globe. Also makes a much neater place from which to teach my field arts workshops! Who else loves to collect rocks, feathers—even dirt!—on their journeys?

Registration opens for nature journaling workshop with the Natural History Institute - July 31-Aug 2, 2020

J-and-R-Hanson-Marble-Cyn-5-17-1040087.jpg

Join me and the Natural History Institute for a multi-day workshop exploring nature through field journals—all live online, including unique virtual field trips and your own field experiences.

Friday, July 31 – 5:30 pm to 7 pm

Saturday, August 1 – 9 am to 2:30 pm

Sunday, August 2 – 1 pm to 3 pm

Saturday, August 8 – 10am to 11 am check-in

$110 USD

Keeping a nature journal or field journal can both deepen your connections to the natural world and help you learn more about it. Neither science education nor art training is needed—you will develop the skills of a naturalist and a field sketch-artist along the way.

This 4-session class will introduce the tools and processes of keeping a nature journal, with instructor Roseann Hanson. There will be an optional 1-hour check-in the following Saturday as well. Sessions will be recorded, for review and if you miss a day.

“Your observations, questions, and reflections will enrich your experiences and develop gratitude, reverence, and the skills of a naturalist . . . If you train your mind to see deeply and with intentional curiosity . . . the world will open before you.” - John Muir Laws, artist, naturalist, and author

In this class we will learn how to practice “intentional curiosity” as the core of nature journaling: to ask questions, to dig deeper, to focus our minds both intently and intentionally.

The class will include:

  • The nuts-and-bolts of journal-keeping (paper and ink types, archival systems, how to make entries that you can refer to later, laying out pages, prompts to jump-start observations, and tips on researching science questions sparked by your observations).

  • Easy tips that enable anyone to get started sketching and painting. Roseann will help free you from your inner critic and start sketching and painting. Art in a nature journal is not only lovely to see, but an important component of your skillset because the very act of drawing and painting something from life involves incredibly intense observation. Your brain is wholly occupied by only that thing you are observing and drawing—it is a kind of meditation that results in new insights, deeper understanding, and even reverence and gratitude.

  • Optional supplies package and book add-ons, mailed to you in advance, see below.

Instructor Roseann Hanson, who has been keeping a nature journal for more than 30 years, will be your guide on the journey to becoming a naturalist, nature journalist, and artist.

Optional supplies: Students may purchase my book, Nature Journaling for a Wild Life , which includes blank journaling pages, and Minimalist Paint Kit and other supplies prior to the class.

TO REGISTER:

Call or email the Natural History Institute 

(928) 863-3232, info@naturalhistoryinstitute.org

Metadata 101: Weather

IMG_2780+copy.jpg

As I write in my book, Nature Journaling for a Wild Life, your field journal or nature journal is so much more than “just pretty pictures.” You record a great deal of information about the world around you—and that information I call “nature data.” This includes observations about what is blooming, what animals you are seeing, what they are doing (feeding, on what? sleeping or flying?), and so on.

There are other data that are also critically important—the “metadata,” which literally means the data that goes with other data. This information includes where you are (latitude / longitude, elevation), the time, sunrise and sunset times, moonrise and moonset times, temperatures, and the weather.

Why do you want all that in your field journal? That information is incredibly useful for giving deeper meaning to what you observe. Say you are exploring in early June in southern Arizona and you note a lot of Ghost Brimstone butterfly activity, which seems a bit early for the region, which is hot and dry during that time and not great for butterflies. You take good notes on their numbers, and do a sketch and describe their appearance. Then you note the weather: cloud cover, cloud types, wind speed and direction, and so forth. If you can, you look up the relative humidity.

Later, you do some research and find out that these butterflies often precede summer thunderstorms in the Sky Island region, moving up from the south with the storms, and sure enough a week later the monsoons start a bit early. Your metadata helps you and others who might access your notes observe that the week before, the relative humidity was in the single digits but when you observed the butterflies, it had jumped up to double digits and there were cumulus clouds on the southern horizon. Bingo: your metadata may help correlate butterfly activity to local storm activity.

I’m often asked about the symbols I use in my field journal for recording the weather—in the image above, note the symbols in the upper right. These are taken from the classic meteorologist shorthand for recording weather at weather stations. When I was in grade school, my dad made me a classic white-louvered weather station and stocked it with high-low thermometer, rain gauge, barometer, and anemometer. We printed out special sheets from the National Weather Service and I instantly became a life-long weather nerd. More than a decade later, when my husband and I became caretakers at a remote wildlife refuge, one of our duties was to record the weather via the weather station (yes, in a white-louvered box) at 4 pm every day. Of course today nearly all official weather stations record the data automatically and upload to servers, but I still love to write mine by hand.

Below is the cheat-sheet I use for the classic weather symbols. I don’t do it exactly as a weather station, just picking and choosing what I want to focus on. I keep a copy of this in the front of my journal. Click on the chart to open / download.

And here are some apps for your phone for looking up other useful metadata:

  • Sunrise / Sunset: Sun n Moon (iPhone), lunasolcal (android)

  • Location: Backcountry Nav (Android); MotionXGPS (iPhone)

  • Weather: MyRadar (iphone, android)

  • Tides: tide alert - NOAA (iphone); tide charts (android)

The National Weather Service has an excellent guide to the symbols and how to use the format for station plots (though you can set it up any way you like for your own data collection, using whatever information you want, or not). Access the page at their website via this link (click on “print version” for a PDF):

https://www.wpc.ncep.noaa.gov/html/stationplot.shtml

You can also create your own page for the front of your journal depicting cloud types and adding their altitudinal ranges and symbols from the charts above. I used Erin Ryan’s Types of Clouds worksheet from SuperTeacherWorksheets.com.

Cloud Types of the Troposphere - Roseann Hanson.jpg
cloud-types-article_WMWFQ.jpg

Visualizing landscapes in 3D, part 2

07+IMG_2711.jpg
IMG_2759+copy.jpg

Because we can't reach our studios and workspaces at the University of Arizona’s Desert Laboratory on Tumamoc Hill, I've been working on multiple ways of visualizing and mapping landscapes (see TumamocSketchbook.com for a 3D cube visualization of Tumamoc, and a previous Field Arts post here on creating a 3D cube of Cave Creek Canyon).

This time I worked on an aerial view, from the north and several thousand feet above Tumamoc Hill but also trying to show the topography and sense of its place on the Earth. Then, looking directly overhead, I used an old-school "hachure" method to show gradients between contours, and handmade walnut ink that is water soluble, to make the shading (I’ll do a future tutorial on my method for creating an accurate hachure-style map). It’s interesting to compare the two viewscapes side-by-side.

I worked from an aerial photograph of Tumamoc Hill, looking south.

I worked from an aerial photograph of Tumamoc Hill, looking south.

Using a mechanical pencil, I sketched the hill and just a few other landscape features, leaving out the city and hills in the background, to maximize the 3D map effect (sterling silver vintage Parker mechanical pencil with HB graphite).

Using a mechanical pencil, I sketched the hill and just a few other landscape features, leaving out the city and hills in the background, to maximize the 3D map effect (sterling silver vintage Parker mechanical pencil with HB graphite).

When I was happy with the proportions and simple marks to show shapes, I inked over the pencil with waterproof ink (Platinum Carbon Black, an archival quality pigment ink, in a refillable cartridge in my vintage Mont Blanc fountain pen).

When I was happy with the proportions and simple marks to show shapes, I inked over the pencil with waterproof ink (Platinum Carbon Black, an archival quality pigment ink, in a refillable cartridge in my vintage Mont Blanc fountain pen).

After I erased the pencil lines, I laid a piece of waxed paper over the drawing (wax-side down) and used a dull pencil to trace just the roadway going from the base up to the top—I wanted to reserve a pale margin over the roadway during the final wa…

After I erased the pencil lines, I laid a piece of waxed paper over the drawing (wax-side down) and used a dull pencil to trace just the roadway going from the base up to the top—I wanted to reserve a pale margin over the roadway during the final watercolor washes, below.

Using a damp brush, I first applied yellow ochre and then, when it was mostly dry, a light brushing of red ochre (from (Greenleaf & Blueberry). Note that my brush strokes are in the direction of the slopes, and that I didn’t extend beyond the ba…

Using a damp brush, I first applied yellow ochre and then, when it was mostly dry, a light brushing of red ochre (from (Greenleaf & Blueberry). Note that my brush strokes are in the direction of the slopes, and that I didn’t extend beyond the base of the hill. The drier brush let me feather the color nicely.

Finally, using dry brush technique and my own Tucson Mountains purple ochre and a dark green blended from yellow ochre and Mayan blue (Greenleaf & Blueberry), I added shading and the suggestion of plants.

Finally, using dry brush technique and my own Tucson Mountains purple ochre and a dark green blended from yellow ochre and Mayan blue (Greenleaf & Blueberry), I added shading and the suggestion of plants.

How to render 3D block maps

IMG_2652.JPG

Cartography is one of the oldest field arts—many ancient petroglyphs might actually be maps (there are several at Twyfelfontein in Namibia).

Here is a step-by-step pictorial on how to render a cool 3D map. I did this one from a photo after a visit to Cave Creek in southeastern Arizona's Chiricahua Mountains. The biggest challenge is pulling the "box" out of the 2D image and envisioning the "cut away" part in a way that works in a 3D cube. Thanks to John Muir Laws for the tutorial in his excellent Laws Guide to Nature Drawing and Journaling.

Study your photo or live landscape and decide where you want to pull out your 3D box. I wanted to be sure to depict the creek, especially the whimsical spillage off the box (idea stolen from Jack Laws). Getting the landscape right in the box is the …

Study your photo or live landscape and decide where you want to pull out your 3D box. I wanted to be sure to depict the creek, especially the whimsical spillage off the box (idea stolen from Jack Laws). Getting the landscape right in the box is the hardest part, and you will probably have to do 4 or 5 tries before it feels right. That's how many it took me on this one! I used this photo for inspiration; from the Friends of Cave Creek Canyon (FOCCC) on Facebook, by Steve Wolfe.

After studying your photo (or live landscape) and deciding where to pull out your 3D box, use pencil to draw a rectangle on your page. with all the corners and "bottom" included.

After studying your photo (or live landscape) and deciding where to pull out your 3D box, use pencil to draw a rectangle on your page. with all the corners and "bottom" included.

Using pencil still, sketch in the upper corners and limits of the landscape within the box. You can see I drew the right-most upper corner too high and fixed it later. Then I added the general creek location and the background.

Using pencil still, sketch in the upper corners and limits of the landscape within the box. You can see I drew the right-most upper corner too high and fixed it later. Then I added the general creek location and the background.

When I was happy with the placement of the landscape elements, I drew over the main parts in pen.

When I was happy with the placement of the landscape elements, I drew over the main parts in pen.

After the pen dries, erase the pencil lines that marked the structure of the box. Then go back with pencil and add details; I roughed in the rock spires, the slopes, where I wanted to make the darker patches of vegetation, and a few symbols for habi…

After the pen dries, erase the pencil lines that marked the structure of the box. Then go back with pencil and add details; I roughed in the rock spires, the slopes, where I wanted to make the darker patches of vegetation, and a few symbols for habitat types. When happy, I finalized in loose pen sketching, keeping the marks fairly light.

The final step was adding the watercolor, making sure to make the farthest mountains darker and warmer blue in tone so they feel like they are receding (instead of making them green or cooler blue). Don't go crazy on the details for something this size and this simple.

I decided to add the clouds and hawk as a fun whimsy.