

If you can’t laugh at yourself, I’ve always said, you should never, ever laugh at anyone else.
So, you think your Zarges cases are stylish?

How about an aluminum-clad explorer’s trunk from Louis Vuitton?
Apparently only a few of these trunks were produced in 1892, and of that few only two known examples survive. This one was recently auctioned by Christie’s for the astounding figure of £160,000 ($206,000). For that price you could buy 412 similarly sized Zarges cases.
But they wouldn’t say Luis Vuitton on the label.
Apparently this one spent much of its life in the UK basement of a family who had no idea of its value.
More here.
New MAXTRAX Xtreme

It’s well-known that I’m a fan of the original MaxTrax, and have defended them against cut-price copies. I’ve also noted that I refuse to use the company’s all-caps MAXTRAX spelling, which as a grammarian I find wincingly annoying (I compromise with MaxTrax). Now . . . sigh . . . the company is torturing me again with their new product, named the Xtreme. Ugh.
I grit my teeth and continue, because the new product, a prototype of which I received recently, looks to be a significant leap in the technology of composite recovery mats. Why? Because the teeth, or studs, of the new mat are made from hard-coated aluminum rather than molded-in nylon. And . . . they are user-replaceable.
As anyone who has used them knows, the salient disadvantage of composite recovery mats is that, if you allow too much wheel spin while attempting to climb onto them, the studs can melt, significantly and permanently reducing the effectiveness of the product. Recent mats using harder plastic studs helped but did not cure the issue. The Xtreme might just do so.
The composite base of the new mat is the same reinforced nylon material as the original MaxTrax, which I and many other testers have found to be superior to the polyethylene used by some lower-priced competitors. There is also extra reinforcement in the bottom webbing. Combining that with the aluminum studs should provide vastly improved durability.
As you might expect, the Xtreme is a bit heavier than the standard MaxTrax—8.9 versus 7.4 pounds each. But at 18 pounds per pair that’s still lighter than even perforated aluminum sand mats.
They are not, however, cheaper. Retail on the Xtreme will be $449 a pair. I remember being scandalized at the idea of the original $300 MaxTrax—until I used them. I suspect our perspectives will continue to evolve as long as such price increases are backed up by such meaningful improvements.

More on the new Land Rover Defender.

No, we don’t know what it looks like yet, aside from the heavily camouflaged mule pictured here (ignore the various Photoshopped images of the long-condemned DC100 still floating around).
There were rumors the unveiling would happen before the New Year, but it was not to be.
However, we are learning more about the vehicle, in particular its potential as the “most capable Land Rover ever made for off-road driving,” as the factory is claiming. Note the image above, from the excellent Alloy and Grit magazine (a much-welcome successor to the creepy Land Rover Lifestyle publication of a few years ago).
If the mule’s dimensions are more or less production-ready and the magazine’s measurements are correct, the new Defender will have impressive approach and departure angles. Those shown here, on what appears to be the long-wheelbase version (still to be called the One Ten, I understand), compare very favorably with the Jeep Wrangler Rubicon Unlimited, at 44º and 40º.
Another tidbit concerns the possible inclusion of a central tire inflation system, which would be a hugely significant feature. Note the intriguing functions indicated here, such as Puncture Assist Mode and, interestingly, Recovery Mode.

I note that the Recovery Mode only appears to go down to 1.2 bar, or 17.5 psi. That’s low enough for much off-pavement work, but not low enough for soft sand, where 1 bar or below is frequently needed. Still, it would be an extremely useful feature if it shows up even as an option.
These tidbits definitely seem to indicate that Land Rover is indeed intent on making the new Defender very capable. But that capability will inevitably be technology-based, with sophisticated traction-control systems managing power to the all-independent suspension under a unibody platform shared with the current Discovery. We need to keep in mind that the new Defender will be an entirely different vehicle than its predecessor.
A better Hi-Lift base plate.
Let’s be honest: You can make a perfectly functional base plate for a Hi-Lift jack by gluing together a couple of foot-square pieces of 3/4-inch plywood. If you want to get fancy you can add a third layer of 1/2-inch plywood with a cutout for the jack’s foot, to help stabilize it. This is exactly what I used for years.
However, the plywood got chewed up pretty quickly, and once I used it in mud it started delaminating. So I switched to one of the ubiquitous red plastic bases. It was (and is) an excellent product, and mine has held up through not only personal use but numerous training classes as well.
My only real issue with the red base is its bulk, which is significant if you’re storing it in the back of an FJ40. It takes up an inordinate amount of volume for a single-function implement.
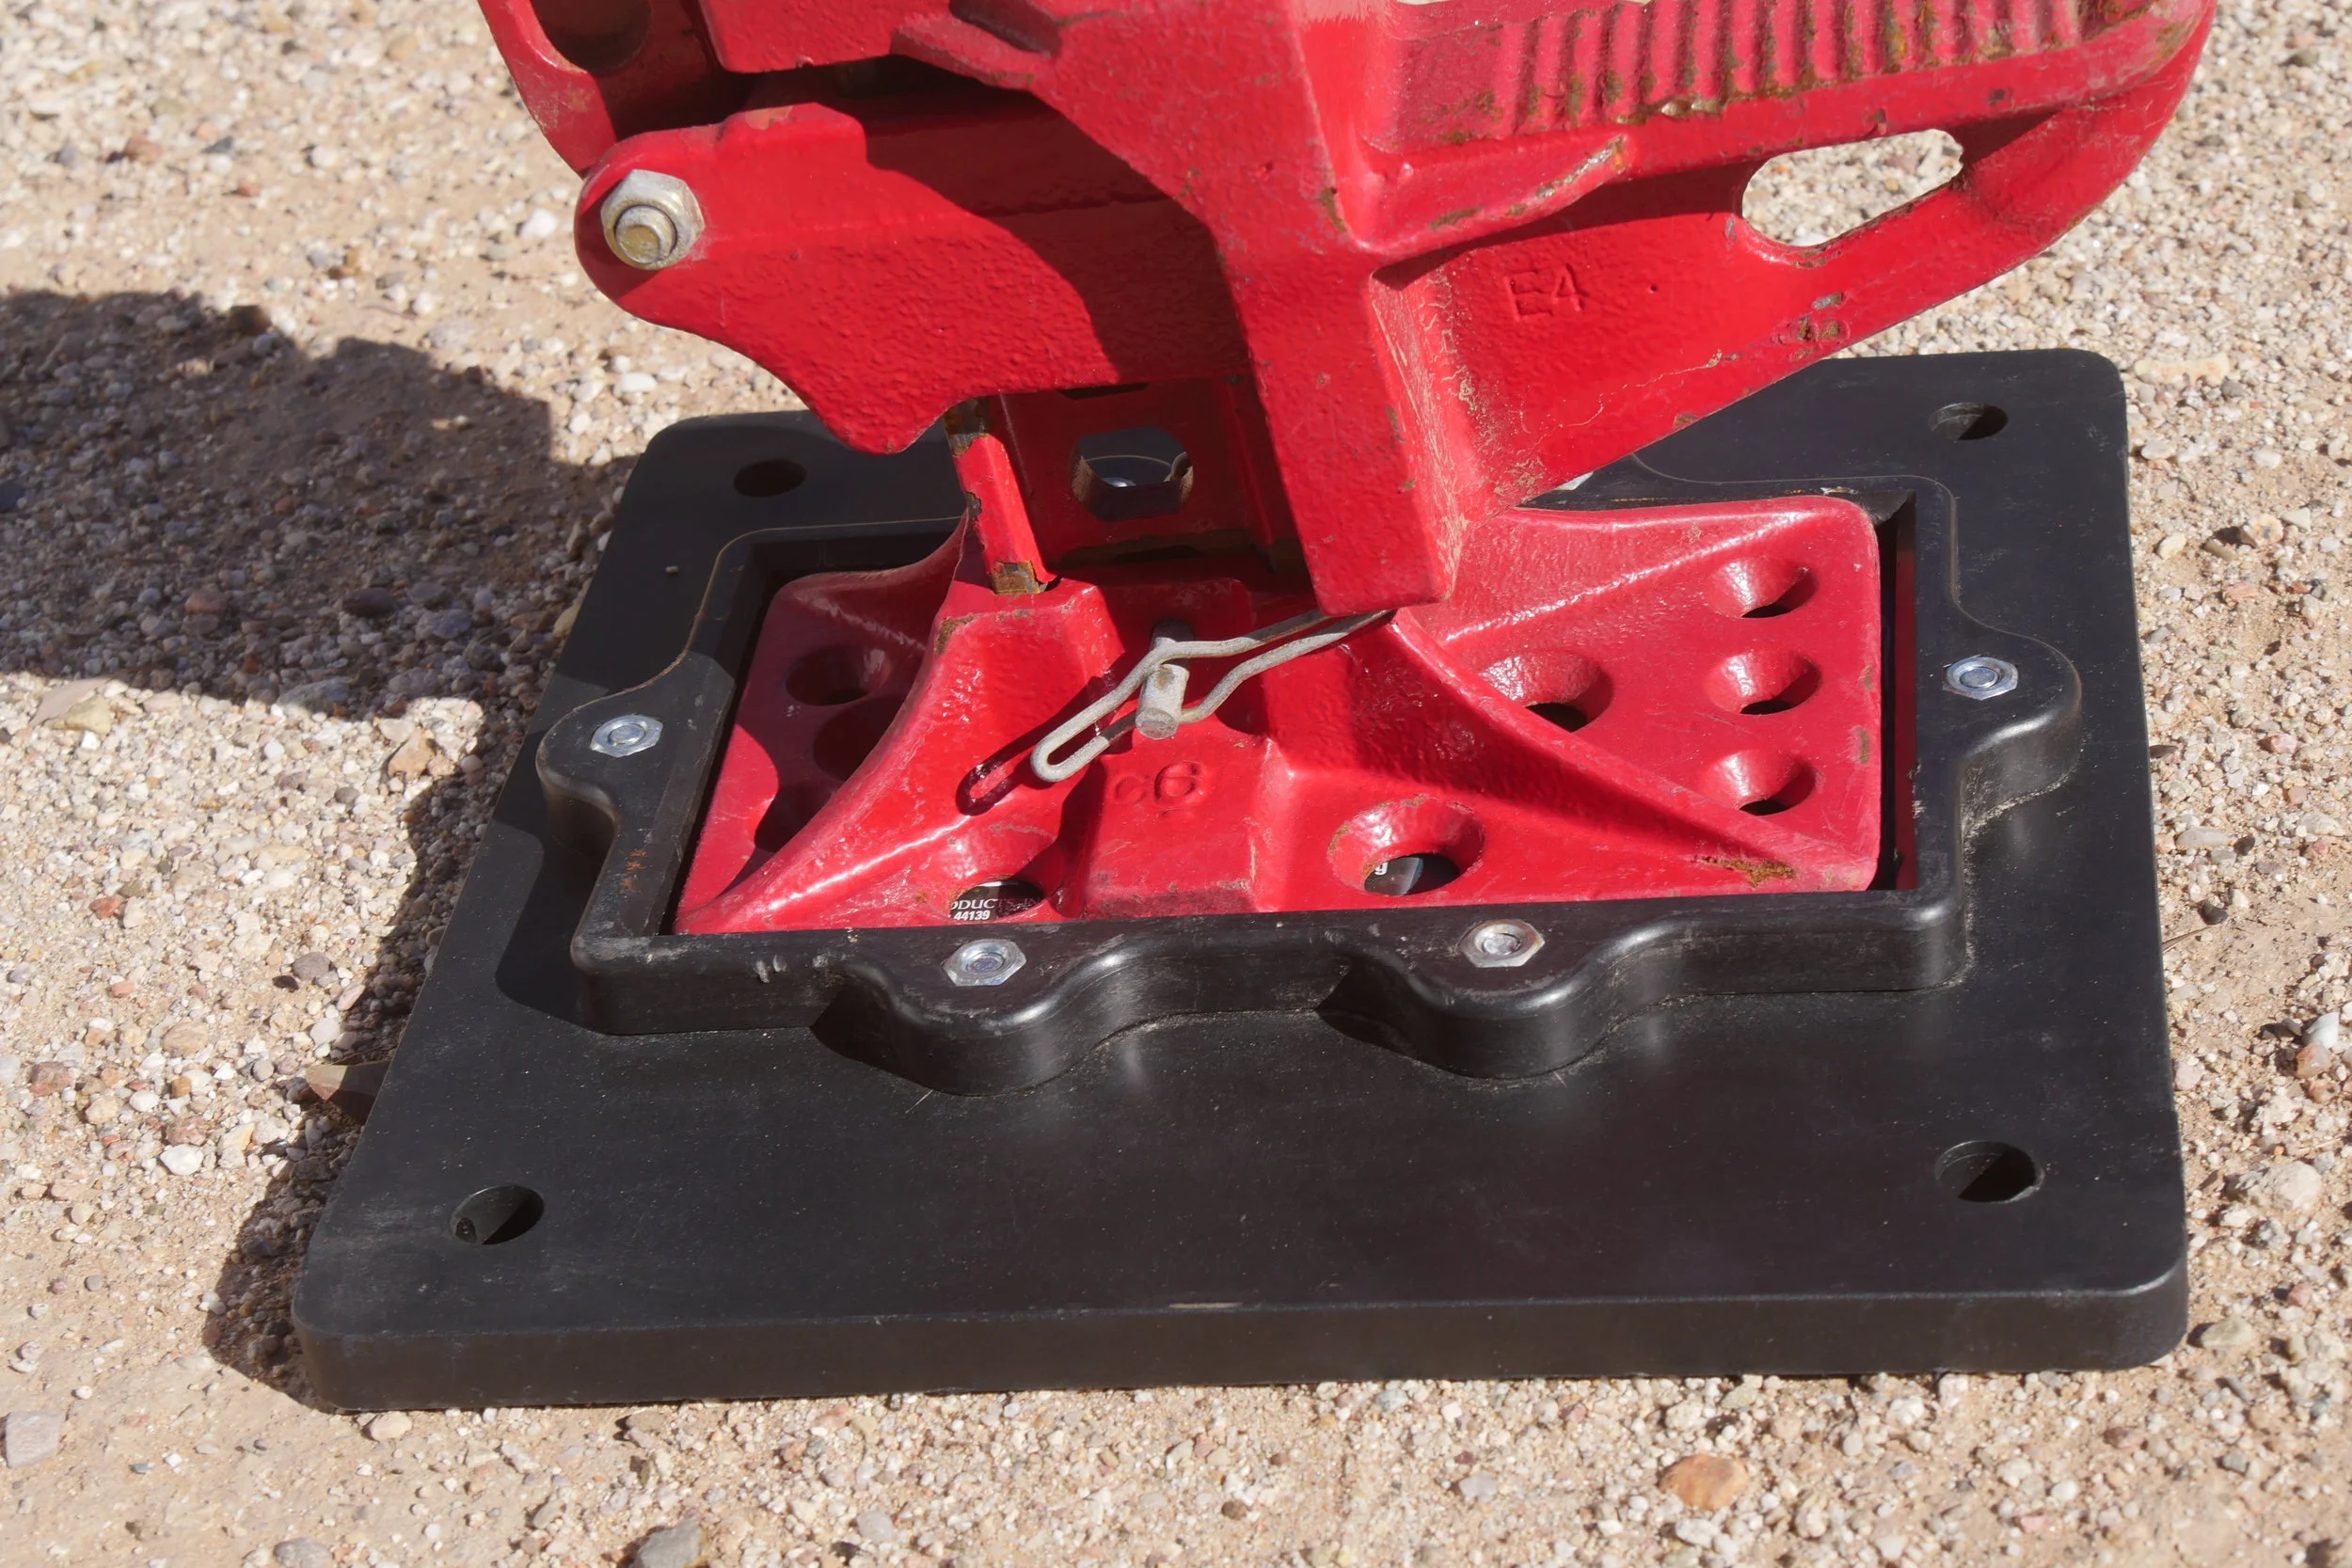
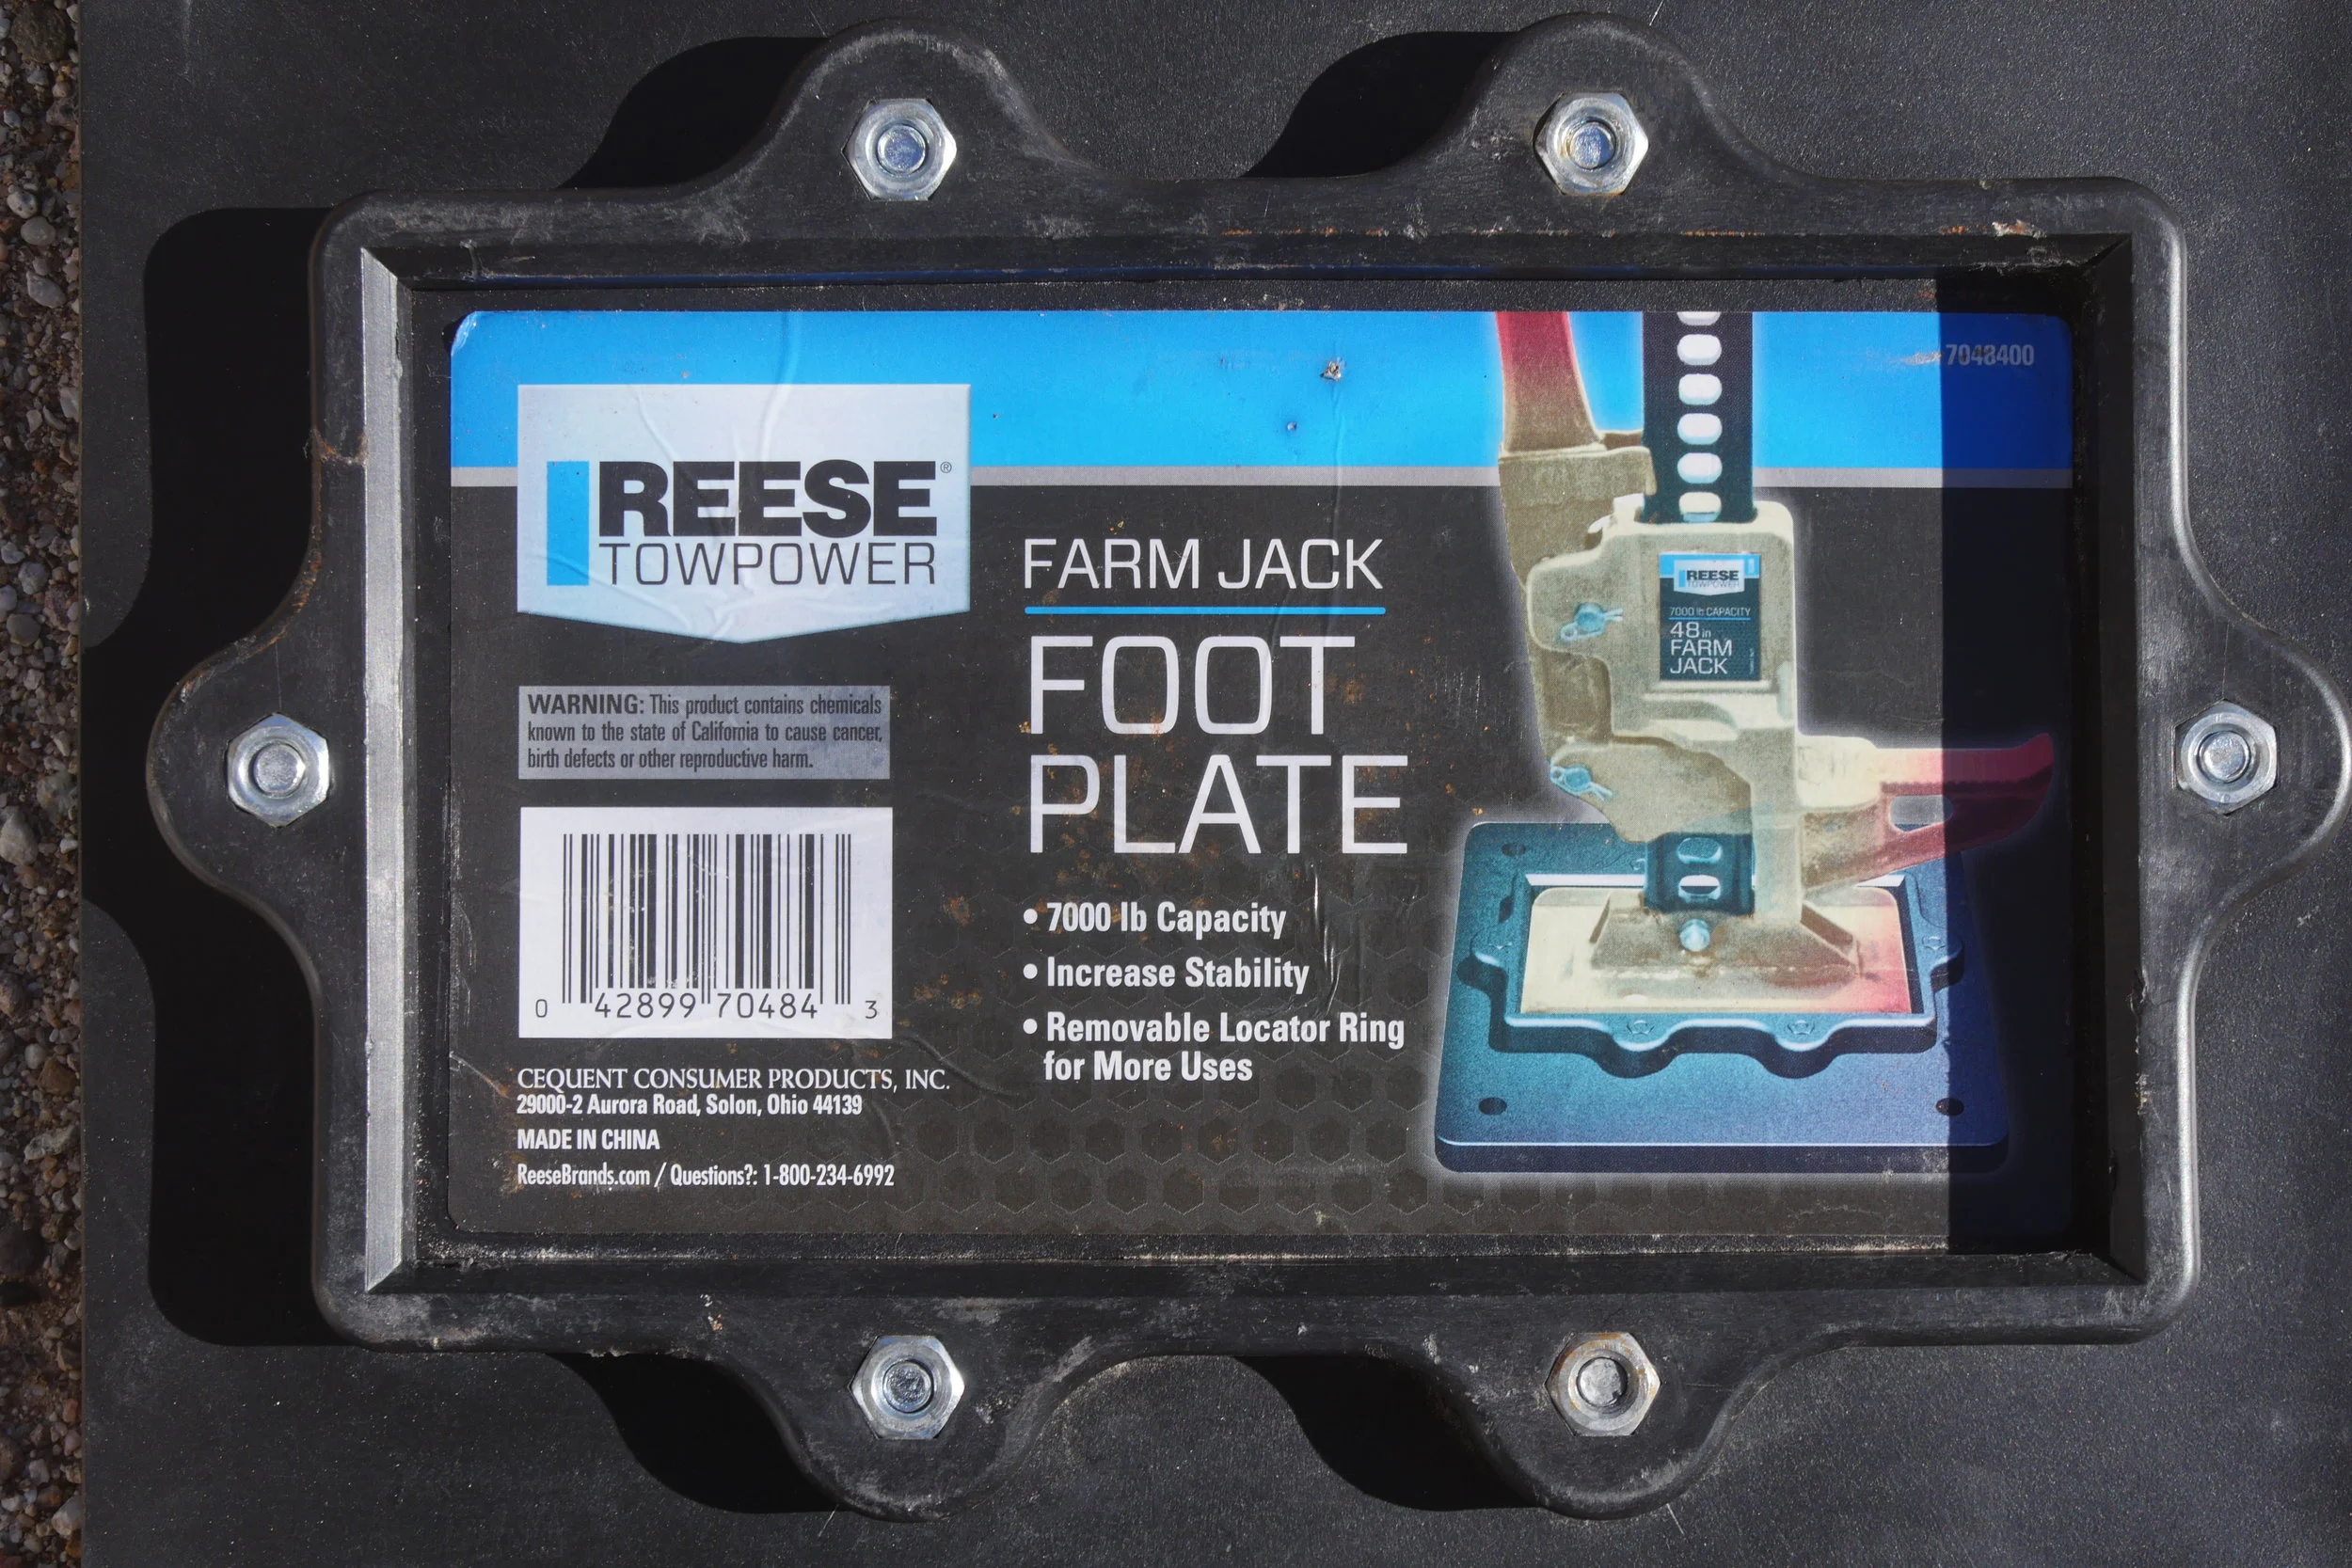
While shopping for some items we needed for Expo East this November at one of the Tractor Supply Company (TSC) stores, I chanced upon a solution in the form of the Reese Farm Jack Foot Plate. Constructed of thick polypropylene, it’s far more compact than the red base, yet boasts a 7,000-pound capacity. I put it to an unusual but effective trial at the show: Our 20-foot cargo trailer, which hauls all the Expo equipment and grosses about 10,000 pounds, had to be parked where the tongue jack would be in very soft mud. So I placed the Reese plate under the tongue’s foot, lowered probably 2,500-pounds plus onto it—and left it there for the duration of the show. It emerged unscathed and unwarped.
The Reese plate is one-third the height of the red base but seemes even thinner, it’s so easy to stash. And I like the low-profile black color, too. This is my new standard-equipment Hi-Lift base plate. About $25 from TSC or Amazon.
The only three knots you need for paracord lashing

In my opinion nothing beats a ratchet strap for securing cargo. Cheaper cinch straps—even the superior style with the roller buckle—just can’t be cinched tight enough to reliably secure heavier and potentially dangerous items.
But it’s not always possible to use ratchet straps. Often you’ll simply run out of your supply, or the hooks won’t fit where you need to secure a load. Sometimes with a bulky roof-rack load you might need to run your lashing back and forth a dozen times to prevent flapping.
Time for the paracord.
Parachute cord has come a long way since its original application. Now you can find it everywhere from those ubiquitous “survival” bracelets and wrapped “tactical” knife handles to—ready?—the Hubble Space Telescope, where astronauts from the space shuttle Discovery used 35 feet of it to resecure loose thermal blankets protecting the instrument.
That ubiquity has spawned a lot of substandard variations of the authentic product. Genuine mil-spec nylon paracord will advertise its conformity to military standard C-540H Type III (“550” paracord, indicating its rated breaking strength in pounds), or C-540H Type IV (“750” paracord, again indicating breaking strength). If you pull apart the end of a length of paracord you can confirm authenticity by counting the individual cords within the kernmantle sheath. Genuine mil-spec paracord will have between seven and 11 of them, and each cord will comprise three twisted strands (cheaper paracord might have fewer cords made from only two strands). On genuine mil-spec paracord one of the inner cords will be a contrasting color; this is a marker for the manufacturer.
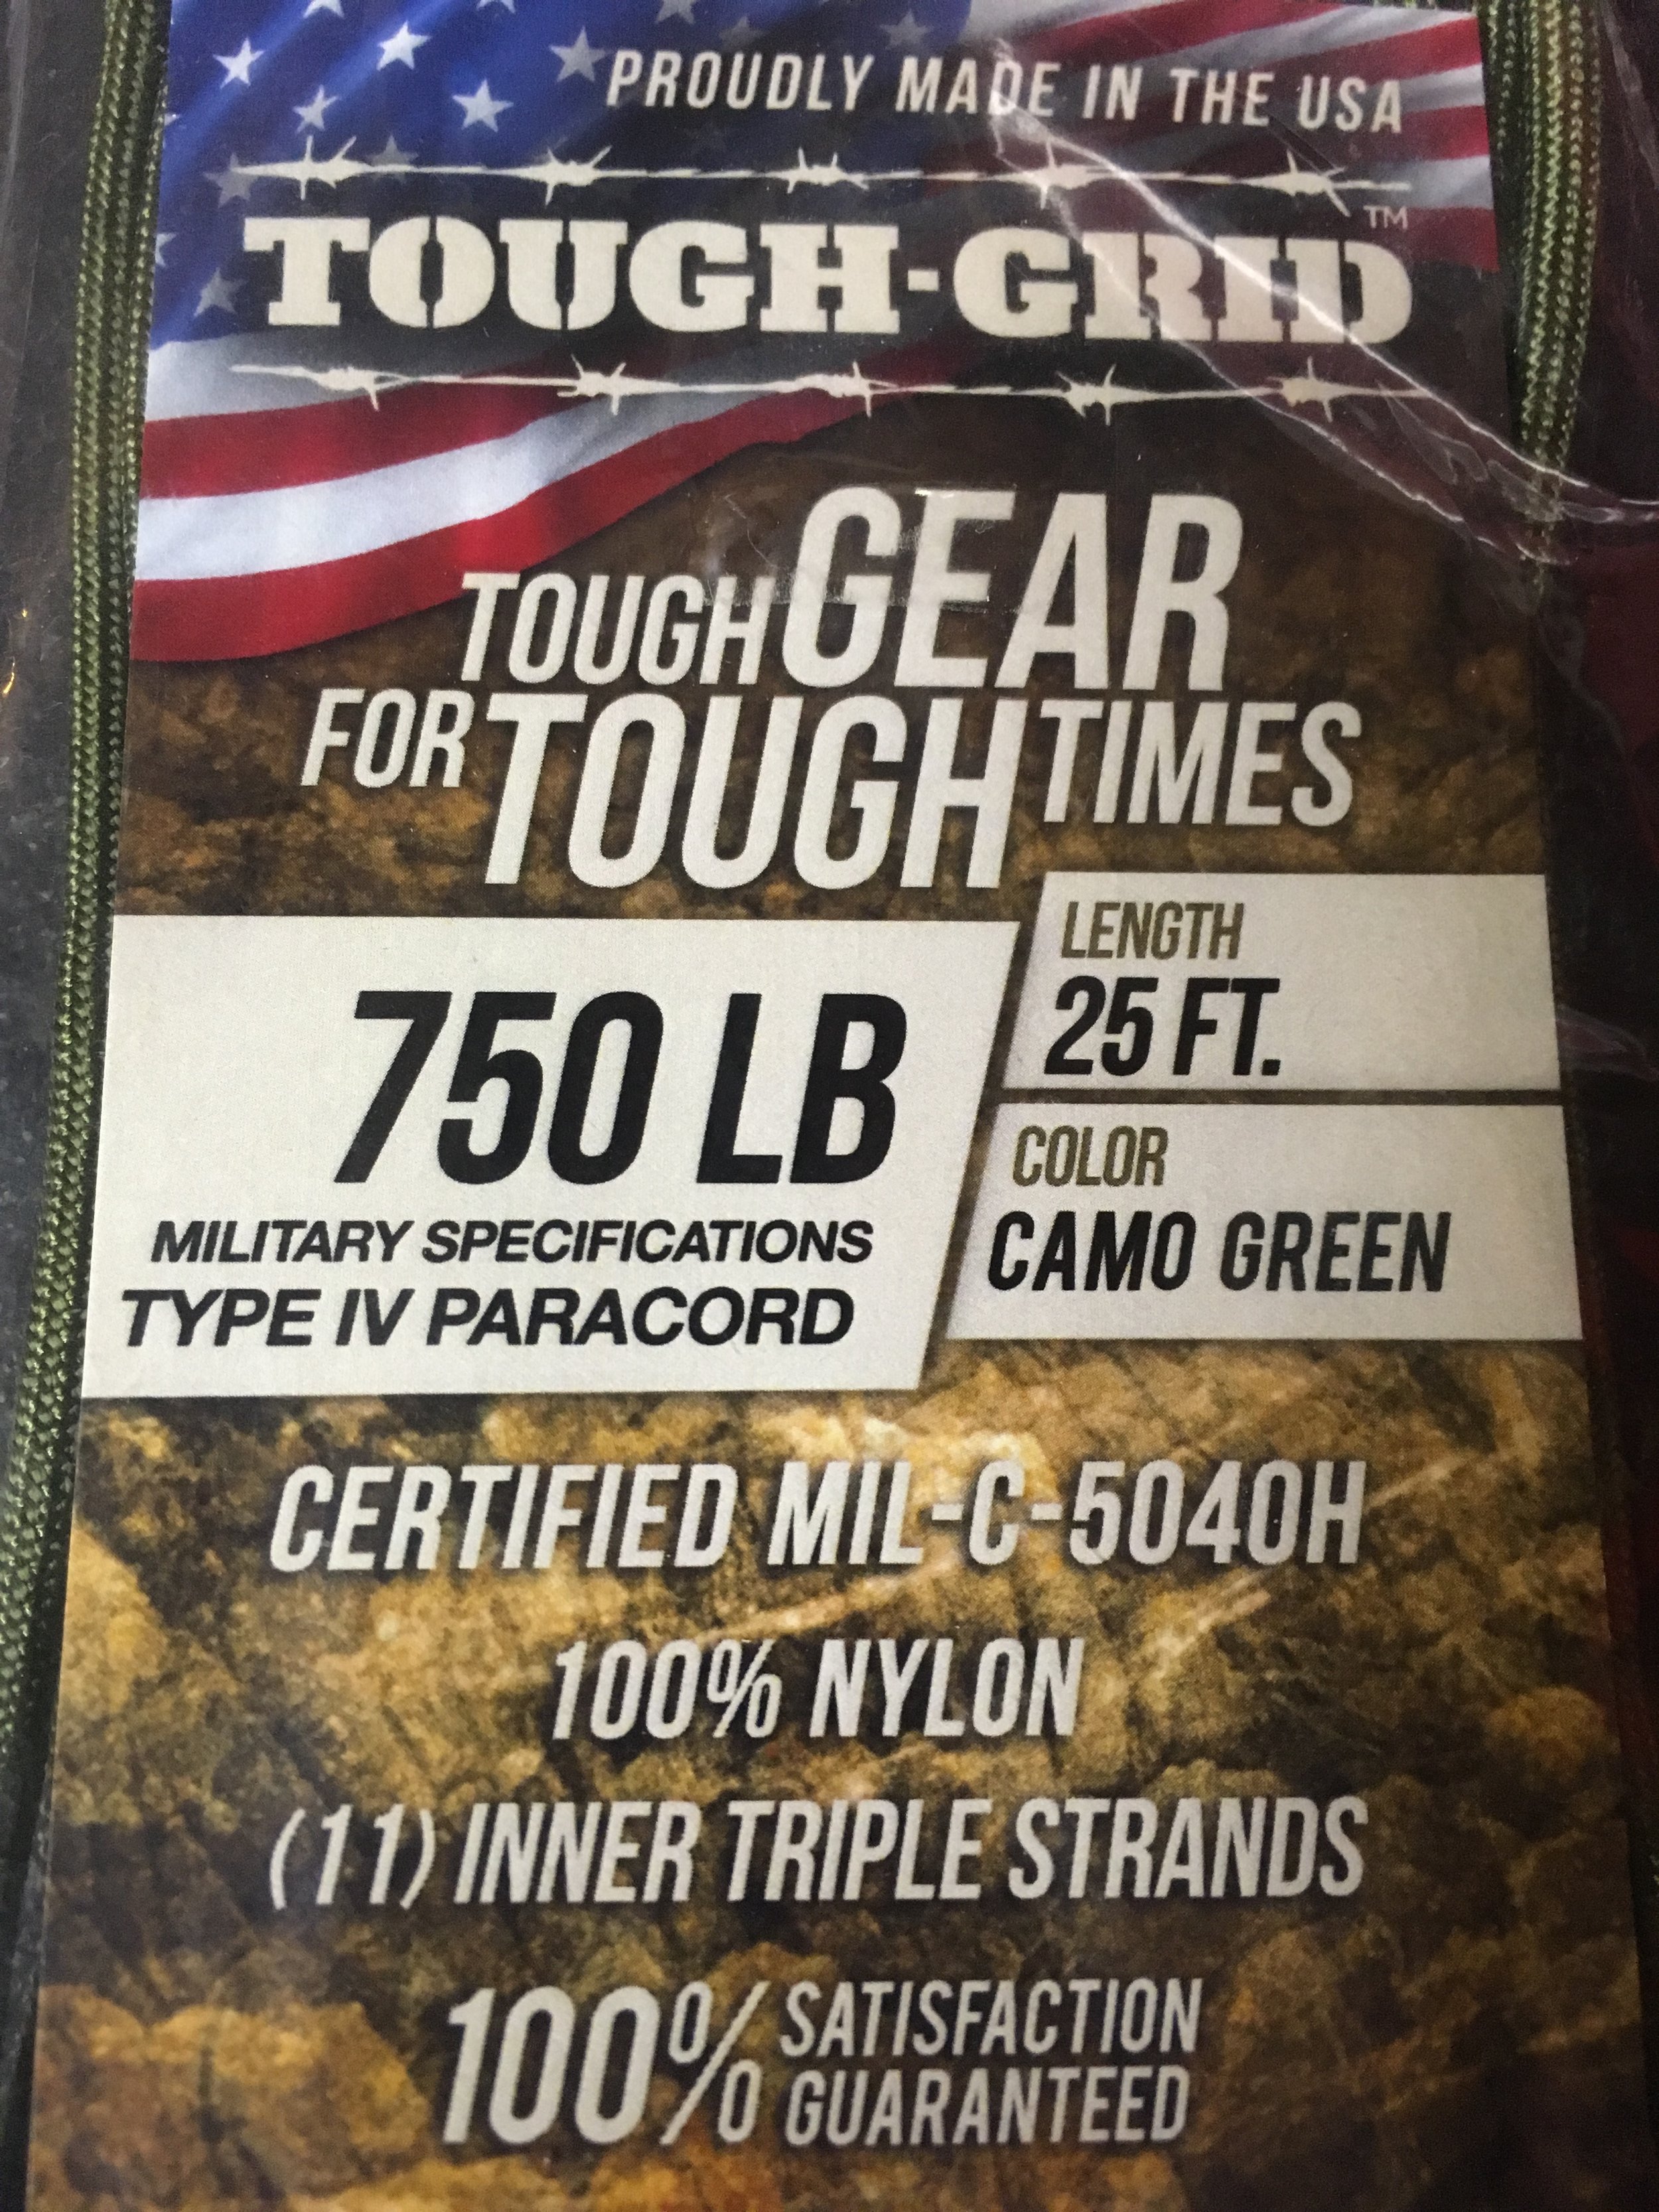
Even genuine mil-spec paracord is inexpensive enough that keeping a couple hundred feet in the vehicle for odd jobs is affordable. Of course, you can opt for larger and more expensive kernantle cordage, even Kevlar if you want the ultimate in strength. But 550 or 750 paracord is pretty stout, as long as you keep in mind that a knot—any knot, to a greater or lesser degree—will reduce its strength by up to 25 percent.
Once you’ve determined the need for a fabbed up lashing and have cut the length you need, don’t neglect to fuse the end, otherwise the interior cords can protrude and snarl and your work will look decidedly less than pro. I work the kernmantle sheath over the end, so when I apply a flame it (usually) melts nicely and encapsulates the cords. Just make sure you have a solid, tight blob. I find that putting the flame next to but not right on the end helps melt the cord neatly.
Now you need to secure that cargo securely. Paracord has two characteristics that can work with and against you. It’s a bit stretchy, which makes it easier to tell when you’ve pulled it tight enough but can let the load shift if you haven’t. And it’s fairly slippery, which makes it easier to pull tight across duffels and other luggage, but which also means knots can come loose if not chosen correctly and tied properly.
To ensure that, you need know only three: a bowline, a trucker’s hitch, and a sheetbend.
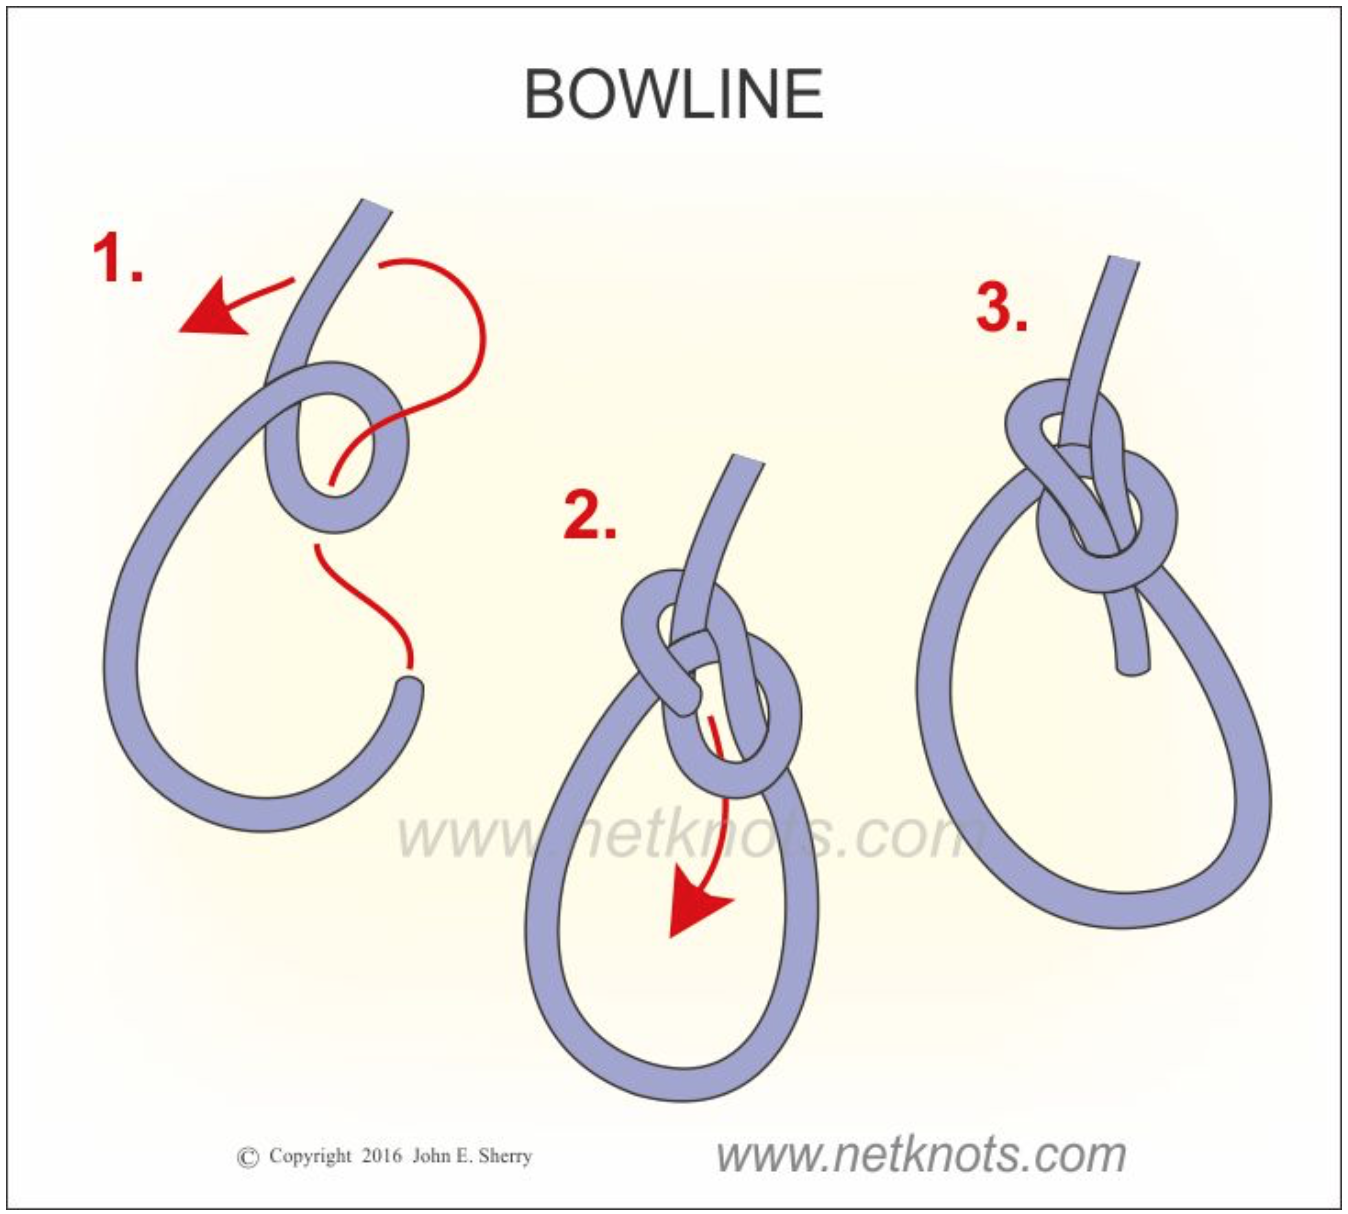
The bowline is the best way to make a secure loop, to tie the first end of your paracord to the roof rack or cargo eyelet. (I’ve blatantly lifted the still images here from the excellent site netknots.com, because I urge you to go there and watch the easy-to-follow animations of these knots, and dozens more.) The bowline is strong, it weakens the rope less than some other knots, yet it is easy to undo.
At the other end, you want to pull that cord as tight as possible and secure it so it won’t loosen. The trucker’s hitch actually functions as a jive pulley to multiply the force you’re pulling with, and when tied off properly will not slip.

When using paracord I suggest augmenting the netknots instructions. In part three, they finish off the knot with a single loop (basically a half hitch). However, paracord can slip if secured thusly. I strongly suggest looping the end of the cord through twice, then looping it the opposite direction below, so you in effect add a tautline hitch, like this:
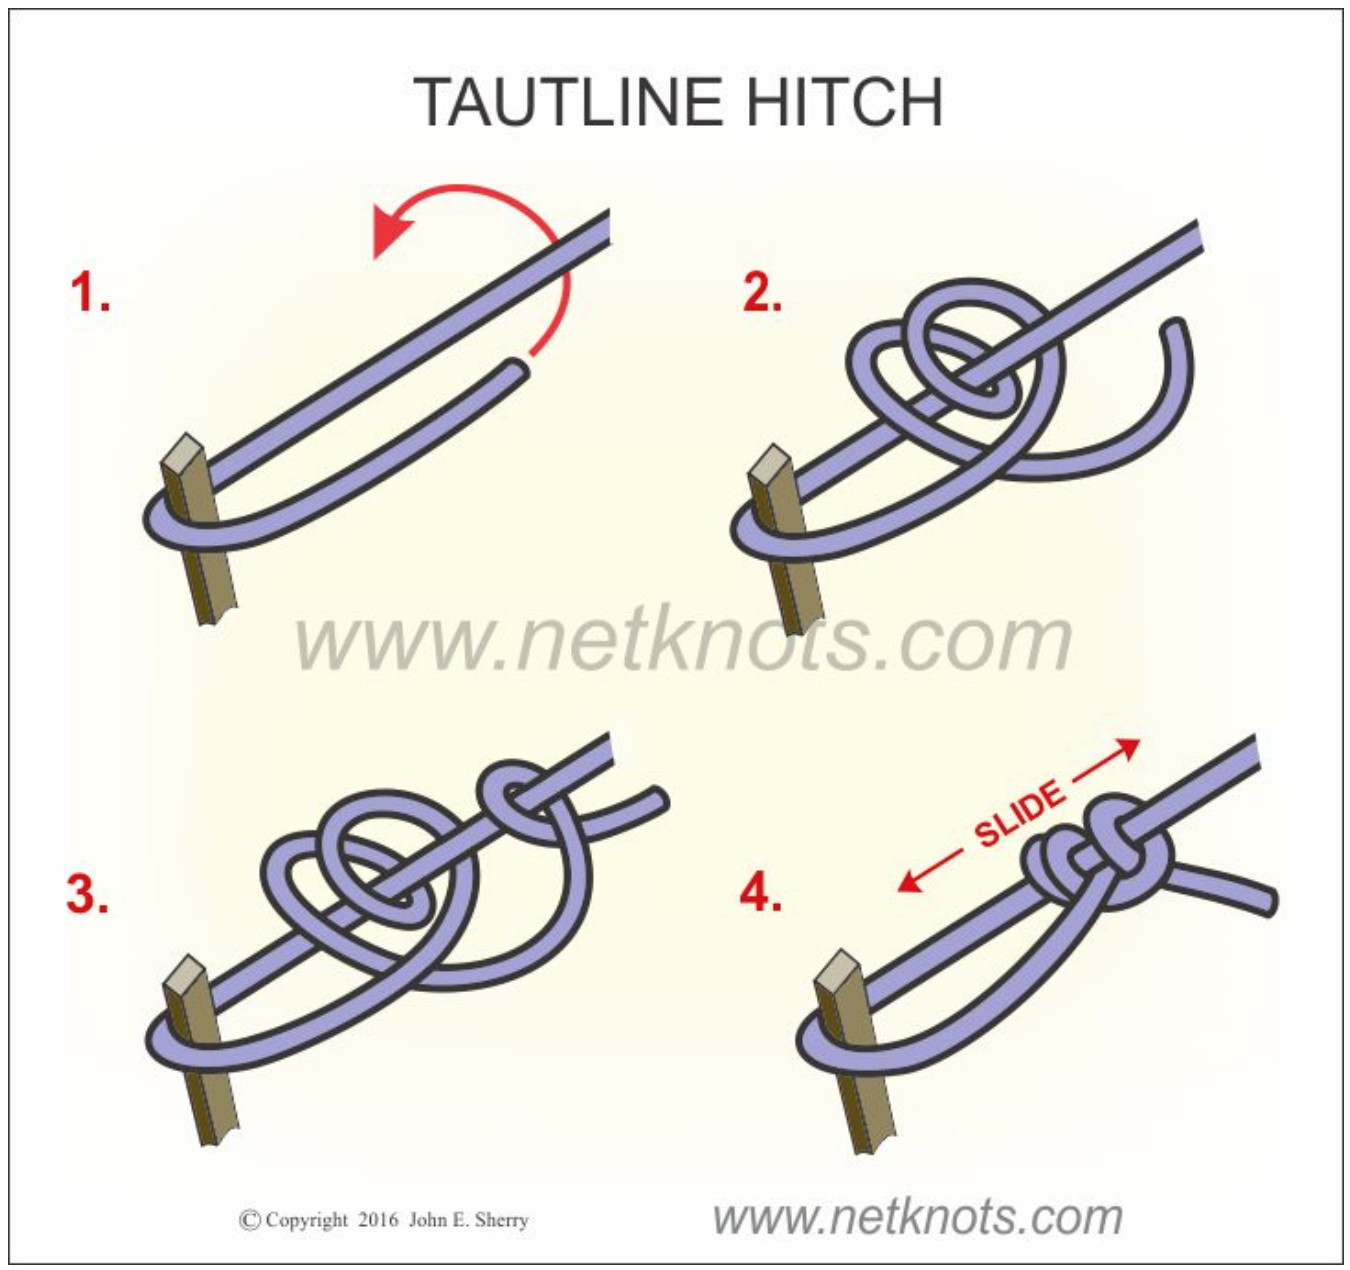
Do this finishing knot right up against the “pulley” loop. Just as with the bowline, the trucker’s hitch unties easily, and in fact the slippery half hitch you tied to use as the “pulley” will pop loose simply by pulling on either end of the cord.
The last knot you’ll use if you need to join two cords that are each too short: the sheet bend. It’s an incredibly simple knot, almost a square knot except the free end of the second (blue here) cord tucks under as shown.

For extra security you can double the knot as in the diagram. The brilliant thing about the sheet bend is that it will effectively join two cords or ropes of different diameter. Just remember to use the smaller line for the second (blue) part of the knot.
And the brilliant thing about all these knots is that they’re useful in hundreds of other situations. So cut yourself a three-foot piece of mil-spec paracord and practice them until they’re second nature. They’ll serve you well.
Quality, seen and unseen

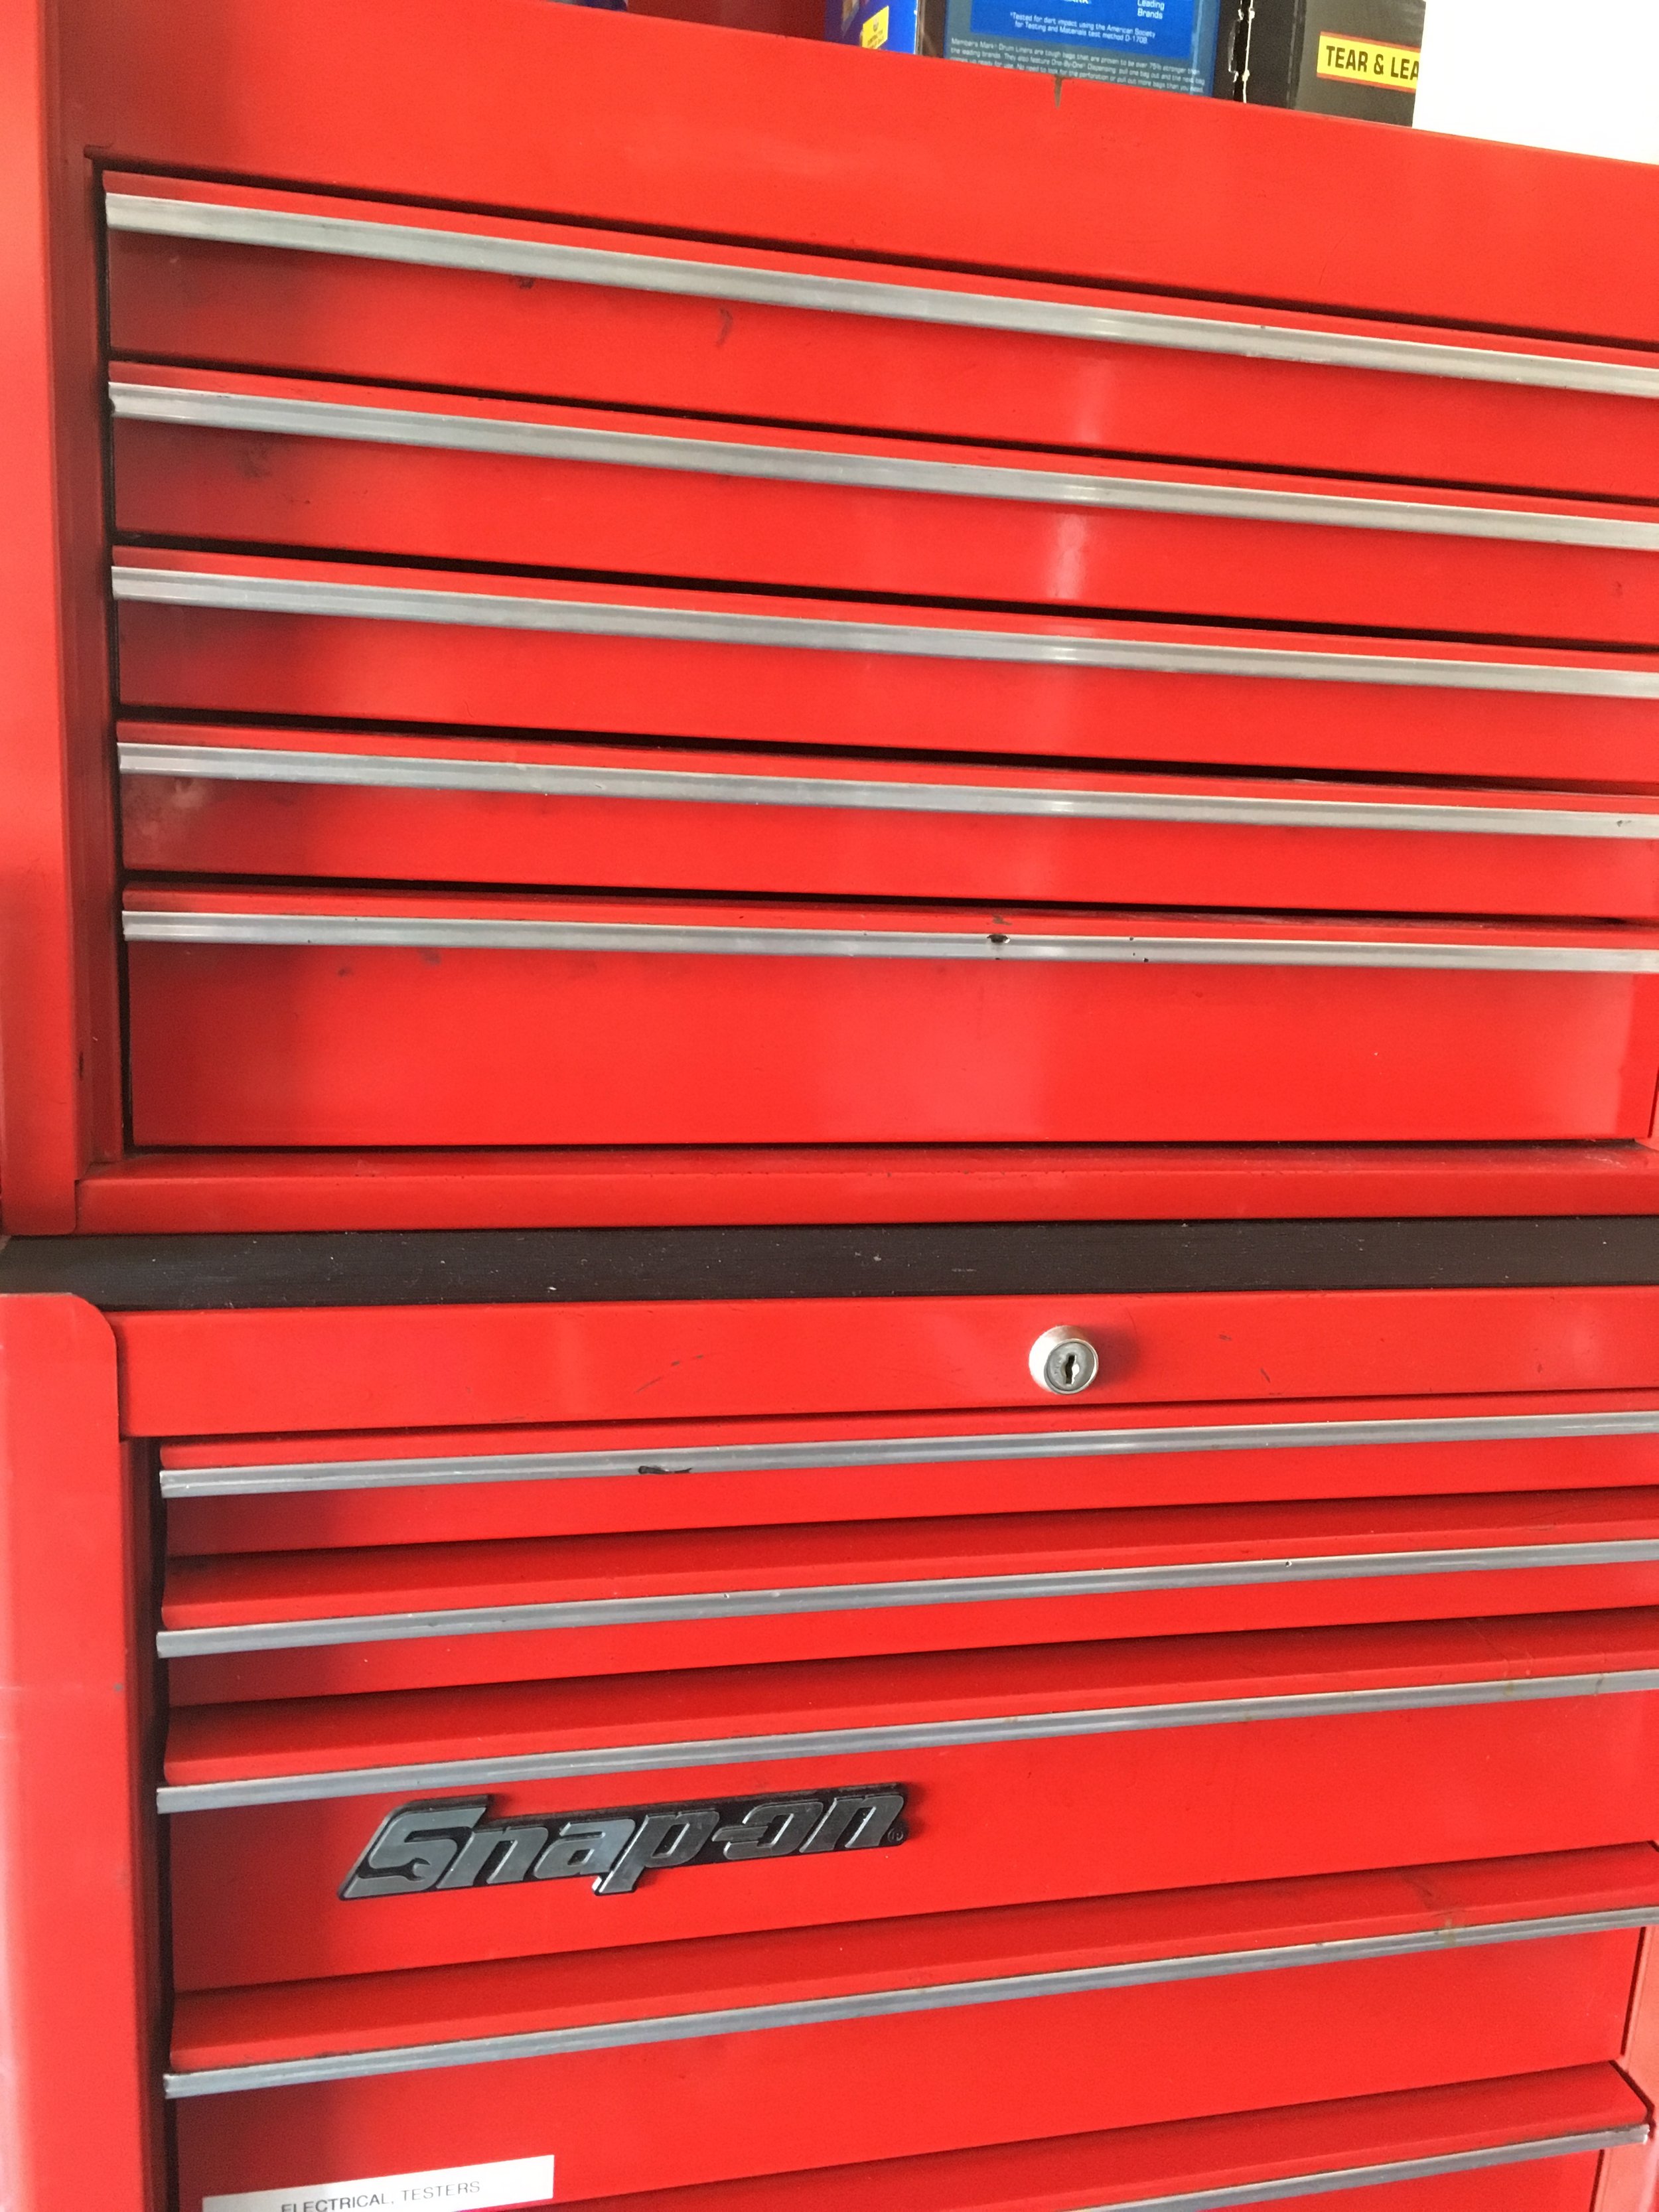
For several years I’ve stored my “in-town” automotive tools in a modest older Snap-on rolling chest combination (which I bought used). But it’s been getting really crowded recently, and I’ve been thinking about augmenting or replacing it. The decade-old Craftsman chest out at our desert place is larger, but I didn’t want to just swap the two as I still need a full complement of tools out there as well.

By sheer coincidence I was at an acquaintance’s house last week to deliver a gate opener I’d sold him, and it turned out he had recently bought the entire remnant stock of Kobalt tool chests from the local Lowe’s home improvement stores. Kobalt had been the chain’s store brand for years, but recently they switched to Craftsman—which, as you might know, is now owned by Stanley Black and Decker rather than Sears. In my mind this switch is actually a step down: Recent made-in-China Craftsman tools that I’ve examined in their packaging show noticeably poorer finish than the older made-in-America products, poorer in fact than the few Kobalt tools I’ve purchased to review.

Anyway, my friend had scored several dozen of Kobalt’s top-of-the-line stainless-steel-clad tool chests, and quickly unloaded all of them at fire sale prices. He had exactly one left, and it happened to be a tall, narrow, 27-inch-wide model, which is the only configuration that will fit in the in-town garage. So I bought it for a song.
Back at home I had to pull the drawers to unload it and get it into position. And that gave me the opportunity to look past the beautiful stainless exterior and the nifty soft-close drawers. What I noticed made me pull apart that plain old red Snap-on chest to examine it as well. And that’s where significant differences showed up. Drawers out, the Snap-on cabinet was noticeably heavier and more torsionally rigid than the top box on the Kobalt. Where Snap-on used nuts and bolts and spot welds to assemble pieces, the Kobalt had been assembled almost exclusively with pop rivets—in fact I found several stems from those rivets still inside the cabinet. Both brands incorporate smooth roller-bearing drawers, but when I re-installed the Snap-on drawers they each slotted perfectly into their slides and snicked home effortlessly, while the Kobalt’s drawers proved to be a real pain to get properly lined up. I had to carefully fit each side in each slide to prevent it simply falling out, then guide the assembly in until it clicked back together—after which, I should note, each worked perfectly, including the soft-close function.
Don’t get me wrong: The Kobalt chest is a very nice item and I’m glad I bought it, especially at the price. I’m sure it will serve my amateur mechanic needs adequately, as I’m only in those drawers a dozen times per month, rather than dozens of times per day as a pro would be. But it was clear that the Snap-on chest would hold up to that kind of use far better than the Kobalt would. (And I managed to squeeze the Snap-on chest into another corner of the garage.) Snap-on certainly puts a hefty price premium on its products, and it is inarguable that a good part of that premium is strictly due to the name and cachet, but at least you get the excess you pay for.
In a larger context, it points out the obvious fact that external looks aren’t everything. It’s the engineering underneath that determines quality.
Classic Kit: The capstan winch

If you’ve ever crewed (or skippered) a sailboat longer than 20 feet or so, you’ve probably used a capstan winch to control lines such as the jib and spinnaker sheets. A basic capstan winch comprises a vertical drum geared so it will only turn one way (always clockwise on a sailboat). When you wrap the line around the drum (again, clockwise) two or three times, you can more easily control the forceful pull of the sail. The friction of the wraps helps prevent the line being pulled away from you. If you need more power to sheet in a sail in a breeze, a a fitting on top of the drum allows you to insert a crank for extra leverage. There are more elaborate capstan winches with two speeds, self-tailing mechanisms—and electrically powered winches that eliminate the need for manual cranking.
For many years, a capstan winch could also be ordered as a factory option on Land Rovers and a few other vehicles. Visually the vehicle-mounted capstan winch was very similar to our sailboat winch; however, it was powered through a gearset from a driveshaft usually connected directly to the vehicle’s crankshaft via a sliding coupler. The worm-drive gearset reduced the 600 or 700 rpm of an idling engine crankshaft to just a dozen or so turns per minute of the drum (which, curiously, rotates counterclockwise on every one I’ve seen).
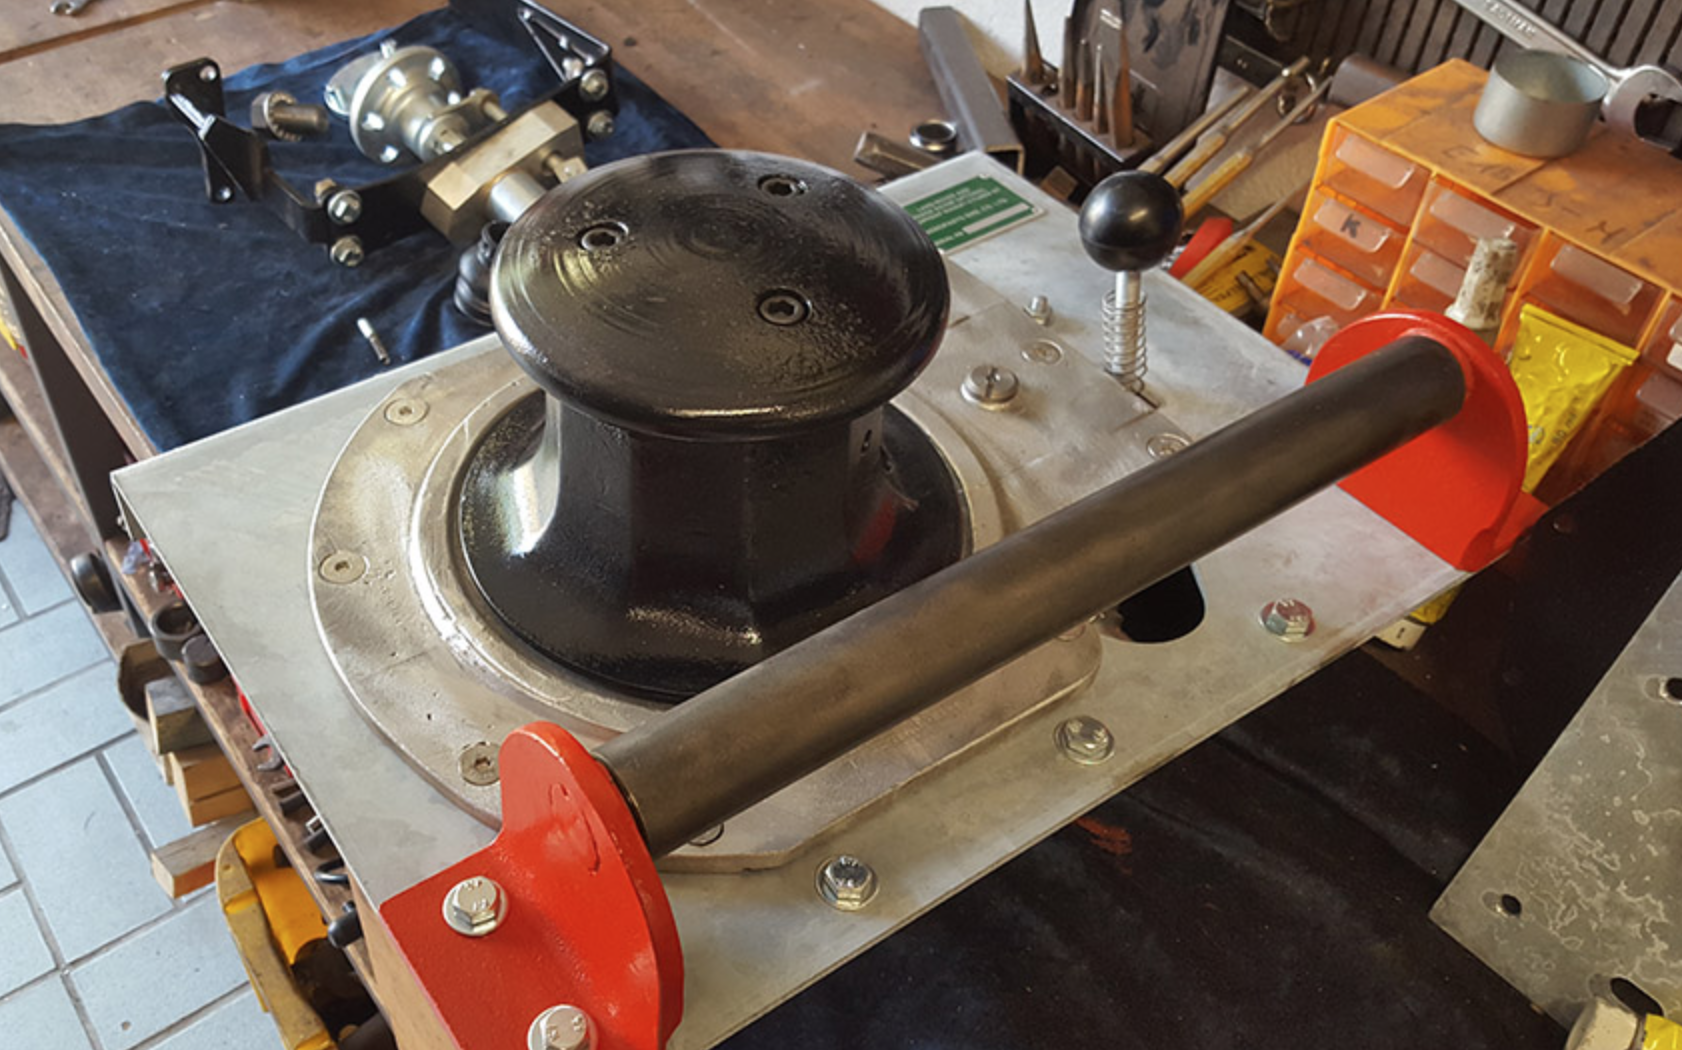
A capstan winch at LR-Winches. Engagement lever is at upper right. The rope is led under the roller from the anchor or object to be moved.
A capstan winch has an entirely different method of operation from the common, horizontal-drum electric, hydraulic, or even PTO winch with which we’re familiar. You don’t store line on the capstan, and it cannot use steel cable. Instead you carry a separate, low stretch rope—traditionally 3/4-inch manila or an equivalent natural fiber—of whatever length you chose, with a hook on one end.

Let’s say you’re driving your Series II 88 along a forest track and you come across a downed tree blocking the way. Pulling it out of the path would go like this:
Position the vehicle so the winch has a clear route to drag the tree off the path. Leave the engine idling, transmission in neutral (obviously), parking brake on and, if possible, the wheels chocked as well. (If you have a hand throttle you can bump up the engine rpm a bit.) Wrap a strap around the tree and connect your winch rope to it with its hook. Take the free end of the rope back to the vehicle, run it under the roller guide and around the drum three or four times counterclockwise in an ascending spiral, then lay the free end of the rope off to the left of the vehicle as you’re facing the front. With the coils of the rope around the drum still loose, engage the lever to connect the drum to the gearset and the drum will begin turning slowly—but the loose rope will simply slip around it. Now stand back from the vehicle a few feet and pull on the free and of the rope to tighten the wraps around the drum. The drum will grab the rope and begin pulling on the downed tree, as you take in the rope fed you by the winch. You now control the speed and engagement of the winch simply by pulling or slacking off on the rope to tighten or loosen it around the drum. Once the tree is off the path, let the rope go slack, disengage the gearset with the lever, and de-rig. It’s that simple.
Of course you can also connect the rope to a standing tree or another vehicle to free yours if it is bogged; however, since the capstan winch requires someone standing outside the vehicle to operate the winch, it’s nearly mandatory to have a second person in the driver’s seat to steer the vehicle and stop it once it’s free. Solo vehicle recovery with a capstan winch can be a very dicey operation indeed.

Consider the situation pictured below. Tom Sheppard was in Mali in 1978, en route to Timbuktu, driving his Land Rover Velar—that’s right, the original prototype of the Range Rover—and towing a trailer full of fuel and water, when a section of mud proved a bit deeper and stickier than was apparent from the driver’s seat.

Tom’s Range Rover was equipped with a Fairey capstan winch cleverly hidden behind the grille—note the horizontal roller on the bumper. To deploy it one simply unscrewed the center grille section, a matter of a couple of minutes. However, Tom was, as is common with him, traveling solo. Therefore he first unloaded all 21 (!) jerry cans from the trailer, decoupled it from the Range Rover, and recovered the Range Rover with aluminum sand (i.e. mud) ladders. Then he positioned the Range Rover in a spot where he could use the capstan winch to recover the trailer, re-connect it to the Range Rover, reload all 21 jerry cans, and continue on his way.

(Tom’s story made me remember the tour Roseann and I got of the Gaydon Museum, courtesy Land Rover historian extraordinaire, Roger Crathorne. I looked up one of the photos, which shows, in addition to Roger and me, one of the Range Rovers used on the 1971/72 Trans-Americas Expedition—and there was a capstan winch peeking out from behind the grille.)

The capstan winch’s labor-intensive method of operation, combined with its modest power—most were rated for around 3,000 pounds, as was the rope used on them—saw them fade from popularity with the increasing availability of horizontal-drum electric winches of considerably higher rating. Yet the capstan had its advantages. It could work all day without overheating or stressing the vehicle’s electric system, and its line capacity was essentially unlimited—if you needed to rig a 200-foot pull, all you needed was a 220-foot rope. And that labor-intensive method of operation gave the operator instant control over the procedure—let off on the rope tension and the pull stops instantly. The capstan winch, with its leisurely speed, hands-on attitude, and natural-fiber rope, always struck me as, well, the friendly winch compared to the whining, straining, ozone-smelling electric winches of today (hugely capable though they certainly are). Go ahead, laugh.
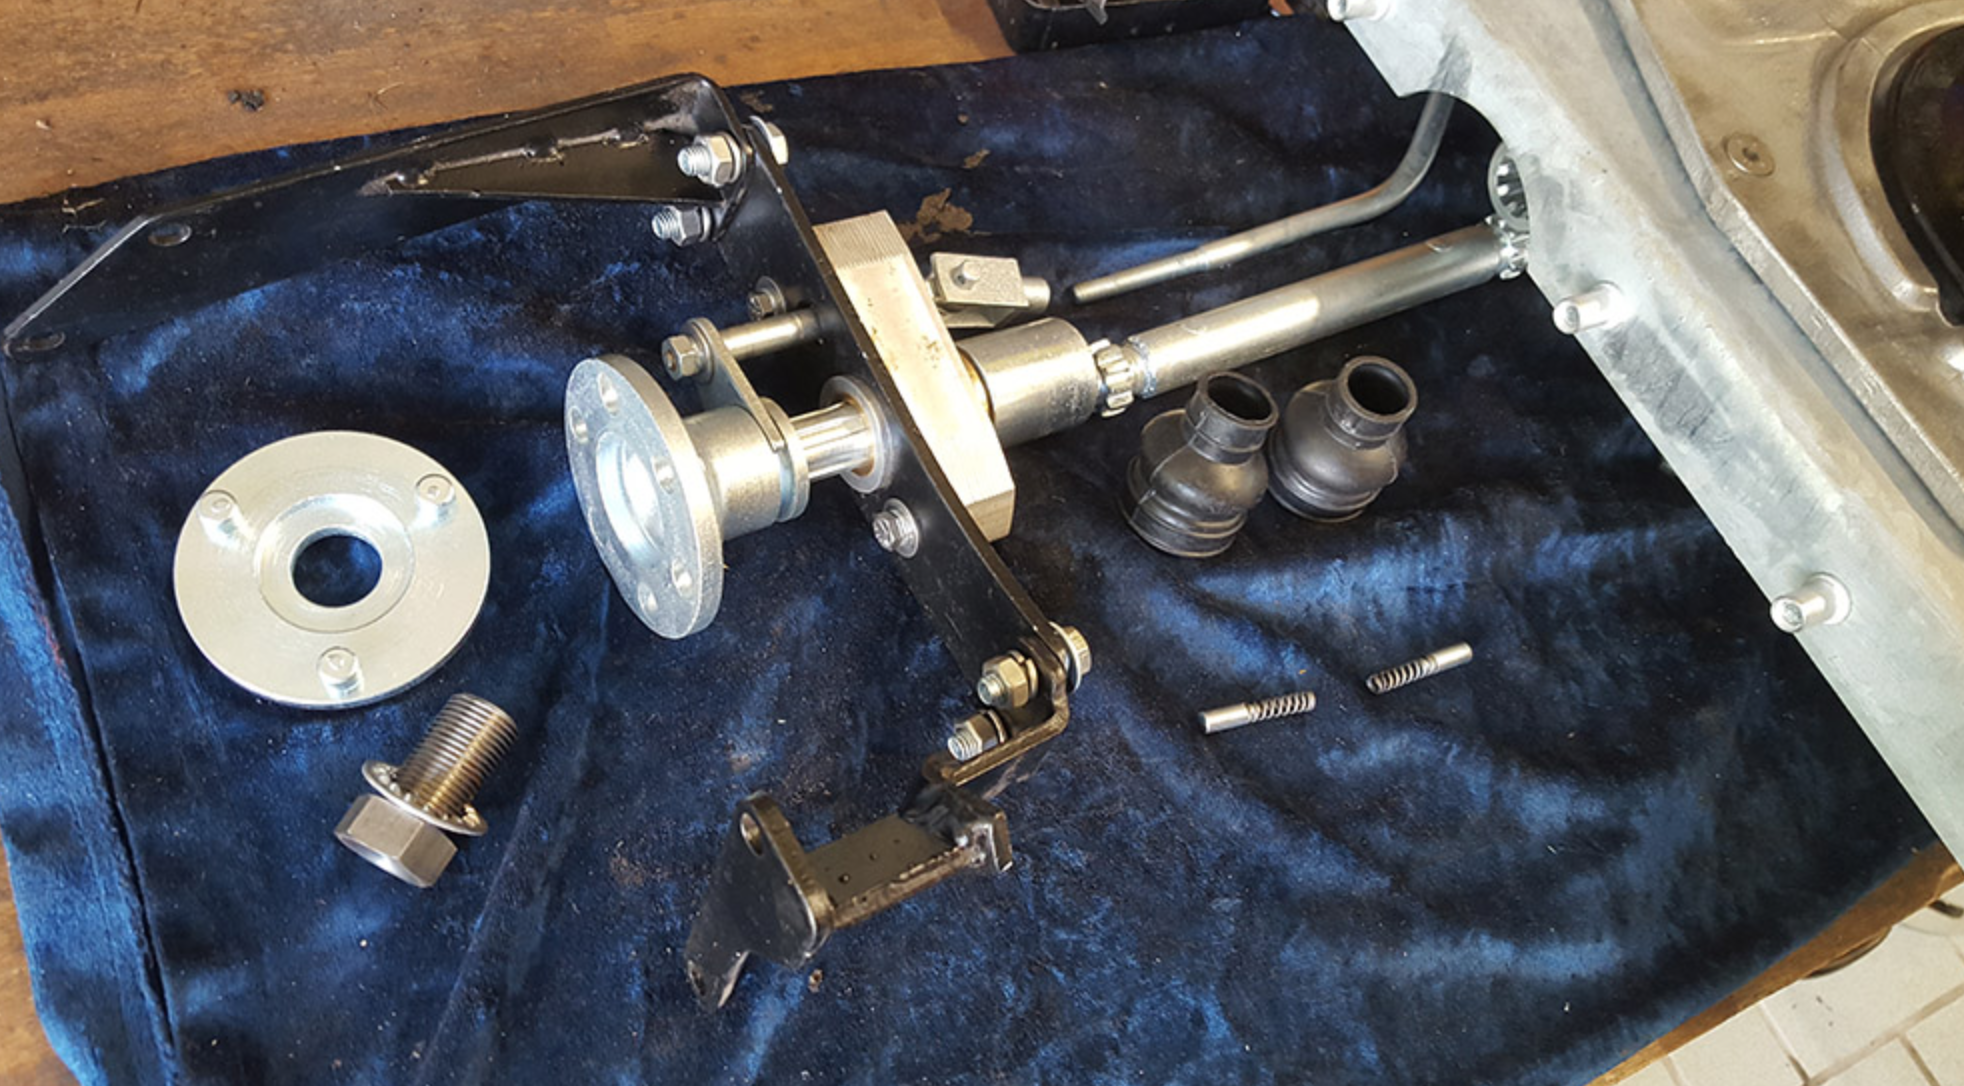
This is the driveshaft and engagement mechanism that allows the capstan to be powered off the front of the vehicle’s engine.
You can still, very occasionally, spot a vehicle equipped with a capstan winch—virtually always a Series Land Rover. If you own a Series Land Rover and have a hankering for a curious and historical piece of very useful equipment, you can still buy one (or parts for one) through sources such as the experts at LR-Winches (where most of these images originated). You can even buy a synthetic rope suitable for a capstan winch, from LR-Bits.co.
But I’d recommend sticking with the manila rope. It’s just . . . friendlier.
For a . . . curious . . . installation of a capstan winch, see here.