craft

Adventures in making paint

36516131_10212385569417211_6933859090300928000_o.jpg

In the past year I began making my own watercolor paint from pigments—both purchased and wild-found.

I was very excited about this rare pigment from one of London’s oldest and finest colorists, L. Cornelissen. This is genuine Lapis Lazuli, true Ultramarine Blue in a painter’s palette.


36458664_10212385569697218_3921047670843506688_o.jpg

I used natural gum arabic as the binder, and the humectant is honey.

This is a WIP: I was not 100% happy with the flow or transparency—will have to mull another batch. Each takes about 2 hours so it’s quite a commitment!

36543200_10212385570377235_5202367235649175552_o.jpg
36542669_10212385570097228_4387621298331713536_o.jpg

Next up: grinding found ochres from Australia’s Great Victoria Desert into fine enough powder I can make paint.

20286801_10209989534877845_2417951419505398791_o.jpg

Simple Leather Journal — 15 years on

1000w.jpeg

My faithful companion now for 15 years, over five continents, tens of thousands of miles. Nothing fancy: It's a one-piece unstructured cover cut from simple vegetable-tanned cowhide, which was simply finished with olive oil. I incorporated the natural edge of the hide into the front cover. (Find a book about the size you want, cover it with plastic, get the leather wet, and shape it to the book and let dry; when the leather is wet, you can also score the cover with decorations—I added my initials.) As you can see, after 15 years of use it gets a nice patina but holds up well; it's been on five continents with me—tens of thousands of miles!

I use Bee Paper 90-pound 9x6 sheets, which is inexpensive but good 100% cotton paper that is archival and holds up well to watercolor washes.

A couple of cheap leather bootlaces act as the sheet binder and the keeper (decorated with African trade beads).

When I fill up a journal, I unbind it and transfer the pages to inexpensive three-ring binders (last photo; I plan to cover these in nice leather eventually—I have 40 years' worth!). 

Advantages: inexpensive, customizable (can add fancy papers, insert memorabilia, maps, etc.), lays flat, durable. Disadvantages: double-page spread is not contiguous (but it works fine for journaling), it's self-made so it's not as easy as buying a new notebook off the shelf, threading the leather cord into the holes is a pain, and sometimes the flexible cover makes it hard to draw (but I found a plastic board to put behind it when I need).

[Related post: Field Sketching Kit — for stand-up sketching]

EDC Field Notebook

1000w copy.jpeg

Sometimes the world aligns in wonderful ways. 

Just before Overland Expo 2016 WEST, I was looking to replace my longtime EDC notebook (Every Day Carry). Since 2006, I've used a Moleskine Cahier notebook encased in a leather cover that I had designed myself and was stitched by Jonathan.

But over the years it became too small, and also I had lost track of so many notebooks — I had no system for managing them. 

I found the Midori notebooks (now called Traveler's Notebooks) and was looking at the Bullet Journal system for tracking multiple EDC journals (

http://bulletjournal.com

) over time, using indexes and notes-journals as well as task-journals. 

I loved how the Midori notebooks and covers were so versatile: you can combine multiple journals with a clever elastic band system.

But I found the Midori sizing to be not quite right—they offer either passport-sized (too small) or much-larger sized journals (8.2 x 5.5) in leather covers. I waffled. 

To feed my journal lust while postponing the decision about the actual journal, I ordered a new fountain pen from GouletPens.com, a lovely brown-iridescent swirled pen handmade by Brian Hall in Ohio (

EdisonPen.com

), along with some Midori accessories—pockets, a pen clip, and ink.

Then, in Asheville this week while planning the upcoming new EAST show with our wonderful core staff, assistant director Alison DeLapp presented the whole team with Field Notes (

http://fieldnotesbrand.com

) journals encased in custom leather covers made by one of our favorite instructors, Andrew Pain of MinimalMotorcyclist.com. 

Based on the 5 1/2 x 3 1/2 size of the Field Notes (and Moleskine Cahier), it was perfect. And, it had a custom stamping on the cover: our tagline, "The World Is Waiting."

En route home from Asheville, I discovered it perfectly held two Field Notes insets plus my passport and my iPhone 6S in a Lifeproof case. 

Once home, I collected my new Midori accessories and pen, and put them together into what I think is going to be the perfect EDC field notebook:


Another addition I made was a center insert of watercolor paper (90-pound cold-press) I cut myself and added, about 10 pages total. With my Expeditionary Art watercolor set

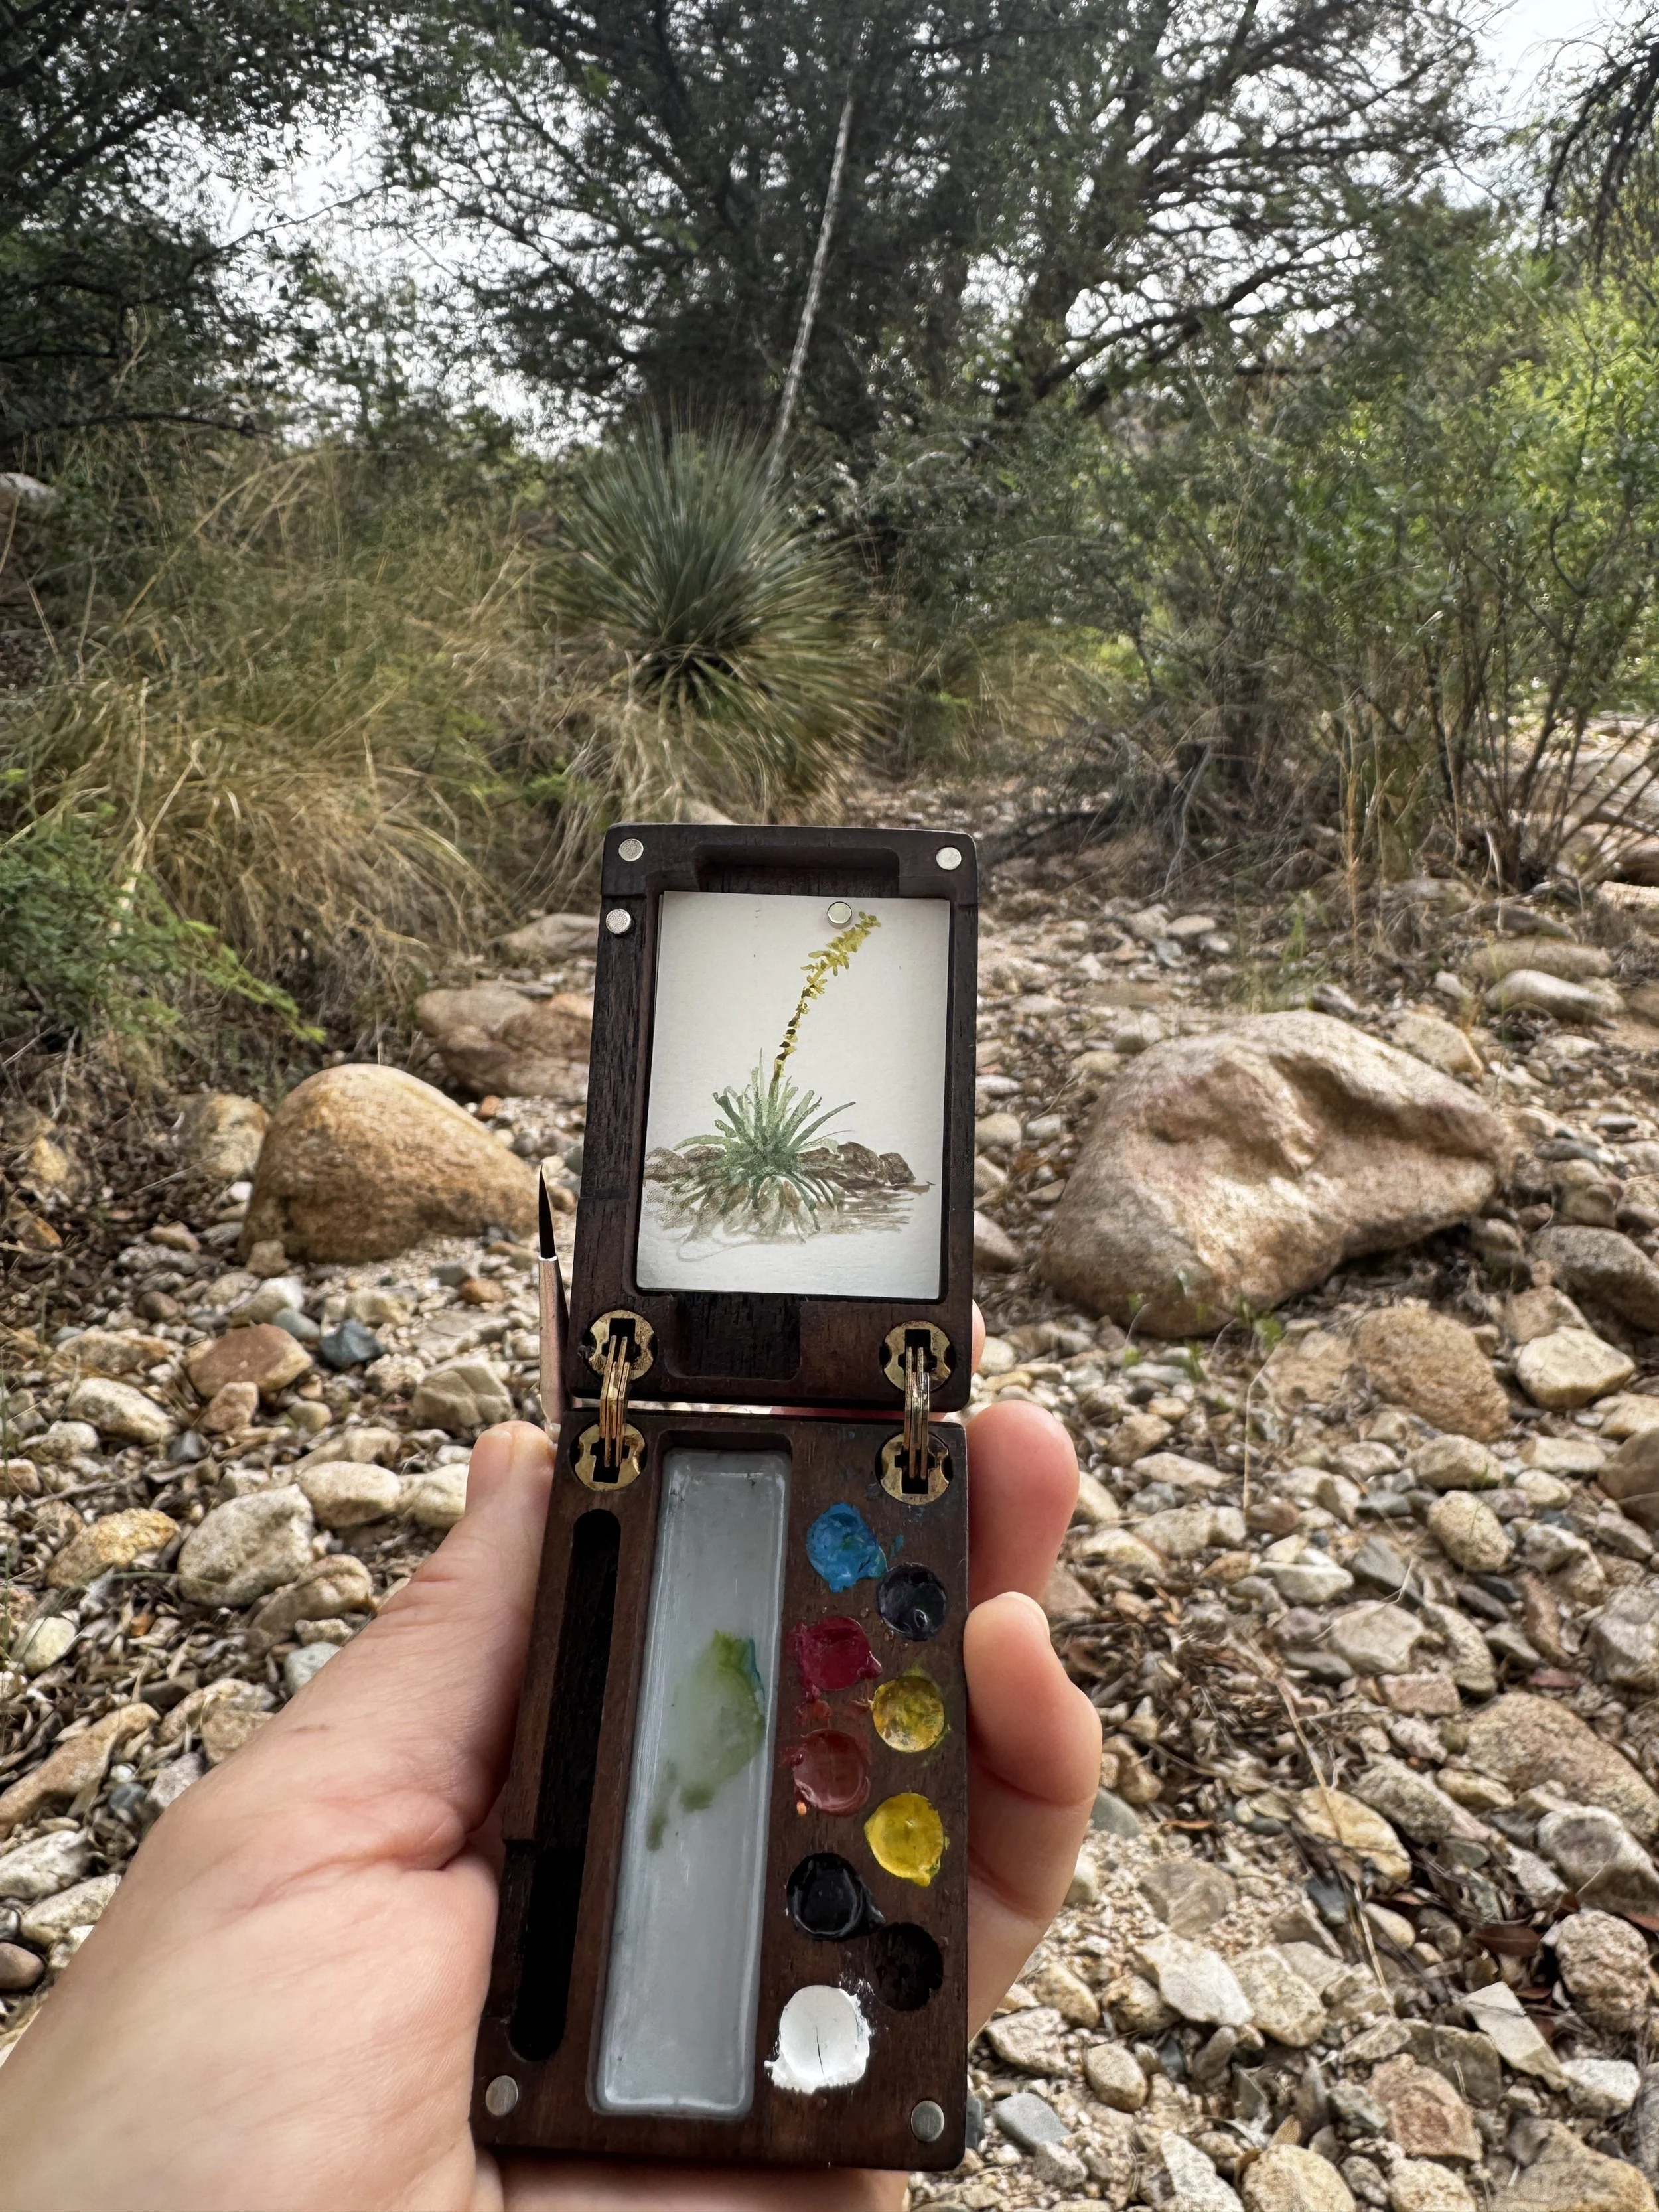
https://expeditionaryart.com/shop/art-toolkit/  and a little mini-field-palette I made from a folded coroplast board with a water-well cut to size for an old Bausch-and-Lomb contact cleaning reservoir (which has a water-tight gasket), I have a perfect mini-field-sketching kit right in my EDC. The little bulldog clip that holds the watercolor set acts as the perfect brush holder for my No. 3 Escoda sable traveler's brush.


Ultralight plein air painting kit


Finally got a chance to field test my ultralight plein air painting kit — love it. I saw a similar setup for sale at an art website for $200 and weighs 10 pounds (and does not include a chair). Being a cheap (and small of frame) Celt, I decided I could do that for under $45 and a whole lot lighter! The tripod, a terribly inexpensive aluminum Sunpak 2001UT ($15!) is just 2.3 pounds and 19.7 inches long folded up. The little chair is just over a pound ($18). I glued strong magnets (a couple bucks) to the base plate of the tripod and a 30-cent 3" steel washer to a piece of Coroplast. Even in a modest breeze it holds tight. Two pieces of the Coroplast ($8) clipped together with bulldog clips hold a paper assortment. This fits in my shoulder bag with my paints, brushes, and other supplies. The tripod and chair strap on top.


Learning watercolor


In September I took the leap and decided to get serious about learning to sketch and paint with watercolor and ink washes—with a plan to become good enough to use my own art in future book and conservation projects.

I started with books by Cathy Johnson and Clare Walker Leslie, two of the best nature illustrators and teacher-authors. But I need to see things demonstrated, just reading about watercolor was not enough. So I discovered both Craftsy.com and Artclick.tv. Both have excellent, affordable tutorials you can buy individually, or in the case of Artclick.tv, subscribe monthly for unlimited access.

I discovered I love color theory, and particularly love painting in triads, especially Daniel Smith watercolors (made in Washington). Right now favoring old-fashioned tint-like colors and pen-and-ink. And I rediscovered how much I love my old Montblanc, a gift 30 years ago from Jonathan. The Montblanc is charged with Platinum Carbon waterproof ink, and a Vintage Parker 75 has a soft, soluble black. Also experimenting with brush pens, with J.Herbin Lie de Thé, a sepia color.


Daniel Smith's Primatek Genuine mineral paints are particularly gorgeous; this hummingbird's gorget is Rhodonite Genuine and Amethyst Genuine, which sparkles in the light.


Blood & Leather Project completed

History records that rapacious, musket-armed Arab slave caravans of the 18th and 19th centuries avoided transiting what is now central and southern Kenya and northern Tanzania—it just wasn’t worth risking the wrath of the belligerent spear-wielding Maasai who dominated the region. Early European explorers as well dreaded the sight of a line of colorful leaf-shaped shields appearing on a hilltop, and took roundabout routes into the interior. Even the mighty British Empire never directly confronted the Maasai militarily, and relied instead on political sleight of hand to squeeze the tribe out of its best grazing lands once the area was deemed a protectorate.

While the Maasai no longer range and raid at will over the East African landscape, they have continued to fight to retain their identity as a tribe and culture, picking and choosing which bits of the modern world they wish to adapt. Thus a red-robed and sandaled herdsman leaning on a spear in the South Rift is quite likely to be chatting in Maa on a cell phone, and a smartly-dressed businessman in Nairobi might go home for the weekend to a hut surrounded by a thorn boma that keeps lions out of the livestock.

But one icon of Maasai history—those tall, intricately decorated rawhide shields, so universally recognizable that one features centrally on Kenya’s national flag—seemed lost forever, save as dusty relics in museums, rare and expensive objets d’art from exclusive curio dealers, or, tragically, as cheap, undersized, shoddily made tourist souvenirs. The loss was doubly sad since each shield’s design elements, or sirata, revealed detailed information about its bearer’s clan and achievements, and thus represented a tangible record of Maasai history.

This loss seemed unacceptable to two elders in the Olkirimatian community of Kenya’s South Rift Valley. Tonkei Ole Rimpaine and Karinte Ole Manka—both former shield bearers now in their 70s—approached ConserVentures, our small non-profit that often donates resources for cultural conservation projects, with a plan: They wanted to put together a workshop to build new shields, using authentic techniques and materials, with the immediate goal of producing examples to be displayed in a planned Maasai heritage museum, and the secondary but much more vital goal of passing on their knowledge to a younger generation. Through the generosity of several donors, we arranged to source rawhide and supply food and transportation to the group, and to use the Lale’enok Resource Center as a base. John Kamanga, the chairman of the Olkirimatian community and a driving force for Maasai cultural conservation, was our liason as we worked on logistics from 7,000 miles away. The construction team comprised John’s father, Ntetiyian Ole Pasoi, two other elders, Sipale Mpoe and Marikete Ole Ilelempu, and four women, Rijano Ene Ntetiyian (John’s mother), Majakus Ene Saitage, Moyiangei Ene Sampao, and Bebi Ene Mugesa.

Over the course of five days in late October, Tonkei and Karinte supervised the group while we photographed and filmed the entire process. In that time, one cowhide (the only major concession to the 21st century, the original cape buffalo being no longer available since Kenya banned hunting), some goatskin, and a pile of limbs from a Cordia senensis tree magically morphed into two sturdy shields—a stiff rawhide face backed by a carved, tensioned center stay and handgrip, the perimeter laced with goatskin around flexible Cordia wands. Then, alchemist concoctions of charred bone, ocher, limestone, and cow’s blood (the latter amusingly stored in an old Famous Grouse whiskey bottle), dabbed and streaked on the shields with chewed twigs, blossomed into recreations of the original Olkirimatian sirata. The two senior elders eyed each line and color critically, and more than once sections were scraped off and re-painted to achieve the proper symmetry. Throughout the process, young Maasai men of the community hung around to watch or help, taking cell-phone photos and fueling our hopes that some might be inspired to take up the craft as a business—we believe there’d be a ready market for detailed and authentic Maasai shields as a counterpoint to the cheesy tourist rubbish.

To us the end products—as far as we know the first true Maasai shields produced in decades—seemed like priceless artifacts. Yet before the paint was dry Tonkei and another elder had grabbed them and set to in a fierce mock duel, leaping and yelling like the Morani they were 50 years earlier while we cheered wincingly from the sidelines.

The completed shields, not minus a few scuff marks, are now stored at the Lale’enok Resource Center. One will be taken to Nairobi to be used in educational programs; the other is destined for the planned cultural museum to be built at a nearby archaeological site, Olorgesailie.

That is, as long as Tonkei Ole Rimpaine and Karinte Ole Manka don’t decide to requisition them, grab a couple of spears, and head out to raid cattle and take some land back from the British.

* * *

51-shield making team at Okiramatian1-elders-shields2-cow3-kill4-skinning and bleeding5-blood
6-stretching hide7-pegging hide8-ash on hide9-rubbing hide10-audience11-burning bones for pigment
12-fire for bones13-bones burning14-grinding burned bones to powder15-powders mixed with milk16-blood ready to mix for pigment17-dried hide
18-hide buried in boma dung19-hide under dung20-gathering rib poles by river21-Cordia poles for frame22-Elder and youth23-roughing in main rib

Photo gallery (51 images): click here.

ConserVentures provided photography and videography services for this project, and will be producing books, posters, and film for the Maasai Cultural Heritage Program. You can learn more about the South Rift Association of Land Owners and their programs at www.soralo.org

Making pigments from local materials (3): cochineal beetle


In the deserts of the Americas you might notice that the prickly pear cactus plants (genus Opuntia) sometimes are covered with what looks like white spit-wads. If you look closely, or touch one of the deposits, it's silky white web-like material. This is actually a protective covering of a little insect called a cochineal (Dactylopius sp.), which is a parasitic scale insect. The insect itself is tiny, about 3-4 mm across; their bodies contain carminic acid, which is a vivid purple-red color - presumably nasty-tasting to discourage predation. If you even gently bump one of them, they ooze this red liquid, which instantly will dye your finger.

I had read that cochineal was one of the earliest and most valuable sources of red dye. Aztecs and Mayas cultivated them; and during the time of the Conquistadores, cochineal dye powder was the second most important economic export after silver - that is a lot of insects!

Because of my interest in natural dyes and inks (see labels for those subjects), I have been looking for a colony of cochineal so I could experiment with using their pigment for coloring in my journal. Earlier in August, visiting my parents in southwestern New Mexico, I was delighted to find some infestations by this sessile parasite. I collected about 20 of them in a margarine tub:
You can see the bright magenta color. I did some research, because I had initially read that the color they produced was red-red, as in the British redcoats, and in Betsy Ross' flag. The original dye preparation involved adding an acid, so I added a little vinegar to a bit of cochineal liquid, and voila, it turned a rich red.

Right now my insect bodies are drying, and I will grind them and add an acid - either vinegar or lemon juice - and see how it goes with use as a pigment in my journaling.

Vin de noix ~ Green walnut wine

Walnuts (Juglans major) in the southwestern states are beginning to ripen . . . time to try something I've had in my nature notes for some time: vin noix (green walnut wine), made from noix de Saint-Jean (Saint John's walnut). One of the best tutorials on the origin and making of this European aperitif is on William Rubel's website (williamrubel.com). Traditionally in France the walnuts (from J. regia) are harvested around June 24, which is Saint Jean's Day, the feast of Saint John. Our southwestern species don't begin to grow until later in July. I don't know if our wild walnuts will yield a quality flavored product (it's actually one of several flavorings in what's known as a fortified wine, since it's made by infusing alcohol and wine with botanicals and spices). The recipes refer to the astringent quality of the walnuts, and ours certainly have that characteristic. I gathered these in New Mexico's Mimbres Valley, northeast of Silver City.


Vin de Noix (from William Rubel)
40 young walnuts that can be pierced with a needle, rinsed and quartered
1 liter alcohol such as brandy, marc, eau de vie, or vodka
5 liters red wine
1 kg sugar (2 pounds)
One or more of the following are often added, but are optional
12 walnut leaves
Zest of 1 orange
4 to 8 cloves
1 vanilla bean

[I reduced the recipe to 15 wild walnuts; 1.25 L red Italian table wine; .25 L vodka; 225 g sugar; 4 walnut leaves; half a vanilla bean; zest of 1/4 orange; 4 cloves.]
1. Pick the walnuts in late June when the walnuts are well formed, but can still be pierced with a needle. Place all of the ingredients in an 8 quart (8 liter) non-reactive container with a lid. I use a large glass jar. Store in a cool dark place for 6 to 8 weeks, shaking occasionally.

2. Strain through cheesecloth into a bowl. Taste, and adjust the sugar if you want the drink to be sweeter. Bottle and store in a cool dark place until the cold weather.

Check back in eight weeks for a taste test. I'll also look for ripe walnuts in the fall; these make excellent pigment.

Making pigments from local materials (2): oak galls


On Friday we drove the southwestern flanks of the Santa Rita Mountains to the hamlet of Patagonia ~ we stayed roughly above 4,000 feet elevation, and I had plenty of opportunity to look for oak galls to try the recipe for oak gall pigment in Gwen Diehn's Decorated Journal. Oak galls are the leftover baby wasp 'housings'; worldwide there are thousands of tiny wasp species (some no bigger than the nib on a pen), which are obligate to one species of oak. On this oak they inject a hormone that triggers the oak to form this structure . . . in which the wasp lays its eggs, which then develop, nicely protected, in the gall. Some are tiny, some are large. All are produced entirely by the plant, and are tannin-rich (and thus can produce nice inks and pigments; galls in Europe have been used for centuries as inks; tannins also are used for curing leather ~ the origin of "tanning"). The holes in the galls indicate where the young wasps emerge.

I finally found some nice big ones, on a Mexican gray oak (Quercus grisea), and collected five.

Back home, I followed the Medieval recipe: 

Grind the galls to powder ~


Boil them in rainwater for as long as it takes to recite the Pater Noster three times ~


Add drops of a mild acid (vinegar or lemon juice) until the liquid turns from rich brown to deep black.

Results are inconclusive as well as enticing. While the majority of the liquid never turned beyond a rich, reddish brown (see the leaves in the drawing above, of the oak galls ~ these are painted with the gall pigment; the oaks there were very stressed, with dried leaves; did this contribute to tannin-poor galls?), I laid down a silver-plated spoon, on which were bits of the ground gall and liquid, on the counter; half an hour later, a tiny puddle under the spoon was a rich, dark black. I tried many other experiments - boiling further (to reduce), adding more lemon, adding vinegar, but was never able to reproduce that one teeny black smudge.

So, my experiments will continue  . . .

Making pigments from local materials

In the past few weeks I have been spending more and more time on my nature journal, which I have been keeping for nearly 20 years. I made the leather cover and a simple page-attachment system (tied with a leather strip) so I can use any paper I like, cut and drilled to fit. There are loops inside for pens. It's been with me all over the world, recording what I see and experience.

I started adding sketches in the mid-1990s, working from the Clare Walker Leslie's books on nature journals and the excellent Drawing from the Right Side of the Brain. The latter is excellent for those of us who have both a strong science leaning as well as an artistic side, but the science side gets in the way of free-flowing art and sketching especially.

Now I've been adding watercolor and a few more collages to my journal, switching to archival watercolor paper and handmade art papers.

In the Decorated Page, Gwen Diehn describes making pigments from local minerals and organic matter - and I had to try it. First, I made ink with charcoal from local mesquite, and then a beautiful ochre pigment from clay collected on a nearby road. I will post tutorials soon. And I can't wait to try other minerals and materials - oak gall ink, turquoise, fluorite, and chrysocolla pigment . . . 

Found objects - Travelers' Treasures Collection


These two pieces represent art made from treasures found while traveling. Pieces such as this can be some of the most treasured we have . . . with each bit reminding us of a moment, a place, a person.

Although created 10 years apart, they ironically were each inspired by focal points found along England's southern coast . . . a piece of green sea glass from near Dover, and a small granite beach cobble worn with a perfect hole.

  • Olde England: Hastings bedrock granite pebble bead, made by the Atlantic, found last year (2008); feathers from a garden rook and an African lilac-breasted roller (we were en route back from an East Africa trip, stopping to see friends in Hastings), English coins, blue beach glass, obsidian, fossil ivory (from England), and amber, including an earring whose mate I lost on that same trip.
  • Seaside England: Ten years earlier I had found the lovely tumbled green glass on a walk along the Dover shore; I drilled it, and used lilac waxed cotton to string pearls, seashells, and painted/dyed fish vertebrae beads from an old Seri Indian necklace bought along the Sea of Cortez on a trip with the same English friends we were with in Dover.
Do you have treasures from your travels? I will do commissions upon request. Please email me at this address.