The ins and outs of airing down
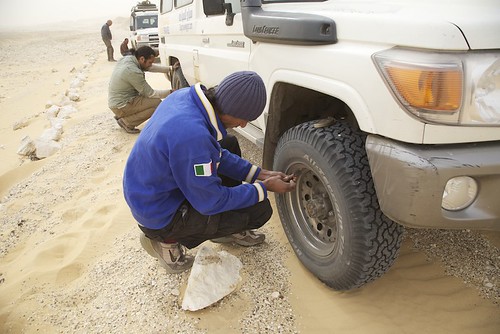
Airing down in Egypt
My early four-wheel-drive experience was strictly trial and error, heavy on the error. A friend owned a beat-up mid-60s FJ40 shod with skinny Armstrong True Tracs and equipped with a Ramsey winch wrapped with a rusty steel cable. We took that thing everywhere, including trails around southern Arizona that I’d later learn were rated 4+ and even 5 on the vehicle-based system. When we got stuck or couldn’t drive up some ledge, which was frequently, we’d simply unspool the winch cable, wrap it around a big rock and hook it to itself (I know, I know), and pull ourselves out. The rocker panels on that poor 40 eventually got battered into gentle arcs (call it a “redneck body lift”). But we had fun and learned a lot—enough that when I got my own, much nicer, FJ40 I was able to keep its rocker panels the way the ARACO body plant meant them to be.
This do-it-yourself approach explains why I came late to the concept of airing down tires on off-pavement trails and four-wheel-drive routes—I simply didn’t hear about it until well into the 1990s, when I began subscribing to magazines that included articles by expedition travelers such as Tom Sheppard. It never would have occurred to me on my own that deliberately letting air out of one’s tires could be a good thing.
Now, of course, the benefits are well-known to anyone who has read anything about overland travel: Reducing tire pressure to suit the conditions allows the tire to more effectively mold itself to the terrain. That increases traction, which reduces wheel spin. That in turn reduces trail damage as well as stress on the vehicle’s drivetrain and wear on the tire itself. In soft sand the enlarged footprint (which comes mostly from lengthening of the tire carcass, rather than widening) provides hugely increased flotation. It’s basically a win-win-win technique, as long as one is circumspect about mixed terrain: You might choose 14 psi for soft sand unless that sand is interspersed with sharp rocks likely to puncture a sidewall (as we encountered in Egypt with the dreaded kharafish—razor-edged lumps of limestone). Airing down even enhances ride comfort on rough roads, as it allows the tire to conform to small obstacles rather than bouncing over them.
If the benefits of airing down are so well-known, why don’t more people practice it? It boils down to two issues: sheer laziness, and lack of proper equipment. And the former is often caused by the latter. If you have to deflate each tire one at a time using the awl on your Swiss Army knife or the button on the back of a tire gauge, and if re-inflation is a 45-minute process tackled with a $29.95 compressor (“with flashlight!”) better suited to blowing up volleyballs, you’re just not likely to do it unless you actually get stuck first.
Since tire failure—whether a simple puncture, losing a bead, or damaging a sidewall—is still the number one cause of vehicle breakdowns, a high-quality compressor should be part of your kit anyway. In fact, after the most basic upgrades on any 4WD vehicle—tires, for example—a proper compressor comes near the top on my list. Maybe even before a fridge.
With a good compressor to handle re-inflation, your next goal is to avoid prolonged genuflecting in front of each tire, letting air hiss out slowly though the valve. There is a dirt-cheap way to accomplish this: Buy a valve-core removal tool. Although it seems drastic, removing the valve core is the absolute quickest way to deflate a tire, yet it’s not so quick as to be difficult to control. Your pressure gauge will still work, and you just need to be ready to reinsert the valve core when the pressure gets close to your target.
The big problem with this technique—besides the fact that it’s a manual, one-at-a-time procedure—is that the tire pressure will do its best to wrest the tiny valve core out of your grasp just as you’re removing (or reinserting) it, and send it flying ten feet over your shoulder. By the time you find it (assuming you can), you’ve got a flat tire.
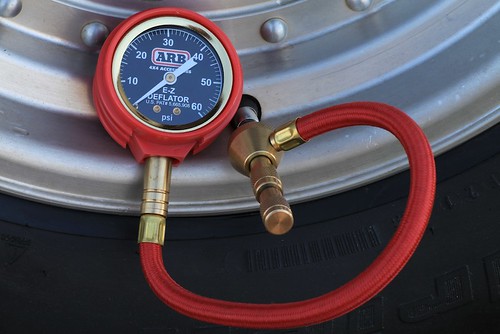
A safer and more stylish approach to the VCR technique can be had with the ARB E-Z Deflator. This tool comprises an elegantly complex brass fitting with a hose and gauge. The fitting screws on to the valve stem, and a separate knob then unscrews the valve core but contains it securely within the mechanism. Pulling back on the collar attached to the air hose and gauge then allows air to escape with a satisfying whoosh. Push back in to stop the flow and check the pressure. It appears to be just as fast as the riskier method—I deflated a 235/85 R16 BFG All-Terrain (my reference tire for the entire test) from 40 psi to 18 in 33 seconds flat.
However fast it is, the ARB still requires full operator attention—which brings us to automatic deflators. While not as quick individually as valve-core removal, you can be doing other things, such as chatting to your friends, getting a snack, or checking the vehicle, while the tool does its work, and if you have multiple deflators the total process can be quicker than the fastest one-at-a-time technique. In fact, with two of the types of deflator reviewed here, you can drive off while they’re attached and working, thus reducing the time stopped to a couple minutes, and pretty much eliminating your last excuse not to do so.
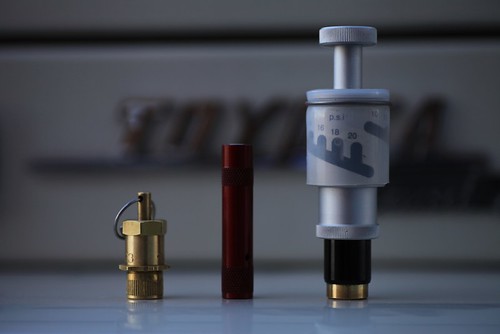
Left to right: Staun II, Trailhead, and CB Developments automatic deflators
The mechanics of an automatic tire deflator are deceptively simple. Essentially the device comprises a plunger with a seal, and a spring calibrated to compress at a certain psi to allow air to flow past the seal and out of the tire. By using a screw-in cap as a base for the spring, its tension can be altered to allow multiple settings in one deflator. The engineering feat is to produce a device that will do this accurately and repeatably over a broad range of pressure.
Coyote Enterprises Staun II $80 (set of four)
Staun is the grandfather of deflators, designed in Australia in 1998. I had one of the early sets, and while they were convenient, I found the target pressure to vary by as much as two or three psi—potentially critical if you’re airing down to the low teens (below one bar) in soft sand. Go too low unintentionally and apply too much welly or steering lock and you can pop the tire bead off the rim. So I was curious to see if the newer style would be more accurate.
The second-generation Staun (made in the U.S., and covered by a lifetime warranty) benefits from a number of modifications. The claimed range is now an astonishing 3 to 50 psi—the original Stauns needed three part numbers to cover this span. Two sets of springs are included to adjust the limits. Also, there is a manual start ring, which among other things allows you to initiate deflation if there is insufficient pressure difference to trigger it otherwise—say, if your tires are at 21 psi and the Stauns are set to 18, or if you want to bump the pressure back down after airing down on a cold morning and driving until the tires warm up (they regain a bit of pressure when hot). The new Stauns also take only two or three turns to lock onto the valve stem. Finally, the maker now sanctions driving off with the Stauns in place and letting them work en route.
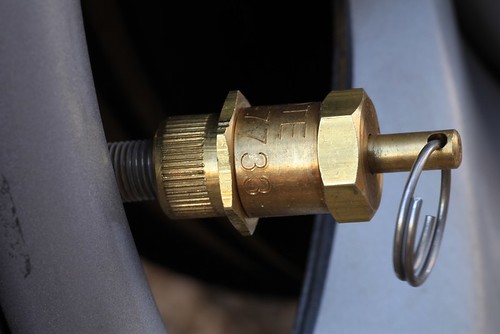
Made of solid and confidence-inspiring brass, the Stauns come with a clear set of calibrating instructions. First, manually deflate a tire to the nominal pressure at which you want to set the Stauns. Turn the hex locking nut and the top of the deflator all the way down (clockwise). Now screw the deflator on the tire until it’s snug, and slowly turn the top of the deflator counterclockwise until air is released. Immediately turn it back clockwise until the air just stops, then turn the lock nut up until it locks the body in place. That’s it. If you prefer different pressures on the front and rear of the vehicle, you can set two to each, and file a notch in the edge of one pair to identify them.
I used 18 psi as my target—it’s a good rough-trail pressure for my FJ40 and many similar-sized vehicles. If you’re quick you can calibrate all four deflators on the reference tire without adding air, but I bumped it back up with the compressor after two (the 235/85s don’t have a lot of volume). With the tire reinflated to 40 psi, I screwed on one of the Stauns and clicked a stopwatch. Three minutes and 19 seconds later, the device snapped closed, and my calibrated gauge confirmed that the shutoff pressure was dead on 18 psi. Reinflating to various pressures and trying the remaining three produced nearly identical results: None was more than a half pound off. Furthermore, with the manual-start ring I found I could initiate deflation even when the tire pressure was only two or three psi higher than the set pressure.
You can estimate a new setting on the Stauns in the field by loosening the lock ring and turning the cap. One turn either direction (clockwise to increase, counterclockwise to decrease) equals “three to four” psi according to the instructions. Mine seemed to do about three per turn, but it’s definitely a rough guide.
Given its accuracy and additional features, the Staun II is clearly a worthy upgrade to the original.
Trailhead $75 (set of four)
Trailhead (originally Oasis) deflators pioneered the “drive-away” function, which made stopping to air down a two-minute procedure. While the Stauns now offer the same capability, I have to admit I was hesitant to do so given their relatively weighty brass construction. Not so with the Trailheads—each slim anodized-aluminum unit weighs barely ten grams, compare to 25 for a Staun.
The procedure for calibrating the Trailhead deflator is a contrast as well. Using the included 5/32 hex key, you unscrew the internal cap until it is perfectly flush with the body. This represents the lower end of the range (5 psi on my 5 to 20 psi model; a 15 to 40 model is also available). From there, each full turn back in supposedly represents an increase of 1.5 psi. To get to my target of 18, I counted up—6.5, 8, 9.5, etc.—until I got to 17, and then added about two-thirds of a turn to estimate 18. I screwed on the deflator and hit the stopwatch, and it shut off just two minutes and 19 seconds later. However, when I checked the pressure in the tire it was at 20 psi. I gave the cap a full turn back out and tried again. This time, after two minutes and 31 seconds, it was within a half pound of 18. I tried the same procedure with the other three units, and each one stopped around two pounds short of the target pressure. So setting the Trailheads precisely required more fiddling. Once finished, however, they remained accurate.
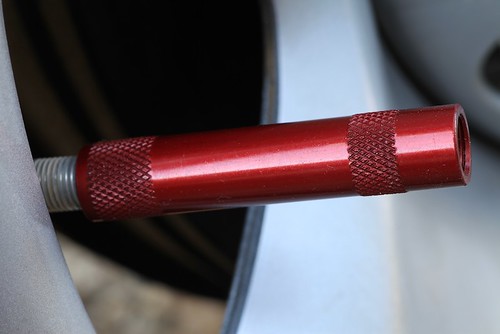
The Trailhead deflators have no manual start function, and the instructions caution that initial tire pressure must be roughly twice the set pressure for them to self-initiate. I found that a bit pessimistic—mine would all initiate at 32 psi when set to 18. But trying again at 30 produced only silence. So if you drive a vehicle that takes that 30 psi on the road, you’ll have to air down to 16 or below for the Trailhead deflators to work.
The Trailheads can be bought in mixed colors —aluminum, red, or blue—making it easy to identify when you set them up differently for front and rear tires. They are made in the U.S. and come in a pouch with instructions, the hex key, a tire gauge, and a handy tire deflation guide.
CB Developments Mil-Spec Tyre Deflation Valve $100 (each)
Compared to the lengthy calibration sequence necessary to set up the Staun and Trailhead products, the procedure for CB deflators couldn’t be more different: There isn’t one. Push and turn the knurled knob so the pin indexes with the target psi on the body of the deflator, and screw the assembly on your valve stem. That’s it. No need to deflate a reference tire, and no need to use math and a wrench if you want to change settings for differing conditions (or different vehicles) in the field—just turn the knob to the new target. I set one of the CB deflators to 18 psi, screwed it on my 40-psi test tire, and just two minutes and 22 seconds later it was finished, beating out both the Staun and, by a slim margin, the Trailhead. Furthermore, every setting I tried, all the way down to 10 psi, was within a half pound of my calibrated gauge. And the deflator would initiate with as little as two pounds of difference between the tire’s pressure and the target. An excellent performance.
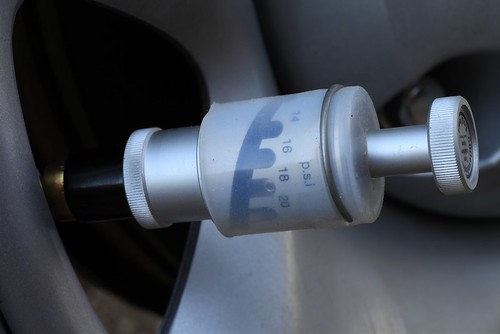
Of course, you pay for that convenience, speed, and accuracy. A single CB deflator costs significantly more than an entire set from Trailhead or Staun. A full set of four would be a frightening chunk of cash. And you cannot drive with the bulky CBs in place, so are tied to the time it takes for however many you own to do their work. The CB deflators also lack the upper range of the Stauns or Trailheads—the highest range model carried by Extreme Outback Products, the U.S. distributor, stops at 20 psi (CB Developments makes another that extends to 24). That means those of you with Sportsmobiles and other heavy rigs, who consider 40 psi to be “aired down,” are out of luck. In fact 20 psi might be marginal for our Tacoma and Four Wheel Camper in anything but soft sand; on the road we keep 50 psi in the rear E-rated BFGs.
Conclusions
All these deflators worked as advertised, and all were very accurate once calibrated. So in a way you can’t go wrong. But in the end I did have preferences.
The Trailhead deflators boast the lowest cost—I’ve seen street prices under $60 for a set—and they were significantly faster than the Stauns. The multi-color option is a nice feature. Their single-hex-key adjustment makes them easier to manipulate than the two-piece adjusters on the Stauns—although as we have seen, the Trailheads take more fiddling to arrive at the target setting. But their biggest drawback is the lack of a manual-start function, and the significant difference in pressure necessary for them to self-initiate. I can recall many situations I’ve been in where they simply would not have worked.
The Staun II deflators run roughly $10 more per set than the Trailheads. However, for that you get a much wider pressure range in one part number, faster calibration, and the ability to initiate deflation with just a few psi difference between the tire and your target. Their sole downside was the slower speed, if the difference between two and a half minutes and three and a quarter minutes is critical to you. I’ll be curious to see how a potential “Trailhead II” deflator responds to the Staun II challenge.
The CB deflators are in a league of their own, in performance, convenience, and price. As long as the psi settings you require lie within the range of the device, there is no easier or more accurate deflator. I keep a pair in my FJ40, and their versatility more than makes up for the fact that I have to deflate tires a pair at a time. If I need to reduce pressure from my nominal 18 to, say, 14, it’s the work of an instant to change the setting—no guesswork needed.
Among the automatic deflators, then, the CB Development Mil-spec product wins if price is no object and the range fits your vehicle. If you baulk at the thought of a $400 set of deflators (or even $200 for a pair), an $80 set of Stauns will serve admirably—and suit a wider range of vehicles to boot.
As to the ARB EZ Deflator, while it is a manual tool, it is in many ways the most versatile of the bunch. If you have a Global Expedition Vehicle* at one end of your garage that you only air down to 55 psi, and a rock buggy with beadlocks at the other end that you take down to four, the ARB is the only tool here that will handle both—and anything in between. At $40 it is the least expensive of all these options. (*That is, ahem, if you didn’t order the GXV’s optional central tire inflation system, which makes this entire article a moot point for you . . .)
Searching for a bottom line, I ran a series of back-to-back double-blind experiments controlled for temperature, humidity, and elevation, and determined that the mean time to stop the truck, deploy a set of Staun deflators, let them finish, and pack them away again is six minutes 37 seconds—which happens to be the exact time it takes to retrieve a cold Coke from the fridge of the JATAC and finish it while sitting in the shade.
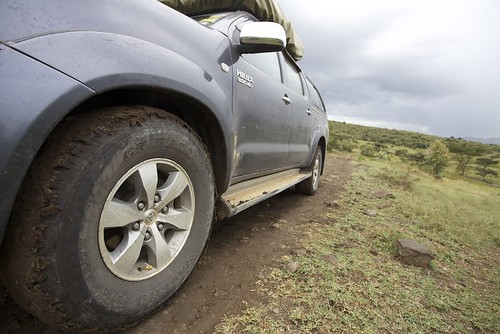
Staun deflators at work in the Rift ValleySource links: ARB, Trailhead, Staun (Coyote Enterprises), CB Developments (Extreme Outback Products)
