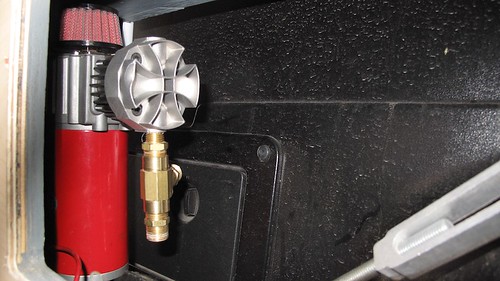
A compressor for the Boss air bags
 The bottom switch adds air to both bags simultaneously. The two buttons above bleed air individually to level side to side.
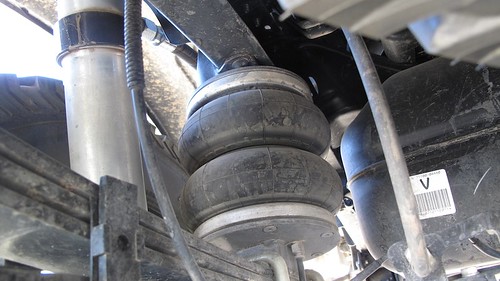
The Boss air bags I installed to level the JATAC (see HERE) have been working perfectly so far. We recently drove into Mexico’s Sierra Madre to retrieve some trail cameras we had set up to survey mammal populations on a remote property owned by the Catholic Church. The last 12 miles requires four wheel drive, and several sections flexed the suspension past its limit so we wound up with one wheel in the air. The Boss bags took it in stride.
When I installed the bags I temporarily hooked up a simple manual-fill arrangement. But the kit came with a very fine compressor and a remote switch and gauge, so last week I installed the complete system to give us push-button control of the bags.
We decided to install the switches and gauge in the camper rather than the cab of the truck, since it’s easier to check the level back there. It also gives us the capability to quickly tweak both the fore and aft and side to side level of the camper when parked. The question was, where to mount the gauge/switches, as well as the fairly bulky compressor. I located what seemed to be a perfect spot for the controls just inside the camper’s door on the left, above the two switches that control the LED interior footlights and the exterior floodlamps. Since the battery compartment is right behind this spot, that would simplify wiring.
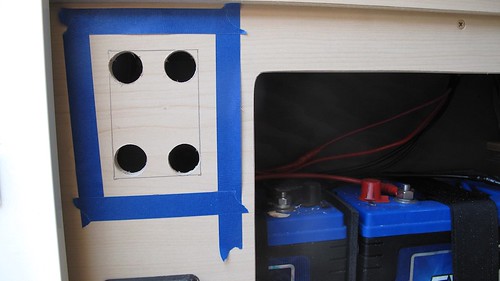 Pilot holes prior to cutting the opening. Painter's tape prevents scratching.
The compressor was more problematic, but eventually I located a spot I thought would work, inside the access port for the left rear turnbuckle that secures the camper to the truck. At the back, inside the hatch, the compressor barely fit vertically against the outside wall of the battery compartment—again minimizing the wiring run.
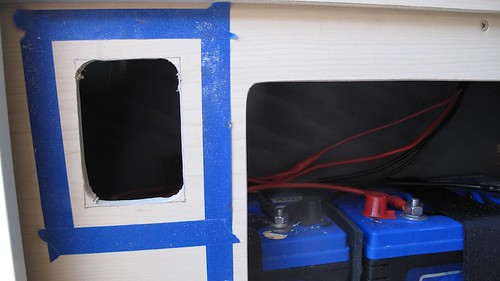
The Boss controls come mounted in a steel panel designed to be attached to the underside of a dash, and that wouldn’t work for this application. I had some 1/4-inch-thick high-density plastic sheet lying around, so I cut a panel from that, drilled it for the gauge and switches, and painted it black with Krylon formulated for plastic. Then I trepidatiously took a jigsaw to the camper’s cabinet and opened a spot for the assembly. The result looked decent and is effortless to access for adjustment.
The compressor took much more winkling, especially because I wanted it secured properly so we’d never have to worry about it vibrating loose. With the help of a sidewinder drill and a bit of blood loss I was able to mount it to the plywood battery compartment wall with stainless bolts and fender washers. I ran the air lines down through a hole I drilled in the bed inside one of the stock little storage compartments. (Doing so confirmed that the fiber-reinforced material Toyota uses on their composite beds is tough stuff indeed; it felt and smelled like drilling through thick fiberglass.)
With everything hooked up, adjusting the level on the truck is as simple as pushing a switch. The way the system is designed, both bags fill at once, and you then use individual buttons to deflate one or the other bags to even them side to side. The clever gauge has two needles, one red and one green. You hook them up so nautical running-light rules apply: red for port (left) and green for starboard.
I won't say having to climb under the truck with a compressor to fill the Boss bags manually was exactly . . . hell . . . but the complete system sure makes it easy.