Journaling Night Skies

How to journal night skies? It's always been a love-hate thing for me—I love tracking the stars and planets and finding constellations, but I was never happy with the journaling results.
Preparing for our recent Sonoran Desert Field Arts Bootcamps, where I knew we’d have great night sky viewing with several Swarovski scopes, I decided to double-down on mastering this skill.
For creating pre-painted watercolor skies on which I could add sky components live or after a sky-viewing telescope session, I turned to the inspiring work and tutorials of Alaska artist Kristin Link, and I’m liking the results. Her technique gives you a rich sky that has a hint of color and lots of depth, so you can easily imagine galaxies far, far away . . .
Using my Sky Palette (five blues plus Burnt Sienna to make blacks and grays), I focused on darks using Indigo alone, then with Burnt Sienna, then brightening spots with runs of Pthalo Blue and Quinacridone Rose. One of the tricks is letting it dry completely between layers (I used a hairdryer).
Stars and labels are created with the Uniball Signo Gel Pen (per Kristin and @johnmuirlaws ), and constellation sketches and plane of the ecliptic line are added with a white pencil.
Below is a video of the process, with steps explained in the caption (the steps match the time stamps):
00:01 STEP 1 Start with a wash of indigo, fading from dark to lighter at bottom. Mix a little burnt sienna into the indigo and darken the top, then drop in pthalo blue and quinacridone rose. Let dry.
00:15 STEP 2 Add another layer of indigo around the edges and smooth into the brighter interior (even wash over a thin layer). Mix a little burnt sienna into the indigo and darken the top and edges. Let dry.
00:27 STEP 3 Mix a dark with indigo and burnt sienna and paint a foreground. Let dry.
00:31 STEP 4 Use a gel pen to add moon, planets, stars.
00:51 STEP 5 Use a white colored pencil to create drawings such as constellations and the plane of the ecliptic.
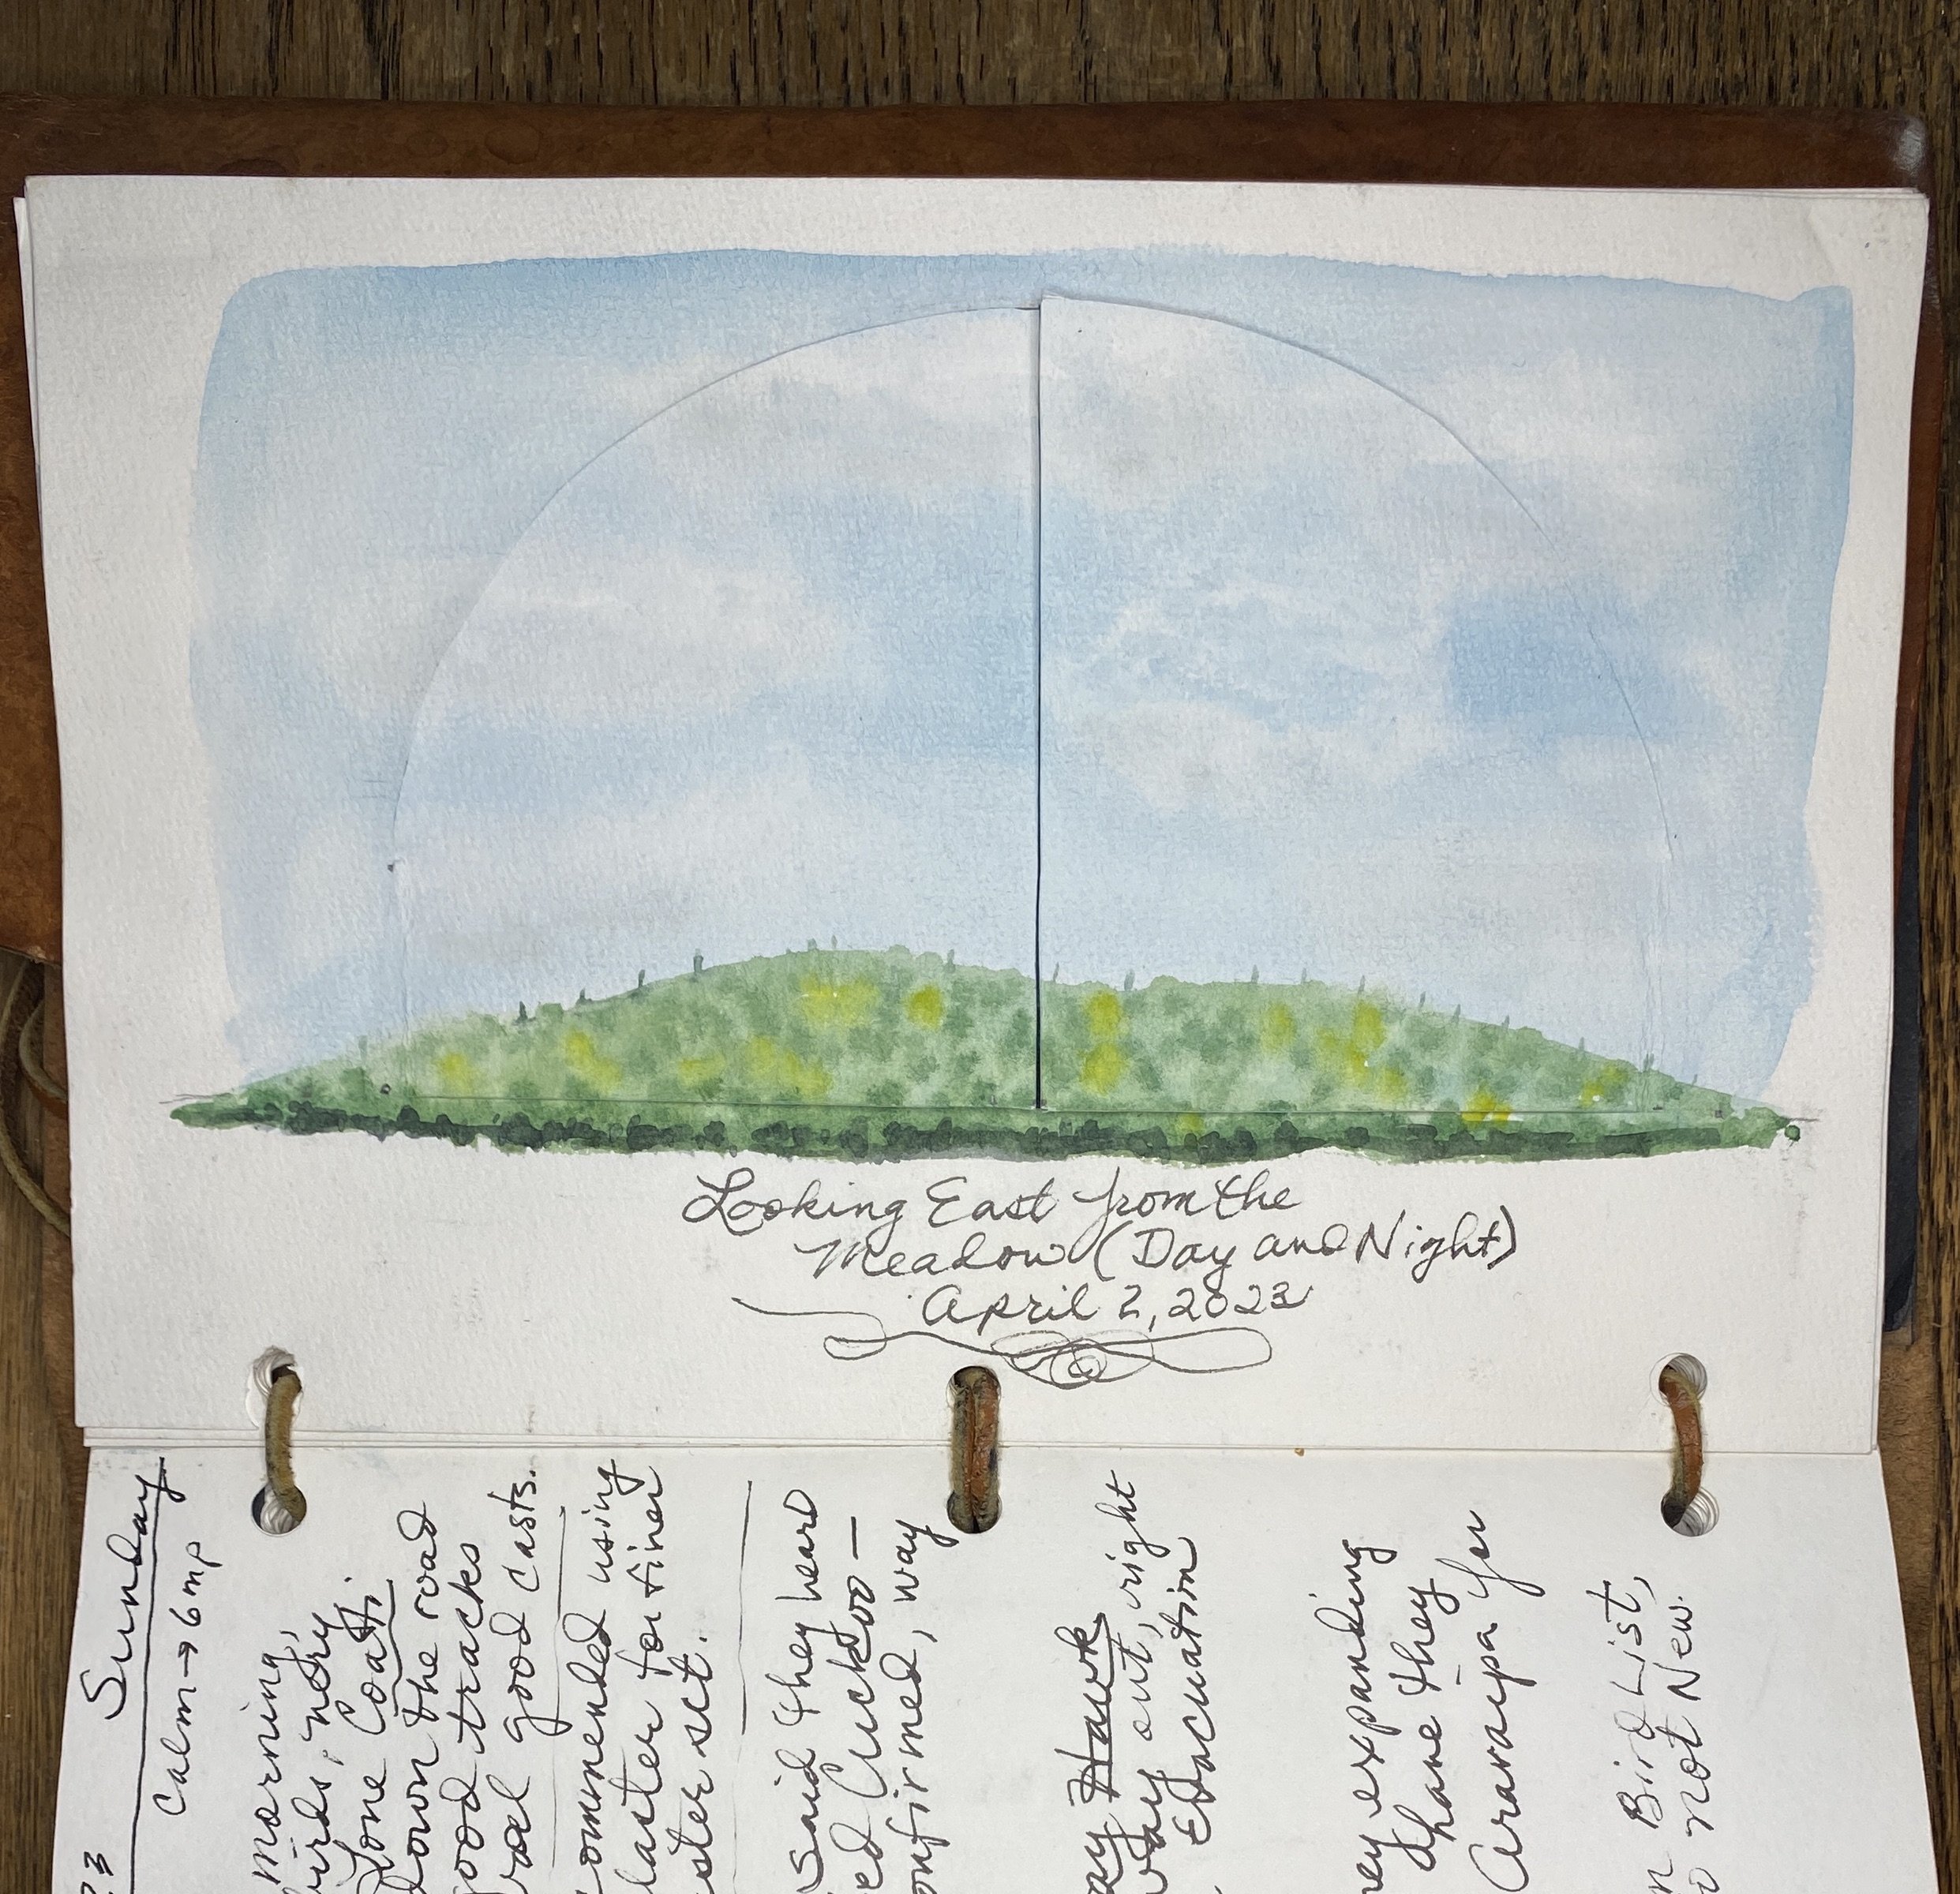

ABOVE: I created this cut-a-away scene by first drawing an eastern view in daytime, then on the next page the nighttime scene of the same view, made a cut-out window, and glued the pages together.
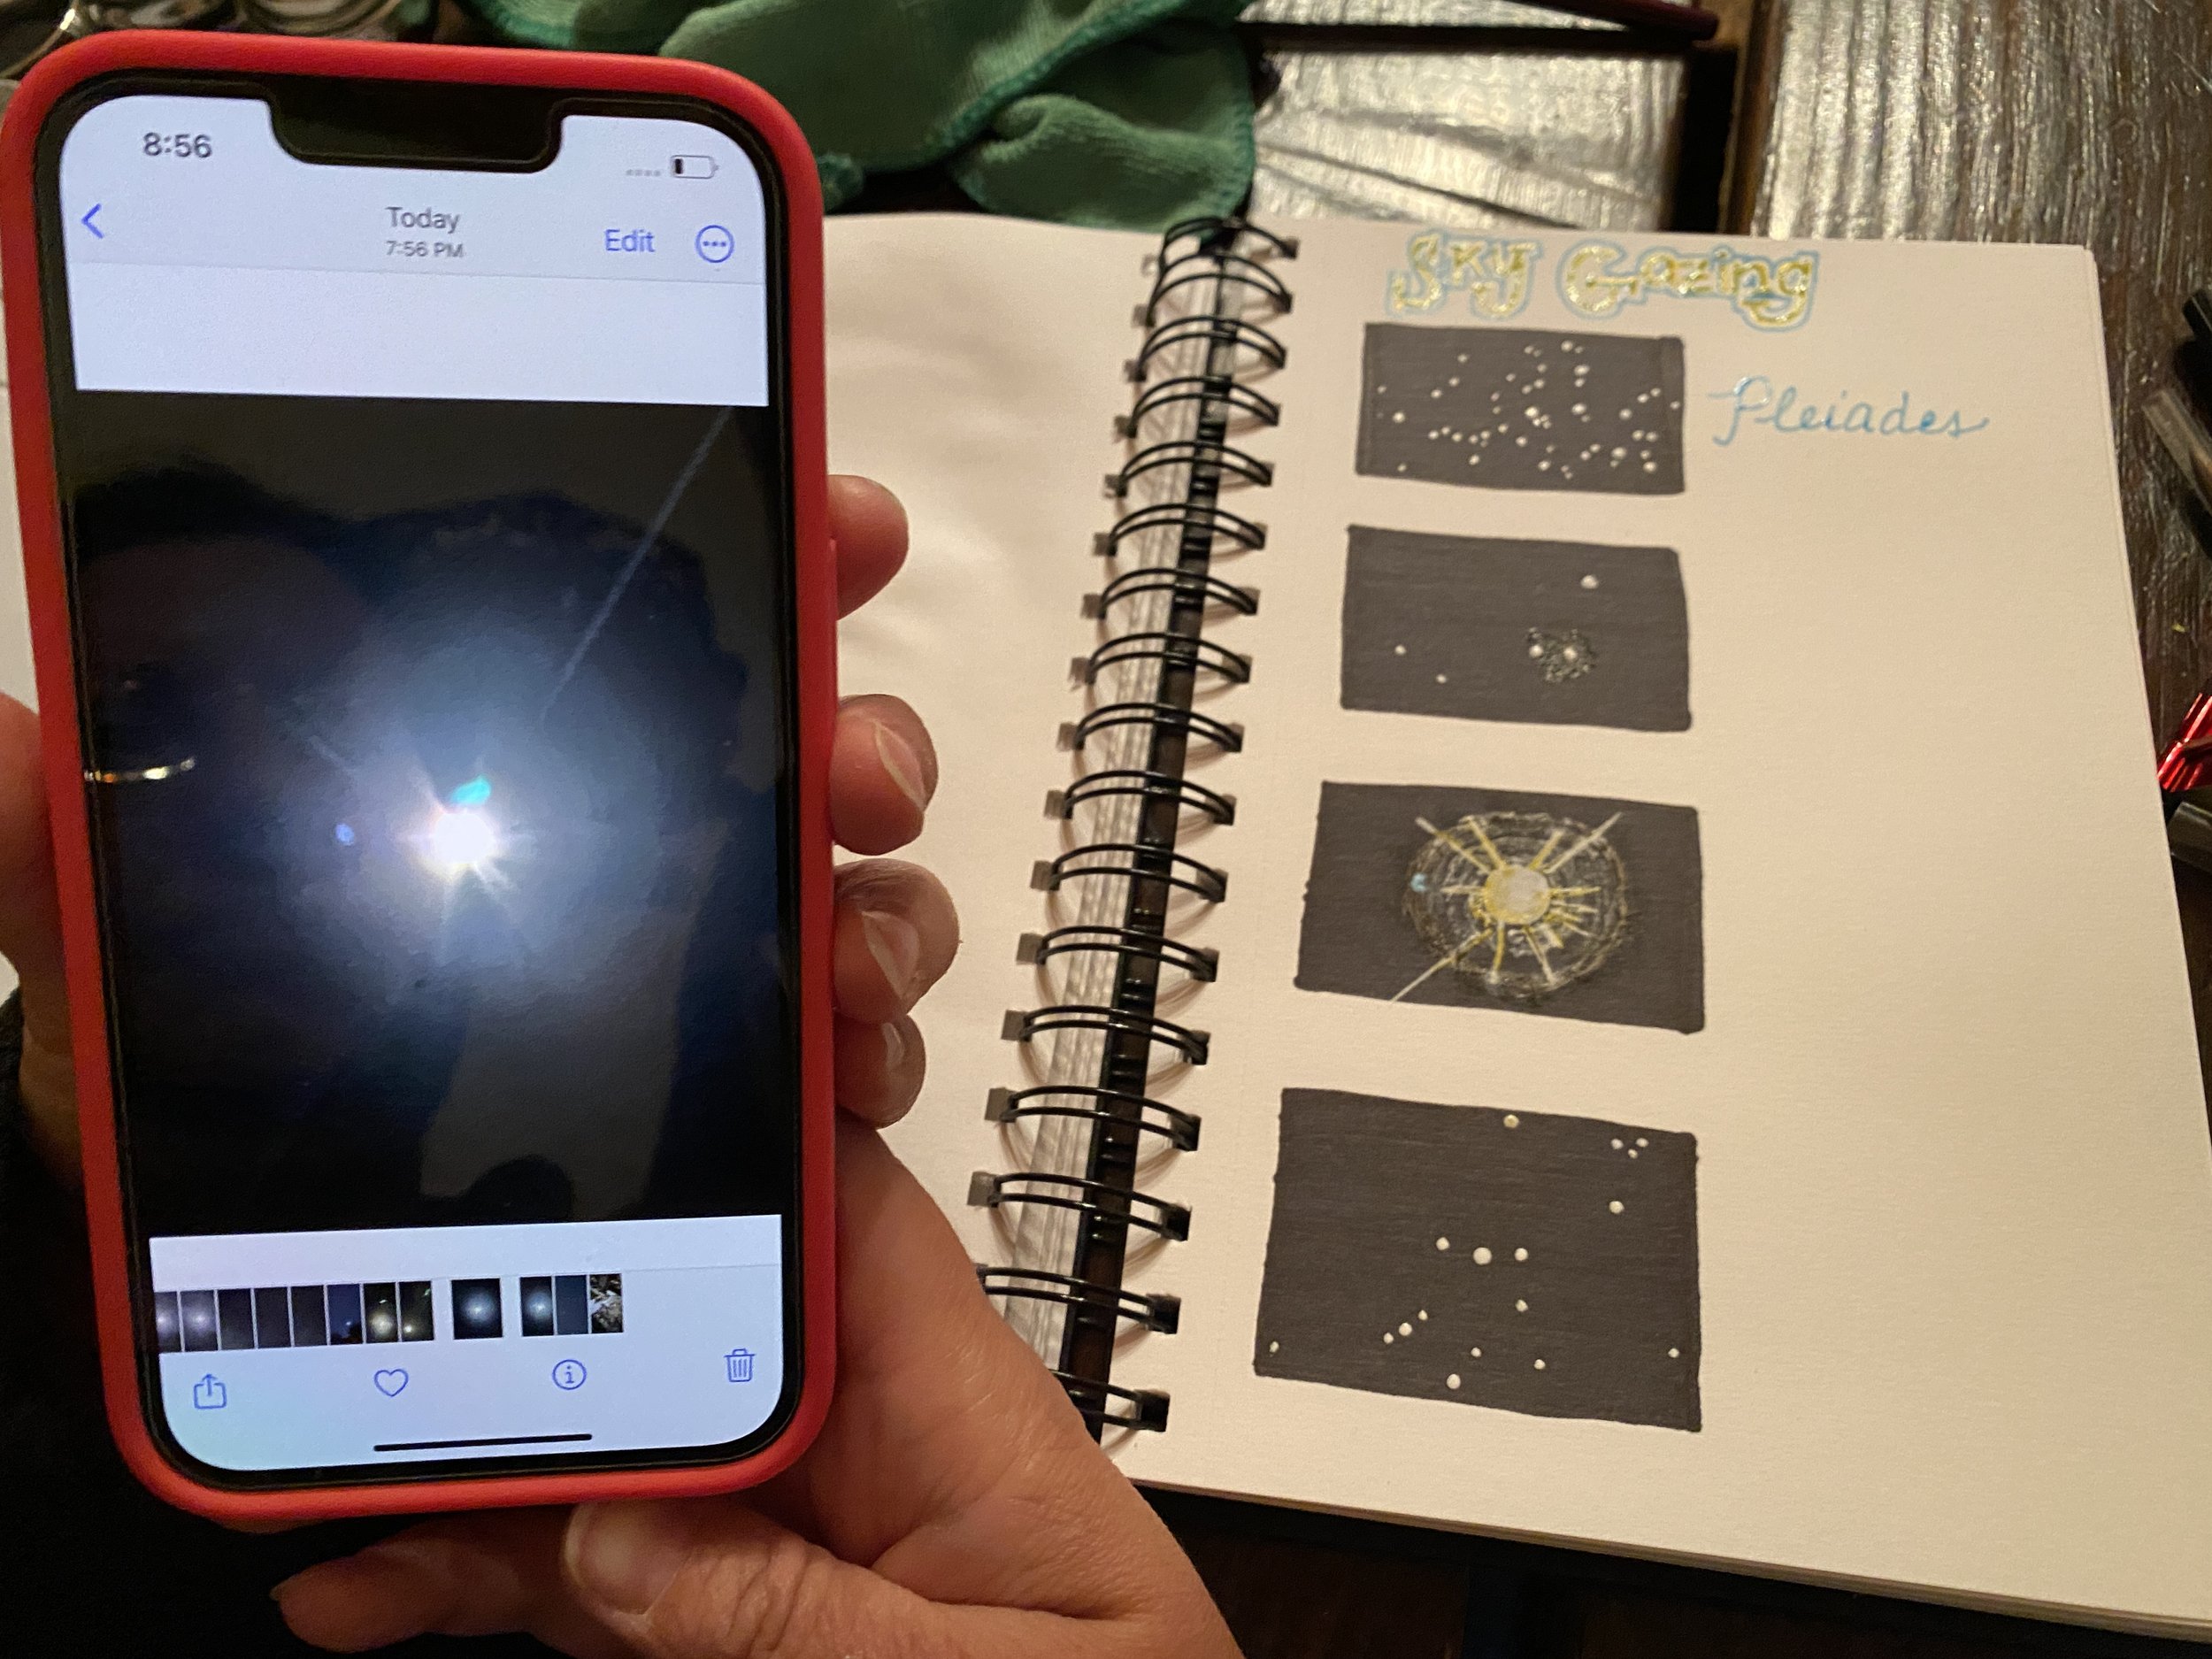
BELOW: Beverly Owens, a science teacher, took photos of the night scenes with her iPhone right through the viewfinder of the Swarovski spotting scope, then she drew them in her journal. The trick for her backgrounds? A Sharpie! Proof that you don’t need to go fancy with watercolor to create great night skies. She used white gel pen and colored pencils.

BELOW: And for zero prep time, keep some black construction paper in your journal to either lace in or glue in. Using a white pencil, I drew the occultation of Uranus and Venus and the other elements of the western skin while laying on my back in the middle of the meadow. Back inside later, I added the labels with a gel pen and enhanced Mars and Aldeberon with red pencil.
