How to render 3D block maps

Cartography is one of the oldest field arts—many ancient petroglyphs might actually be maps (there are several at Twyfelfontein in Namibia).
Here is a step-by-step pictorial on how to render a cool 3D map. I did this one from a photo after a visit to Cave Creek in southeastern Arizona's Chiricahua Mountains. The biggest challenge is pulling the "box" out of the 2D image and envisioning the "cut away" part in a way that works in a 3D cube. Thanks to John Muir Laws for the tutorial in his excellent Laws Guide to Nature Drawing and Journaling.

Study your photo or live landscape and decide where you want to pull out your 3D box. I wanted to be sure to depict the creek, especially the whimsical spillage off the box (idea stolen from Jack Laws). Getting the landscape right in the box is the hardest part, and you will probably have to do 4 or 5 tries before it feels right. That's how many it took me on this one! I used this photo for inspiration; from the Friends of Cave Creek Canyon (FOCCC) on Facebook, by Steve Wolfe.

After studying your photo (or live landscape) and deciding where to pull out your 3D box, use pencil to draw a rectangle on your page. with all the corners and "bottom" included.

Using pencil still, sketch in the upper corners and limits of the landscape within the box. You can see I drew the right-most upper corner too high and fixed it later. Then I added the general creek location and the background.

When I was happy with the placement of the landscape elements, I drew over the main parts in pen.
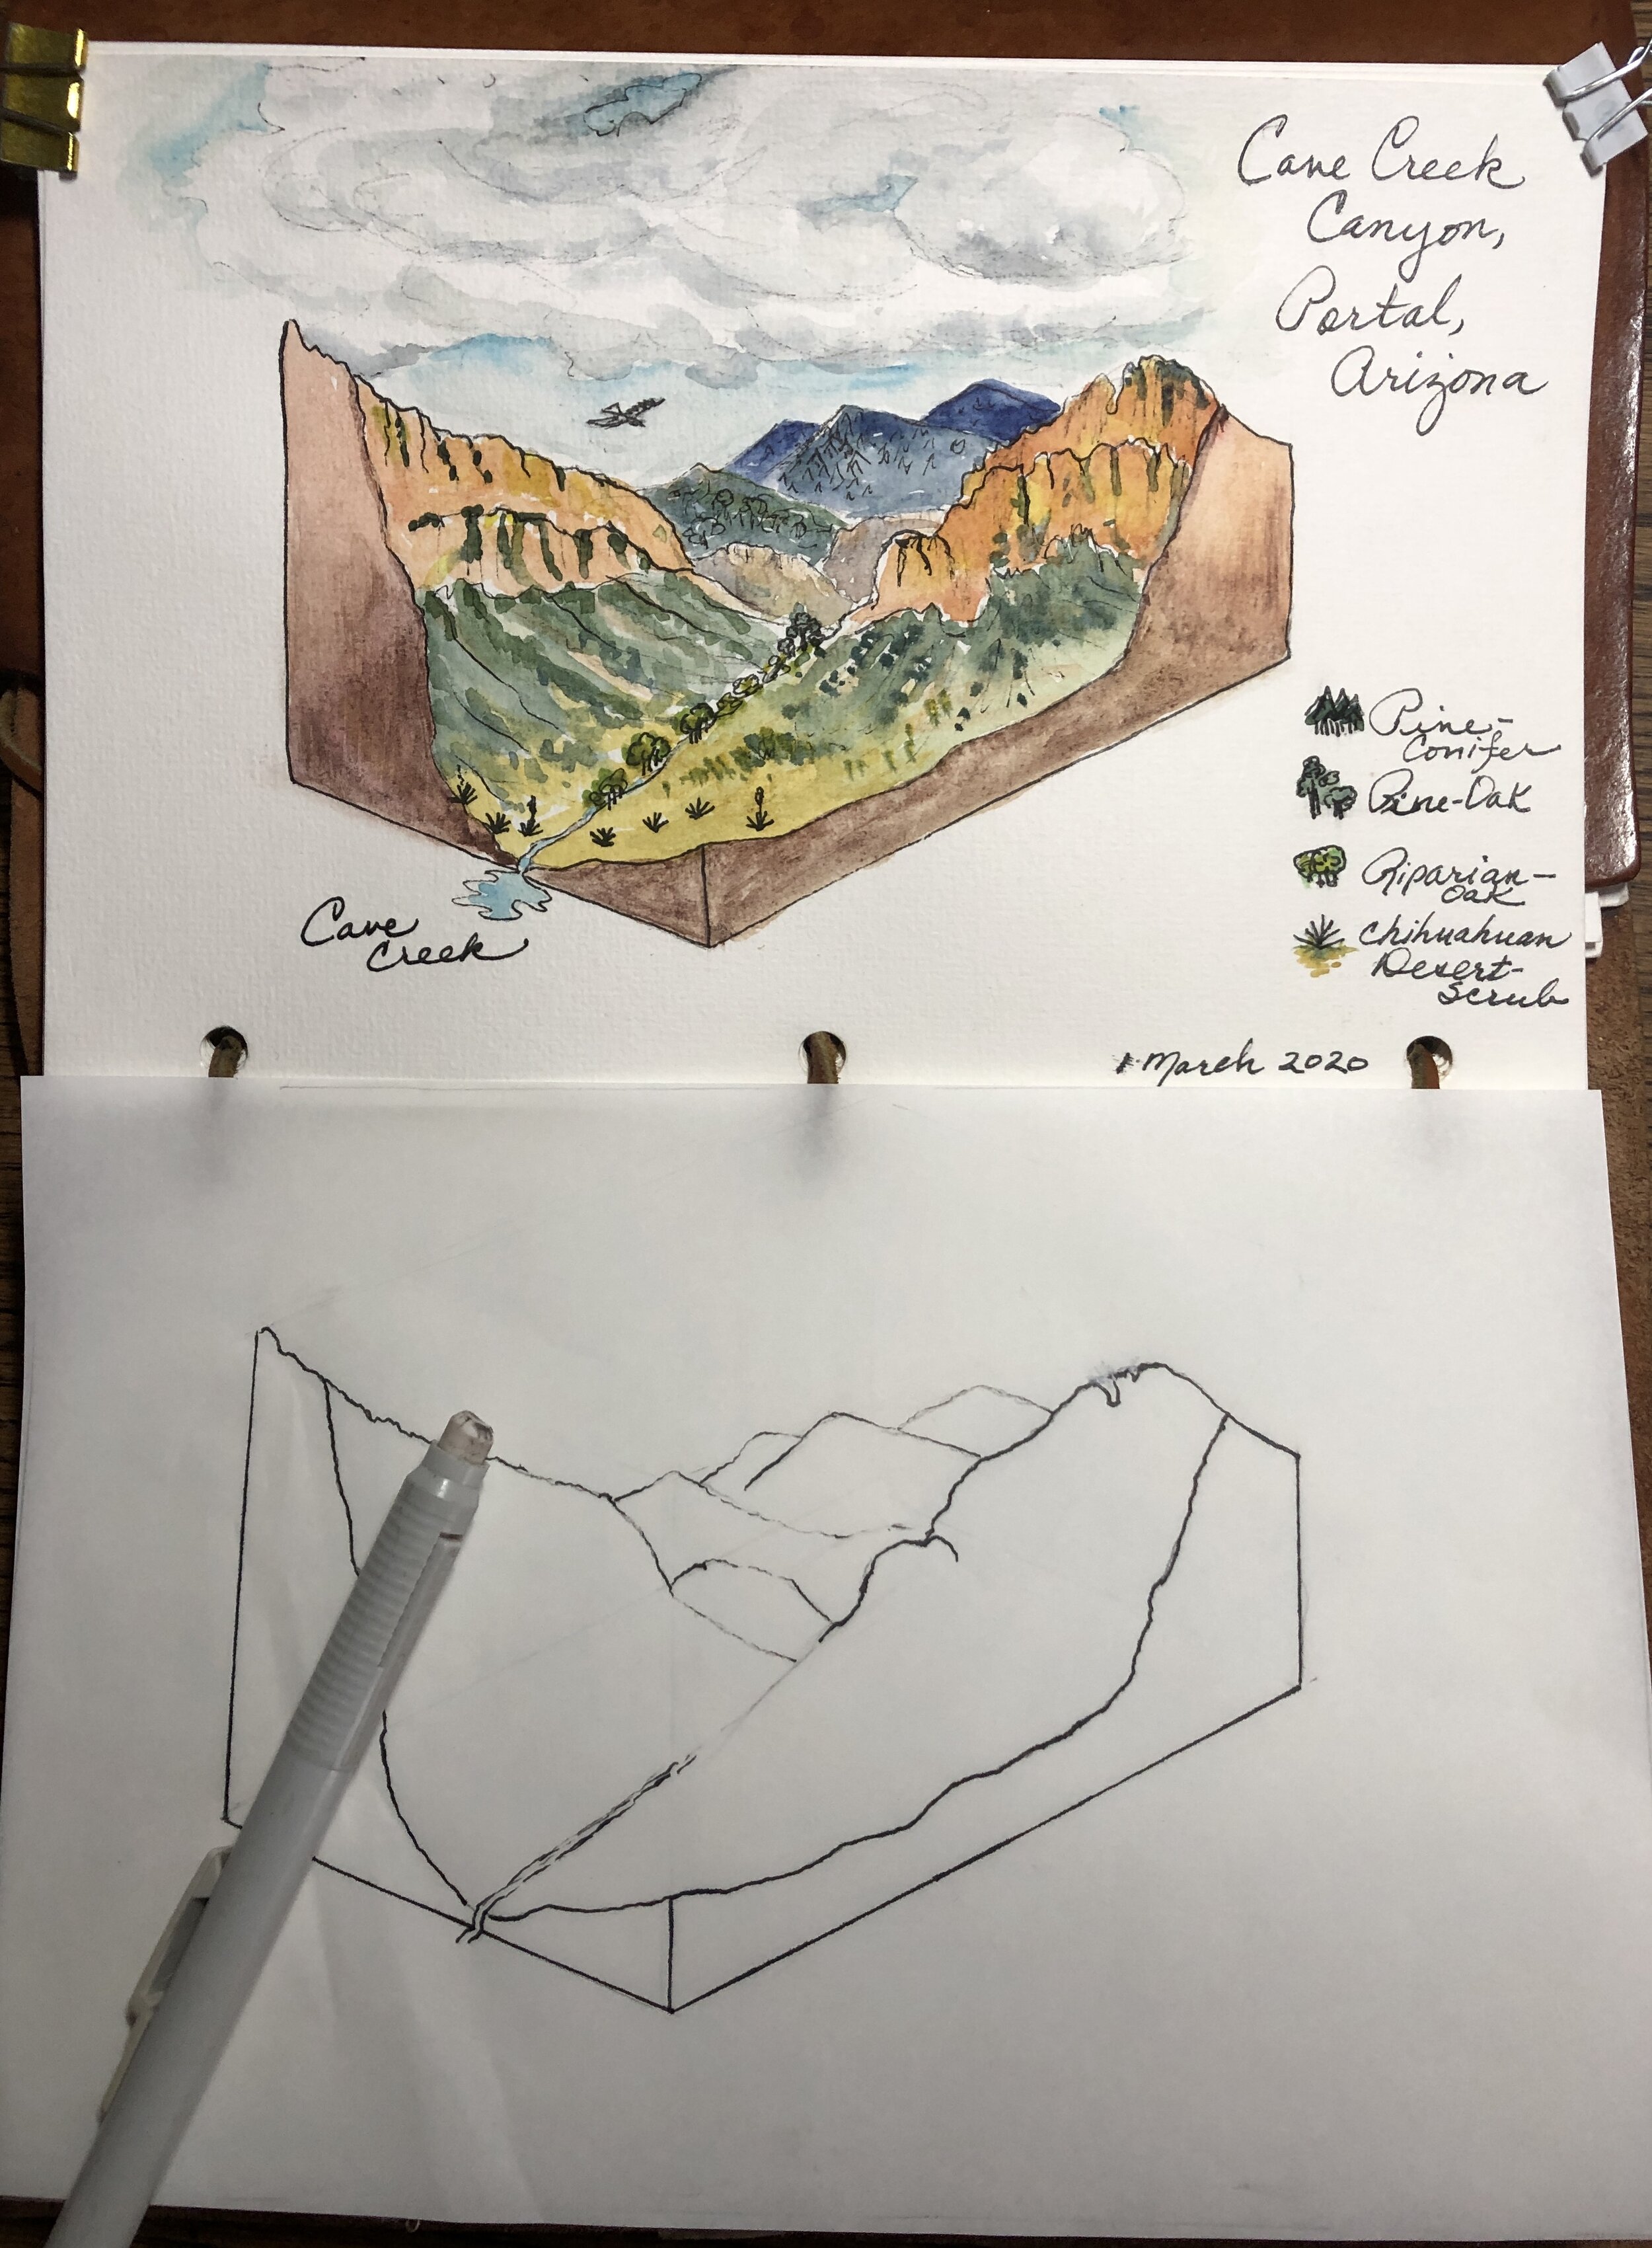
After the pen dries, erase the pencil lines that marked the structure of the box. Then go back with pencil and add details; I roughed in the rock spires, the slopes, where I wanted to make the darker patches of vegetation, and a few symbols for habitat types. When happy, I finalized in loose pen sketching, keeping the marks fairly light.
The final step was adding the watercolor, making sure to make the farthest mountains darker and warmer blue in tone so they feel like they are receding (instead of making them green or cooler blue). Don't go crazy on the details for something this size and this simple.
I decided to add the clouds and hawk as a fun whimsy.