Equipment

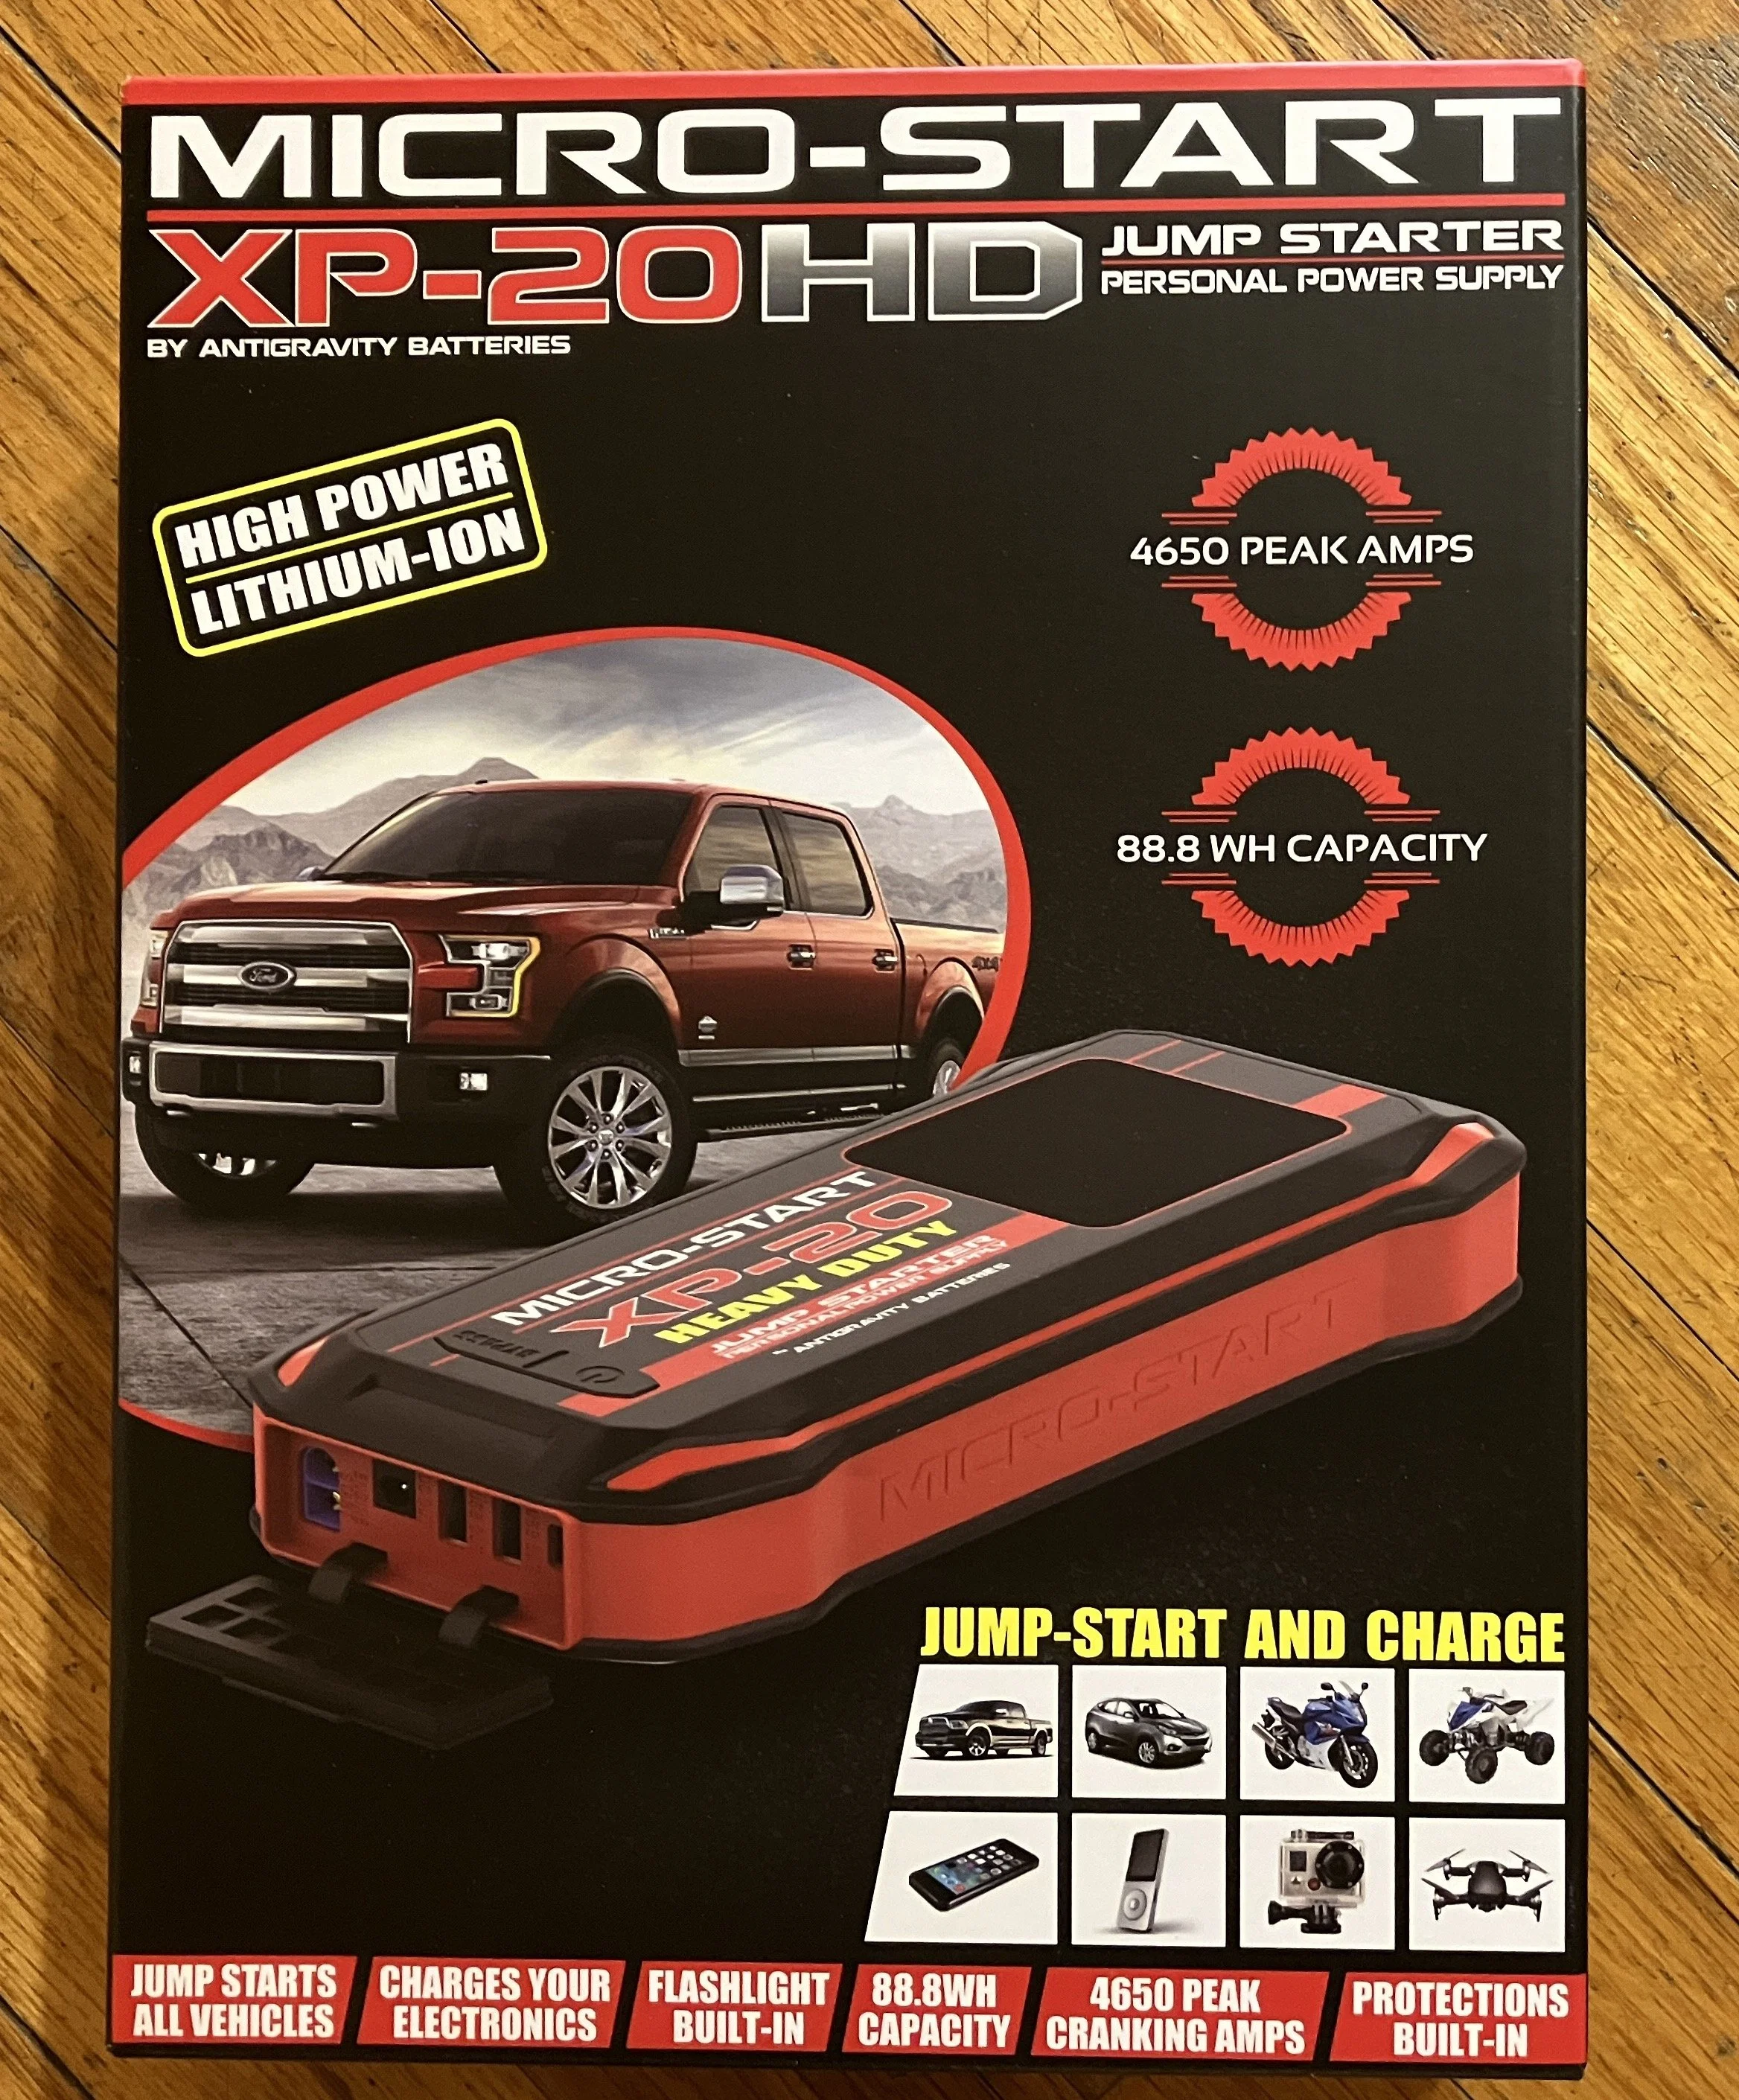
New from Antigravity . . . the ultra-performance Micro-Start XP-20HD

The original Micro-Start XP-1, the first lithium-powered compact jump-starting system on the market, gained instant legend status at the Overland Expo when Tim Scully and I daisy-chained three of them and welded two quarter-inch slabs of steel together, both impressing and horrifying Scott Schafer, the company’s founder. While emphatically not an endorsed application (and probably a deal-killer for any warranty claim), it demonstrated the resilience of the product.

Those same three units went on to do yeoman service at the Expo and on a dozen group trips, jump-starting I have no idea how many SUVs, trucks, and motorcycles, in addition to running our portable devices at the show and other events. We’ve never been without one in each of our vehicles since, and when the heavy-duty XP10 was introduced I put that one in our 6.0-liter diesel Ford F350.

Recently, at long last, two of our original XP-1s began to swell slightly, a sign of impending failure even though both still functioned. So I went to the Antigravity website to see what was new—and found quite a lot. There’s now an economical—and super-compact at three by six inches—XP-3 model, just $120, nevertheless suitable for gasoline engines up to 5.7 liters. The XP-10HD exceeds the capabilities of our already stout XP-10. But what caught my eye were the XP-20 and XP-20HD, the new top-of-the line models with seriously enhanced specifications. So I had the company send me an XP-20HD ($249).

And impressive specs they are. For comparison, the XP-10, which as I mentioned is suitable for starting big diesel engines, offers 300 amps of starting current with a 600-amp peak and a total capacity of 18,000 mAh (milliamp hours). The XP-20HD puts out a massive 930 amps of starting current with a 4,650-amp peak, and total capacity is 24,000 mAh.

That’s not all. Both XP-20 models employ USB-C PD 100-watt charging capability, and will fully recharge in one hour from either a 12VDC or 120VAC source. Each also incorporates a large LED screen that reads out percentage of charge and the power draw of whatever device is connected to it (or the input wattage when charging). When I first used the XP-20HD, to power an iPad at a book festival for taking credit-card payments, the output reading alerted us to the fact that the iPad was running a background program that was drawing excess power. Nice. The XP-20 models will also power/recharge laptop computers via the USB-C output/input port.

Large LED screen shows percentage of charge, and input (or output) wattage.

Oh—incidentally—the XP-20HD will start diesel engines of up to 8 liters and gasoline engines of up to 10 liters. That should take care of most of the overlanding vehicles I know . . .

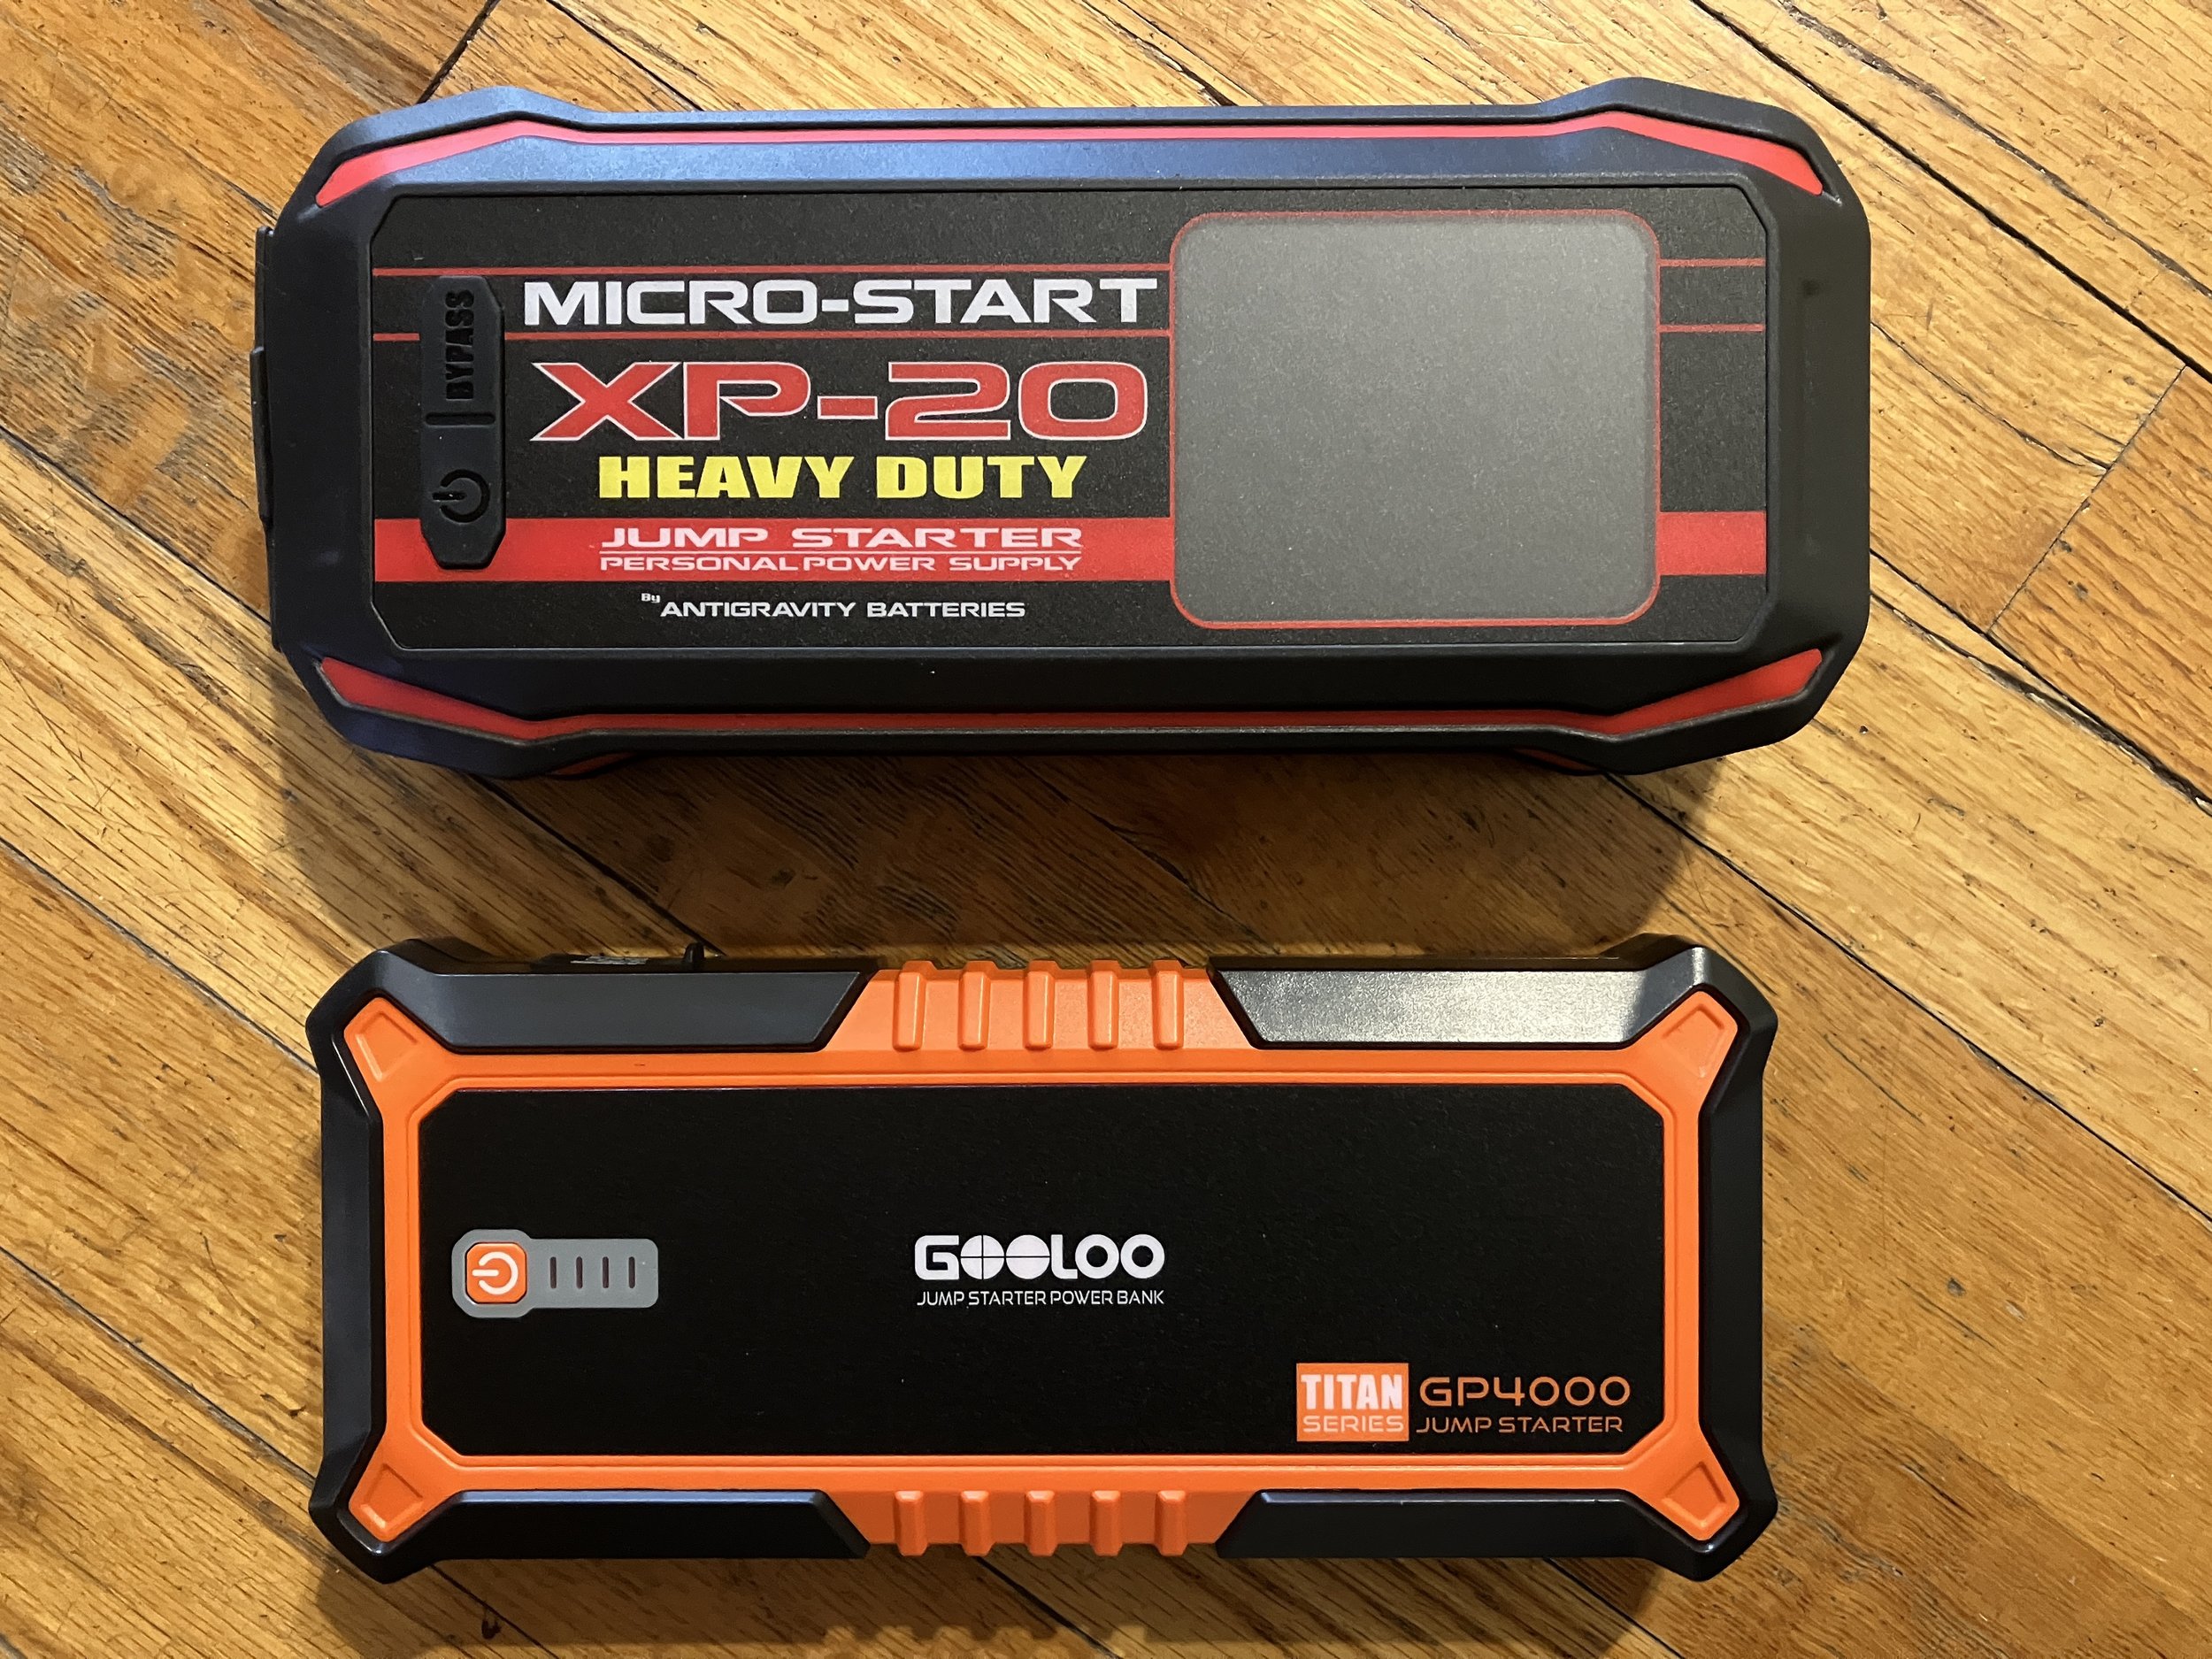
In the years since the XP-1 first came out the concept of compact jump-start systems has exploded in popularity, and you can now find a dozen or more brands you’ve never heard of on Amazon at discount prices. Personally, my experience with the Antigravity units is enough to retain my loyalty, but I thought I would do a comparison, and so took a look at a friend’s Amazon-sourced unit from GOOLOO, the GP400, which sells for a very tempting $130. (I studiously subsumed my editorial annoyance at the ALL-CAPS brand name and did not let that sway my opinion.)

The GP400’s starting specifications are impressive, if about 15 percent below those of the XP-20HD: 800-amp starting current and 4000-amp peak compared to 930 and 4,650 amps. Much more notable is recharge time: five hours for the GOOLOO versus one for the Micro-Start, thanks to its USB-C PD connection and 100-watt capability. That same capability also allows a topped-up XP-20HD to completely recharge a dead MacBook Pro in about an hour—the GOOLOO could theoretically charge the same MacBook, but at a much slower rate. (With a USB-C cord you can even use the MacBook’s Powerbrick to recharge the Micro-Start from a 120/240V source. Got that?)

Other bits: The battery clamps on the GOOLOO are described as “all-metal,” while the clamps on the Micro-Start are solid copper. And the GOOLOO lacks the extremely useful digital readout of remaining capacity and power draw. I actually liked the GOOLOO’s semi-hard case better than the Micro-Start’s semi-floppy case, and the GP400 does offer a lot for the money; however, taken altogether I think the XP-20HD more than justifies its price premium, especially considering Antigravity’s stature and reputation.

Even if, like many of us, you have a dual-battery system in your vehicle, a Micro-Start offers additional peace of mind against the possibility of a no-start situation—not to mention numerous opportunites to be a hero helping out others. The advanced device-powering and fast recharging capabilities of the XP-20 and XP-20HD models catapult them even further beyond the original brilliant Micro-Start concept. Impressive.

That reminds me . . . I’ve got a bit of welding I need to do on the FJ40’s rear rack.

Kidding, Scott. Kidding.

The Sherpa Box Air compressor system . . . initial review.

I consider myself the ARB Twin compressor’s number one fan. No other compressor I’ve used displays as much quality, versatility, and speed, either as a built-in unit—the configuration we have on our Land Cruiser Troop Carrier—or as the cased portable we also own, with its included air tank.

However. No one, including me, ever called the Twin a screaming bargain, at $600 for the stand-alone compressor or an eye-watering $990 for the portable unit. If you can afford it, it’s worth every penny. But what if that’s simply too much for your budget?

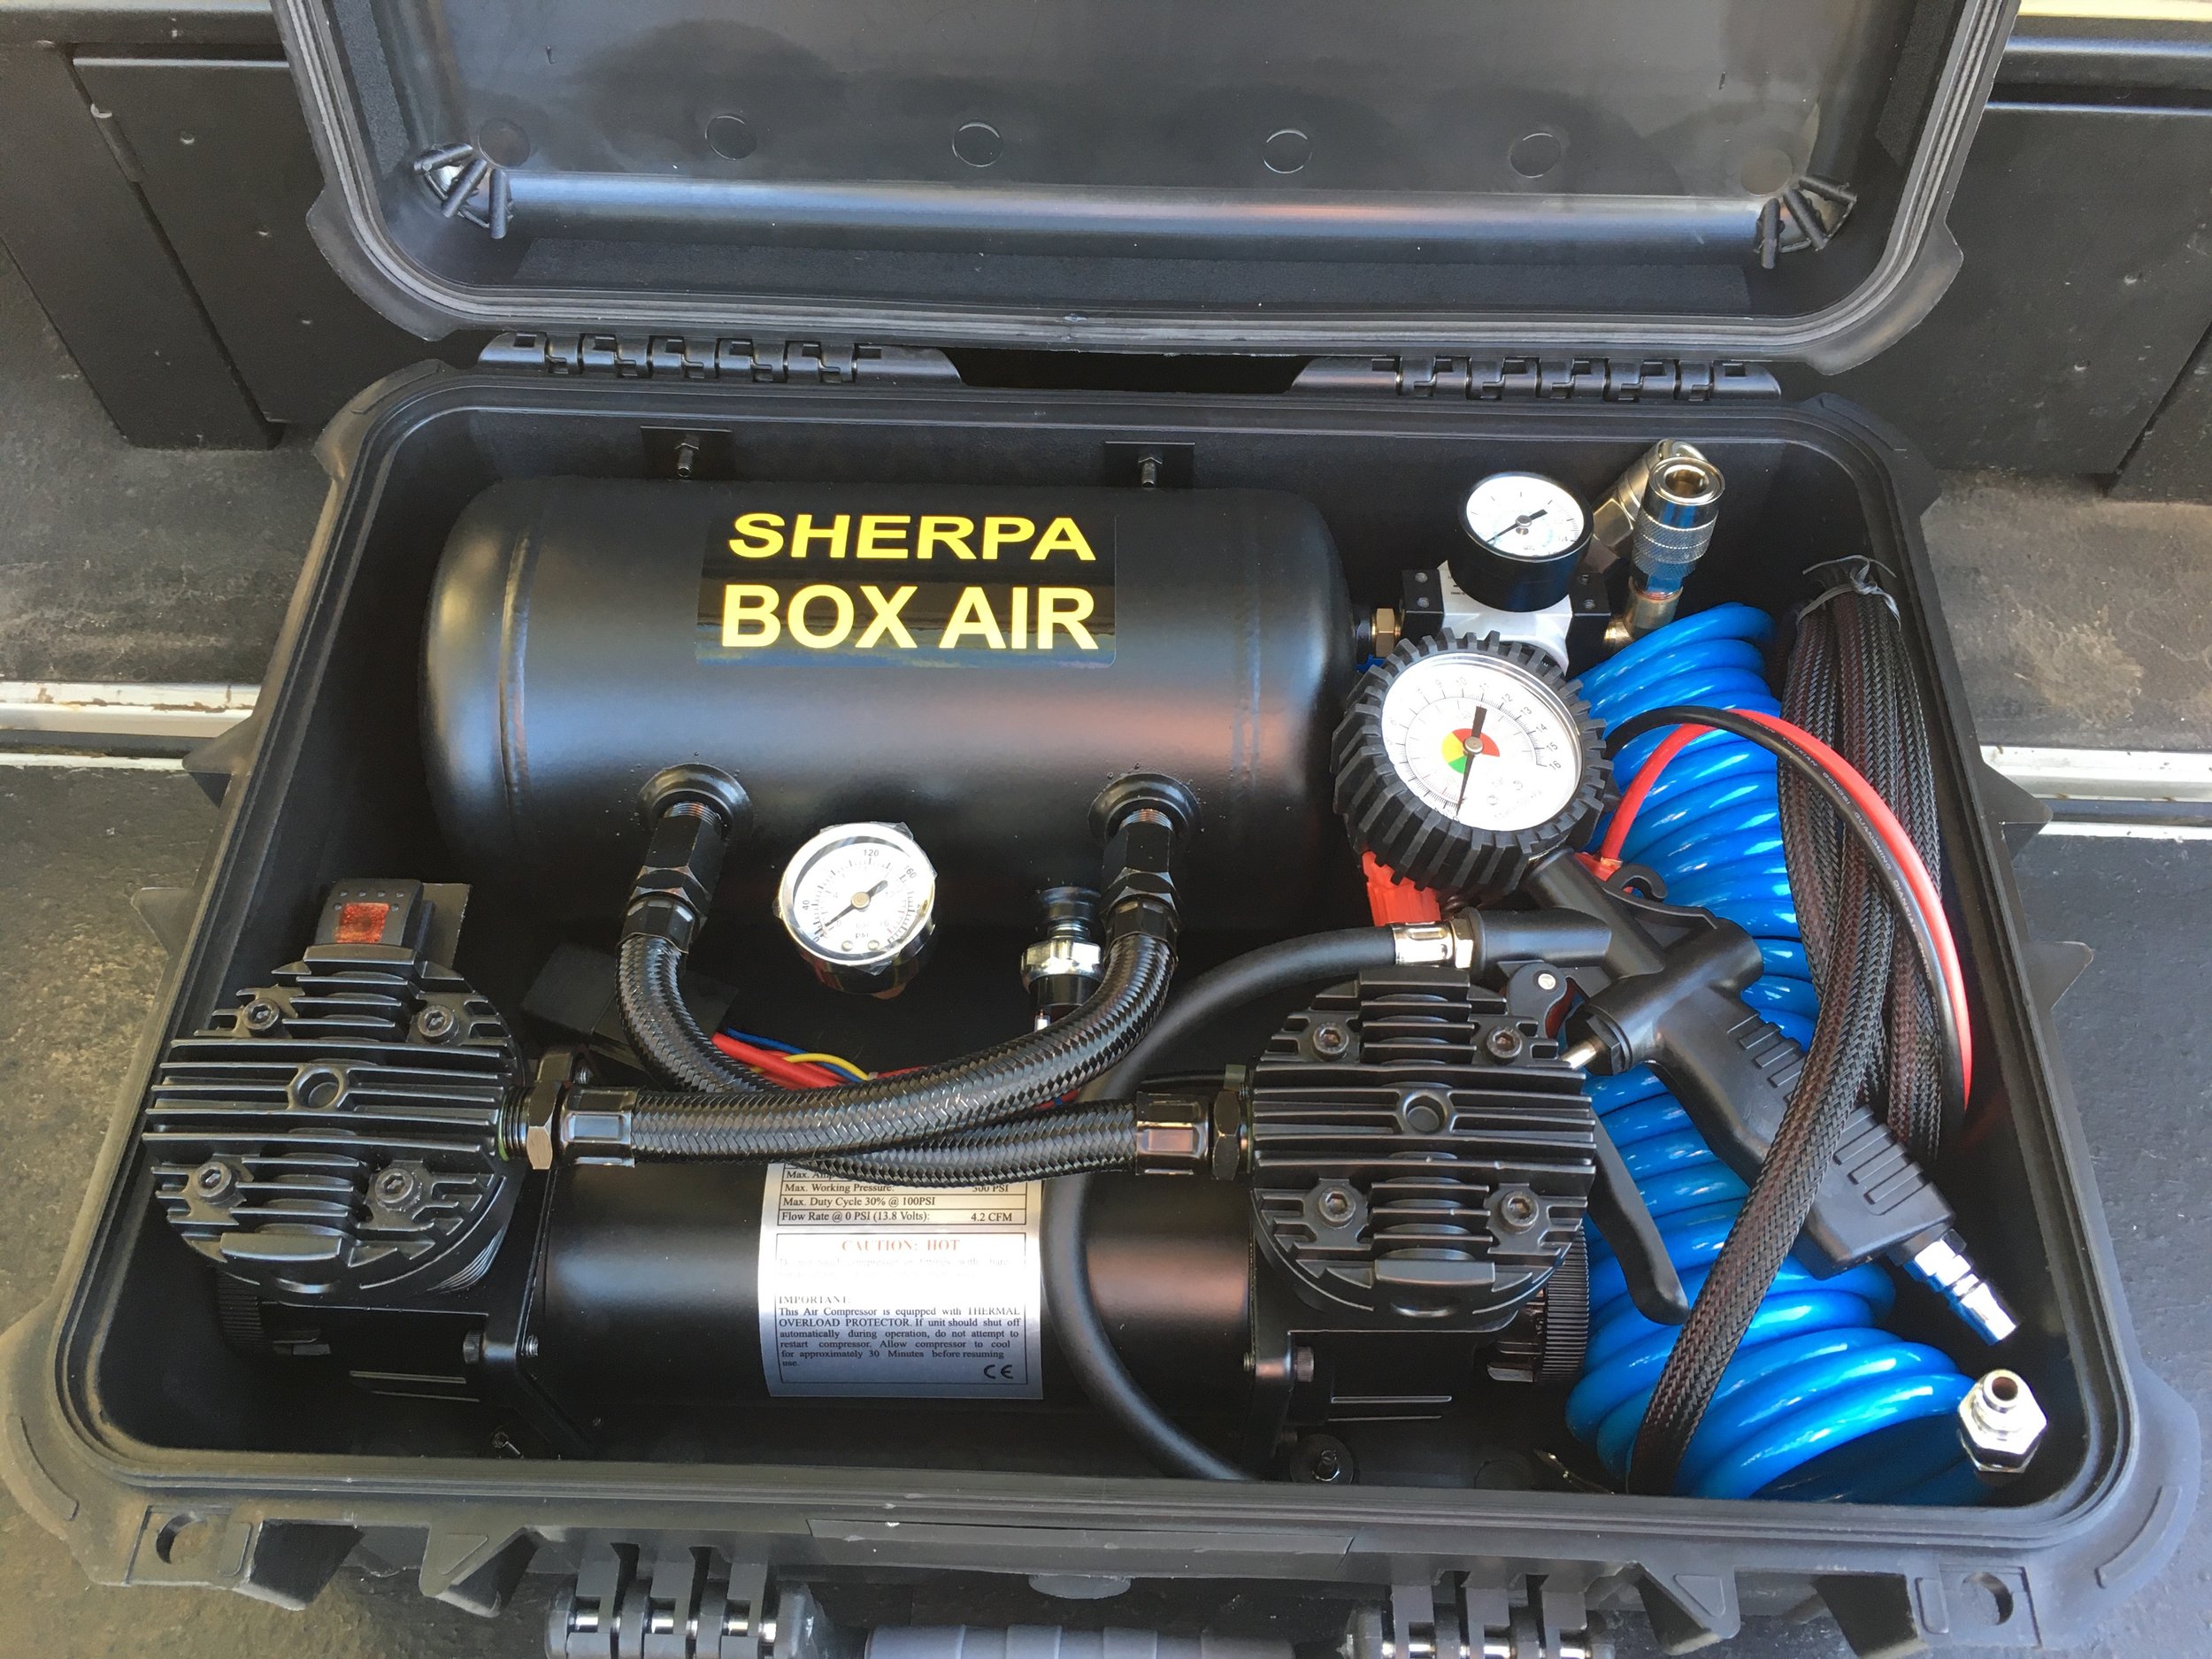
Recently I found what might be a legitimate alternative in the Sherpa Box Air system. At a glance it seems to be a close copy of the ARB Twin Portable, incorporating a twin-cylinder compressor with an air tank inside a Pelican-style case. The price of the Sherpa Box Air, however, is $629 including free shipping from Australia. (Astonishingly, the unit I ordered arrived on my doorstep just four days later, thanks to DHL.) The Sherpa also includes a trigger-style air chuck with a built-in pressure gauge, which the ARB does not.

That sounds like an open-and-shut case, so to speak. However, there are a couple of significant differences between the two units. The ARB Twin is fan-cooled, which in addition to its high-quality internals lends it a superb 100-percent duty cycle. The Sherpa, by contrast, is not fan-cooled and has a 33-percent duty cycle. Otherwise, factory specs regarding air flow and amperage draw are remarkably similar.

On balance I strongly prefer a 100-percent duty cycle; however, a 33-percent duty cycle is not necessarily a deal breaker as long as the unit can air up a full set of tires—or yours plus a friend’s, say—before needing a rest.

I plan to do a side-by-side comparison soon. In the meantime, Sherpa is here.

Edit: I just discovered that Sherpa has updated the Box Air with a slimmer twin compressor that is fan cooled and more closely resembles the ARB design. See below. The duty cycle remains at 33 percent, however.

The difference between a good tool and a bad tool . . .

. . . can sometimes be measured in millimeters.

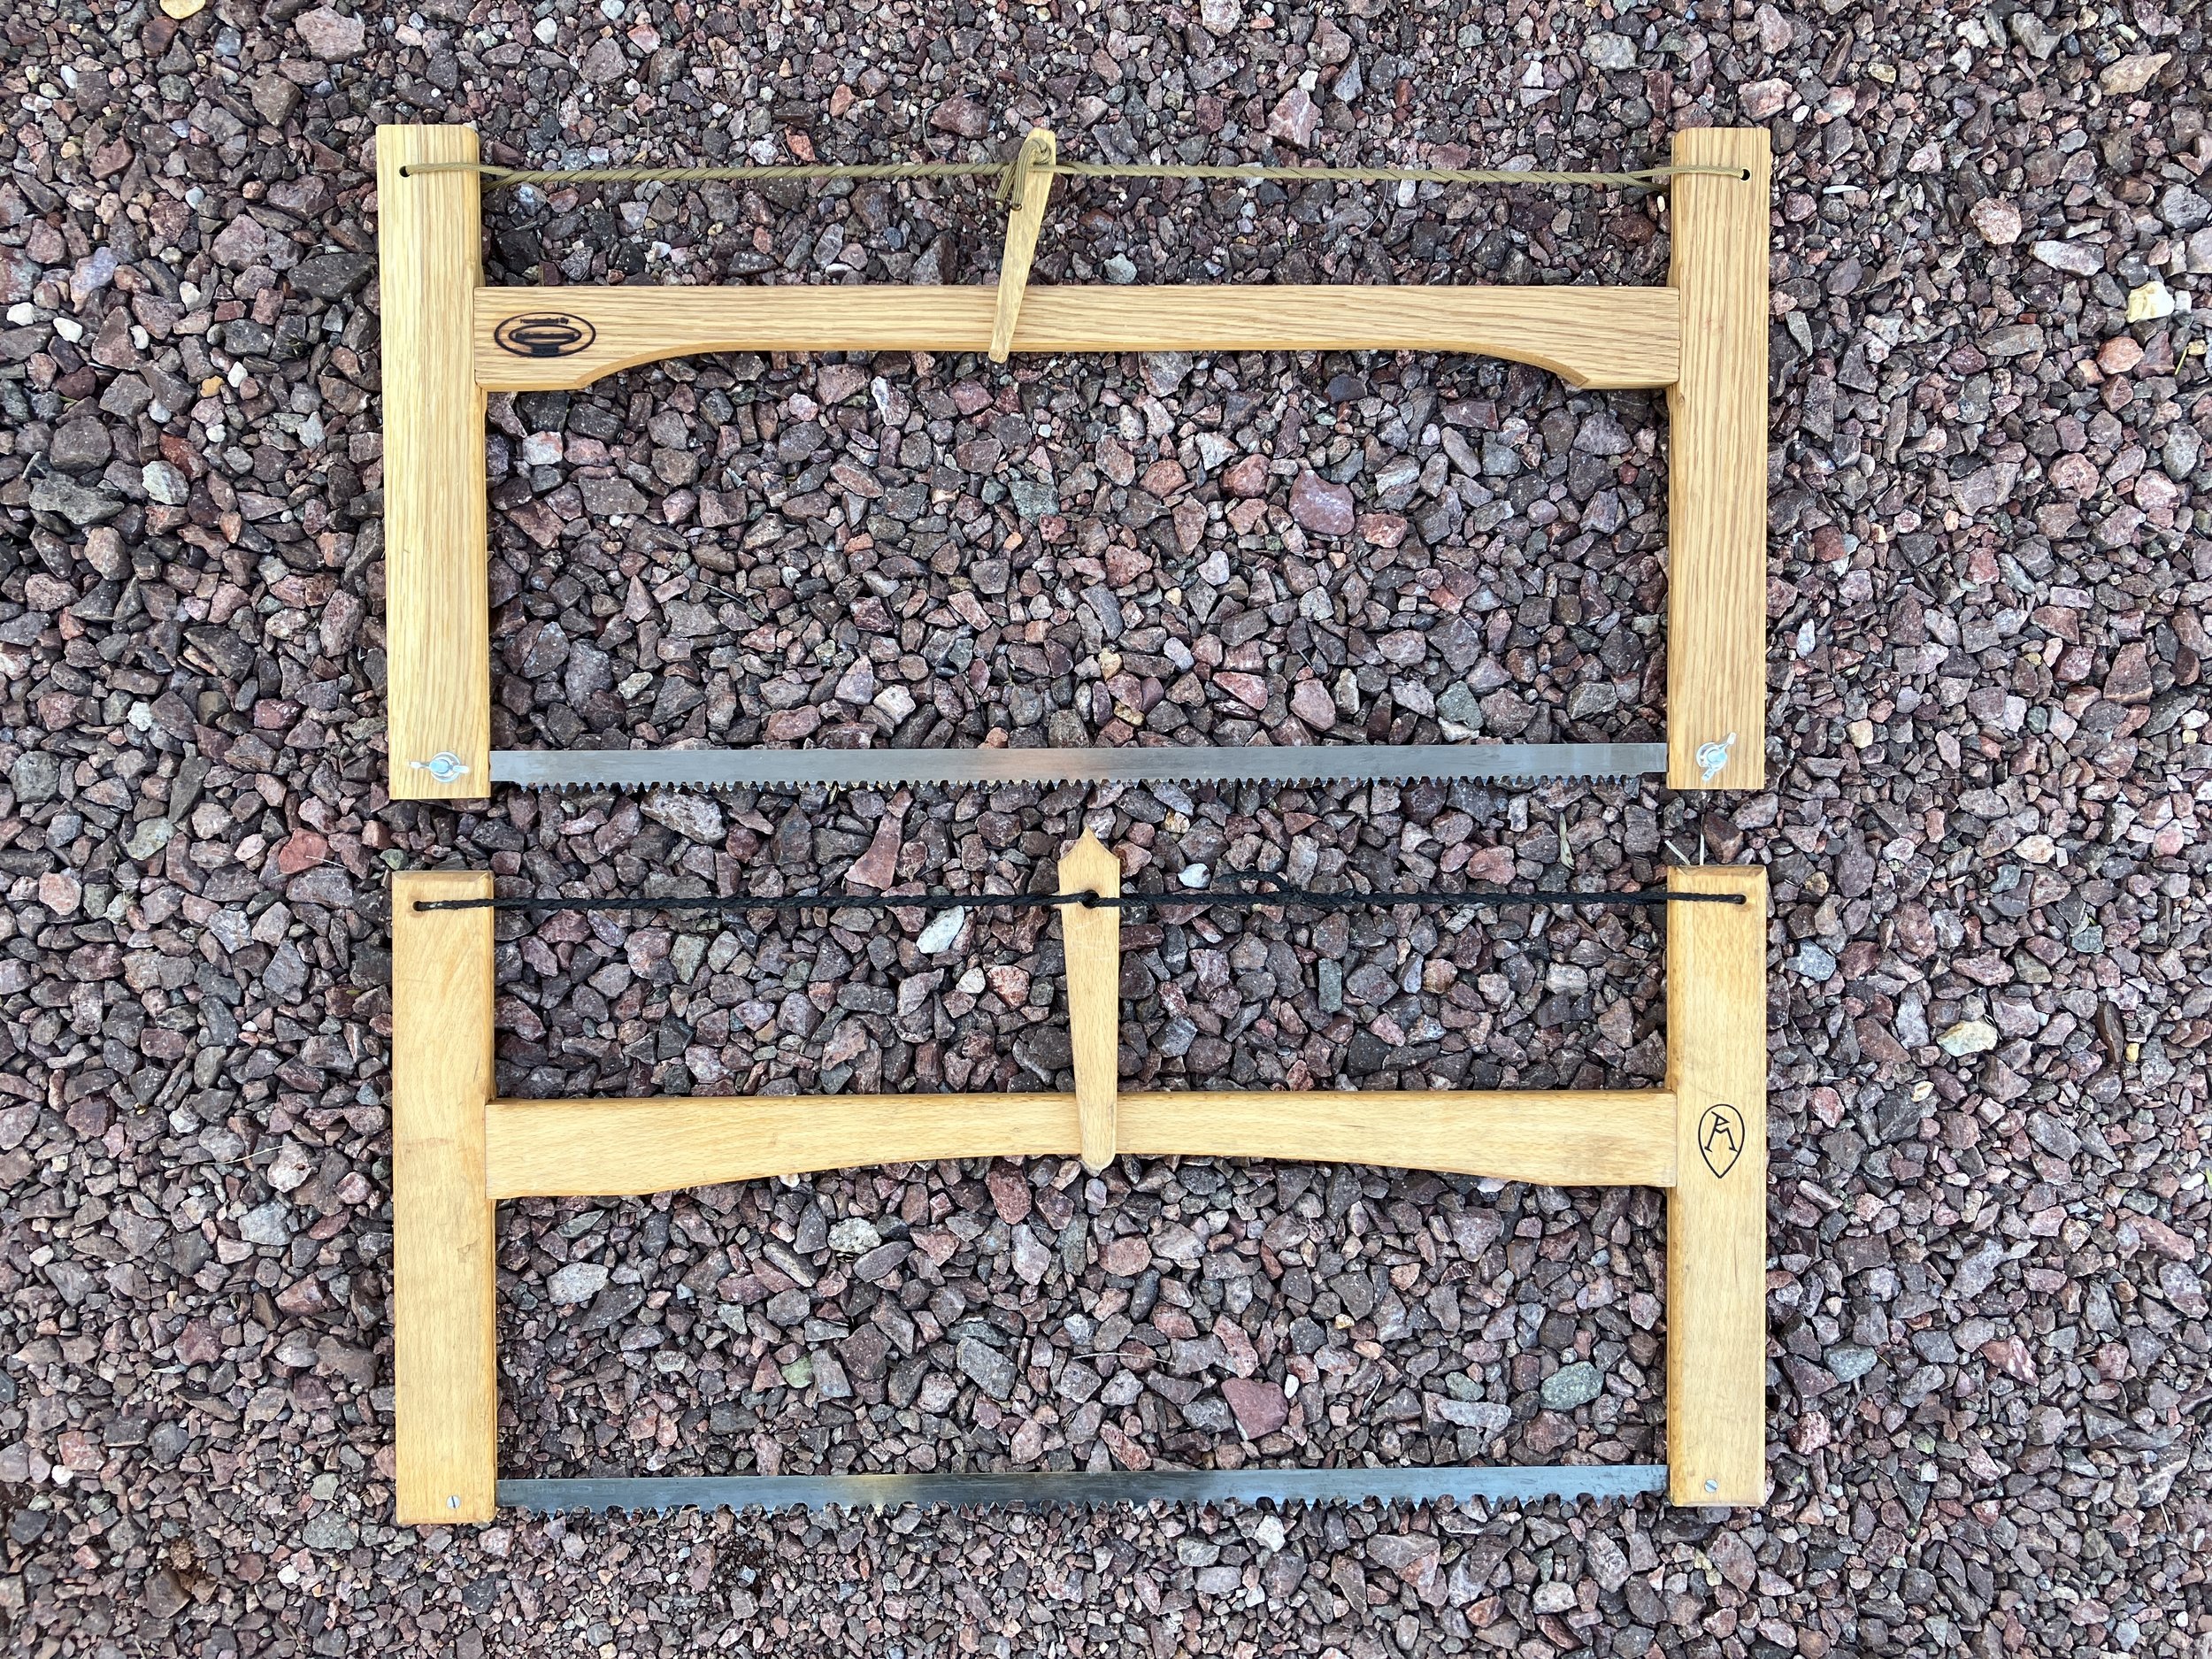
I bought the lovely, collapsible wood bow saw on the bottom from the Ray Mears Woodlore shop in England some years ago. Made for Mears by a local bowyer, it quickly became a favorite—so much so that last year I decided to buy another as an extra. However, the product had disappeared from the site.

A quick search located a seemingly identical product from another English online shop, so I ordered that one, and then set it aside for over a year. A few months back, however, I thought I’d try it out to compare to the “original.”

And . . . it compared poorly. In fact, no matter how much twisting I applied to the “Spanish windlass” tensioning mechanism, the blade torqued and bound maddeningly in every cut. A brief side-by-side comparison revealed why: The crossbar on the new saw was positioned significantly higher than on the Woodlore model, vastly reducing leverage and the resulting tension applied to the blade by the windlass.

Theoretically, the copy should be able to saw through a thicker log, given the extra clearance above the blade; in reality this is a moot point since the thing can barely get through any log.

At some point I might try to modify the new saw by drilling and chiseling a new mortise for the crossbar lower on the frame, but for now it sits idle.

If you’re intrigued by the beauty and efficiency of the Woodlore saw, I did find another here that appears to be constructed properly, and an even more beautiful model here.

Plano cargo trunk

If you know me you know I’ve been a huge fan of Pelican and Zarges cases for years. In their respective applications, nothing matches either for durability or security. However, Pelican cases are heavy for their volume, and Zarges cases are expensive for their volume.

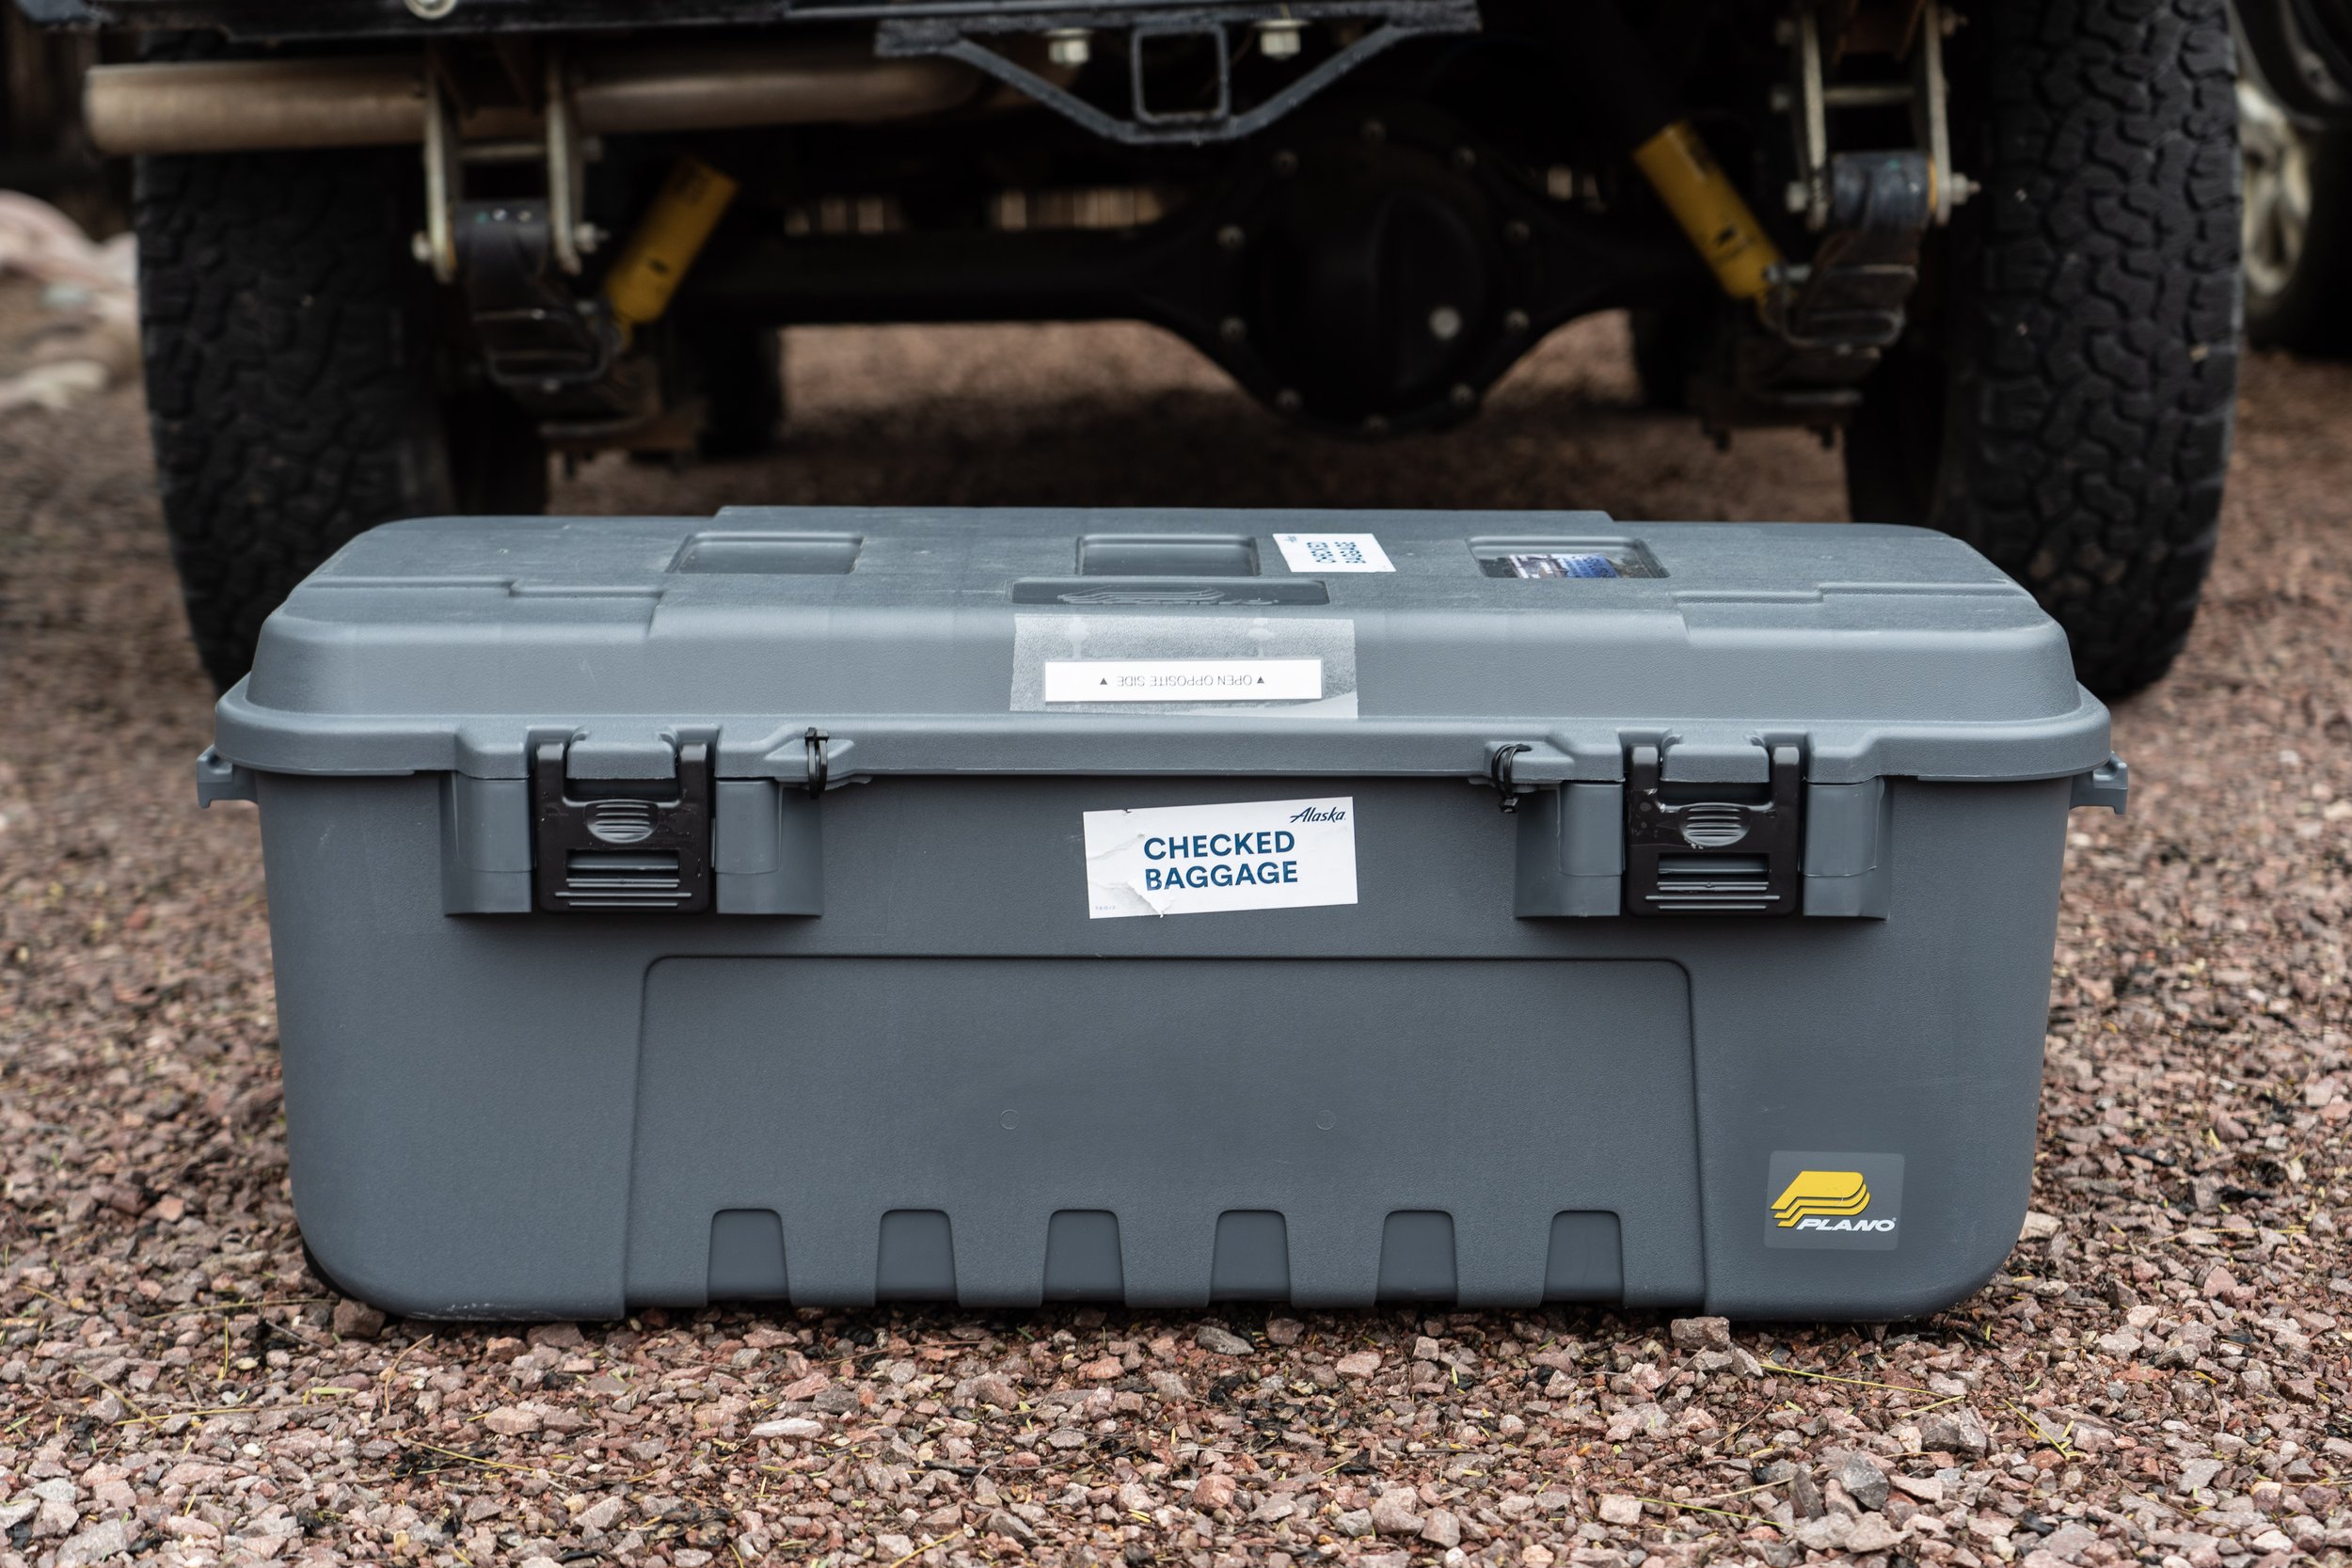
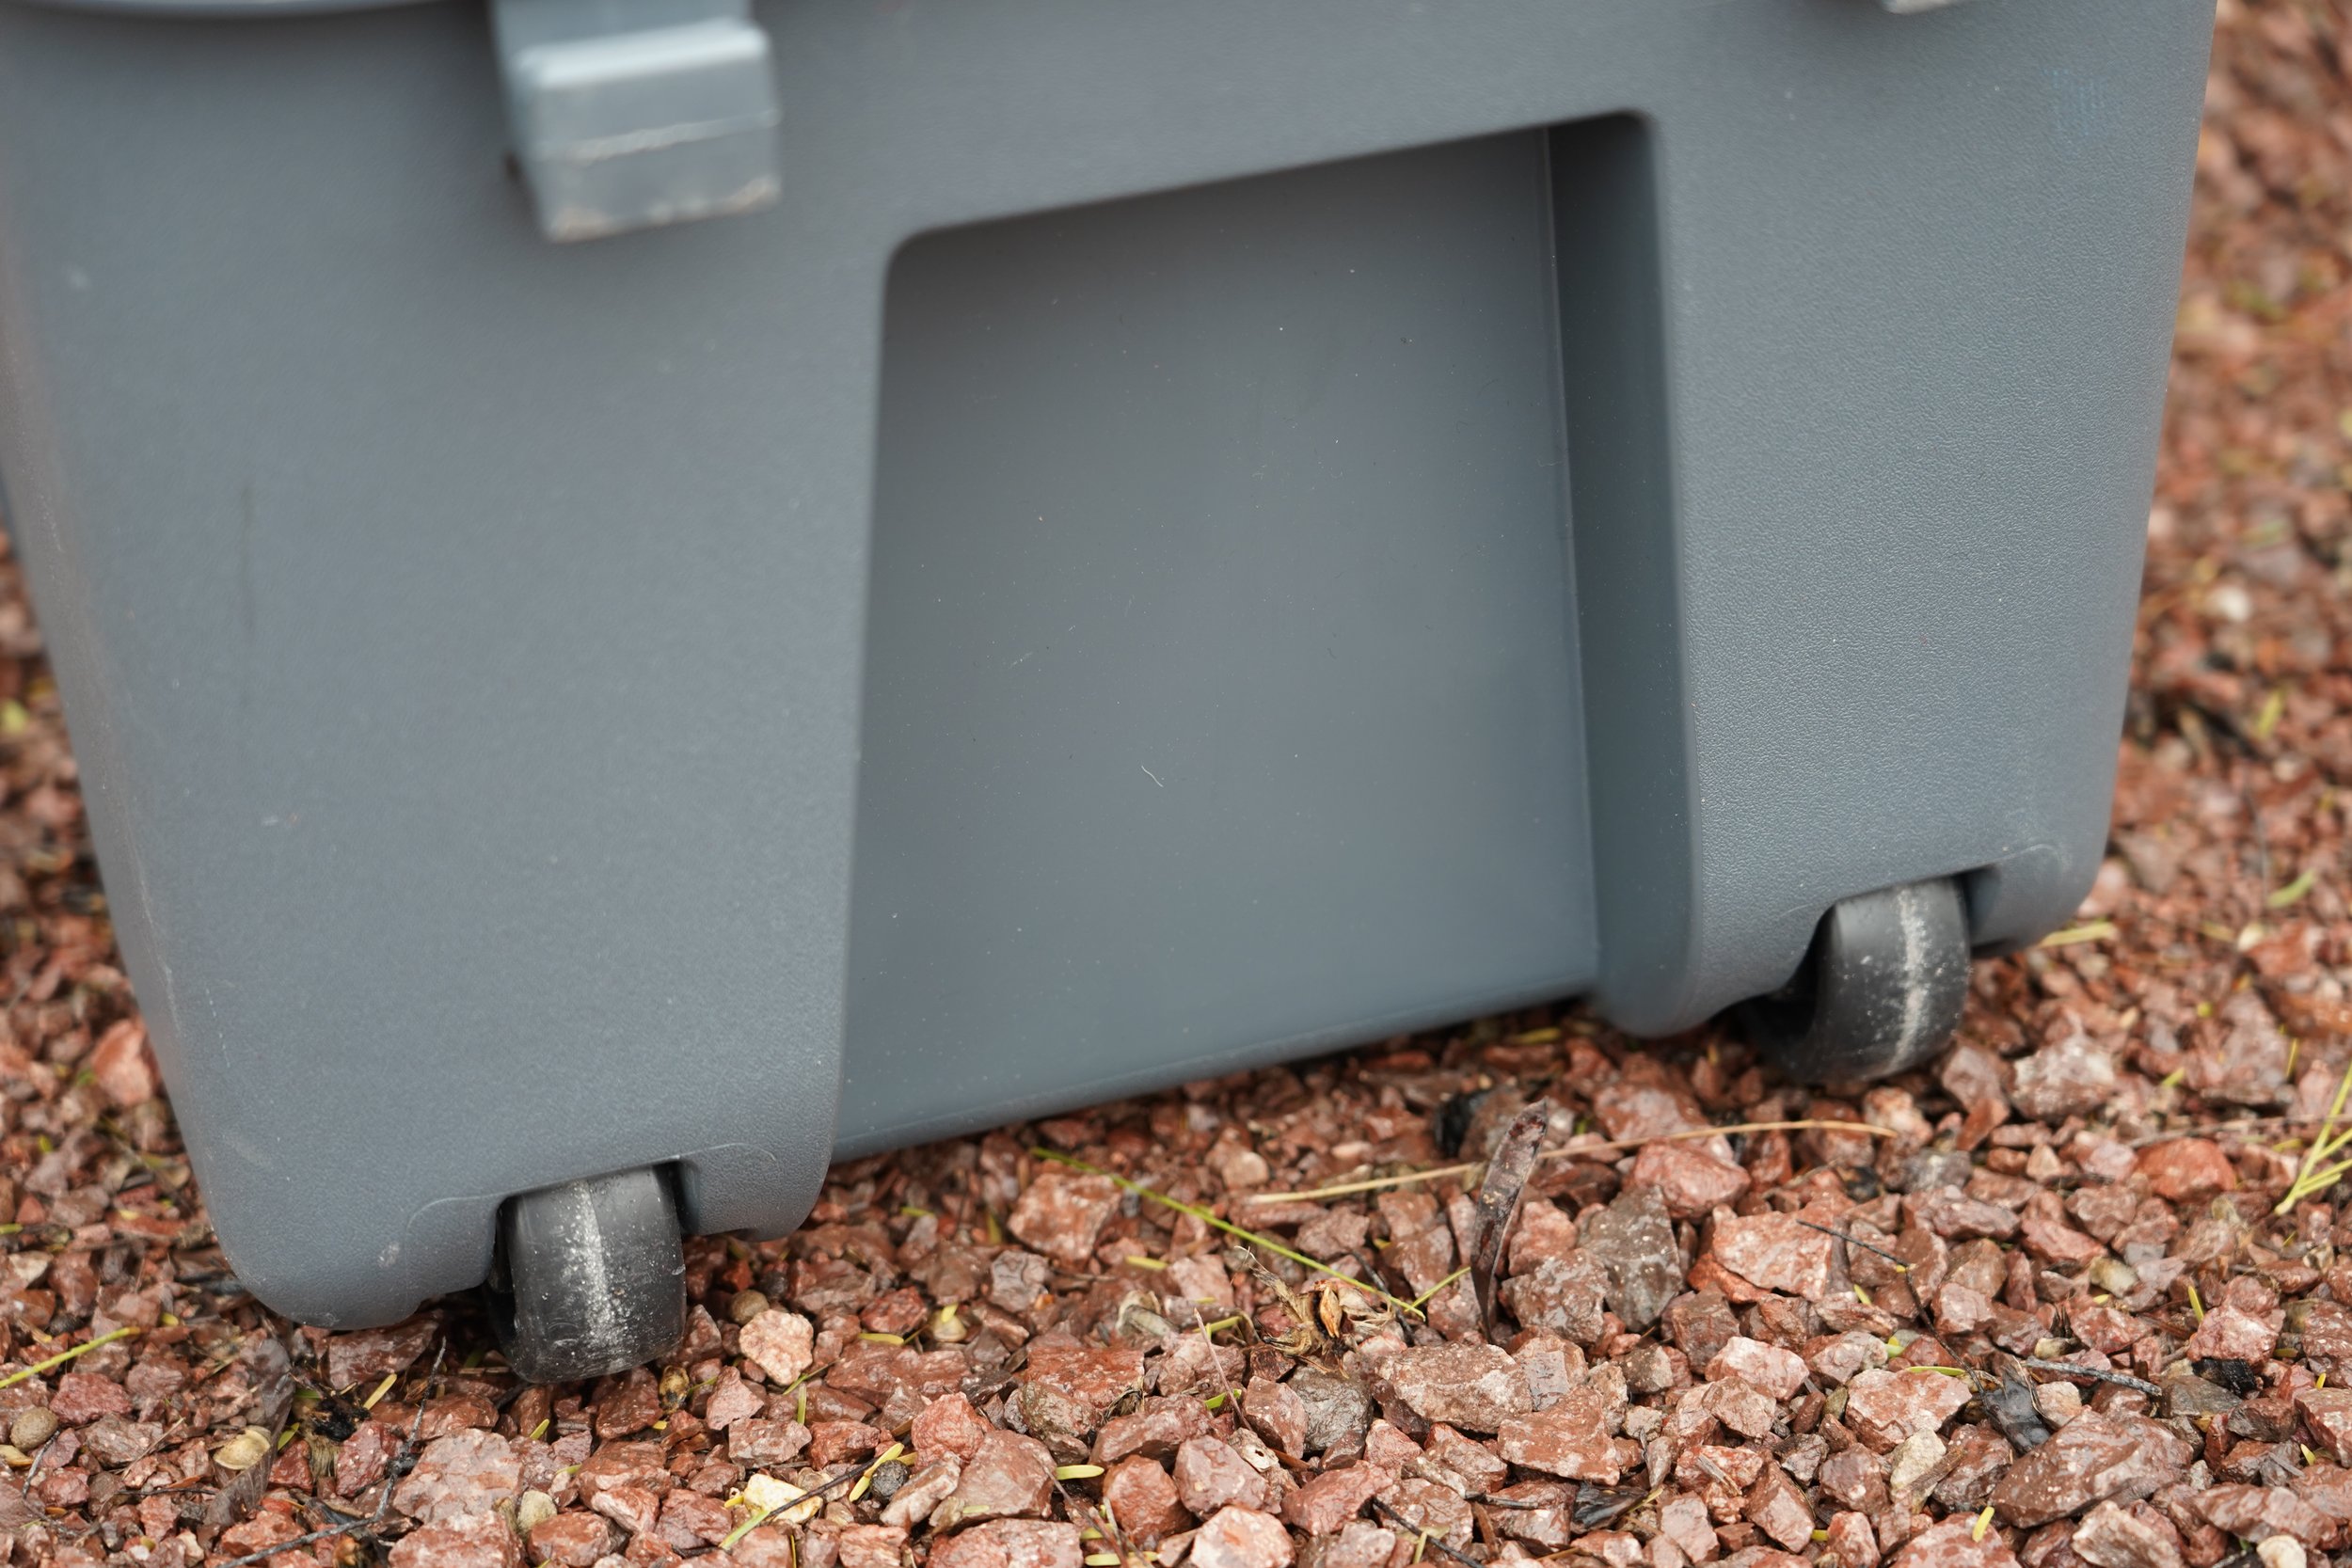
So when we needed a couple of pretty large trunks to regularly ship business materials such as books, plus personal possessions, back and forth via airline between Tucson and Fairbanks, we looked for an alternative, and Roseann found it. Plano (which I remember from fishing tackle boxes owned as a kid) produces this trunk, which boasts conservative interior dimensions of 31 by 13 by 14 inches. That’s 5,600 cubic inches of space—or 108 quarts if you’re used to 12V fridge sizing. The trunk uses four latches, so the lid comes off entirely for easy loading, and it has molded-in carrying handles and wheels. All for around $60. I can stand on it with no signs of stress. We loaded two up with enough stuff to barely squeak under Alaska Airlines’s 50-pound limit each, and have now made two trips with zero issues. Well recommended.

Dometic's brilliant GO Hydration Jug

Despite being lucky enough to have reviewed hundreds—possibly thousands—of products over the last 35 years, from utensils to Unimogs, I’m not the least bit jaded. I still love doing it, and I still get excited whenever a box shows up at our mail depot with some new bit of kit to try.

I am, however, harder to impress than I used to be. And I’ve noticed that certain types of product—lightweight stoves, backpacking tents, binoculars, 12V fridges, and camp seating come immediately to mind—tend to go a long time between genuine innovations.

Until recently that was the case with portable water containers. You had your blue steel NATO can—my longtime standby—the Scepter, the Reliance, and a host of generic plastic five-gallon/20-liter clones. The Lifesaver can stood out for its purification function, but otherwise it was pretty much a standard H2O jerry can. The Rotopax was innovative in terms of its shape and mounting hardware, but (very) expensive as a system, and again more or less just a container. (It’s also, through no fault of the company, become something of a caricature as a de rigueur external accessory to announce that you are driving an OVERLANDING VEHICLE.)

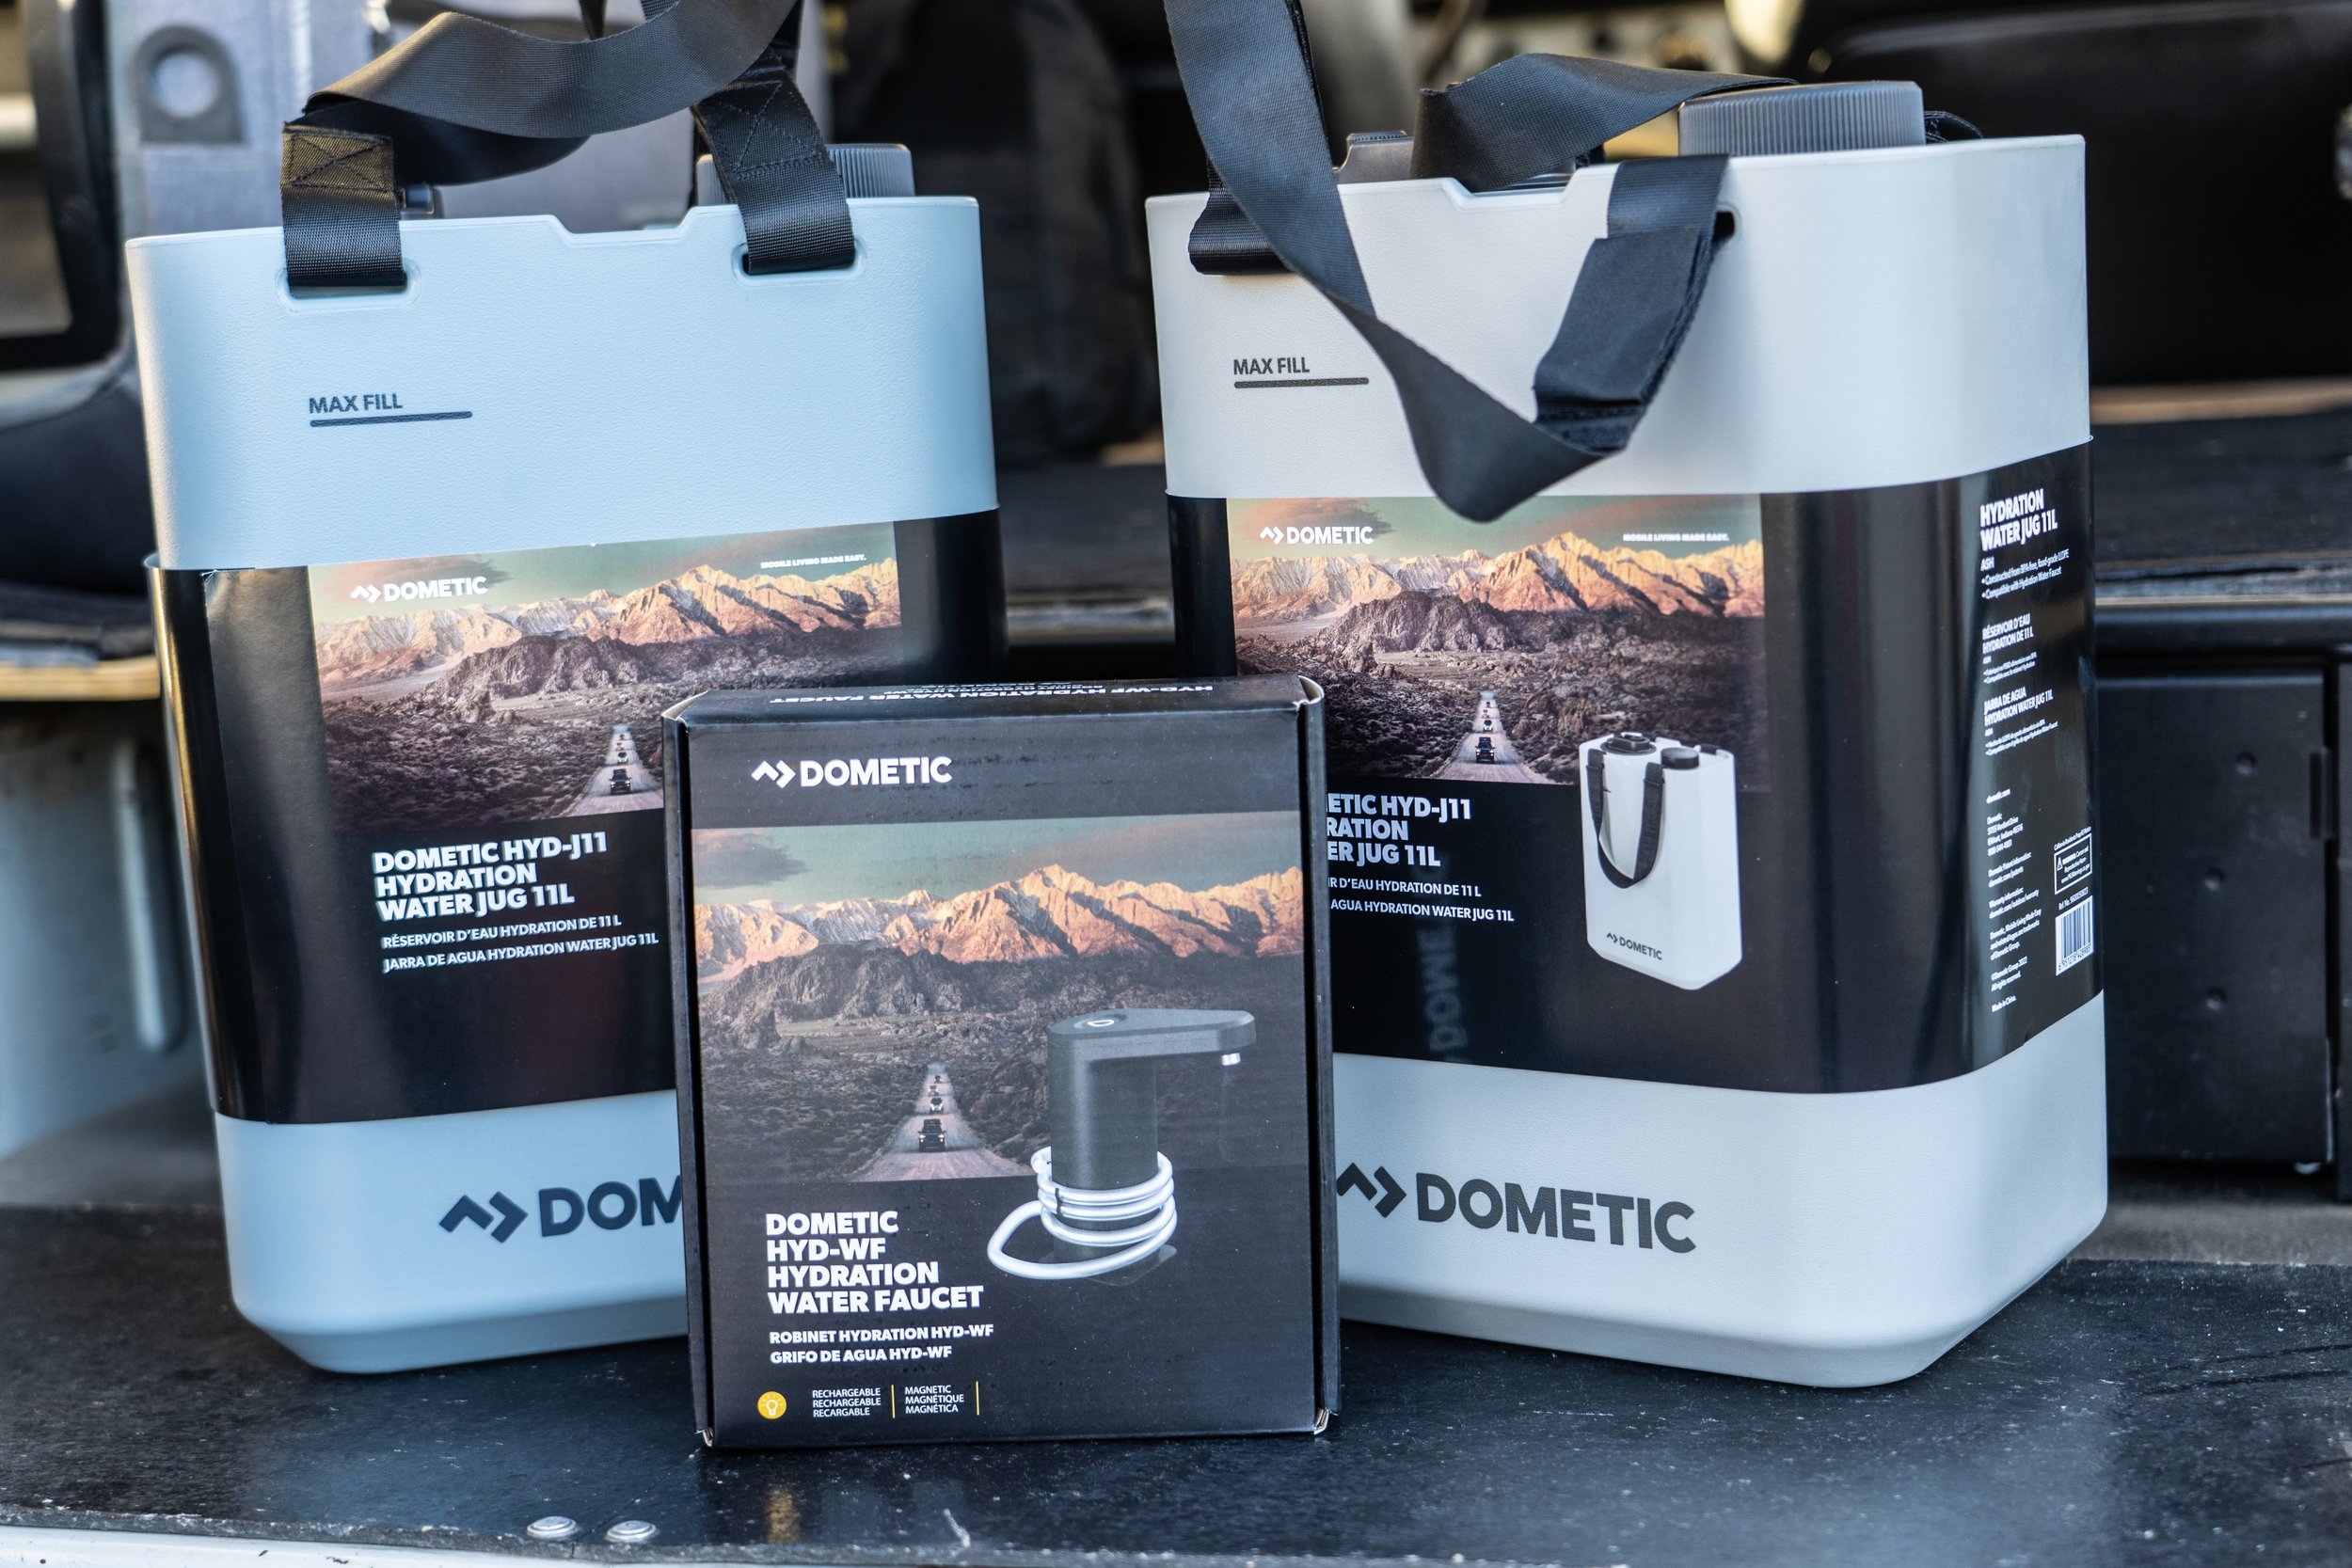
Then, at this spring’s Overland Expo West, I was introduced to Dometic’s new GO Hydration Water Jug. Two minutes into the rep’s spiel, I knew it was different. Revolutionary might be too strong a word, but it’s got genuinely clever innovation in every feature. After the show, for the first time in a long time, I actually pestered my contact at Dometic to get a review sample. It took a while because it seemed others had been impressed too: the units frequently sell out.

Why was I so impressed? Let’s look at the product and the thinking behind it.

First, the designers realized that a full five-gallon jerry can of water, which weighs 45 pounds give or take depending on the container, is an awkward thing to carry, not so much due to the weight as the awkwardness of having the weight all on one side. So they essentially cut the dimensions of a jerry can in half. Turn a Dometic jug on its narrow side and stack another on top of it. The two take up just about the same space as a single standard jerry can, and in fact will fit in many jerry can holders. Yet each jug holds 11 liters, 22 for a pair. That’s 5.8 gallons, more even than a NATO can. Despite that, two full Dometic jugs, one on each side, are far easier to carry than a single jerry can with less capacity. One-and-a-quarter inch (removable) webbing straps help with comfort.

Upright, the jug is stable, and two grooves in the top rim facilitate securely strapping it down (or you can use the carrying straps).

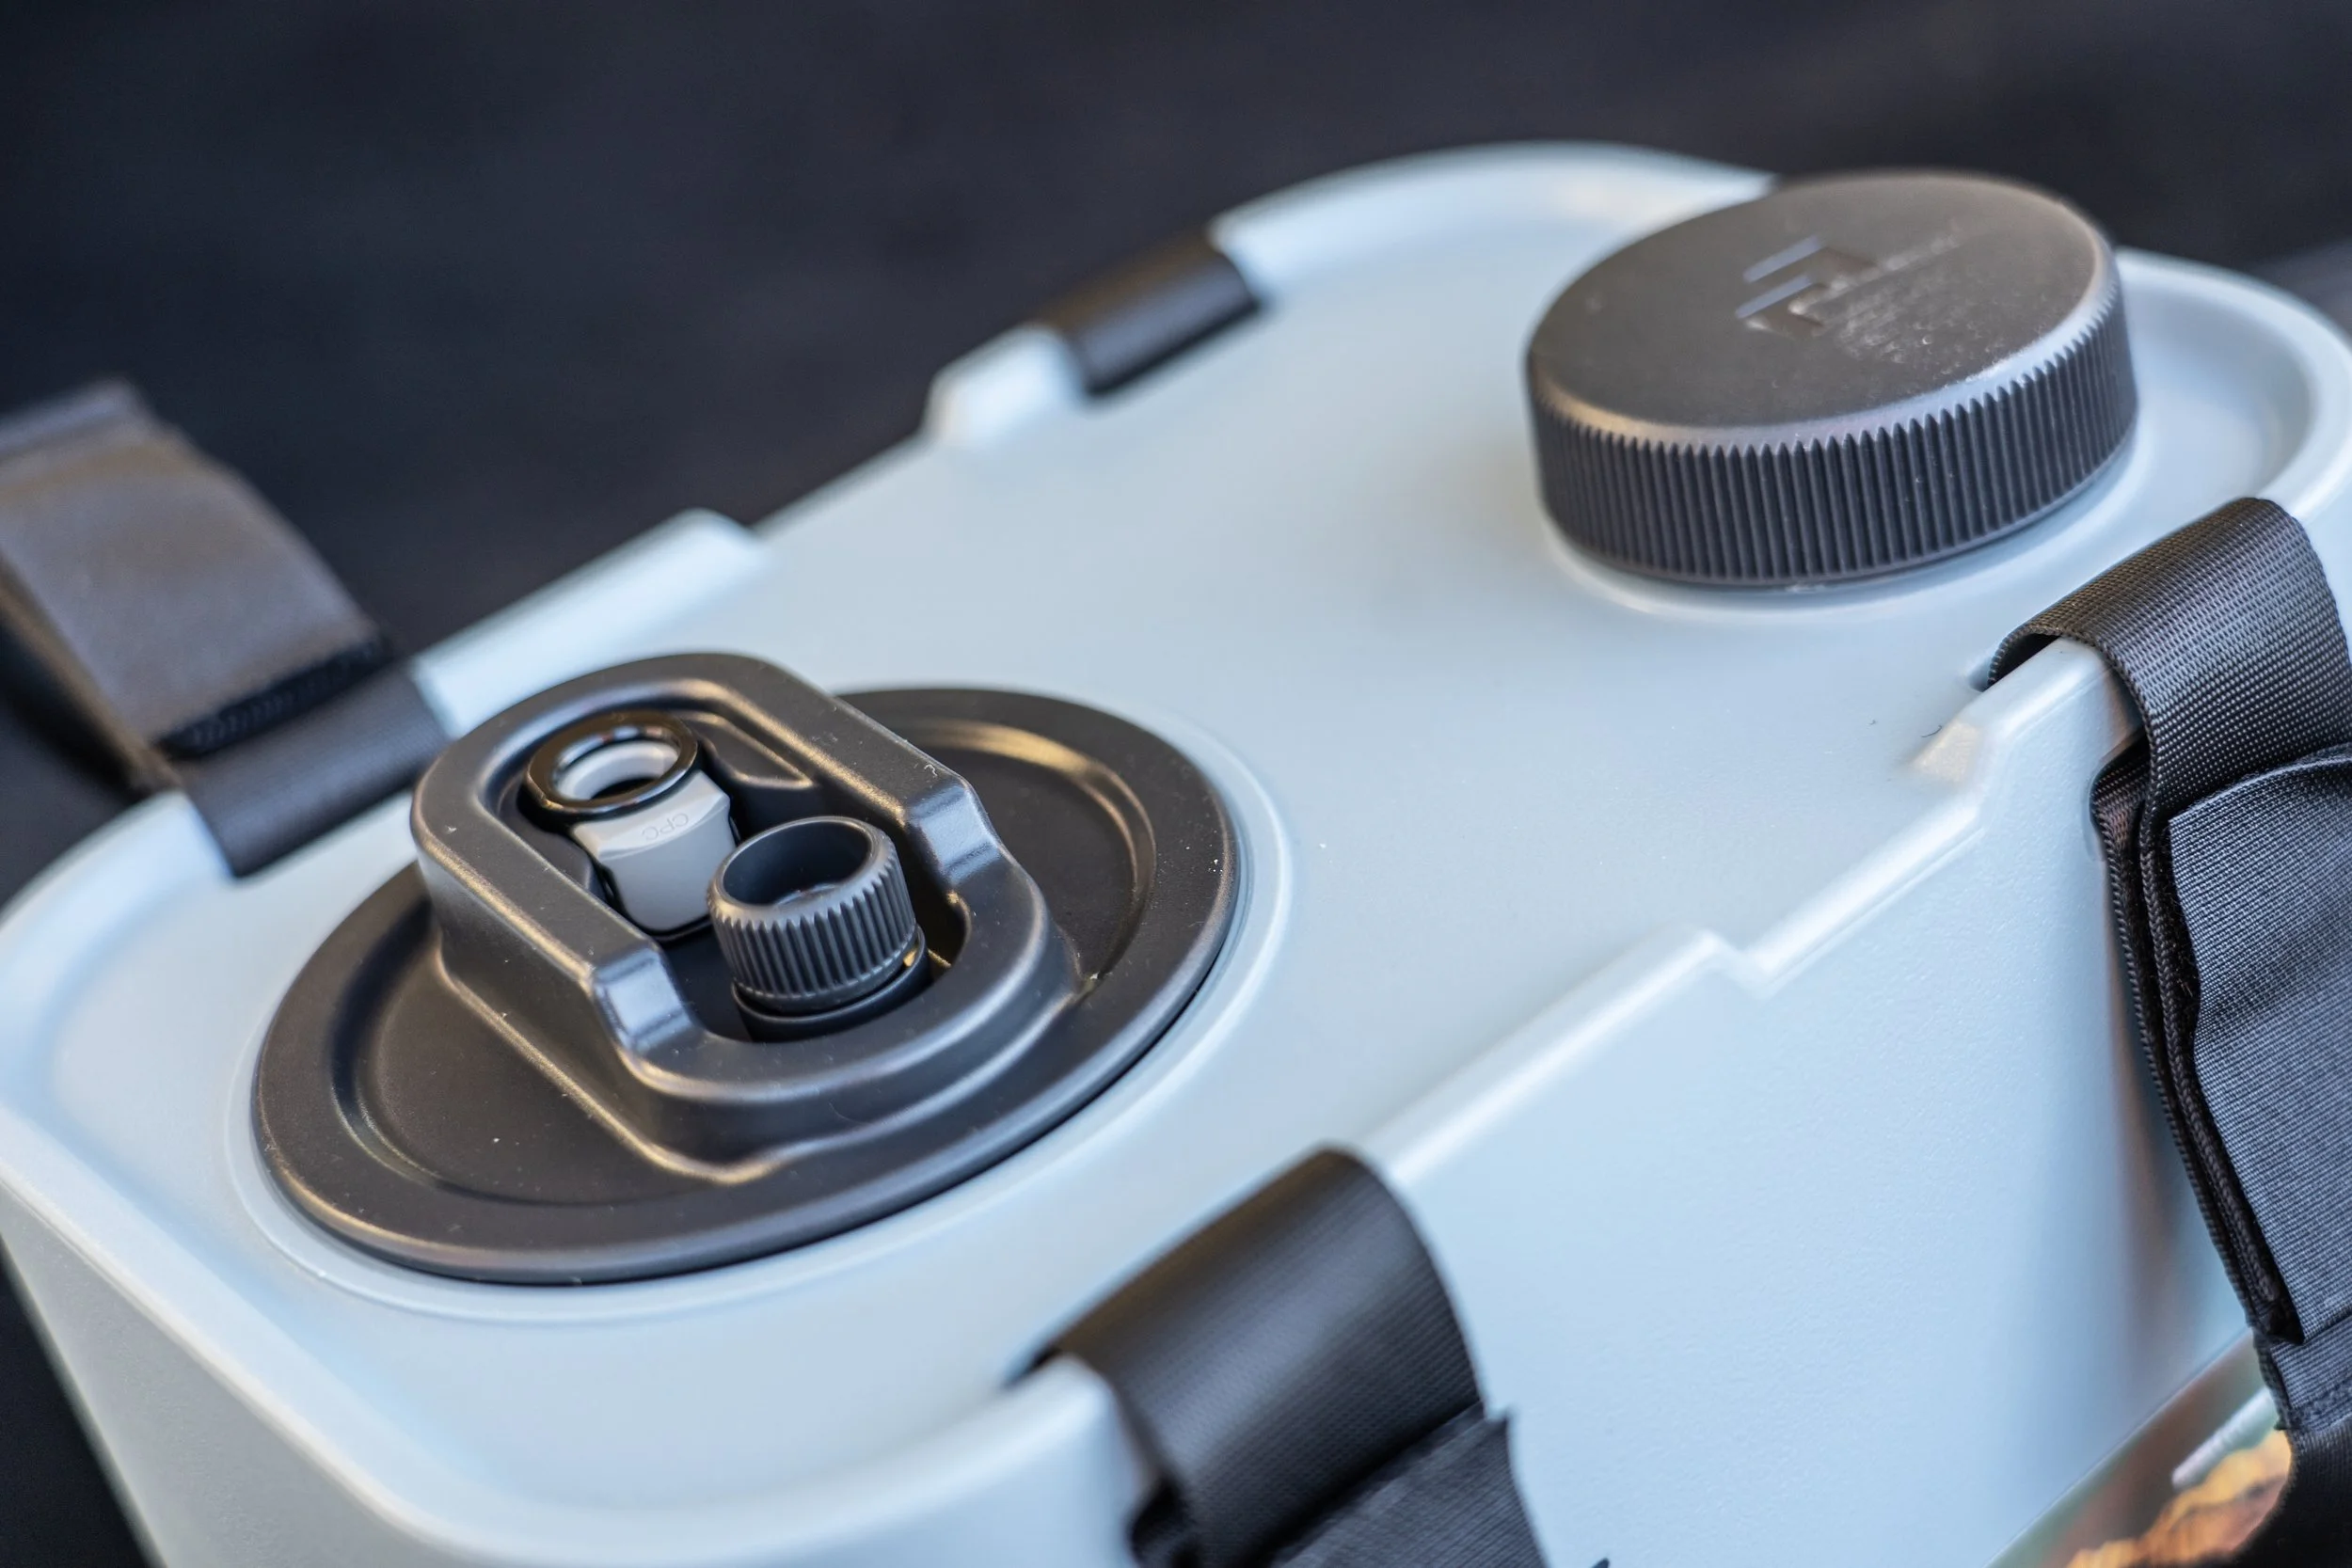
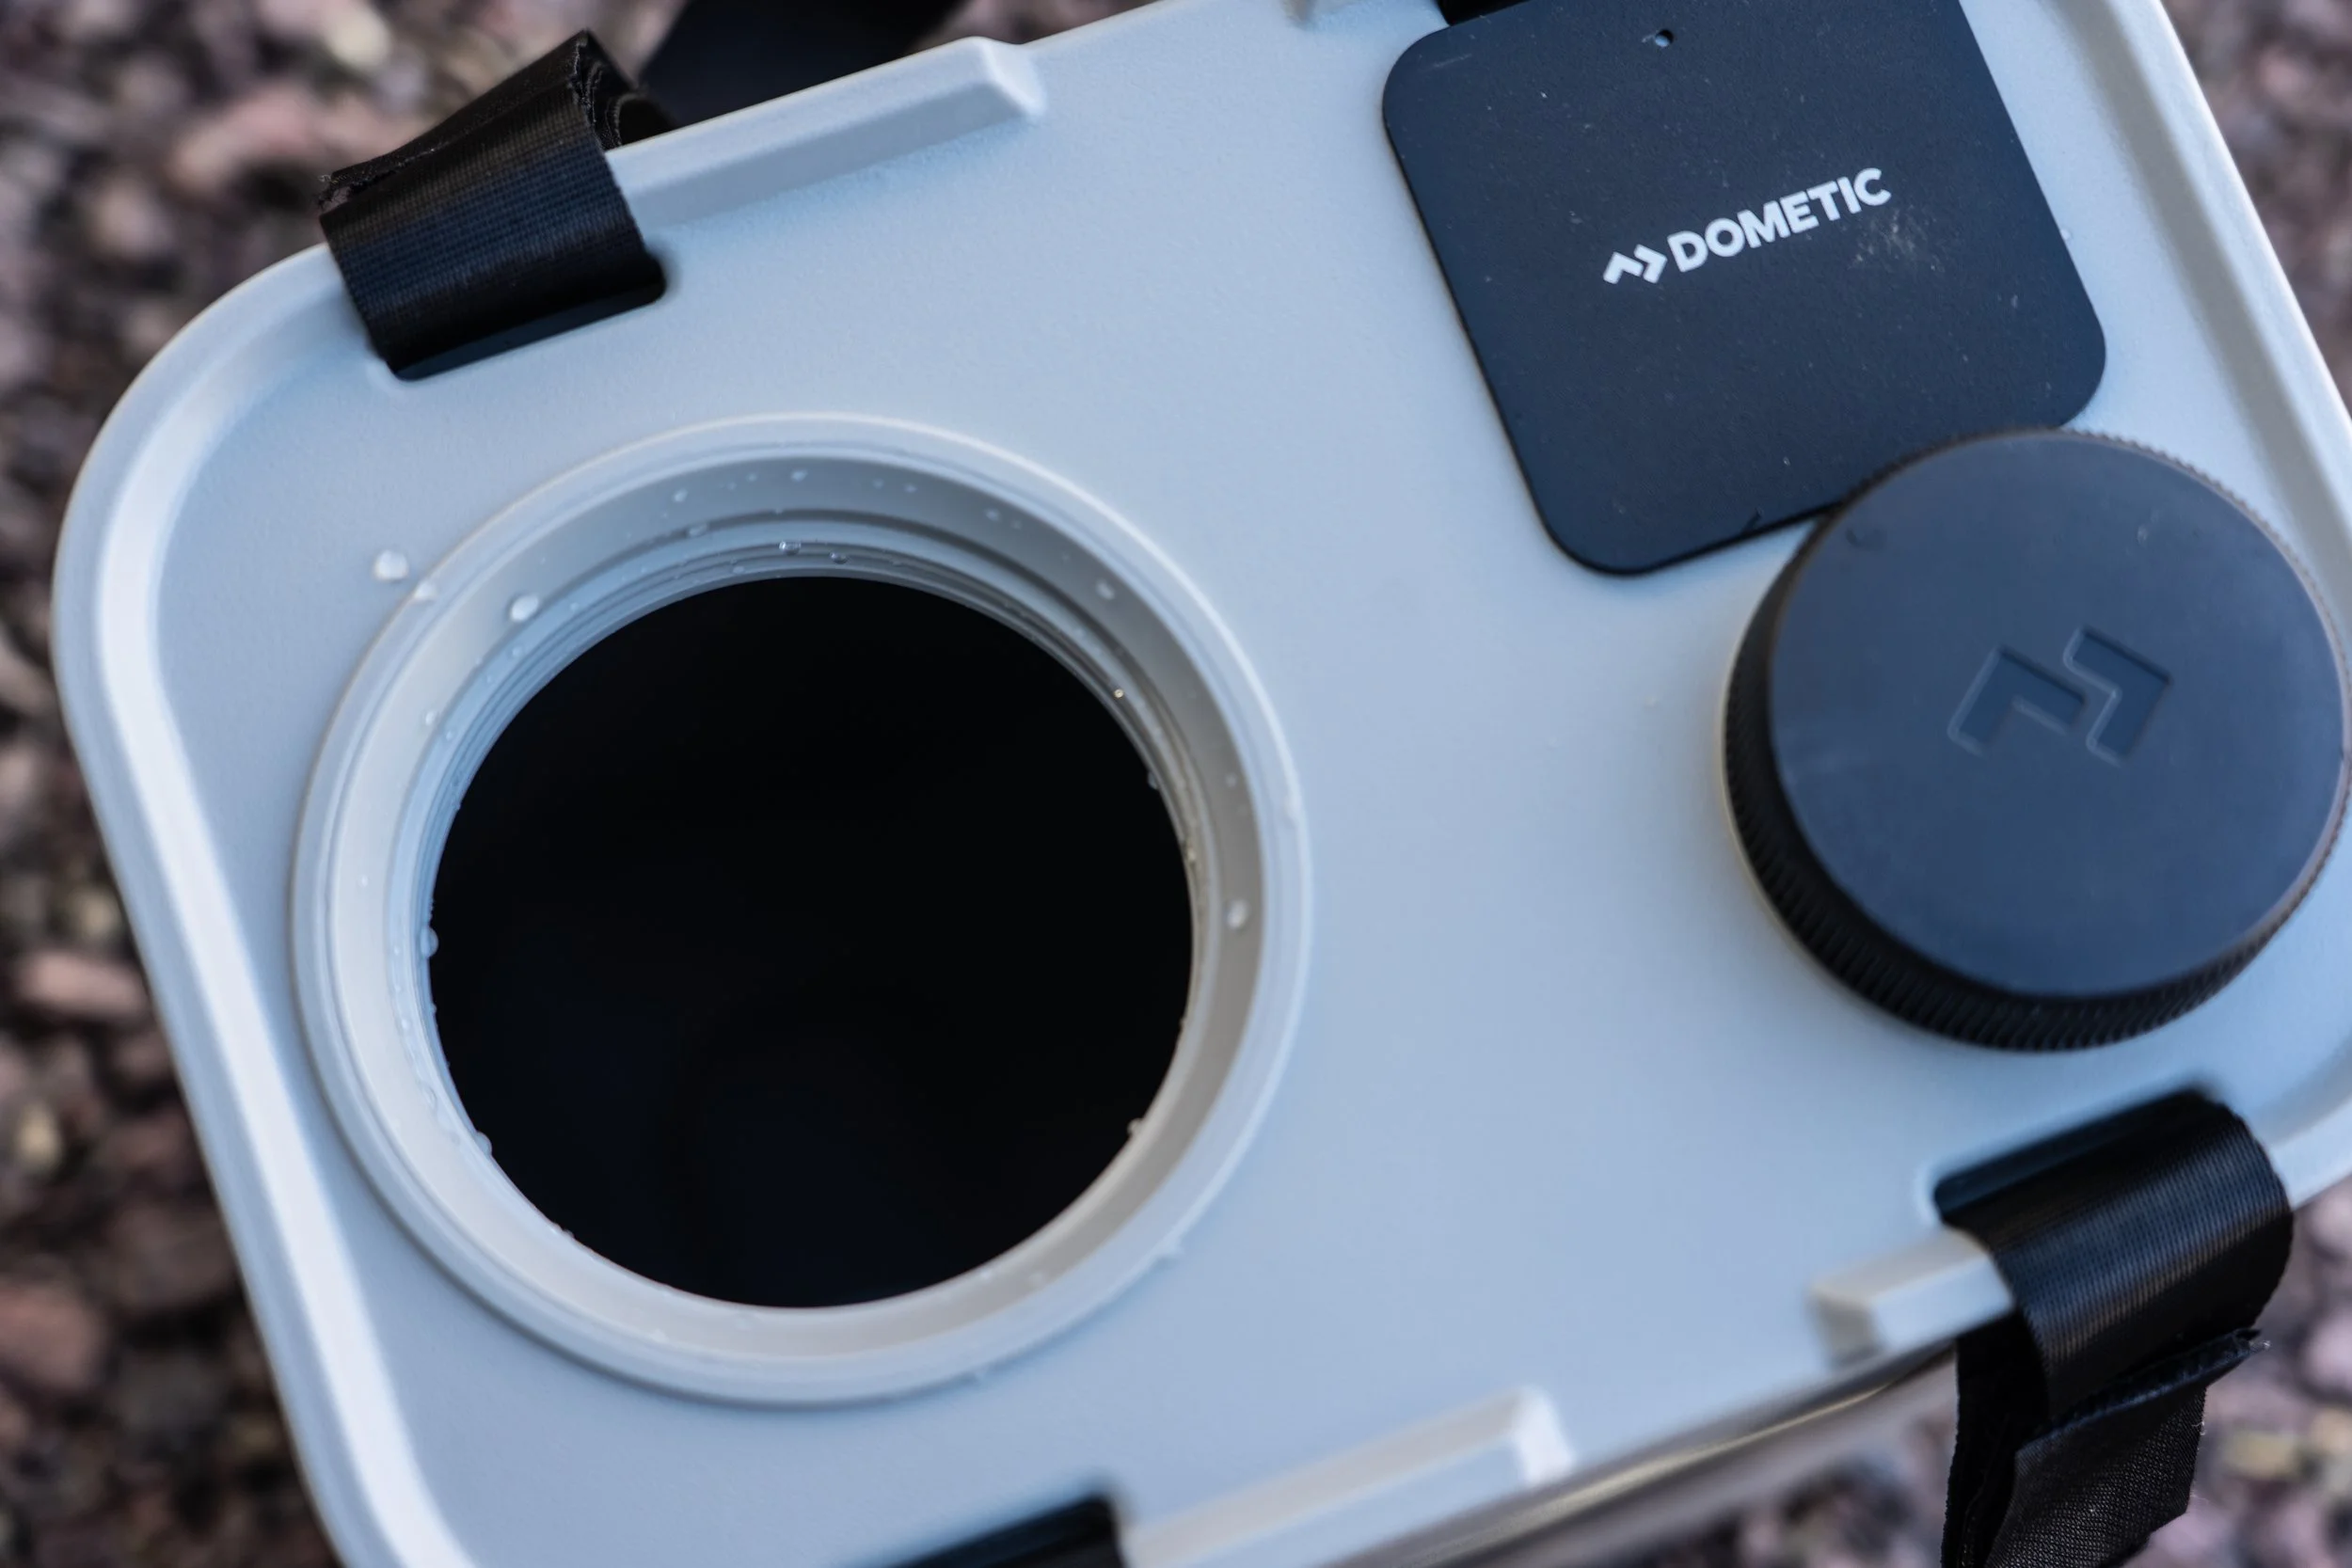
There are two openings in the top. The smaller one is, cleverly, a standard 63mm Nalgene size and thread, which means you can screw any one of a number of water filters directly onto it to fill the can with filtered/purified water. Remove the cap and you’ll see a rubber flow control plug, which allows you to tip and fill small containers without spillover. A groove in the bottom of the can provides a secure grip for your bottom hand. Remove the flow control to quickly empty or fill the jug. In addition to the cap, the Dometic jug comes with a twist-valve replacement cap, to allow simple gravity feed with the can on its side.

The other, larger cap, unscrews to reveal an opening large enough to insert your hand and forearm for scrubbing when necessary—something few if any other water containers allow. It’s big enough to allow filling the can from a bucket with little if any spillage. The cap itself incorporates a screw-down breather, to avoid vacuum lock when dispensing from the tap or pump, and a CPC quick-connect fitting that is connected to a silicone feed tube which reaches the bottom of the can.

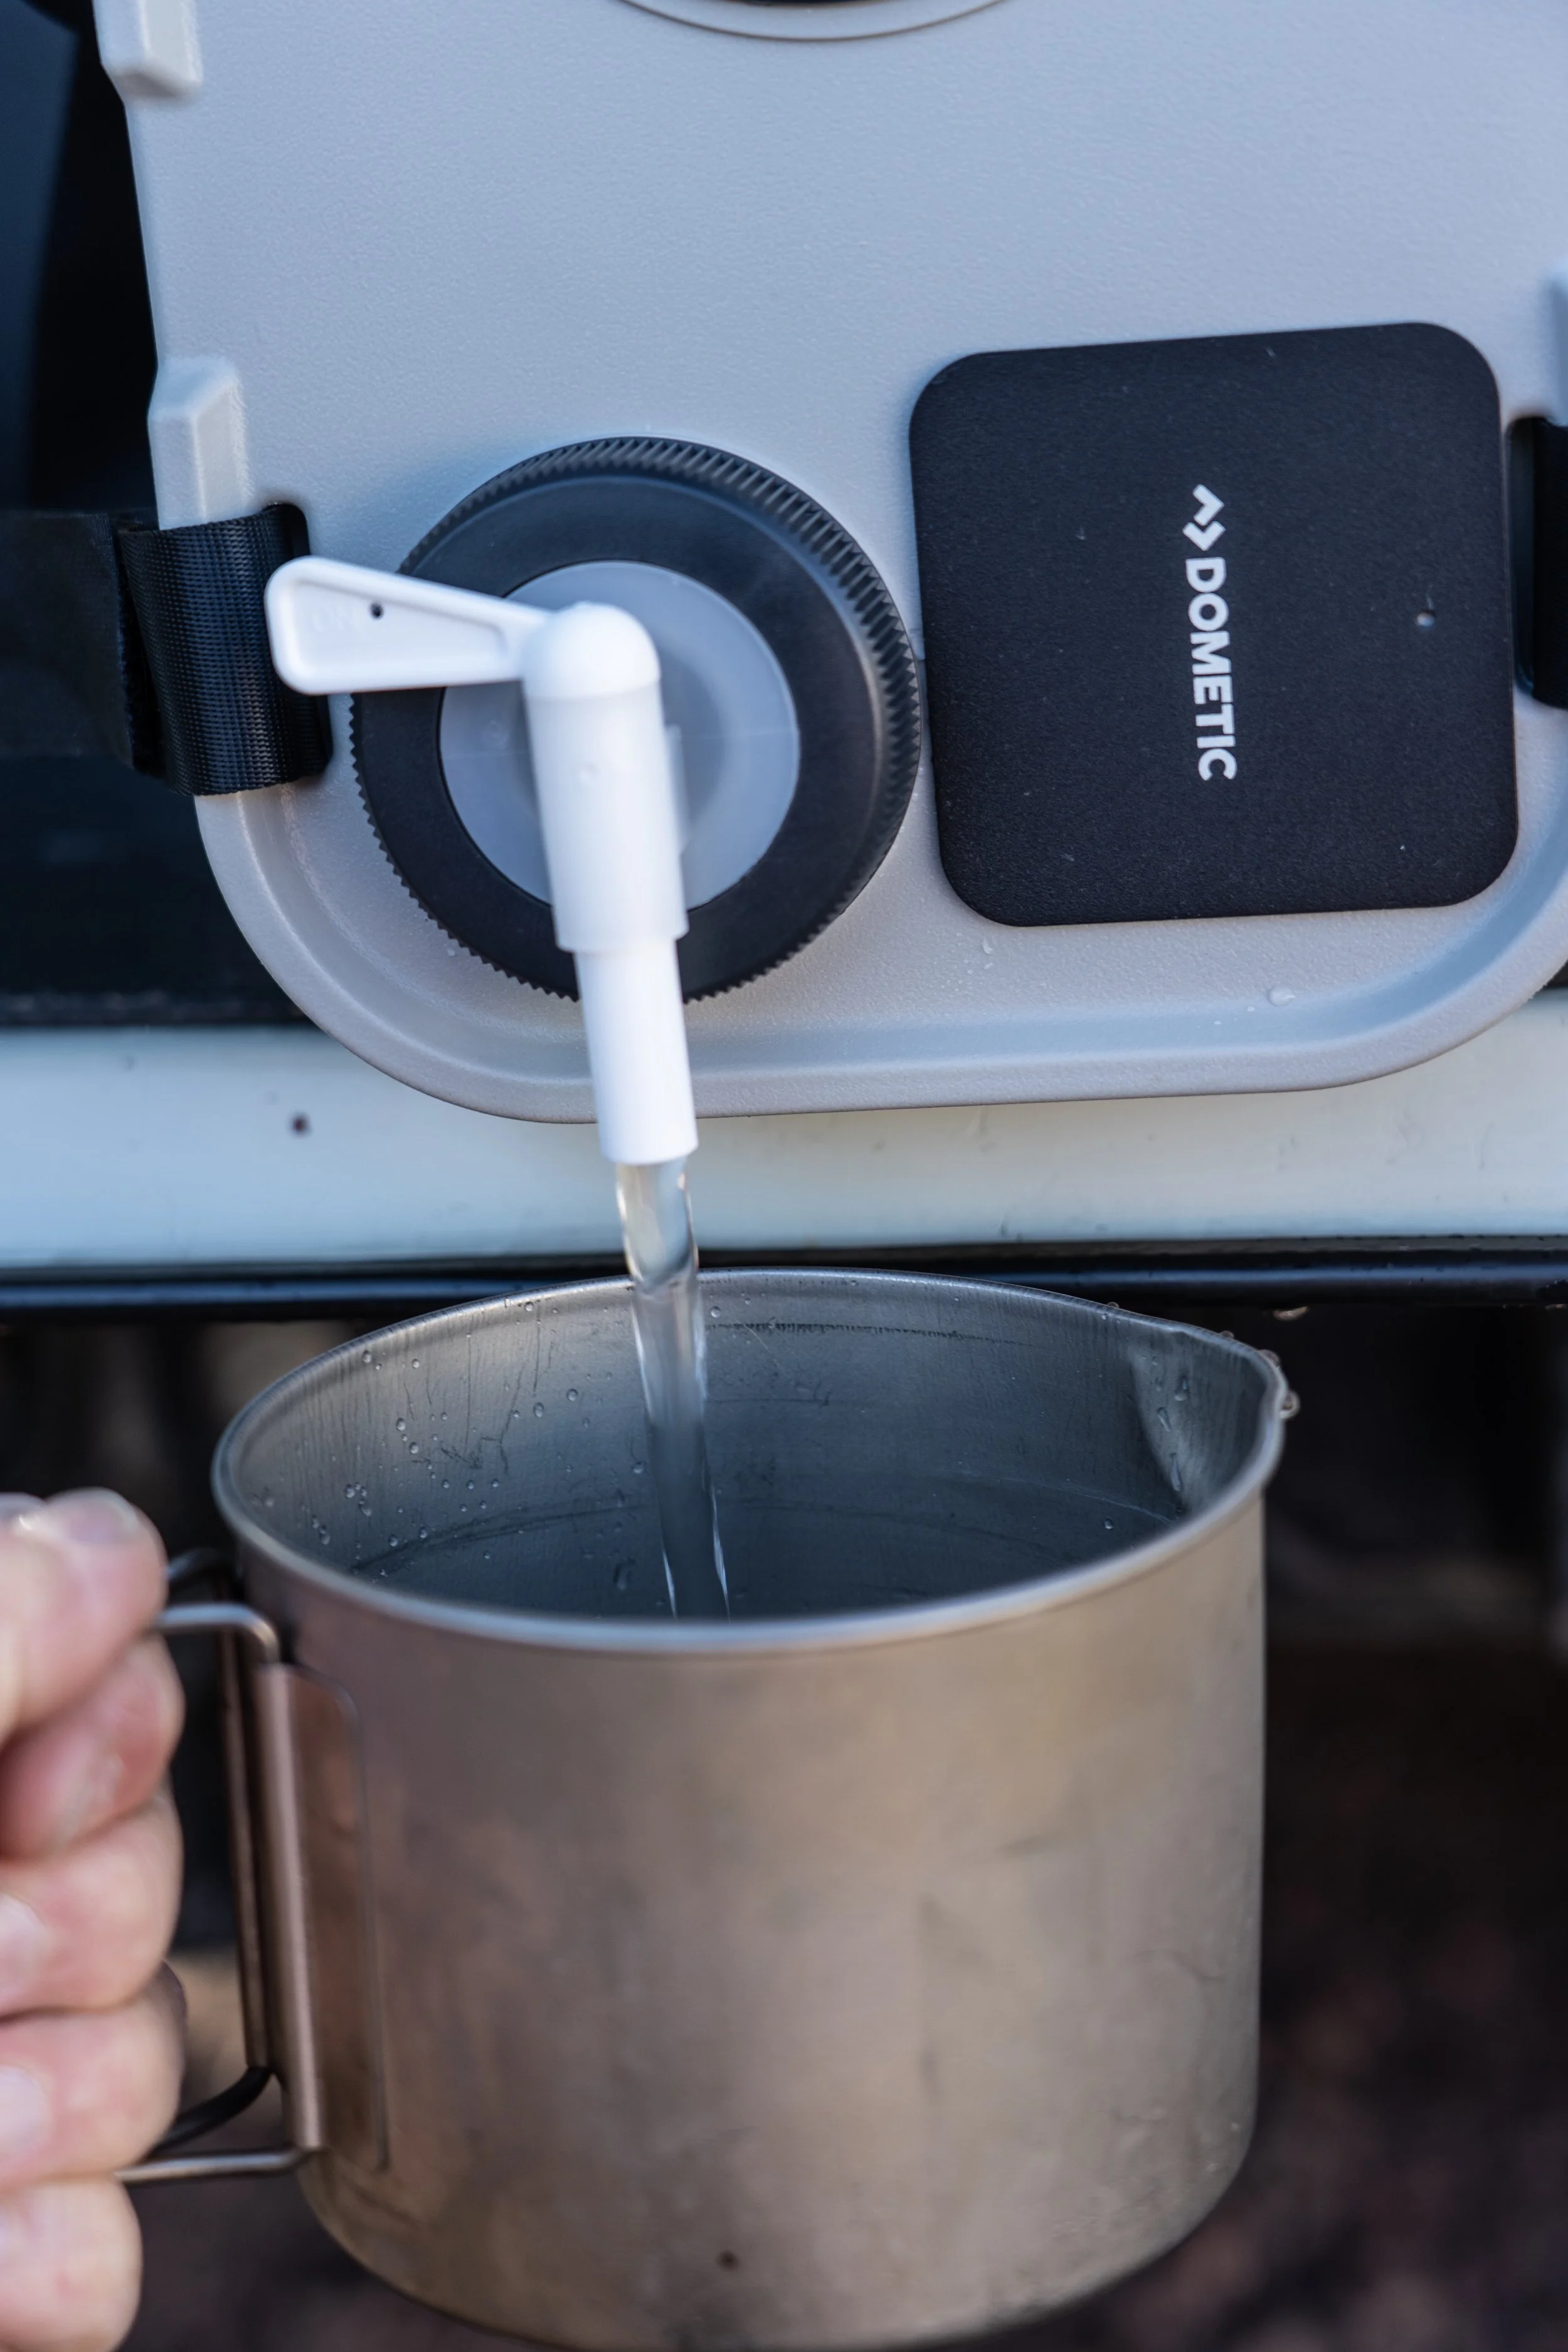
The fitting is used with the Dometic can’s nifty option: a USB rechargeable pump that dispenses water with a double tap on a touch-sensitive switch, and automatically shuts off after one liter or one minute, in case you set it to fill a pot and wander off and forget because you’ve just noticed the black bear rummaging through your Dometic fridge. The pump has a magnetic base, and comes  with two plates which you can affix with adhesive pads to the can itself or anywhere else. The pump will also obviously stick to a steel bumper, tailgate, or the edge of a truck bed. (Land Rover and newer Ford pickup owners will need to use the stick-on plates.) An LED lights up the spigot area in the dark. Nice.

The Dometic Hydration Jug is made of food-grade (did they need to tell us that?) LDPE, and these things are stout. I stood on top of one that was erect, then I stood on it laying on its side. It didn’t squeak. Yeah, I’m probably lighter than the average American these days at 150 pounds or so, but you get the picture.

See why I was impressed? And in use, every feature functions just as it’s supposed to. The rechargeable pump is neat, but you don’t really need it; the included twist valve and gravity feed works just fine, especially given the breather.

A single Dometic Hydration Jug would be worth having even if you already have bulk water storage in your vehicle. Having a portable 11 liters of water with either a spout or a lighted pump would be handy in many situations—carry it to a picnic table if you’re transiting and staying at Jellystone Park. In fact, with the pump you could easily rig one of these as an impromptu shower.

Dometic has released a flurry of well-designed new products in the last year. The GO Hydration Jug is one of the best. Highly recommended.

Find Dometic here.

The homely, perfect chuck box

As a contributor to somewhere around two dozen magazines over the past three-plus decades, I’ve been lucky enough to sample and own a wide variety of camp kitchens, from simple Coleman stove stands to the excellent Kanz Kitchen and the over-the-top, multi-component Iron Grill system from Snow peak.

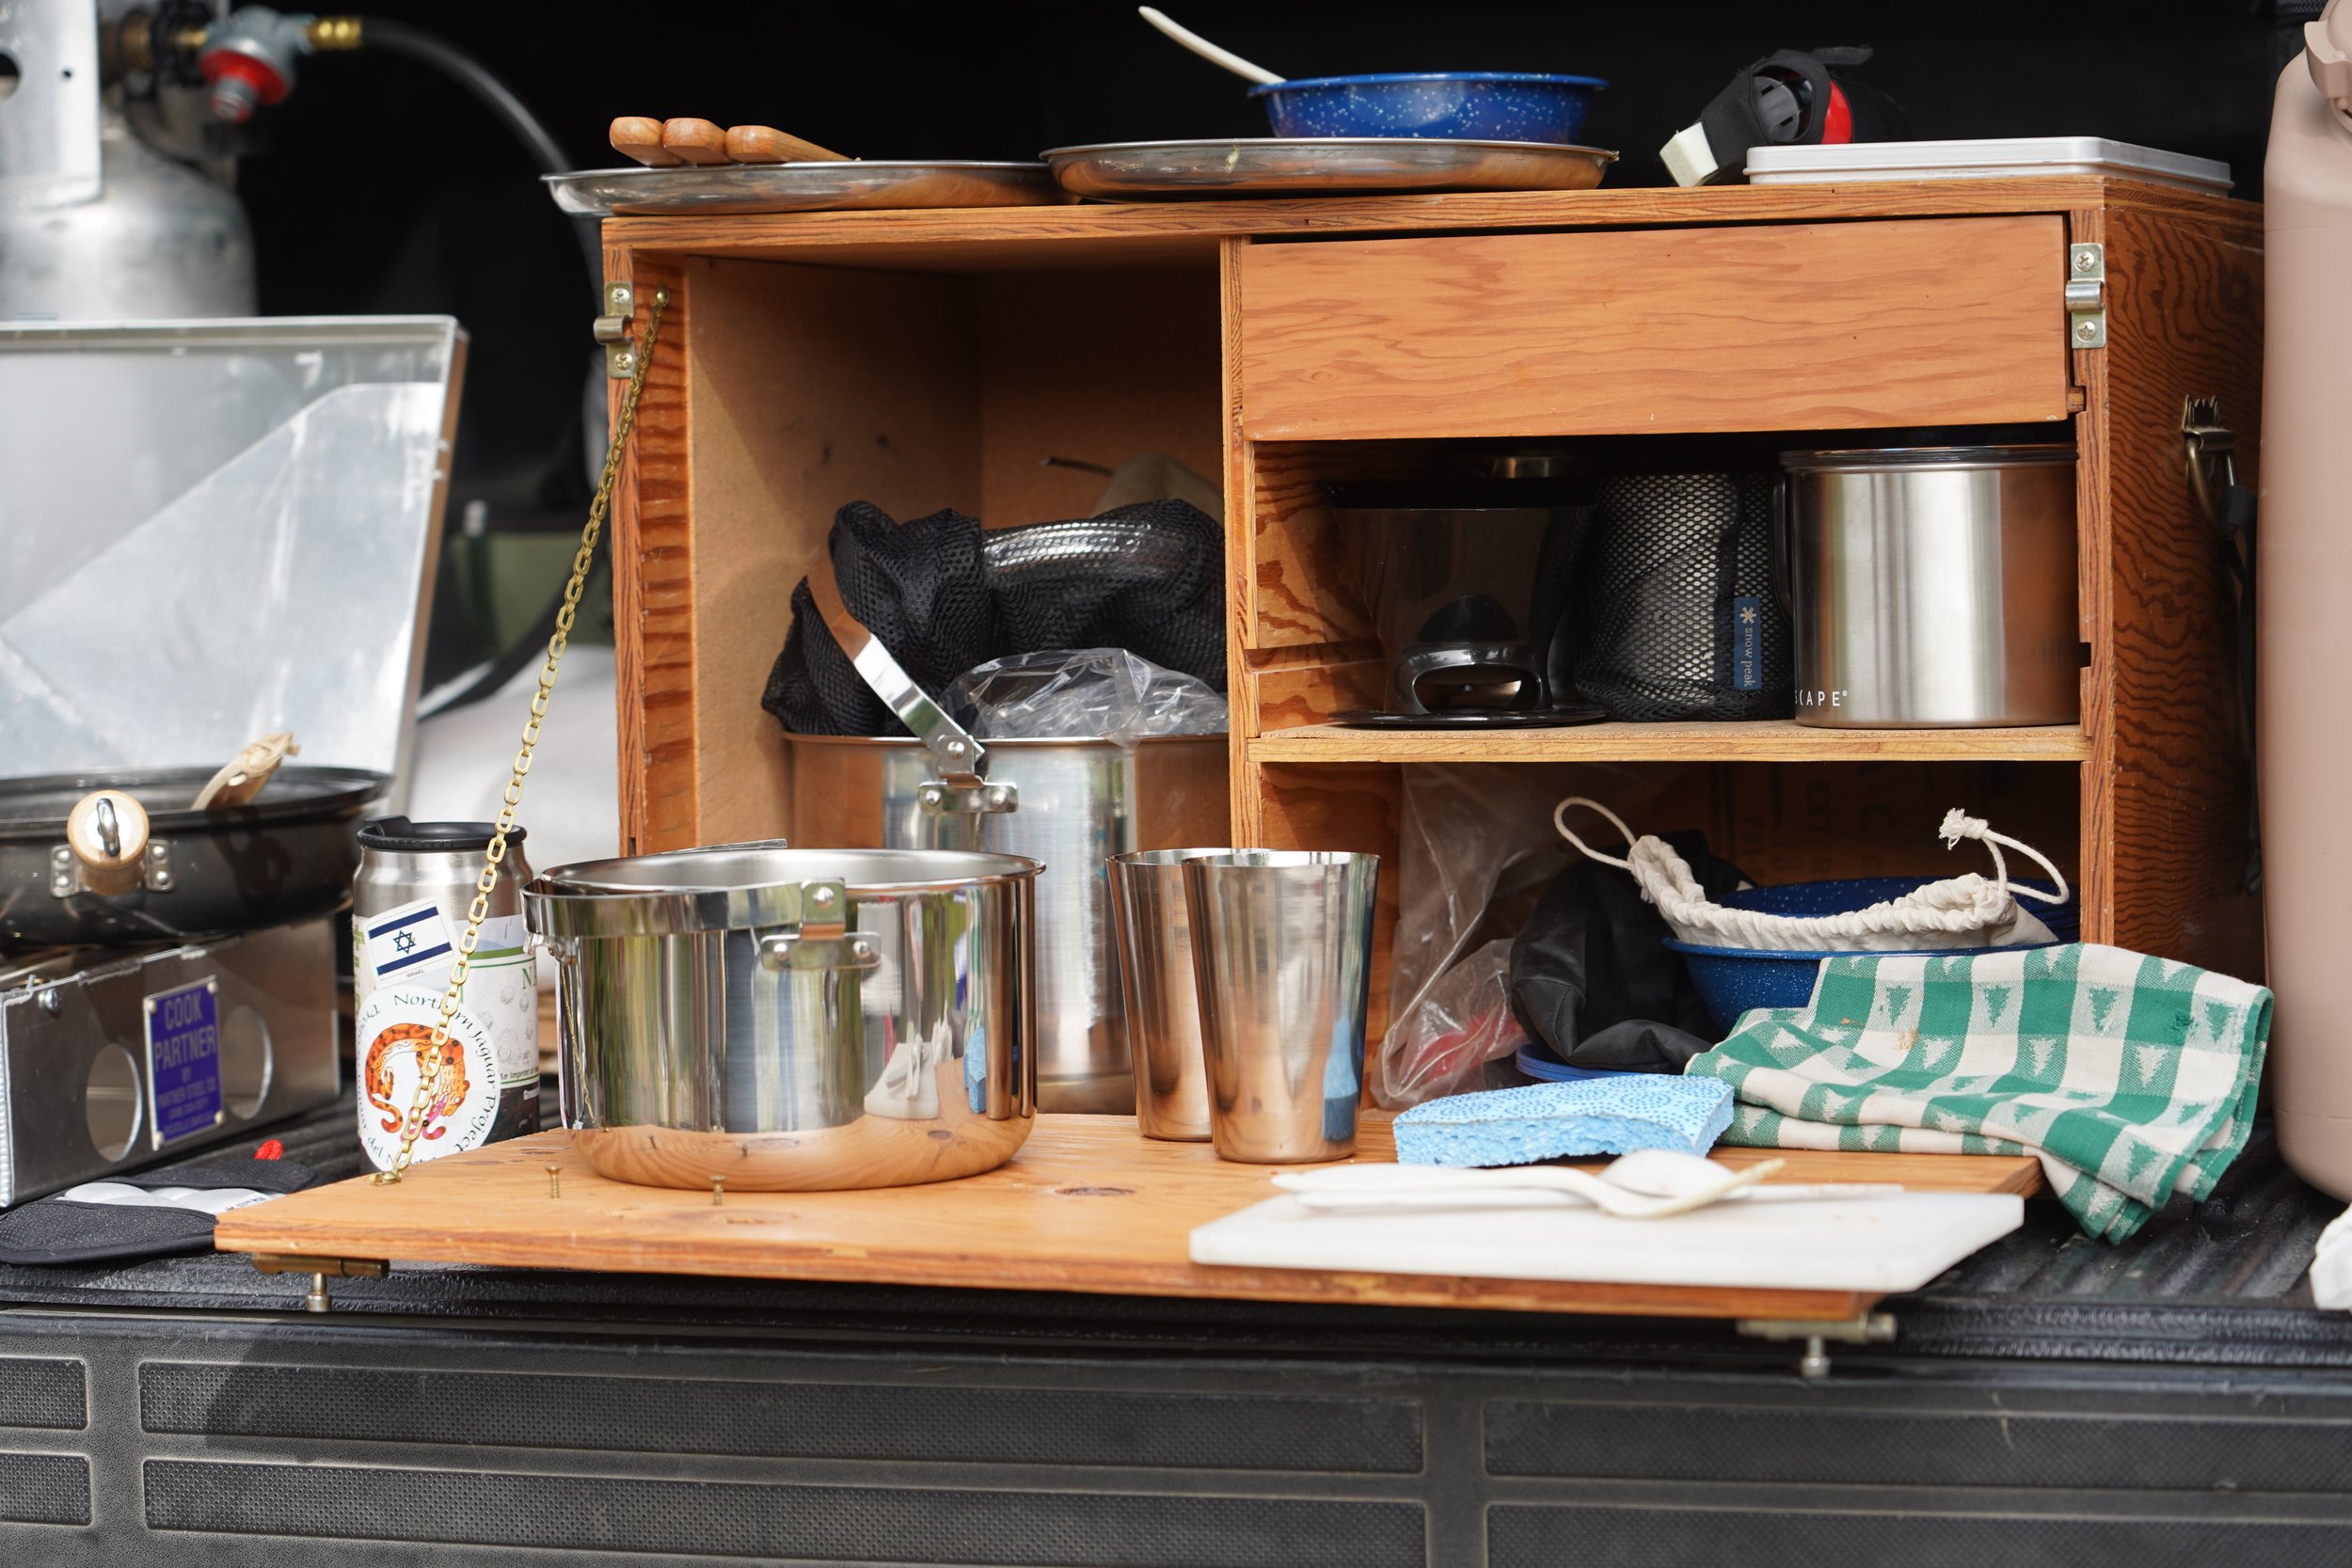
Despite all that, the one you see above is still my favorite.

Why? Not because it’s the “best,” although it functions exactly how it’s supposed to. Certainly not because it’s the most expensive—in fact it is undoubtedly the cheapest camp kitchen I’ve owned. It’s my favorite because I made it back when Roseann and I were penurious college students, exploring the southwestern U.S. and northern Mexico in our FJ40 and, later, an FJ55. Thus, even though subsequent kitchens saw far more exotic destinations, this one contains more precious memories than all of them put together. Like the night we were camped in Mexico’s Pinacate volcanic region when a meteor streaked overhead and its smoky trail covered half the sky. Or any one of several trips to the Sonoran coast of the Gulf of California recording nesting territories of least terns. Or leading sea kayak trips to that same coastline, towing boats and everything needed for excursions out to Isla Tiburón. Or a cross-country skiing trip to the Grand Canyon’s North Rim, when a blizzard hit and our trip leader got hopelessly lost next to a 4,000-foot chasm in ten feet of visibility.

I built the chuck box long before Youtube videos on such things, and so simply used my decent grasp of carpentry and Roseann’s concept to form it out of a single sheet of half-inch plywood. No fancy dovetails; it was simply glued and screwed together (and hasn’t loosened a millimeter since). I made sure to apply four or five coats of varnish, so the finish is still intact as well, despite numerous nicks and scratches. A drawer held utensils, matches, and can openers, the drop-down front created a table, and cork lining reduced rattles.

In recent years, with a succession of fancier kitchen systems from with to choose—not to mantion built-in kitchens in our Four Wheel Campers and Land Cruiser Troop Carrier—the chuck box got tucked away in a high corner of the storage building at our desert cottage, like the forgotten Velveteen Rabbit. When thieves broke in while Roseann and I were in Alaska last fall (by the simple expedient of hot-wiring our Ford truck and driving it through the wall), they took nearly everything . . . but left untouched the plain plywood box in the corner.

And, happily, just like the Velveteen Rabbit, the old chuck box came to life again. When we bought a 2014 Tundra to use as our Alaska vehicle, we decided—for the moment, anyway—to keep the camping setup simple. So when I hauled a trailer full of household goods to Fairbanks, I strapped the chuck box in the bed of the truck, and found that it worked just as well as it did 30 years ago. I didn’t miss those fancier kitchens one bit.

There are chocks . . . and chocks (I needed the latter)

Inadequate . . .

Now and then it’s good to be reminded of the laws of physics.

A few weeks back I conducted a training weekend for a lovely couple who had recently purchased a very well-optioned Sportsmobile. They wanted to become familiar with its capabilities (and theirs), to learn recovery techniques, and especially to learn the use of their winch, an accessory new to them both.

We spent the first day, Friday, driving and marshaling, and I think hugely improved the confidence of both of them, in addition to opening their eyes as to just how capable a Sportsmobile can be despite its size.

Saturday was winching day. I’d picked a dead-end bit of trail where we wouldn’t be in anyone’s way who happened to pass. It was a hill steep enough to actually work the winch, but not so steep as to be intimidating. The Sportsmobile was equipped with a Warn 12,000-pound winch and synthetic line. For an 11,000-pound vehicle that’s marginal if one applies the standard one and one-half times GVW formula for speccing a winch’s capacity, but we discussed ways to ameliorate this by running out more line and, especially, rigging a double-line pull whenever possible.

The only trees available were both marginal in size and behind a barbed-wire fence, so I set up my FJ40 as an anchor, facing down the hill at the top of the slope.

It was then I realized I’d forgotten my set of Safe Jack chocks, the substantial ones I normally use for winching. All I had with me were the smaller folding chocks I keep in the vehicle for tire-changing duty and the like. No problem, I figured—I set the folding chocks in front of the front tires of the Land Cruiser, and we lugged a couple substantial rocks to put in front of the rear tires. I was in low range, reverse selected, engine off and parking brake pulled out stoutly.

The first, single-line pull proceeded without drama. The winch did not seem to be working over hard (although I remarked that it was one of the loudest winches I’d ever heard). So we re-rigged for a double-line pull, running the Sportsmobile’s line through a 7P recovery ring linked to one of the 40’s front recovery hooks, and back to the Aluminess bumper of the van. I stood to one side and directed while Emmett sat in the Sportsmobile’s driver’s seat and operated the winch remote. He began to spool in and the van crept slowly up the hill.

For about five feet. Then a front tire happened to hit a bit of a rock ledge I’d failed to notice, perhaps eight inches high. The Sportsmobile came to a halt—but the winch, of course, didn’t.

Even as I was raising my fist to give the “stop!” signal, I turned to see my 40 pulled gently but inexorably over the folding chocks, which collapsed as if they’d been soda cans. Behind them the rocks in front of the rear tires had held, but were themselves being dragged with the vehicle.

The winch stopped, and I signalled Emmett to apply the brake and shift to park, then let out some slack in the winch line.

The Land Cruiser had only moved about eight inches. Had we for some reason continued to power the winch, it would simply have kept on being dragged slowly across the ground; there was no chance of it careening out of control. Nevertheless, it was a good lesson in the force an 11,000-pound vehicle and a roughly 24,000-pound-equivalent double-lined winch can put on a 4,000-pound vehicle, even on a moderate incline. The math is pretty simple.

These would have been better. From Safe Jack.

What could I have done differently? Having the larger and sturdier chocks would have made a difference, as might using big rocks instead of the little chocks. Even putting the rocks we used in front of the front tires, and the small chocks under the rear tires, might have made a difference, as the front of the Land Cruiser was being pulled slightly downward in addition to forward. However, a more secure option would have been to daisy-chain the 40 by its back bumper to the base of one of the trees on the other side of the fence with the endless sling I had on hand, then pull forward until the sling was tensioned, then chock.

A good lesson that there’s no such thing as “enough” experience, and there’s never a time to stop learning.

For much more on the forces involved in winching, please read this.

Safe Jack’s heavy-duty folding chocks are available here.

A cheap, bombproof lens-shipping case.

For the first 30 years of my career as a writer/photographer, all my camera gear went with me on airlines as carry-on luggage, packed securely in a Pelican case. For 30 years, there were no enforced weight limits for carry-on items, so no one ever noticed that the loaded case eventually weighed upwards of 33 pounds. That changed on one flight to Australia, when the check-in clerk asked to weigh it, and actually laughed out loud when she hefted it. Pointing to the sign I hadn’t noticed that said, MAXIMUM CARRY ON WEIGHT 7KG (15 pounds), she demanded I offload half its contents into our checked baggage. There followed five minutes of panic as we rolled a couple thousand dollars worth of DSLR equipment into our clothing, stuffed it into the middle of our checked duffels, and prayed for the best. (Walking past the business-class check-in we noticed that the limit there was 14kg or 30 pounds, sort of giving the lie to our clerk’s assurance that the limits were to “balance the load.)

We were lucky and everything made it to Sydney intact, but it was obvious a new approach was going to be necessary given increasingly widespread carry-on weight limits. Henceforth I carried a single camera body and a couple lenses on board, and packed the rest inside hard cases in our luggage, knowing it would inevitably be subjected to casual treatment by baggage handlers who, even if they were conscientious, were invariably pressed for time.

Early this year I picked up one of Sony’s brilliant 200-600mm zoom lenses for my Alpha 9 camera, and decided it needed extra protection—and thanks to my long-past life as a fixer-of-most-things, I knew how I wanted to go about it.

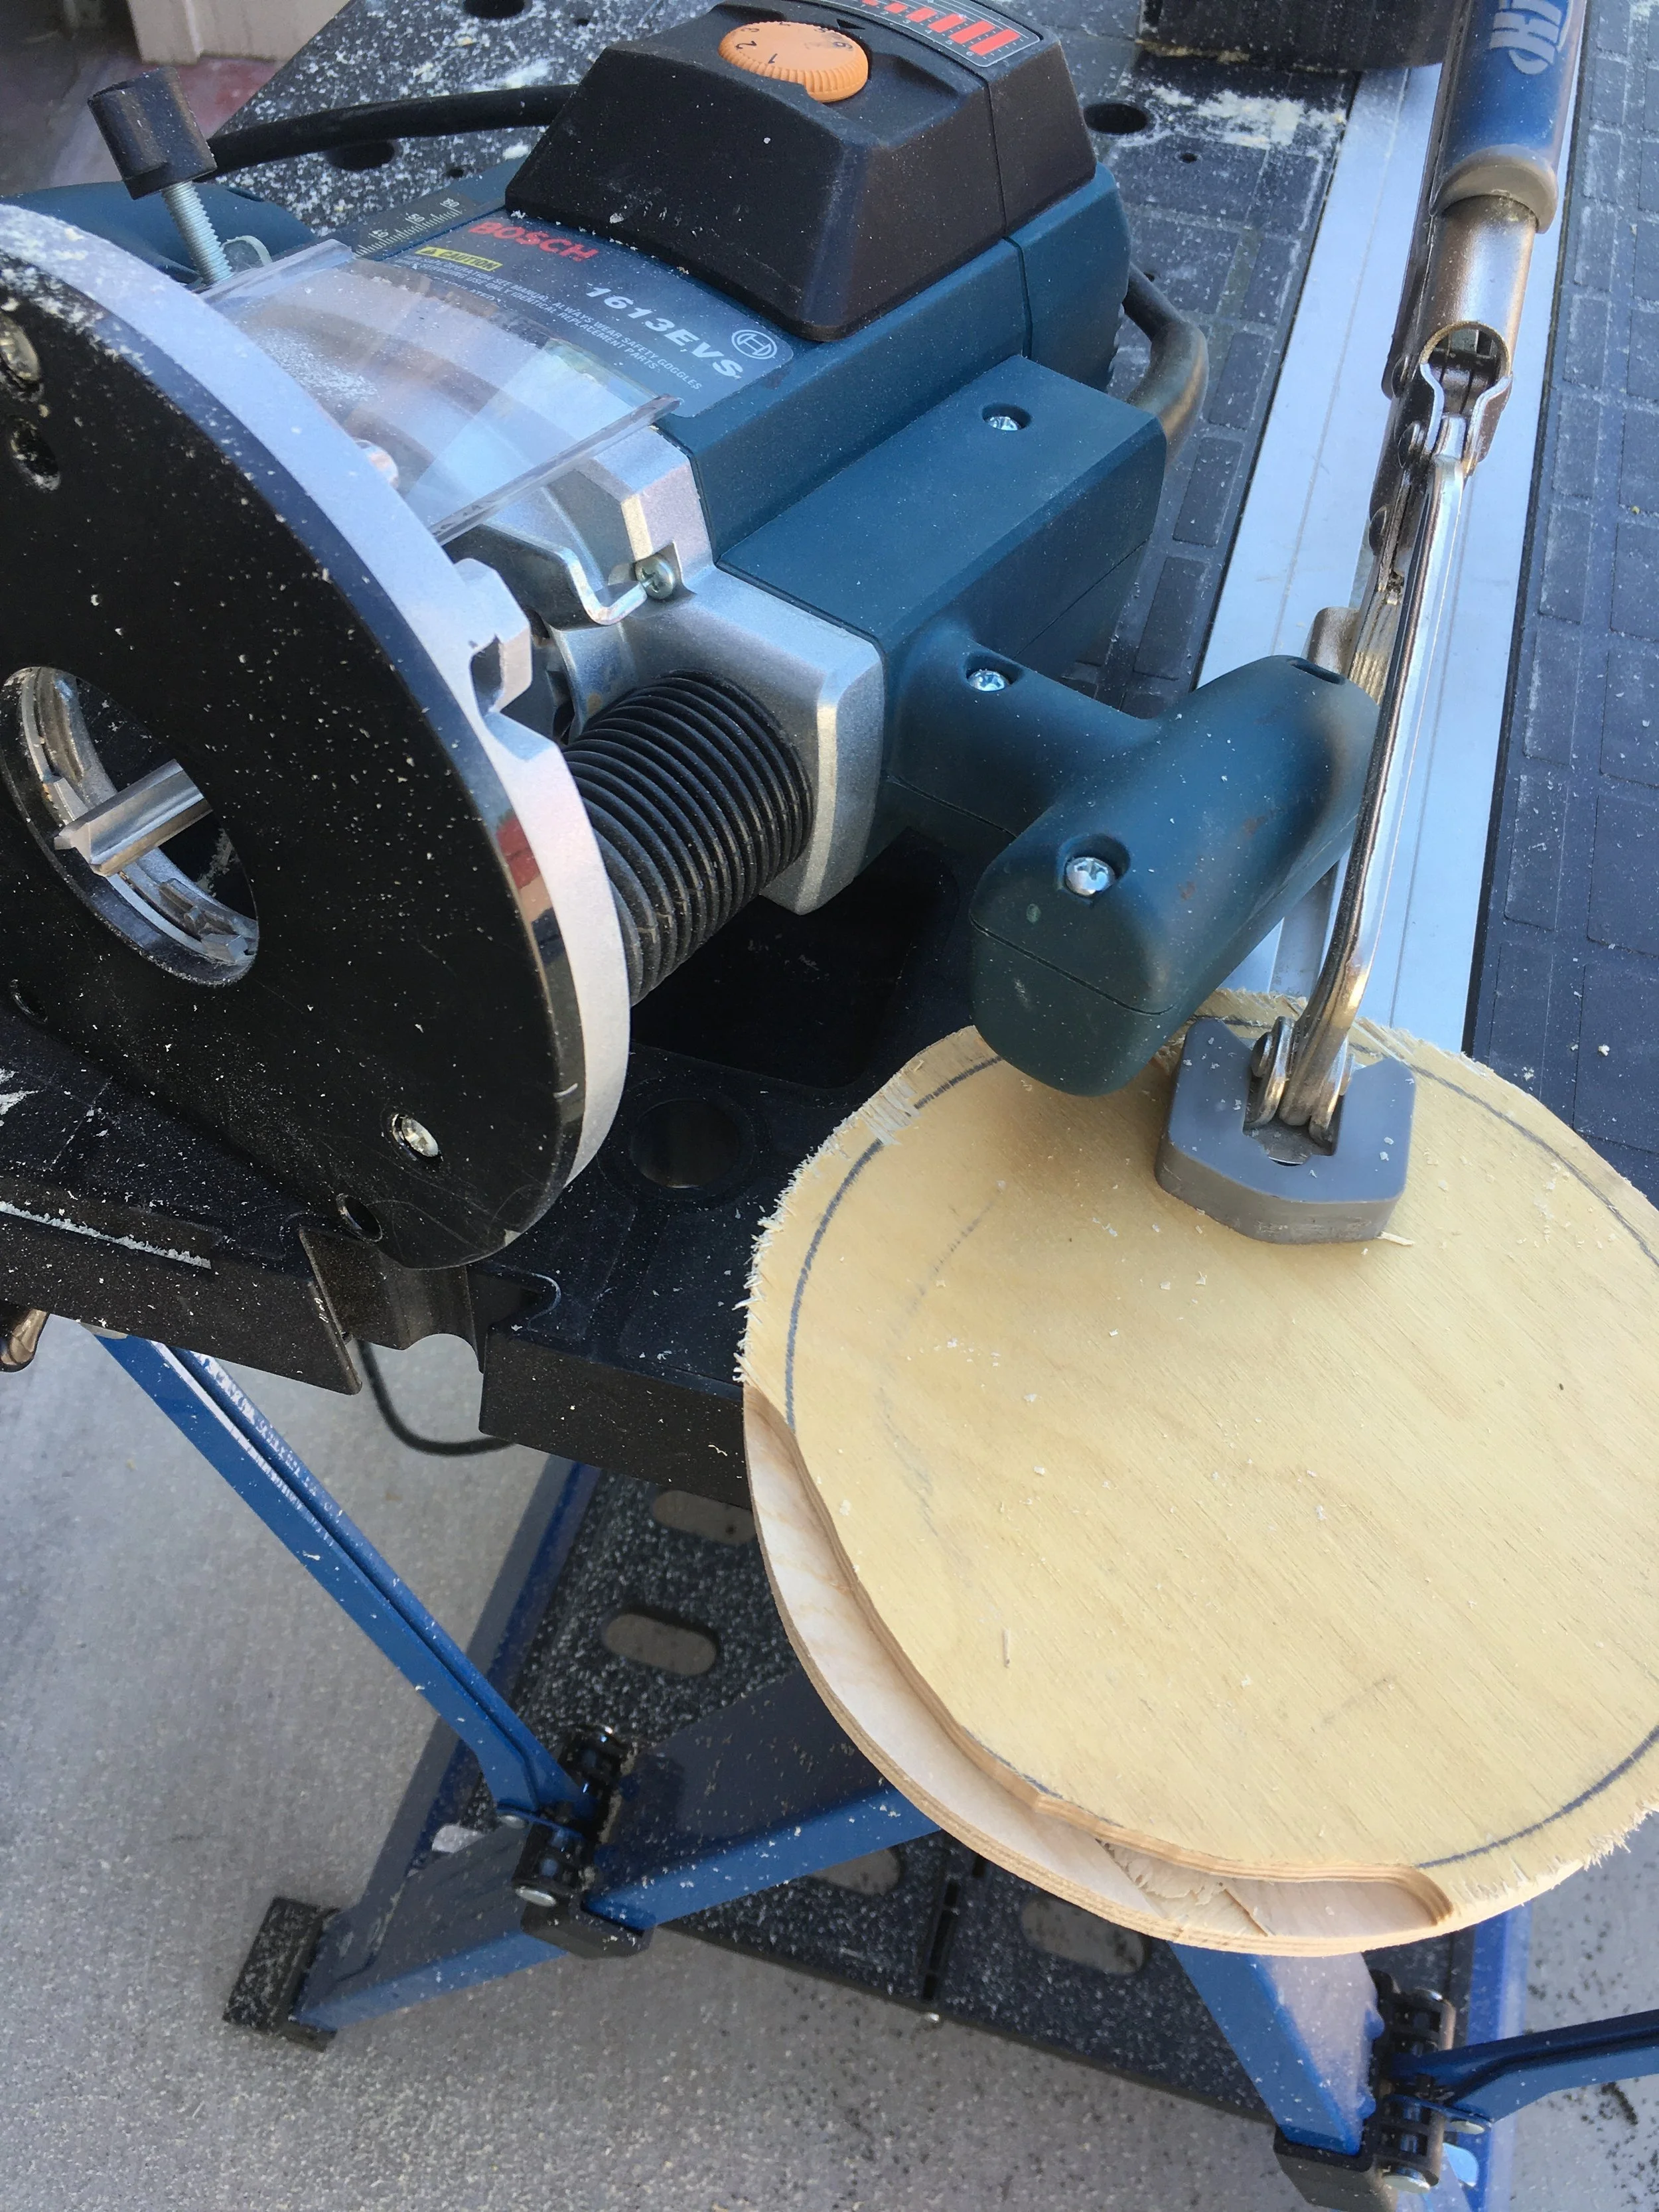
At Lowe’s Home Improvement I picked up an ABS stand pipe, six inches in diameter and 24 inches long, for the princely sum of $8.95 plus tax. Back home I picked out a scrap piece of 3/4-inch plywood (it happened to be Baltic birch but ordinary plywood would suffice). I traced the outer circumference of the pipe twice, then traced another circle inside each, a bit more than the thickness of the pipe wall. With a jigsaw I cut out each circle, then used a router to relieve the outer edge so each cap would fit securely into each end of the pipe.

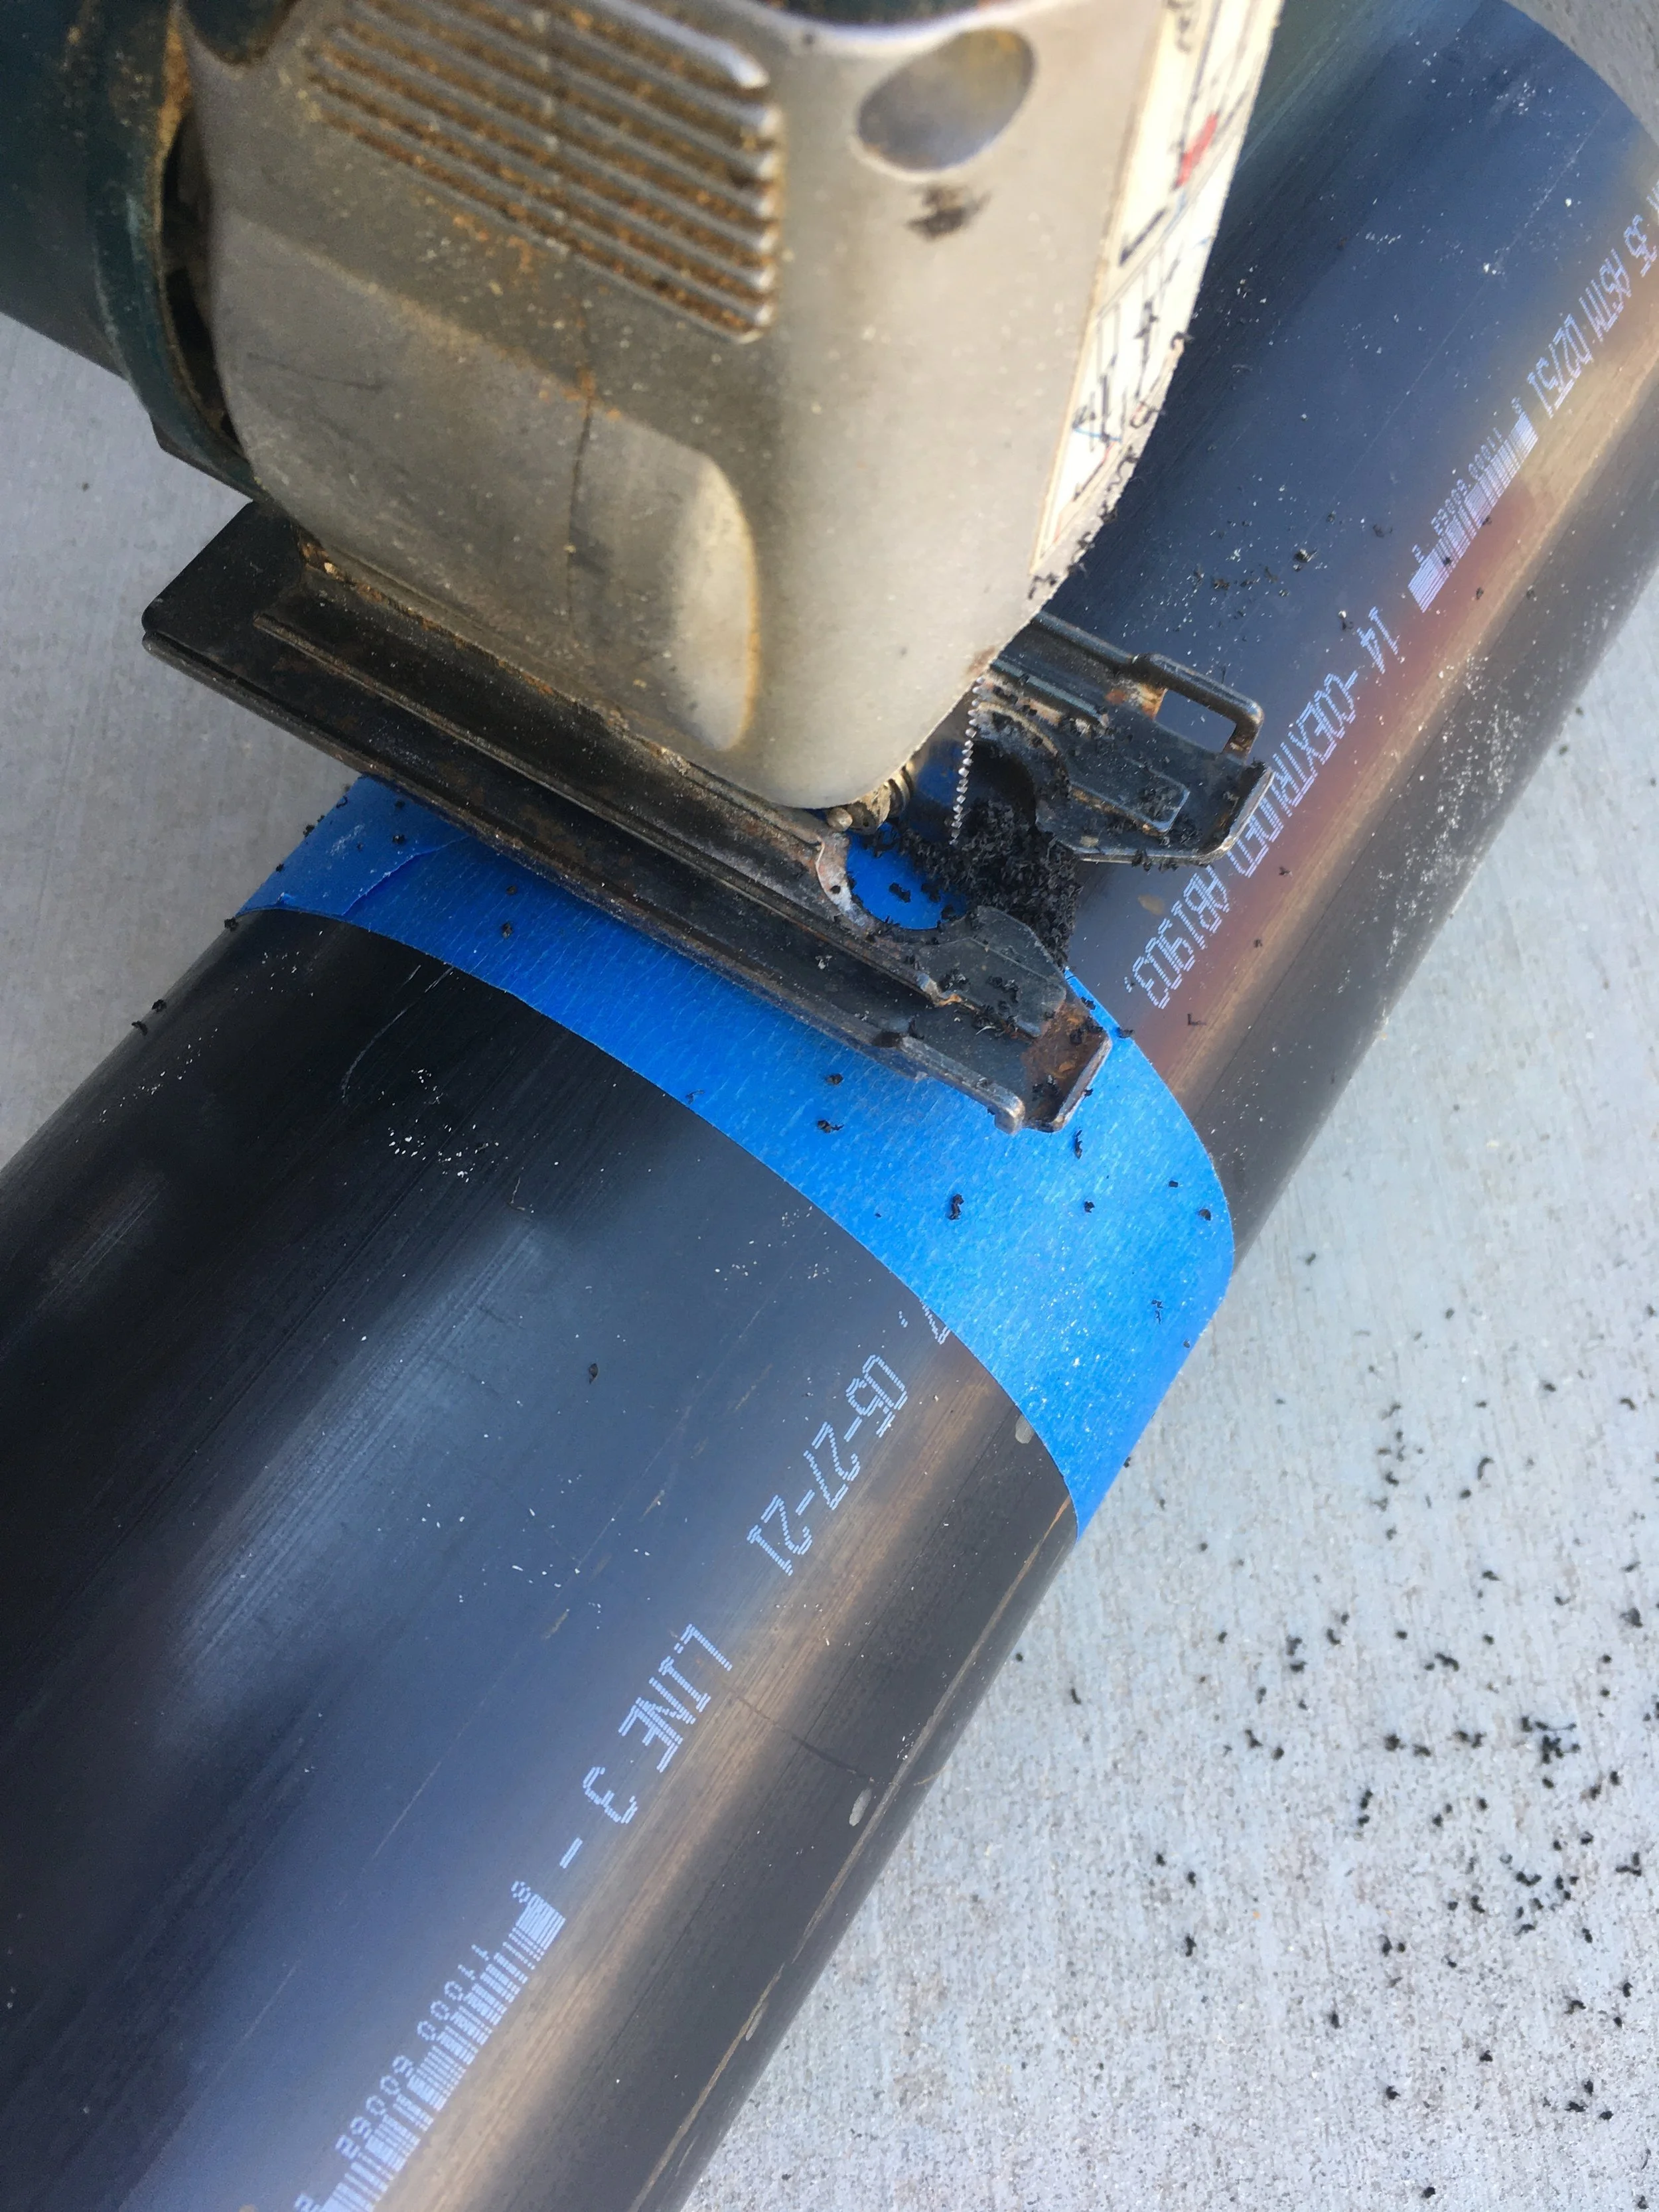
Next I set up the Sony lens next to the pipe, gauging its length with space left over for padding on each end. I marked the spot with a circumference of painter’s tape and trimmed the pipe with the jigsaw.

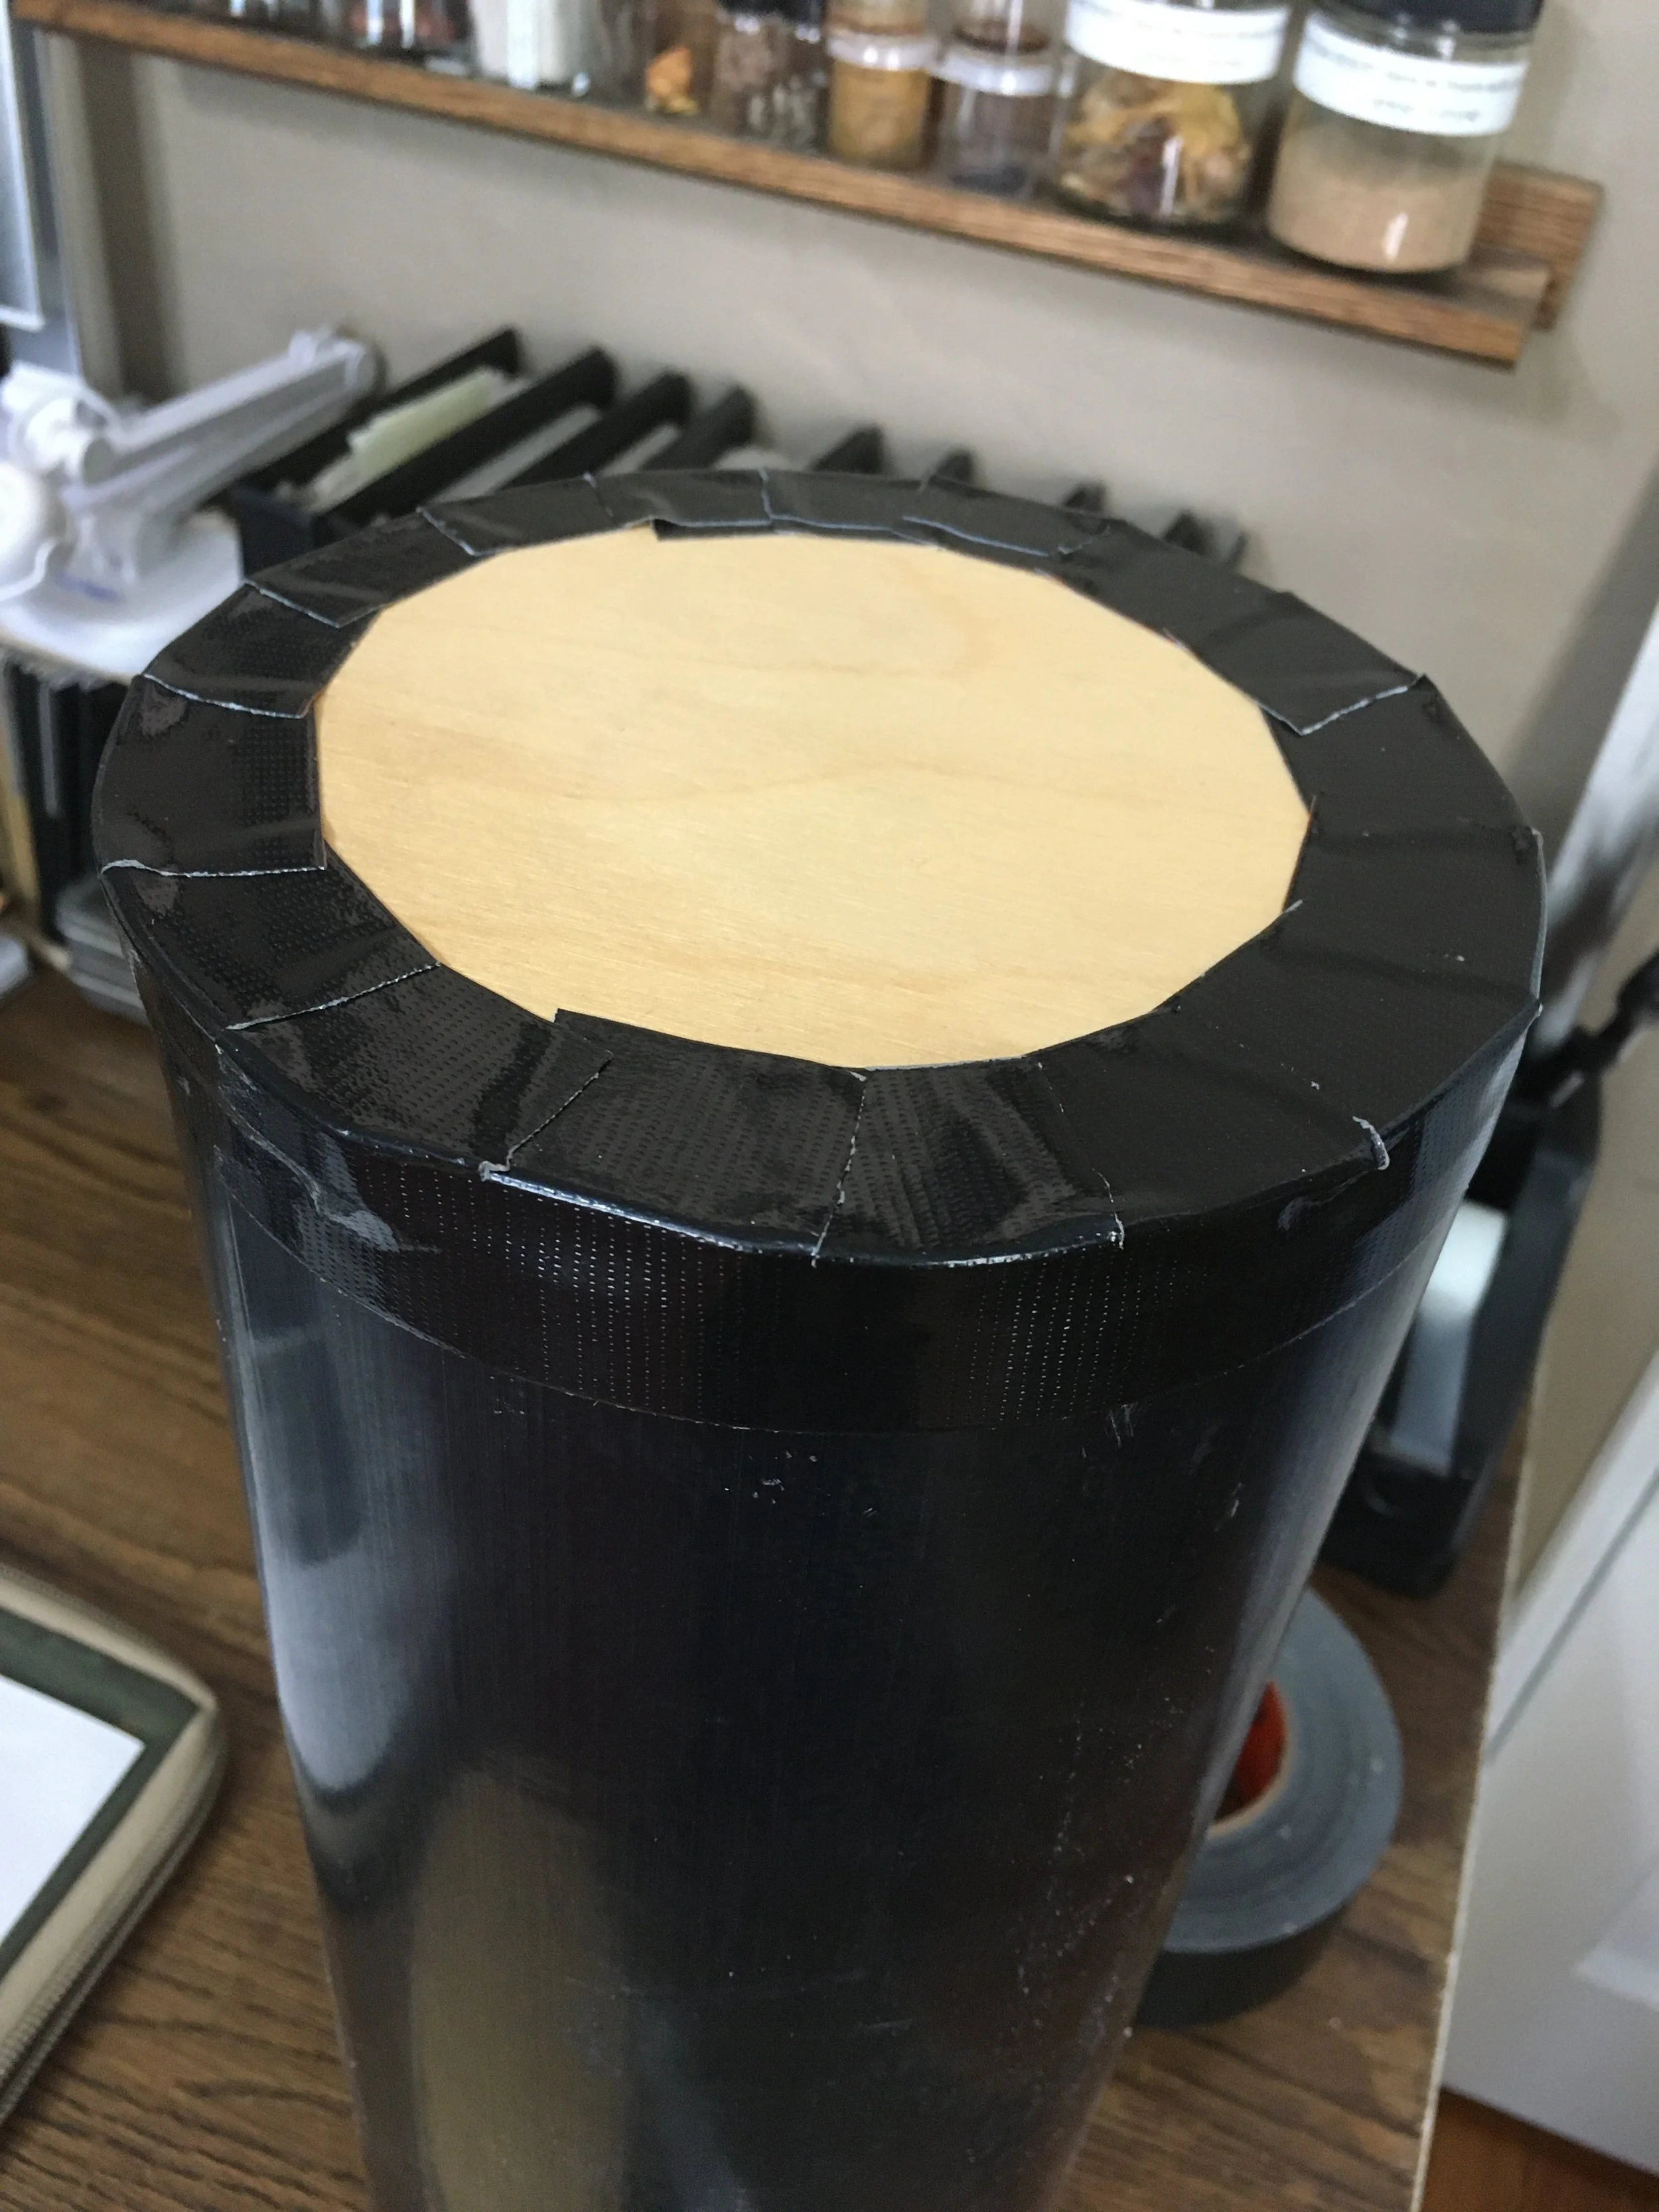
Nearly finished. I made sure the length was good, then used Gorilla tape to secure the “bottom” cap to the pipe, first with a piece around the edge, cut and overlapped thus:

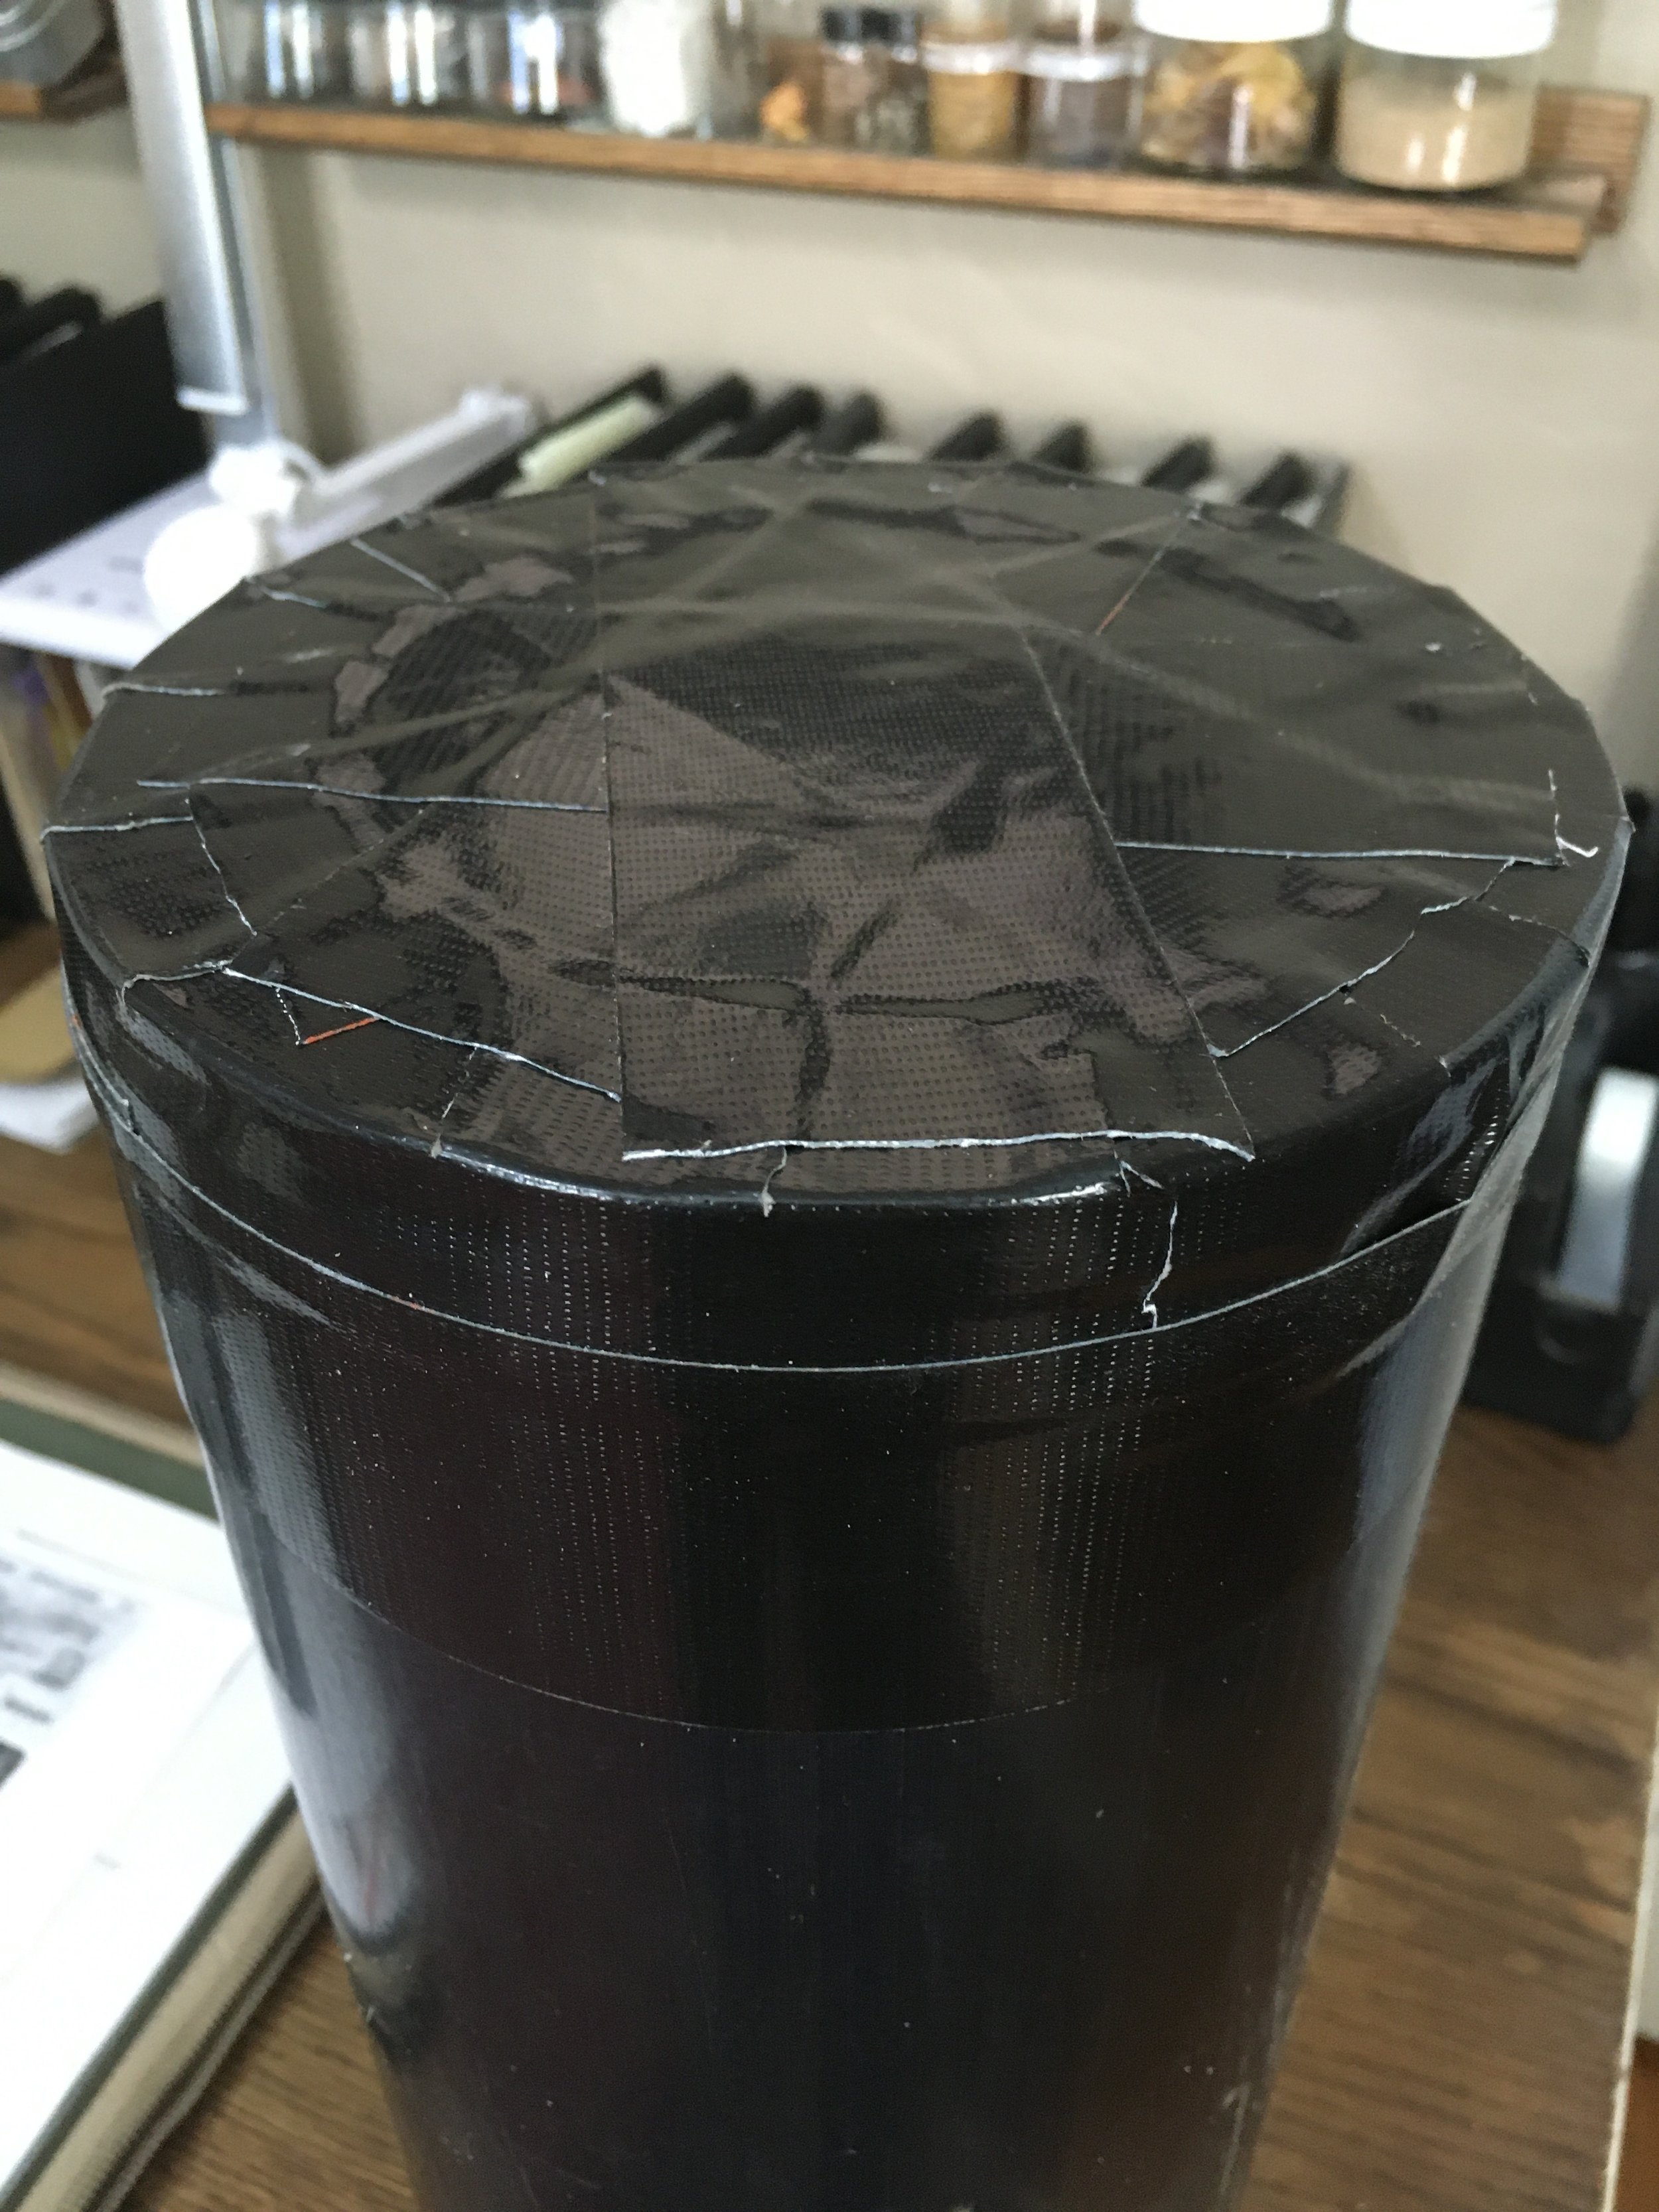
. . . then with strips all the way across.

All that remained was to load the lens—wrapped in a plastic bag to keep it dust-free—well-surrounded by packing peanuts. On top I inserted the remainder of the roll of tape to re-secure it on the way home—and also, I hoped, to allow anyone who might open it for inspection to re-secure it.

With the top taped shut, the case felt utterly bombproof. You’d have to run over the thing with a tractor to damage it (perhaps not beyond the realm of possibility at a couple airports I know, but . . .). I still marked the outside with warnings.

Of course the case survived multiple flights to, from, and within Alaska with zero issues, and for once we felt zero stress consigning such a piece of equipment to the vagaries of checked luggage.

Total out-of-pocket cost: $8.95. Plus tax.