Quality, seen and unseen

IMG_4018.jpg

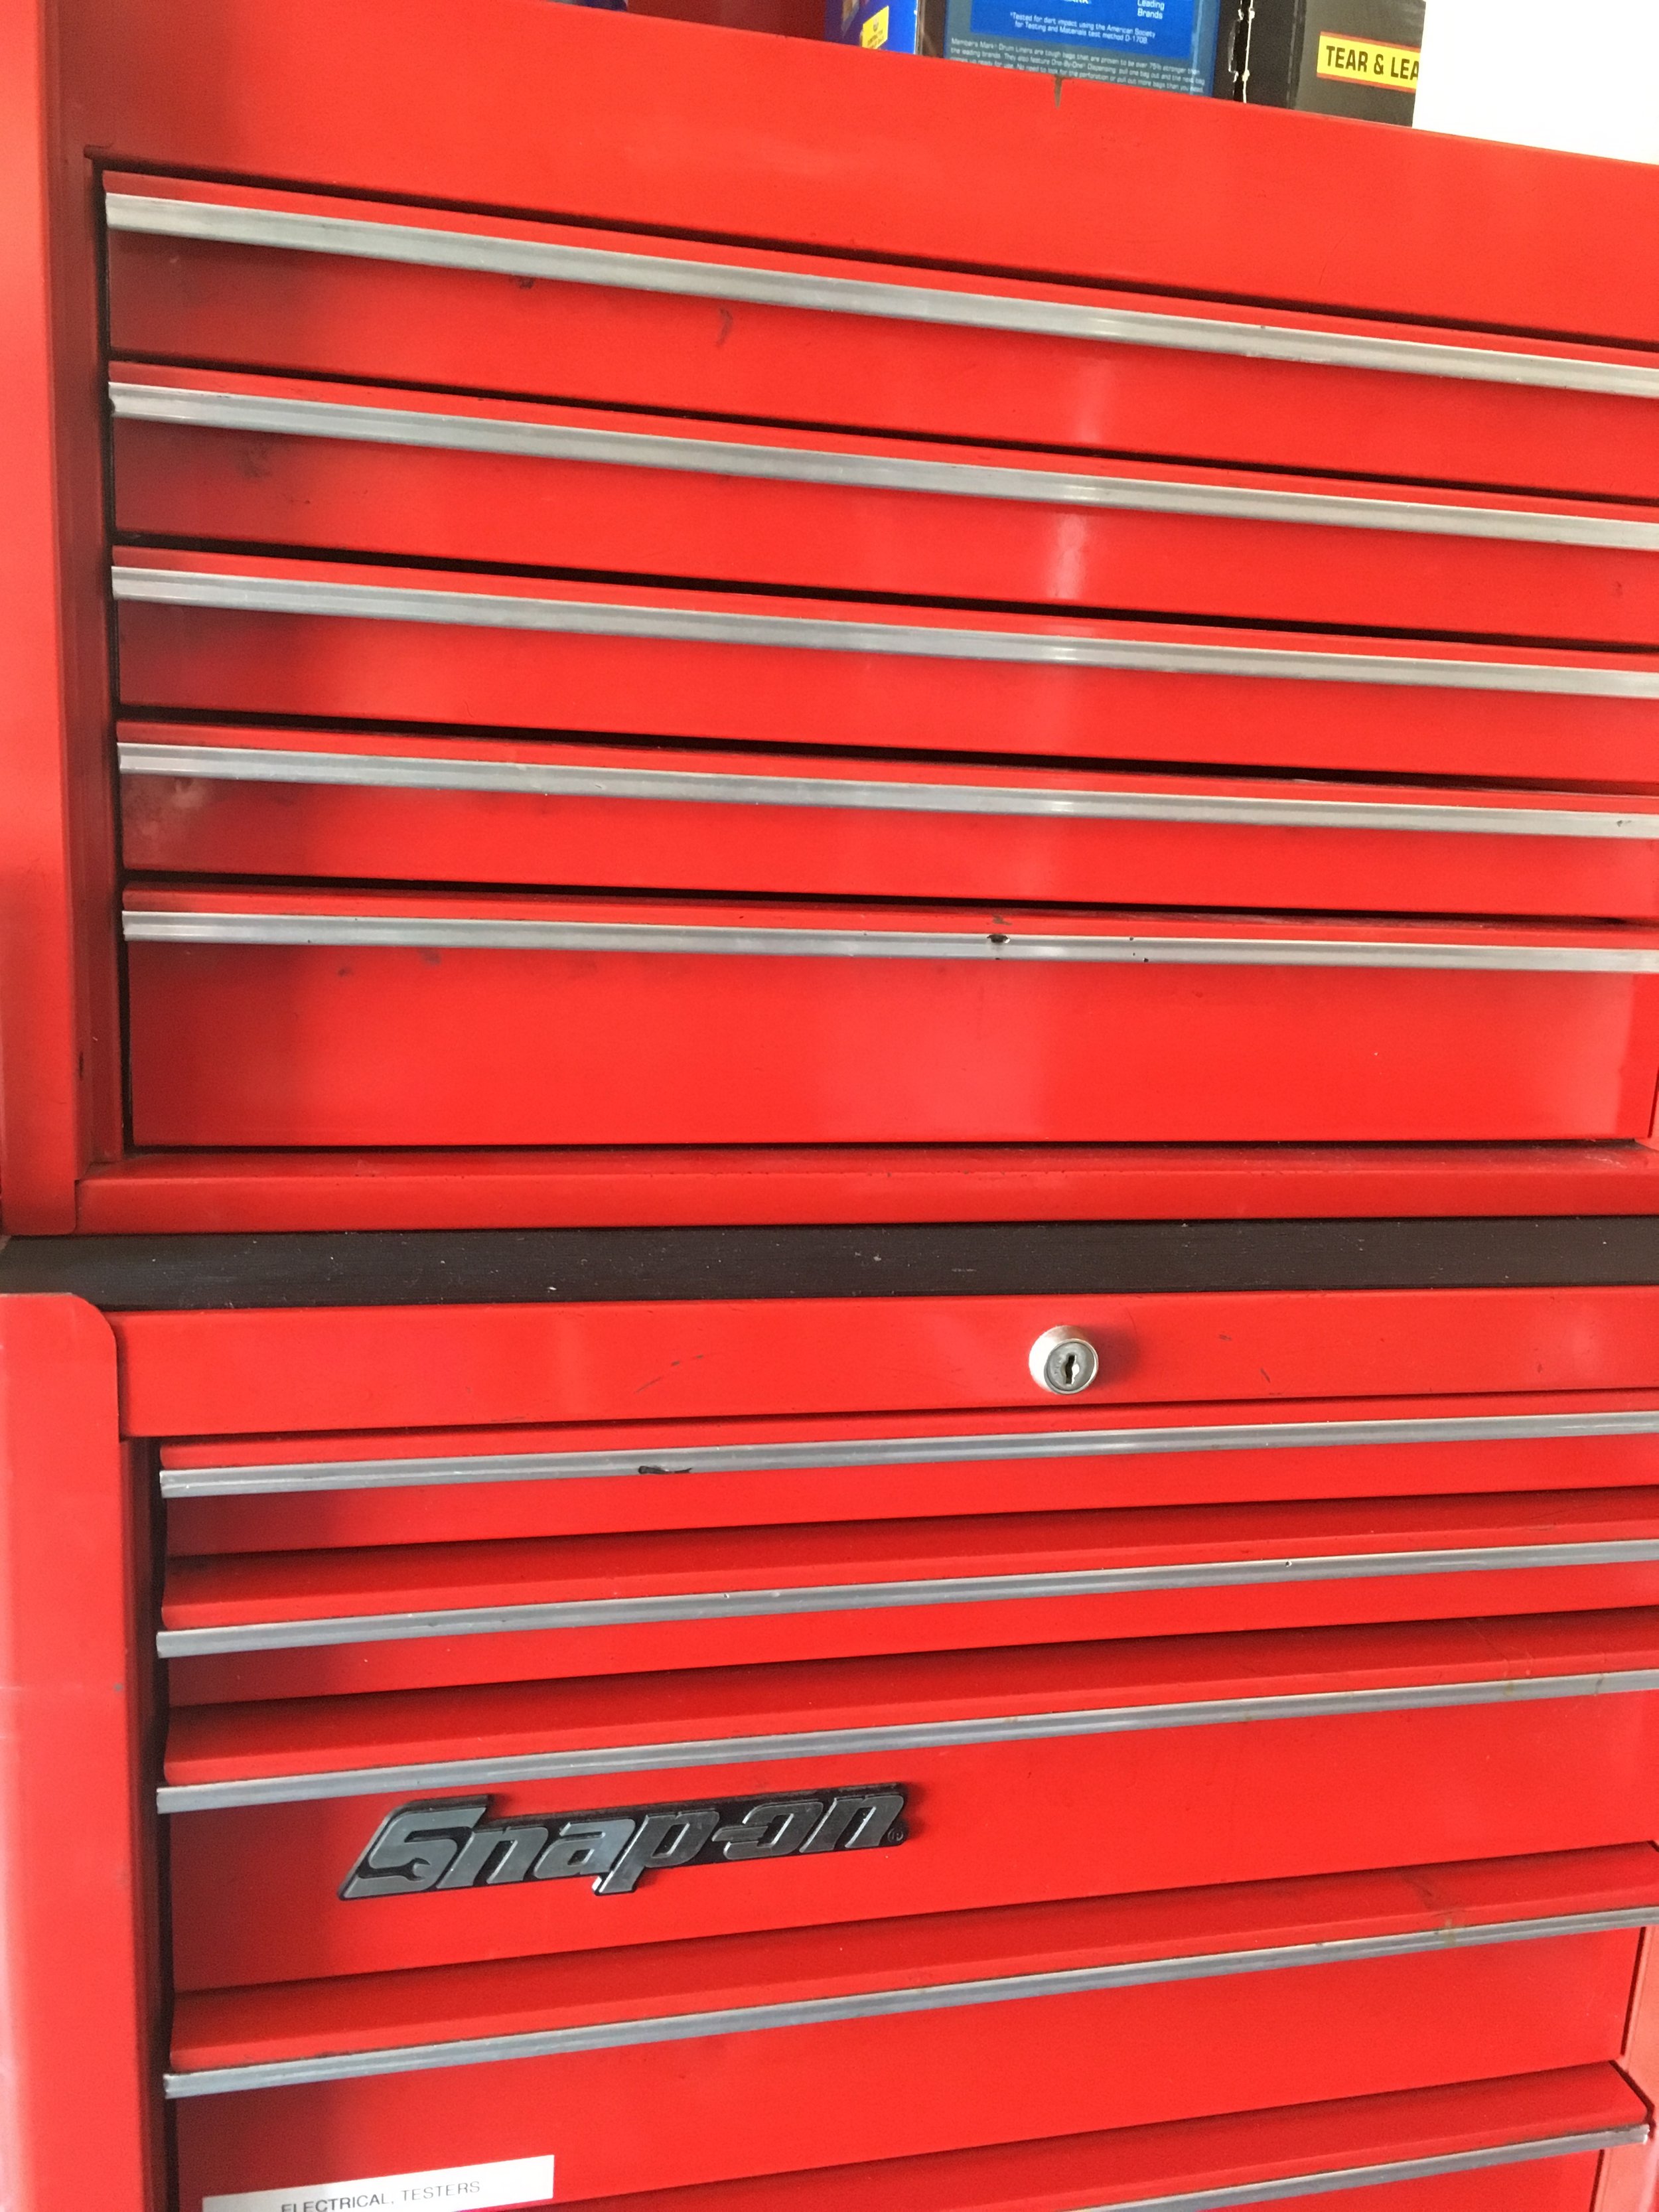
For several years I’ve stored my “in-town” automotive tools in a modest older Snap-on rolling chest combination (which I bought used). But it’s been getting really crowded recently, and I’ve been thinking about augmenting or replacing it. The decade-old Craftsman chest out at our desert place is larger, but I didn’t want to just swap the two as I still need a full complement of tools out there as well.

IMG_4017.jpg

By sheer coincidence I was at an acquaintance’s house last week to deliver a gate opener I’d sold him, and it turned out he had recently bought the entire remnant stock of Kobalt tool chests from the local Lowe’s home improvement stores. Kobalt had been the chain’s store brand for years, but recently they switched to Craftsman—which, as you might know, is now owned by Stanley Black and Decker rather than Sears. In my mind this switch is actually a step down: Recent made-in-China Craftsman tools that I’ve examined in their packaging show noticeably poorer finish than the older made-in-America products, poorer in fact than the few Kobalt tools I’ve purchased to review.

IMG_4015.jpg

Anyway, my friend had scored several dozen of Kobalt’s top-of-the-line stainless-steel-clad tool chests, and quickly unloaded all of them at fire sale prices. He had exactly one left, and it happened to be a tall, narrow, 27-inch-wide model, which is the only configuration that will fit in the in-town garage. So I bought it for a song.

Back at home I had to pull the drawers to unload it and get it into position. And that gave me the opportunity to look past the beautiful stainless exterior and the nifty soft-close drawers. What I noticed made me pull apart that plain old red Snap-on chest to examine it as well. And that’s where significant differences showed up. Drawers out, the Snap-on cabinet was noticeably heavier and more torsionally rigid than the top box on the Kobalt. Where Snap-on used nuts and bolts and spot welds to assemble pieces, the Kobalt had been assembled almost exclusively with pop rivets—in fact I found several stems from those rivets still inside the cabinet. Both brands incorporate smooth roller-bearing drawers, but when I re-installed the Snap-on drawers they each slotted perfectly into their slides and snicked home effortlessly, while the Kobalt’s drawers proved to be a real pain to get properly lined up. I had to carefully fit each side in each slide to prevent it simply falling out, then guide the assembly in until it clicked back together—after which, I should note, each worked perfectly, including the soft-close function.

IMG_4014.jpg

Don’t get me wrong: The Kobalt chest is a very nice item and I’m glad I bought it, especially at the price. I’m sure it will serve my amateur mechanic needs adequately, as I’m only in those drawers a dozen times per month, rather than dozens of times per day as a pro would be. But it was clear that the Snap-on chest would hold up to that kind of use far better than the Kobalt would. (And I managed to squeeze the Snap-on chest into another corner of the garage.) Snap-on certainly puts a hefty price premium on its products, and it is inarguable that a good part of that premium is strictly due to the name and cachet, but at least you get the excess you pay for.

In a larger context, it points out the obvious fact that external looks aren’t everything. It’s the engineering underneath that determines quality.

Classic Kit: The capstan winch

661.jpg

If you’ve ever crewed (or skippered) a sailboat longer than 20 feet or so, you’ve probably used a capstan winch to control lines such as the jib and spinnaker sheets. A basic capstan winch comprises a vertical drum geared so it will only turn one way (always clockwise on a sailboat). When you wrap the line around the drum (again, clockwise) two or three times, you can more easily control the forceful pull of the sail. The friction of the wraps helps prevent the line being pulled away from you. If you need more power to sheet in a sail in a breeze, a a fitting on top of the drum allows you to insert a crank for extra leverage. There are more elaborate capstan winches with two speeds, self-tailing mechanisms—and electrically powered winches that eliminate the need for manual cranking.

For many years, a capstan winch could also be ordered as a factory option on Land Rovers and a few other vehicles. Visually the vehicle-mounted capstan winch was very similar to our sailboat winch; however, it was powered through a gearset from a driveshaft usually connected directly to the vehicle’s crankshaft via a sliding coupler. The worm-drive gearset reduced the 600 or 700 rpm of an idling engine crankshaft to just a dozen or so turns per minute of the drum (which, curiously, rotates counterclockwise on every one I’ve seen).

A capstan winch at LR-Winches. Engagement lever is at upper right. The rope is led under the roller from the anchor or object to be moved.

A capstan winch at LR-Winches. Engagement lever is at upper right. The rope is led under the roller from the anchor or object to be moved.

A capstan winch has an entirely different method of operation from the common, horizontal-drum electric, hydraulic, or even PTO winch with which we’re familiar. You don’t store line on the capstan, and it cannot use steel cable. Instead you carry a separate, low stretch rope—traditionally 3/4-inch manila or an equivalent natural fiber—of whatever length you chose, with a hook on one end.

Screen Shot 2018-10-18 at 8.29.22 PM.png

Let’s say you’re driving your Series II 88 along a forest track and you come across a downed tree blocking the way. Pulling it out of the path would go like this:

Position the vehicle so the winch has a clear route to drag the tree off the path. Leave the engine idling, transmission in neutral (obviously), parking brake on and, if possible, the wheels chocked as well. (If you have a hand throttle you can bump up the engine rpm a bit.) Wrap a strap around the tree and connect your winch rope to it with its hook. Take the free end of the rope back to the vehicle, run it under the roller guide and around the drum three or four times counterclockwise in an ascending spiral, then lay the free end of the rope off to the left of the vehicle as you’re facing the front. With the coils of the rope around the drum still loose, engage the lever to connect the drum to the gearset and the drum will begin turning slowly—but the loose rope will simply slip around it. Now stand back from the vehicle a few feet and pull on the free and of the rope to tighten the wraps around the drum. The drum will grab the rope and begin pulling on the downed tree, as you take in the rope fed you by the winch. You now control the speed and engagement of the winch simply by pulling or slacking off on the rope to tighten or loosen it around the drum. Once the tree is off the path, let the rope go slack, disengage the gearset with the lever, and de-rig. It’s that simple.

Of course you can also connect the rope to a standing tree or another vehicle to free yours if it is bogged; however, since the capstan winch requires someone standing outside the vehicle to operate the winch, it’s nearly mandatory to have a second person in the driver’s seat to steer the vehicle and stop it once it’s free. Solo vehicle recovery with a capstan winch can be a very dicey operation indeed.

Screen Shot 2018-10-03 at 4.41.21 PM.png

Consider the situation pictured below. Tom Sheppard was in Mali in 1978, en route to Timbuktu, driving his Land Rover Velar—that’s right, the original prototype of the Range Rover—and towing a trailer full of fuel and water, when a section of mud proved a bit deeper and stickier than was apparent from the driver’s seat.

Mud-bog.1.sm.jpg

Tom’s Range Rover was equipped with a Fairey capstan winch cleverly hidden behind the grille—note the horizontal roller on the bumper. To deploy it one simply unscrewed the center grille section, a matter of a couple of minutes. However, Tom was, as is common with him, traveling solo. Therefore he first unloaded all 21 (!) jerry cans from the trailer, decoupled it from the Range Rover, and recovered the Range Rover with aluminum sand (i.e. mud) ladders. Then he positioned the Range Rover in a spot where he could use the capstan winch to recover the trailer, re-connect it to the Range Rover, reload all 21 jerry cans, and continue on his way.

Mud-bog.2.sm.jpg

(Tom’s story made me remember the tour Roseann and I got of the Gaydon Museum, courtesy Land Rover historian extraordinaire, Roger Crathorne. I looked up one of the photos, which shows, in addition to Roger and me, one of the Range Rovers used on the 1971/72 Trans-Americas Expedition—and there was a capstan winch peeking out from behind the grille.)

Darien Range Rover.jpg

The capstan winch’s labor-intensive method of operation, combined with its modest power—most were rated for around 3,000 pounds, as was the rope used on them—saw them fade from popularity with the increasing availability of horizontal-drum electric winches of considerably higher rating. Yet the capstan had its advantages. It could work all day without overheating or stressing the vehicle’s electric system, and its line capacity was essentially unlimited—if you needed to rig a 200-foot pull, all you needed was a 220-foot rope. And that labor-intensive method of operation gave the operator instant control over the procedure—let off on the rope tension and the pull stops instantly. The capstan winch, with its leisurely speed, hands-on attitude, and natural-fiber rope, always struck me as, well, the friendly winch compared to the whining, straining, ozone-smelling electric winches of today (hugely capable though they certainly are). Go ahead, laugh.

This is the driveshaft and engagement mechanism that allows the capstan to be powered off the front of the vehicle’s engine.

This is the driveshaft and engagement mechanism that allows the capstan to be powered off the front of the vehicle’s engine.

You can still, very occasionally, spot a vehicle equipped with a capstan winch—virtually always a Series Land Rover. If you own a Series Land Rover and have a hankering for a curious and historical piece of very useful equipment, you can still buy one (or parts for one) through sources such as the experts at LR-Winches (where most of these images originated). You can even buy a synthetic rope suitable for a capstan winch, from LR-Bits.co.

But I’d recommend sticking with the manila rope. It’s just . . . friendlier.

For a . . . curious . . . installation of a capstan winch, see here.

JL Wrangler frame issues

Photo: Brett Stevens

Photo: Brett Stevens

The folks over at Jalopnik have a good and extremely important article about the issues some owners are having with welds on JL Wranglers. The critical issue is the weld that holds the track bar to the frame, and the article includes photos and a video of the problem.

The track bar is what locates the front axle side to side, so if it goes so does directional control and steering—not a good thing.

If you own a JL Wrangler you will probably be receiving information about this, but in the meantime you might want to take action yourself. Reportedly FCA has issued a stop-sale order until the matter is addressed.

The new Defender appears, sort of . . .

landrover_002.jpg

Currently making the rounds of forums, at last, is a photo of a heavily disguised test prototype of the much-awaited, much-delayed, resurrected and re-invented Land Rover Defender.

The speculation about this vehicle has been on a level like nothing I’ve seen in the four-wheel-drive universe, even beyond the theories that swirled around Jeep’s re-designed Wrangler.

The Wrangler rumor mill terrified aficionados with hints that the new model would lose its solid front axle for independent suspension—perhaps even on the rear axle as well. Then we heard its separate, fully boxed chassis would be abandoned for unibody construction, rendering it in the faithful’s eyes no more than a glorified jacked-up sedan.

In the event, the new JL Wrangler stayed built the way God intended Jeeps to be built: solid front and rear axles, body-on-fully-boxed-frame construction. Parent company FCA managed to incorporate modern safety and convenience features into a decades-old blueprint, and the new Wrangler remains a superb choice for extended travel in rough country.

Tragically, at least for thousands of traditionalist Land Rover faithful, the exact same rumors (or perhaps I should say rumours) proved well-founded as Jaguar/Land Rover gradually released details of the new Defender. The 2020 replacement for the 70-year-old expedition icon will ride on all-independent suspension and will be built on aluminum-intensive unibody architecture shared with other Jaguar/Land Rover products.

Thus one thing is clear: The old Defender is dead and buried (recent outrageous £150,000 factory specials notwithstanding). No more will Land Rover ship CKD (Complete Knock Down) Defenders in crates to be assembled in developing-world countries and pressed into rough service in the remotest backwaters of the Realm. No more will adventurous owners boast of accomplishing major drivetrain rebuilds with hand tools outside an Angolan village. The new Defender will be a completely different vehicle than the old one. The question is, will it be a better vehicle?

J/LR swears the new Defender will be more capable off-road than its predecessor—not at all an outrageous claim given the huge advancements in traction control systems since the relatively primitive system installed in the last generation. And, honestly, it won’t be difficult to exceed the capabilities of the pre-traction-control Defenders, which relied solely on gearing and compliant suspension to negotiate challenging terrain, thanks to Land Rover’s obstinate decades-long refusal to fit cross-axle differential locks. Even the independent suspension will only be a handicap in certain situations, such as when both front wheels compress upon hitting an obstacle, reducing clearance to the fixed front differential. It will certainly enhance ride and handling. And while traditionalists might not like it, unibody construction actually results in a vehicle with far higher torsional rigidity than a vehicle riding on a separate frame, even a fully boxed one. You simply lose the ability to unbolt the body from the chassis with your sockets and wrenches. And repairing collision or trail damage on a unibody vehicle is considerably more involved.

So the capability will be there. Whether J/LR offers the new Defender in suitably basic form to satisfy those who eschew leather and carpet and 10-inch entertainment screens in their overland vehicles—as well as to create an affordable version—remains to be seen.

One area where I suspect the company will get it right is styling—not that there’s much to tell from the disguised test vehicle. After the PR disaster that was the DC100, I’m willing to bet J/LR went to great lengths to evoke the original’s styling without being overtly retro. I predict it will look properly sturdy and adventurous.

Thus we’ll have a capable vehicle that looks the part. The only remaining big question involves market placement. Will Jaguar/Land Rover aim for existing Defender owners, or will they exploit that iconic model name and shove it toward the upscale end of buyers, those who want the look and the rugged association, but who wouldn’t dream of actually shipping their rugged-looking vehicle around the Darien Gap or across the Strait of Gibraltar and exploring another continent?

If you look at sales history I think the answer is clear. The last Defender—the solid-axle, separate frame, bolted-together genuine expedition machine, went extinct for one reason: It stopped selling. Why would Land Rover aim at the exact same customers with the new one?

In some ways the decision will be out of their hands. A technologically advanced vehicle, built largely out of aluminum, with all-independent suspension, sophisticated traction-control and safety systems, and advanced powerplants, is going to be expensive to produce and will cost a lot to buy. I’ll wager the base price of the new Defender 110 (or whatever it will be called) will be substantially above that of the already dear Wrangler Rubicon Unlimited. The temptation to just go with that and load it up with leather and carpet and entertainment screens will be powerful.

I’ll wager further that ads for the new Defender will be stoked with historical family references, and heavy on images in rainforests and sand dunes. Just which magazines those ads appear in will betray the direction the new Defender will take—towards the real jungle or the concrete one.

The versatile 1/4-inch ratchet . . .

Tools3 copy.jpg

The ratchet and socket set is the most critical component of your tool kit. It’s what comes out when things need attention that are held on to the vehicle with actual nuts and bolts, rather than just trim screws or plastic press fittings. Important things, in other words. I’ve always maintained it’s the part of your kit you should spend the most money on, to get the absolute highest quality. Of all the tools I’ve broken over the years, the majority by far have been cheap sockets that split, or cheap ratchets that jammed or broke altogether.

Most owners—me included—start out with a 3/8ths-inch ratchet and socket set (the 3/8ths refers to the diameter of the anvil, the square peg on the ratchet to which you attach the sockets). A 3/8ths set will comfortably handle bolts or nuts from about 9mm or 5/16ths inch up to 19mm or 3/4 inch. That’s suited for a lot of medium-sized repairs—replacing fan or serpentine belts, water pumps, radiators, etc. Above that you really should step up to a 1/2-inch ratchet, which is able to handle larger sockets for fittings such as those on suspension components, which need more torque to remove or fasten securely.

Thus for a long time my automotive tool kit has included a 3/8ths-inch ratchet and socket set for general work and a 1/2-inch set for major repairs. And that worked just fine. But lately I’ve been rethinking. Why? Several reasons.

Even a 3/8ths ratchet can be a bit long and bulky when working in tight spaces on fasteners smaller than 11 or 12mm. Yes, you can add a short-handled ratchet to the kit, but the head will still be just as bulky. And your 3/8ths socket set will probably have a lot of overlap with your 1/2-inch set. Typically the former will include sockets up to about 19mm, and the latter will include sockets down to 12mm. I’d rather use a 1/2-inch ratchet for that 19mm nut, yet a 1/2-inch ratchet is silly overkill for any 12mm bolt or nut I’ve ever encountered.

Enter the 1/4-inch ratchet. It’s smaller all around, able to fit into spaces no 3/8ths equivalent could. You can argue that the ratcheting mechanism is inevitably weaker as well, but consider two things: First, there is only so much torque necessary for even a 12 or 13mm fastener; second, a high-quality ratchet will withstand force comfortably in excess of any you’re likely to need. I’ve yet to meet a 12mm or even 13mm nut that I couldn’t remove with a 1/4-inch ratchet. And it will be far handier for smaller sizes.

Additionally, a 1/4-inch ratchet and socket set will cost less than a larger one, so you can go for higher quality. Finally, the 1/4-inch set will be lighter and take up less space, a surprisingly real consideration even in something such as our Troop Carrier, the tool bin of which is approaching maximum capacity and the GVWR of which is approaching, period.

So I’ve been wondering if a versatile combination might be a 1/4-inch set with sockets ranging from very small, say 4 or 5mm, up to about 13mm, and a 1/2-inch set with sockets from 12 or 13mm up to whatever you like—my current set goes up to 32mm. The slight overlap would mean that if you ever did run into a recalcitrant 12 or 13mm bolt while using the 1/4-inch kit, you could switch up to the 1/2-inch.

I have a nice mixed set of 1/4-inch stuff, but this scheme was a perfect opportunity to spend money on tools. I like investigating brands new to me, and my friend, driving trainer extraordinaire Graham Jackson, is fond of the German brand Proxxon, so I looked them up on Amazon, and ordered the 23280 49-piece “Precision Engineer’s” 1/4-inch drive set.

The first thing that impresssed me was the box it came in. While plastic rather than metal, it had decent sliding latches rather than the usual flimsy snap latches with stressed-plastic hinges, which invariably fail. A nice touch.

Inside I first examined the ratchet itself. The mechanism was a fine 72-tooth unit. Check. Push-button release, check. Lever-operated reversing switch, check. Perfect. The offset head is supposed to ease access to tight spaces. Not sure about that one.

The selection of sockets was very good. Standard sockets from 4mm to 13mm—perfect. They’re forged from chrome vanadium with a double-nickel and single chrome layer finish for corrosion resistance. They of course employ a copy of Snap-on’s Flank Drive system to help grip rounded off nuts (and to avoid rounding them off). A bonus was a comprehensive selection of bits for either the ratchet or the included driver: Screwdriver bits, hex bits, and Torx bits. Five sockets for external Torx fittings. There was even a little selection of angled allen keys, 1.25 to 3mm. The set included two ratchet extensions—one of which included a (removable) sliding T-bar fitting—and a universal joint.

The only flaw I found was the paucity of deep sockets—just four of them, in 6, 7, 8, and 10mm. Odd. Why not a full complement up to 13mm? I would have traded the external Torx sockets for them. As it was there was no space in the tray for additional sockets. But . . . what’s this? There appeared to be some voids in the box under the molded tray. Indeed, when I lifted it out there were several generous gaps.

I called the U.S. Proxxon headquarters. They told me they don’t directly import the hand tools sets, only power tools (I bought mine through a third party dealer). However, when I told them what I was trying to do they generously offered to special-order the sockets I wanted. So I filled in the deep sockets and bought a flexible drive extension as well. All those plus a Snap-on flex-head 1/4-inch ratchet fit underneath the tray.

I guess I need to clean up those holes.

I guess I need to clean up those holes.

Now I had a comprehensive 1/4-inch socket and ratchet set with the bonus of the driver bits and handle. As expected, it was significantly more compact than an equivalent in 3/8ths. The last task was to make it easier to get the molded tray out when I wanted the stuff in the bottom. So I Dremelled two slots in the tray, and ran a piece of flat 1/2-inch webbing through them and under the tray, leaving the ends loose on top. It’s now easy to pull the tray free.

Our Troop Carrier has a comprehensive set of tools, but they live in a cabinet under a bench that is somewhat of a pain to get to. I’ve been wanting to have a more convenient tool kit for small repairs and adjustments. This Proxxon set, with its combination of sockets and bits, should fill that role perfectly—and it’s compact enough to fit behind a seat.

Hmm . . . I wonder if I should order another two or three sets?

Epilogue: Regarding my idea that a 1/4-inch socket set combined with a 1/2-inch set might be all one needs for just about any job: Proxxon sells a kit (23286) that combines just that, with sockets from 4mm all the way to 34mm. Impressive. Just add some deep sockets and a breaker bar.

71QPNSlQiQL._SL1000_.jpg

When equipment makers go under

20131023_bankruptfeature.jpg

Recently the overlanding forums have been buzzing—steaming might be a better verb—with the news of a bankrupcty filing by a (formerly) respected maker of aftermarket bumpers and skid plates—and the concomitant loss of the deposits of a good number of innocent customers.

Similar sagas have followed an all-too-common pattern. A company with a solid reputation for quality overextends itself with the orders flowing in after many positive reviews from journalists and previous owners. First it can’t keep up with production, and deliveries fall behind. Zealous overspending early on—a bigger factory, a new truck (or house) for the owner—now means that incoming deposits are used to purchase materials for products that were ordered months before. Cash runs short, then out altogether. By the time enough customers realize what’s happening and post warnings on relevant forums, dozens of later customers are already out of luck as well. And throughout it all the company’s website stays active, inviting the unaware to click “Buy now,” in a desperate bid to get more cash to try to catch up with a cascading backlog of production.

This has happened before in my experience with companies servicing the overlanding market—once with a maker of top-of-the-line bumpers and roll cages for Land Rovers and Ford trucks, once with a very high-profile manufacturer of luxury truck-based campers. Given the exploding popularity of overland travel and the associated equipment (and the Great Recession that hit just as the activity was gaining traction), I’m surprised it hasn’t happened more frequently—businesses go out of business while making money all the time, due to other factors that can range from poor management to the management snorting the profits or letting it ride on 32 red.

The reasons are of little concern to those who have lost hundreds or thousands of dollars after placing a deposit or even paying in full for a product they have every expectation of receiving in a reasonable amount of time.

What can a consumer do? In most cases, thorough prior research into the company’s reputation will suffice, especially if you look up current forum posts regarding their products and customer service. Don’t look at only one thread or jump to conclusions from one post—just as there are customers with legitimate complaints, so are there trolls whose mission in life is to complain and badmouth in an attempt to make others as unhappy with life as they are.

Once you’ve committed to ordering a specific product, basic steps to protect yourself should be mandatory. Be sure all your correspondence with the company is in writing (email is fine), including specifications, final price, and, above all, a final delivery date. Consider negotiating a discount if delivery is late.

However, despite precautions there is always the chance you’ll be caught at just the wrong time, after trouble starts but before it becomes widely known. The next best defense is to use a credit card with a strong buyer-protection plan for any deposit you are required to put down. We once paid several thousand dollars to a service company that utterly failed in its promises to us. Fortunately we had used an American Express card, and when we provided complete documentation of the issues and our attempts to rectify them, we received a full credit from Amex.

Without a guaranteed way to recoup your money from your end, your chances of doing so from the company can be slim. If there are bankruptcy proceedings in court, you can bet the banks, steel suppliers, and landlords will get their claims way higher on the list than your piddly little $1,000 deposit.

Thankfully such situations are rare. But it’s always smart to practice due diligence.

The new ARB hydraulic Jack

P1000571.JPG

It’s been a century and a decade since the Automatic Combination Tool, as the Hi-Lift jack was originally known, was introduced by Philip John Harrah, founder of Bloomfield Manufacturing. And for that 110-plus years, nothing else has achieved the versatility and capability of the Hi-Lift. It will raise two and a quarter tons anywhere from 22 to 46 inches in one continuous operation, depending on the model selected (36, 42, 48, or 60-inch). It can be used as a clamp, a spreader, and a winch. Its various parts have been employed as bodge fixes on countless broken vehicles—I used the tubular handle of one to sleeve a broken tie rod and get an International Scout back to civilization.

However. For all its strengths, the Hi-Lift has some significant issues. The most salient among them is that, if used carelessly, it has the capability to break any number of body parts on that user, from fingers to jawbones to skulls. When the operating lever is under tension (either lifting or lowering) it is extremely unwise—let’s just say stupid—to stray into the arc between it and the main beam. The Hi-Lift is heavy at 30 pounds for the popular 48-inch model. Finally, it is prone to jamming when exposed to road dirt, although a quick dousing with any spray lubricant will usually clear it.

And yet, surprisingly few attempts have been made to improve on the Hi-Lift (the raft of outright copies don’t count, of course). One attempt I tested about seven years ago (here), the Radflo Hydra-Jac, showed promise, since it operated hydraulically and there was no risk of kickback on the reassuringly small operating handle. And the Hydra-Jac weighed just 13 pounds. However, its lifting range was a relatively modest 18 inches, the round base was far too small, and, much more importantly, the jack’s capacity was a measly 2,200 pounds. It would barely get the front of my FJ40 off the ground; our Ford F350 would have laughed at it.

Enter the brand-new ARB JACK. That’s right, simply “jack” in all-caps. I hope no one got paid to come up with that. But let’s forgive them for the moment and look at the product. Note, however, that I will refer to the product as the ARB Jack, just one capital, because as a writer and grammarian I refuse to empower this lamentable trend toward all-cap product names (MAXTRAX, GLOCK, etc. etc.). You know those annoying people who post in forums in all-caps so it sounds like they’re YELLING AT YOU? That’s how I feel about all-cap product names.

Where was I? Right: 

Like the Hydra-Jac, the ARB Jack is hydraulically operated. Distinctly unlike the Hydra-Jac, the ARB is rated to lift a proper, Hi-Lift-like 2,000 kilograms (4,400 pounds, and tested to 7,000). Furthermore, it will lift that 2,000 kg a full 48 inches off the ground. That’s 10 inches more than a 48-inch Hi-Lift. Yet when compressed the ARB is just 36 inches long. In its heavy-duty case our test sample fit easily crosswise behind the seats of our Troopy with room to spare. Impressive.

P1000552.JPG

If that’s not enough to convince you this jack is a contender against the long-reigning heavyweight champion, note that the ARB Jack weighs just 23 pounds, a useful 25-percent reduction. Also, the handle of the ARB is not prone to flopping loose as the Hi-Lift’s handle will if you don’t have one of those polyurethane keeps slid over it. Combined with the short compressed length, this makes the ARB far easier to handle than a 48-inch Hi-Lift.

Last bit of empirical information: The ARB Jack can lift in precise 1/2-inch increments, unlike the larger jumps necessitated by the Hi-Lift’s climbing pins. And the ARB’s lowering lever (which takes a one-finger press to operate) has two speeds, so gentle or swift dropping is your choice. Literally effortless compared to lowering with a Hi-Lift (which is actually its most fraught procedure since if control is lost on the operating lever it can slam up and down in a violent feedback loop).

So far this sounds like a nearly complete shutout for the ARB Jack versus the Hi-Lift. But—we might as well get this over with now—there is an 800-pound gorilla in the room. Or, to be precise, an 812-pound gorilla, because the U.S. list price of the ARB Jack is $812. For that much cash you could buy yourself and seven friends a 48-inch all-cast Hi-Lift.

Is the ARB Jack worth it? After trying it out briefly on a trip through Australia, I’d say it depends on you. If you own a Hi-Lift that never comes off the roof rack or that pedestrian-mangler mount on the front bull bar, then you’d just be showing off to switch to the ARB. And I doubt many people will be mounting such a thief magnet to the outside of the vehicle anyway.

P1000536.JPG

On the other hand, if your Hi-Lift is rusty, its red paint nearly gone, its jam-prone mechanism lubed over the years by everything from WD-40 to beer; if you’ve forgotten how many times it’s extracted your vehicle or that of a complete stranger, if it’s caught you out and smashed a finger or bruised a hand or worse, and if every time you use it you treat it like a capable and strong pack mule that hates your guts and is just waiting for a chance to kick your head in, then you might find the ARB Jack to be a bargain.

Nine slots facilitate easy adjustment of the tongue height.

Nine slots facilitate easy adjustment of the tongue height.

I used the Jack to raise the rear end of our Land Cruiser Troopy (via the dedicated jack slot in its Kaymar bumper, which the jack’s tongue fit perfectly), and immediately noticed the first advantage of the ARB over a Hi-Lift. When you lift the tongue of a Hi-Lift to fit into a bumper, you’re reducing its total lifting capacity by the height of the bumper. Not so the ARB Jack. Instead, the tongue itself slides up the jack and engages one of nine slots in the anodized aluminum alloy body, leaving the full lift capacity intact. Thus, although the total lift distance of the ARB is less than that of a 48-inch Hi-Lift, it will raise the vehicle higher. Only when lifting something from ground level will the Hi-Lift better it.

Only 36 inches tall stored, the ARB Jack will lift to a full 48 inches.

Only 36 inches tall stored, the ARB Jack will lift to a full 48 inches.

The next thing I noticed was expected, but still revelatory: Pumping the actuating handle is way, way easier than operating the lifting handle of a Hi-Lift. It’s much shorter and thus cannot exert the same leverage—but it doesn’t need as much leverage because the magic of hydraulics is doing much of the work for you. The back end of our Troopy is not exactly light—in addition to our pop-top camper unit, fridge, and cabinetry we have a 90-liter water tank and a Long Ranger 180-liter fuel tank closely tucked around the rear axle—but the back came up with remarkably little effort. I’ve taught Hi-Lift technique to a lot of people, and those under 140 pounds or so—men or women—often have trouble raising a very heavy vehicle, even with proper technique. They’ll have no such trouble with the ARB. 

The short lifting handle is easy to operate, with zero chance of kickback.

The short lifting handle is easy to operate, with zero chance of kickback.

To lower, simply press the red lever.

To lower, simply press the red lever.

As for lowering—oh my is it easy. Lowering a weight with a Hi-Lift requires exerting exactly the same force one used to raise it, with the added risk of that feedback loop if one loses grip on the handle. Not possible with the ARB. Just press the little red lever with one finger, and down it goes, slow or fast, your choice; all at once or a half-inch at a time, your choice. Brilliant. 

A heavy-duty ball joint allows the base to tilt about ten degrees.

A heavy-duty ball joint allows the base to tilt about ten degrees.

Another aspect of the ARB revealed itself in the red sand of Australia’s Great Victoria Desert. Its mostly round base has more area than the rectangle of a Hi-Lift (34 versus 28 square inches), but it will still sink in soft substrate. Attempting to raise the Land Cruiser in sand resulted in more downward movement of the base than upward movement of the vehicle. And that round base does not fit in the rectangular receptacle of the standard red plastic jack base. I expect someone will quickly rectify this issue; in the meantime it would be easy to fab up your own from three layers of 3/4” plywood, with a cutout in the top layer to secure the base from sliding. 

P1000540.JPG

One characteristic of the ARB Jack did prove to be a bit of a pain. When you lower a Hi-Lift and the load on the tongue is relieved, the tongue and lifting assembly automatically drop free. With the ARB, once the load is off there is still considerable hydraulic resistance in the piston; lowering fully requires keeping the red lever pushed all the way down while leaning on the jack with enthusiasm—and it won’t happen quickly. I think a significant upgrade to this tool down the road would be a switch that engaged a bypass valve to completely (or nearly so) release the pressure. Such a switch would need to be covered to prevent accidentally pushing it when a load was supported. But it would rectify my sole complaint about the ARB Jack’s operation.

Graham tries futilely to hurry the lowering process . . .

Graham tries futilely to hurry the lowering process . . .

 . . . while Roseann takes her time.

 . . . while Roseann takes her time.

Some people with whom I’ve discussed the ARB Jack have brought up the inevitable argument: “Can you winch with it? Can you clamp with it?” To which I ask, how many times have you winched or clamped with a Hi-Lift jack except to try it? I can answer for myself: zero. I’d bet a lot of cash that an exceptionally tiny fraction of Hi-Lift owners have ever used theirs in anger as anything except a jack. 

The rubber sleeve slides up or down to protect the vehicle's sheet metal.

The rubber sleeve slides up or down to protect the vehicle's sheet metal.

Conclusions? The ARB Jack is distinctly superior at its primary function of jacking, compared with the Hi-Lift and its many copies. It’s lighter, it’s easier to handle, it takes much less effort to raise a vehicle and literally no effort to lower it, it is significantly safer (although obviously safety depends heavily on the operator for either product), and it is much easier to store.

It remains to be seen if the ARB Jack will prove as durable as the Hi-Lift, many of which have been going strong for decades. The slowness in lowering once a load is removed is annoying but definitely a first-world problem. (Still, it would be nice to see a relief valve added at some point.) I have little doubt aftermarket companies, and ARB itself, will soon fill the gap for expanded bases and other accessories.

Fine sand can collect against the piston seal. Best to keep this clean.

Fine sand can collect against the piston seal. Best to keep this clean.

The sole remaining issue is that 812-pound gorilla. When I (reluctantly) turned in the jack to the ARB dealer in Perth, the manager told me they’d been selling every one they could get. So perhaps in this current overlanding world of $2,000 fridges, $4,000 roof tents, and $20,000 adventure trailers, an $800 jack is going to be no big deal. If you’re considering one, I can at least assure you that it will work as advertised—it is a very, very fine tool.  

ARB Jack: $812. Leaving a stylish brand in the Australian sand: Priceless.

ARB Jack: $812. Leaving a stylish brand in the Australian sand: Priceless.

For want of an M8 x 30mm bolt . . .

P1000720 copy.jpg

It still amazes me how well I can prepare for a long, remote journey, yet still find myself unprepared.

Over the course of four trips to Australia in the Land Cruiser Troopy we bought there, I slowly accumulated a pretty decent selection of tools, highlighted by a superb Bahco S106 combination kit (see here), which includes full 1/4 and 1/2-inch socket sets, wrenches, plus numerous drive fittings. An additional set of 1/2-inch deep sockets, a screwdriver selection, an electrical tester, and various pliers rounds out the kit. 

Our recent trip was without doubt the hardest on both our Troopy and that belonging to Graham Jackson and Connie Rodman, as we covered 2,600 kilometers of dirt tracks between Coober Pedy to Perth, some of them heavily corrugated. And as on earlier trips, substandard work done by a mechanic in Sydney (not the Expedition Centre which did all the camper conversions, but a repair shop nearby) began to manifest itself. A new radiator installed on Graham’s vehicle, bought long distance before we arrived—and guaranteed by the mechanic to be “as good as Toyota”—began leaking halfway through the journey. Radiator stop-leak controlled but did not completely plug it. Next, I found the transfer case lever in our vehicle would engage four wheel drive but flopped back and forth rather than engage low range. The nut on that section of linkage had fallen off. (The transmission had been removed to repair a leak before a previous trip.)

A bit farther on, Roseann and I started noticing a rattle that seemed to be coming from the exhaust, as if some gravel had become caught on top of a heat shield. But soon we could hear an obvious exhaust leak. Underneath the vehicle I inspected the “performance” exhaust system the mechanic had installed. A joint near the middle was completely loose. It had been connected with two bolts and nuts—no flat washers, no lock washers, no jam or nylock nut, no Loctite. One bolt and nut was completely gone; the other I easily removed with my fingers, to find most of the thread stripped.

IMG_8178.JPG

And that was a problem, because while I had plenty of tools with which to install or remove virtually any nut or bolt on the truck, I had not gotten around to the item on my pre-trip list that read BUY SPARE BOLTS AND NUTS.

Sigh . . .

This time I got lucky. We had some leftover washers from a RAM mount, plus several bolts I had bought to secure it, and against all odds they just happened to be a suitable size and length. We were soon back on the road with a quiet exhaust (and Graham had found an extra M8 nut with which to fix the low-range linkage). 

Needless to say, when we got to Perth I made my first task a trip to the local Bunnings to get a start on rectifying the situation before we loaded the Land Cruisers into a container for Africa.

One suggestion: I usually buy mostly high-tensile spare bolts (Grade 8 in SAE or 8.8 or 10.9 in metric), figuring that it won't hurt to replace a missing standard bolt with a high-tensile spare, and I can be assured of having the proper strength fastener for a critical component.

P1000722 copy.jpg